


These homemade orange scones are soft, flavorful, and better than Panera! With nearly 40,000 saves and rave reviews, this easy scone recipe is a reader favorite—perfect for brunch, tea parties, or a cozy weekend treat.
Reader Review: ⭐️⭐️⭐️⭐️⭐️ “One of the best Scone recipe’s I have ever made (AND I have made plenty) they turned out perfectly, as instructed. Anyone who has never made scones before may be intimidated about trying them, BUT they shouldn’t with this recipe! Thank you! My husband Thanks you too!!!” ~ Florence
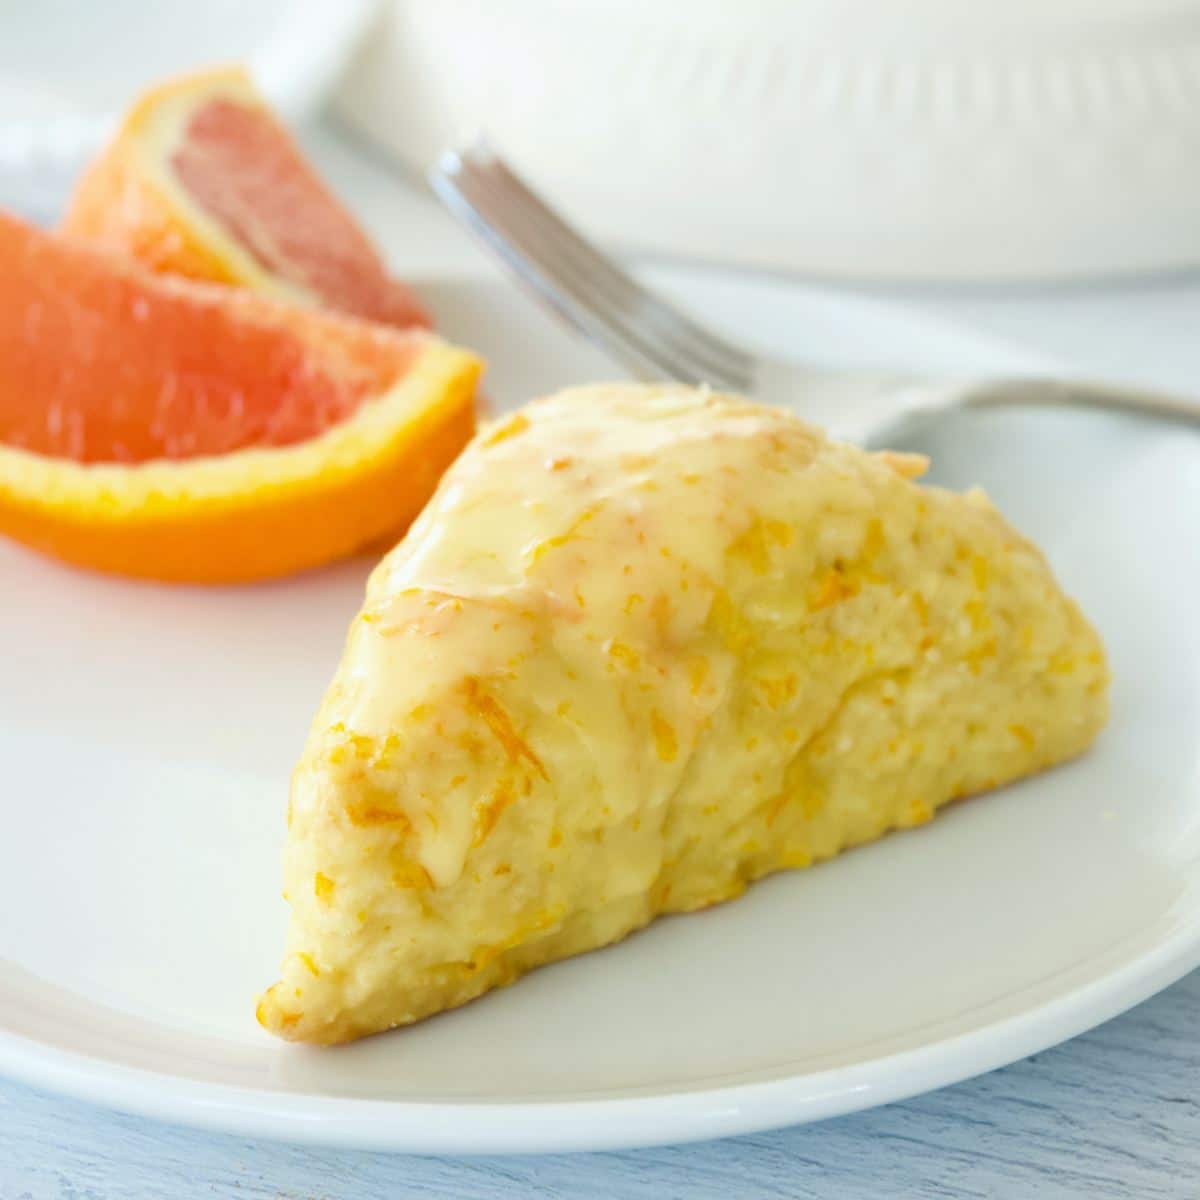
I created this orange scone recipe for my son who loved the original orange scones from Panera. But then they changed the recipe—and just like that his favorite treat was gone. So, like any determined mom, I stepped in (cape not included) to recreate the scone he missed so much. After a few rounds of testing I landed on this version and he says it’s even better than the original.
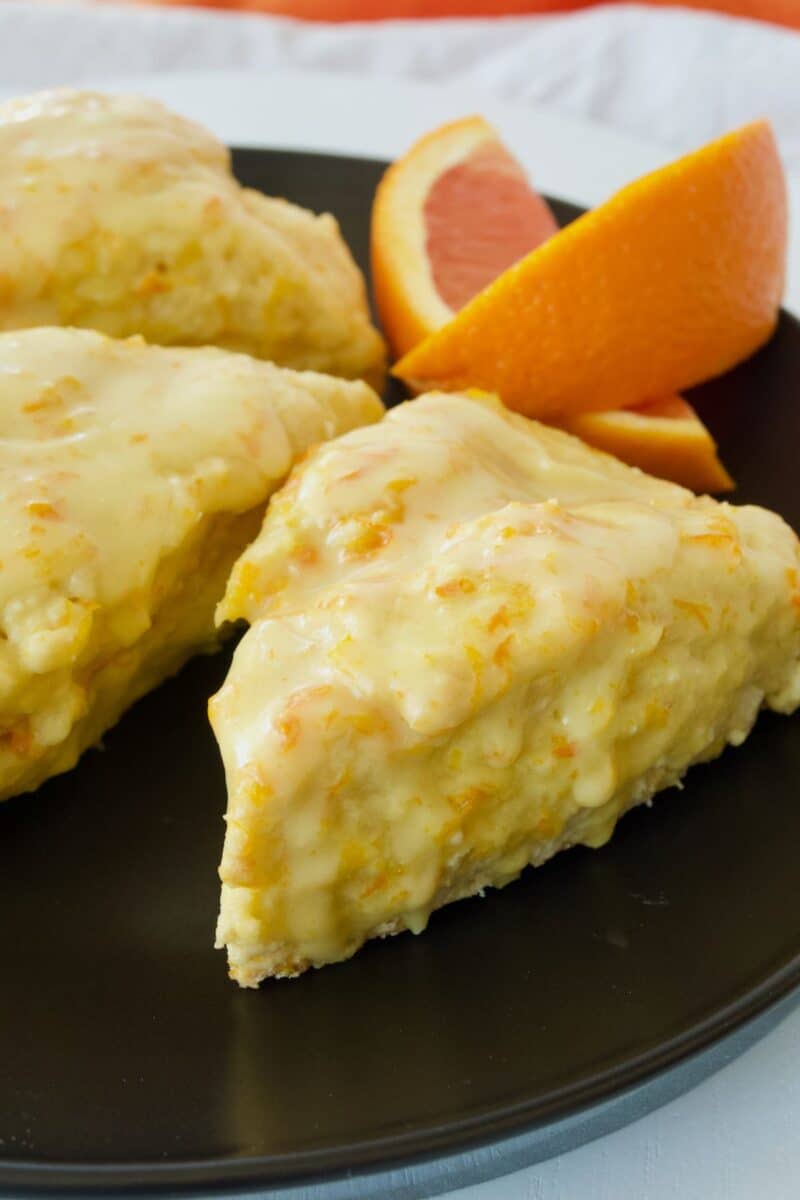
With almost 40,000 saves and thousands of happy bakers this recipe has become one of the most popular on the blog. These scones are soft and tender inside, full of fresh orange flavor and topped with a sweet citrus glaze.
Here’s what real readers are saying:
⭐️⭐️⭐️⭐️⭐️ Lani: “Scrumptious! Making to take to our Women’s Tea. Topping glaze with dried edible flowers.”
⭐️⭐️⭐️⭐️⭐️ Dawn: “Love these scones! They are so easy to make, and the flavors are perfect. I use this recipe all the time. 🩷”
If you’ve ever been disappointed by dry, bland scones, this recipe will change your mind. I’ve tested it to make sure it’s not just delicious but totally doable whether you bake all the time or just once in a while.
Like a twist on the classic? You can also try my Cranberry Orange Scones—they’re based on this same recipe but with tart cranberries that pair beautifully with the bright citrus flavor.
I hope these orange scones become a favorite in your kitchen too—just like they did in ours.
Watch our video to make orange scones
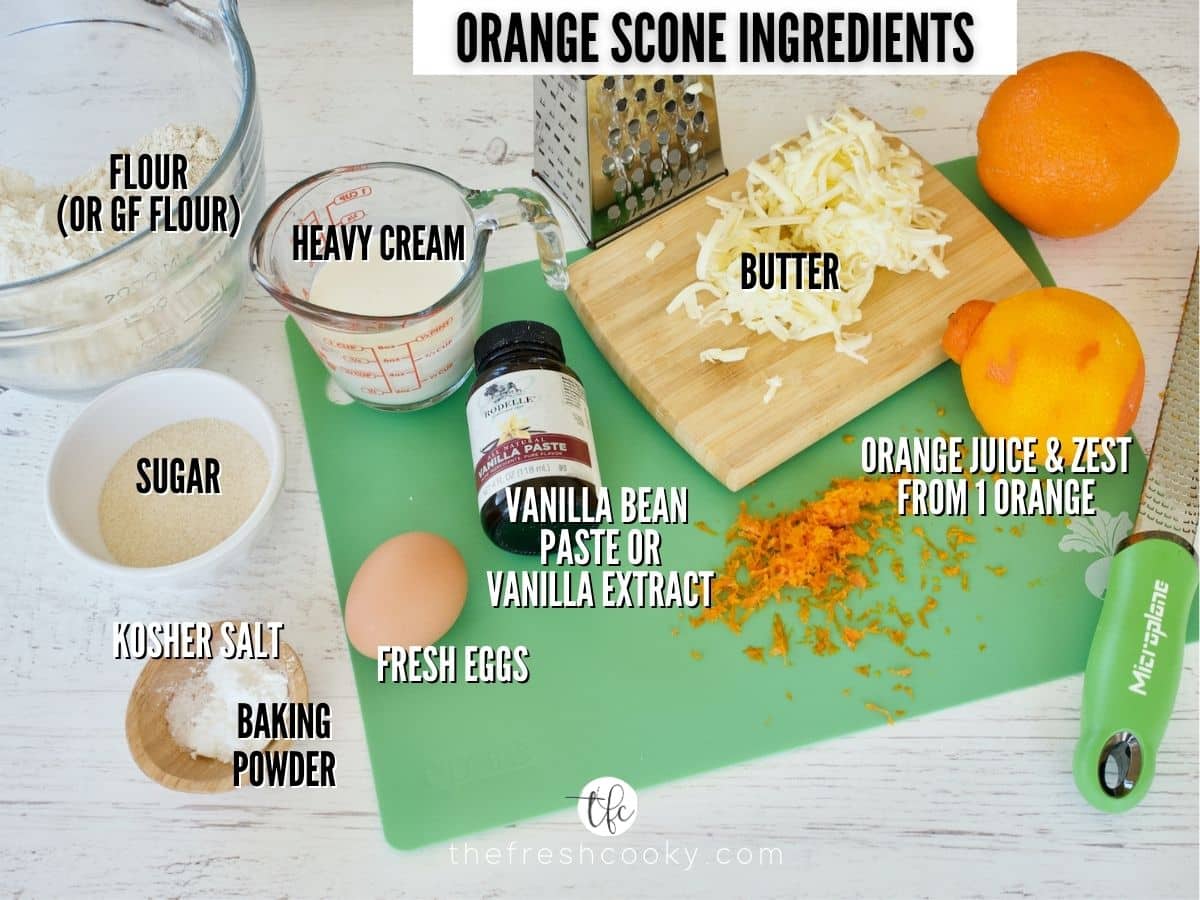
Simple Ingredients for Orange Scones
- All-purpose Flour: I used organic, unbleached all-purpose flour, I give details below on how to make gluten-free.
- Sugar: Just enough to sweeten it up a bit, I use all-natural cane sugar. Some have said they aren’t sweet enough, you may add up to ½ a cup!
- Butter: I believe in real cream butter — if it’s soft coming out of the fridge, it’s not real butter, but a blend. For scones, splurge for European butter with more butterfat and less water added–after all, you don’t make them every day!
- Heavy Cream: Use the real stuff; this allows the scone to rise, be fluffy and tender.
- Egg: I use large eggs in all my baking; bring to room temperature (if you forget, you can place the egg in a bowl of warm (not hot) water for 5-7 minutes.
- Vanilla Bean Paste: Adds beautiful flecks of vanilla bean, aromatic and subtle, enhancing other flavors. You may substitute vanilla extract.
- Zest & Juice: This is the essence of the orange scone, fresh zested orange peel, and a splash of juice.
Get the full recipe in the recipe card below.
Zesting Tips: Ever grated a knuckle while trying to zest citrus? I have the tool for you! This Microplane zester is one of my most used and favorite kitchen tools! And makes short work to a lot of zest!
You might love these other scone recipes, too: Glazed Berry Scones and Cinnamon Crunch Scone, or these Cinnamon Chip Scones. Be sure to read to the end for many more great scone recipes.
How to make Orange Scones
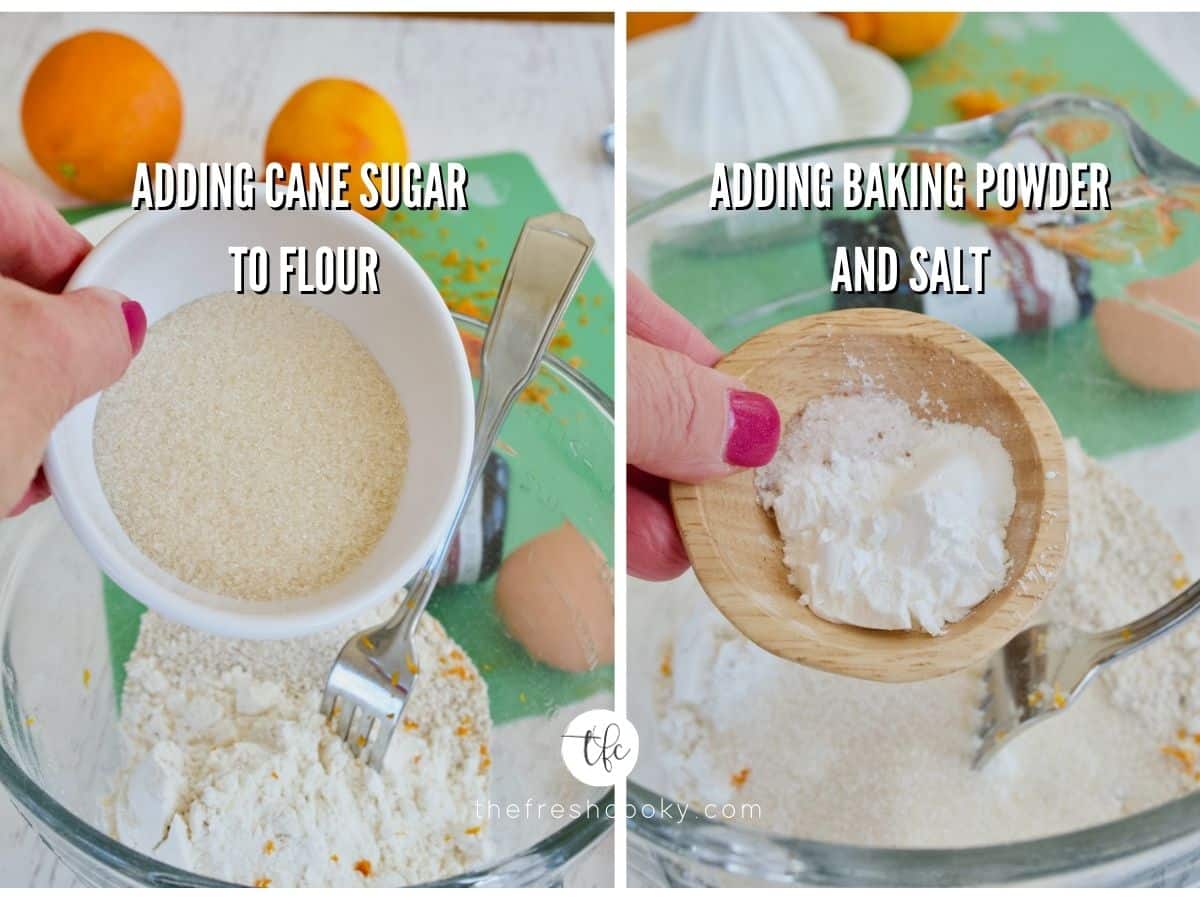
Step 1 | Prep Ingredients and Oven
Line a baking sheet with parchment paper. In a large bowl, whisk flour, granulated sugar, baking powder, and salt together. Preheat oven to 400°F (240°C).
Grate butter using a box grater, then place in the freezer until ready to use. Or chop into small chunks, also placing in the freezer until ready to use.
Zest orange(s) and juice the orange, set aside.
Step 2 | Make Easy Orange Scones
Toss frozen, grated butter into the flour mixture using a pastry cutter or your hands. Quickly mix until it resembles coarse crumbs.
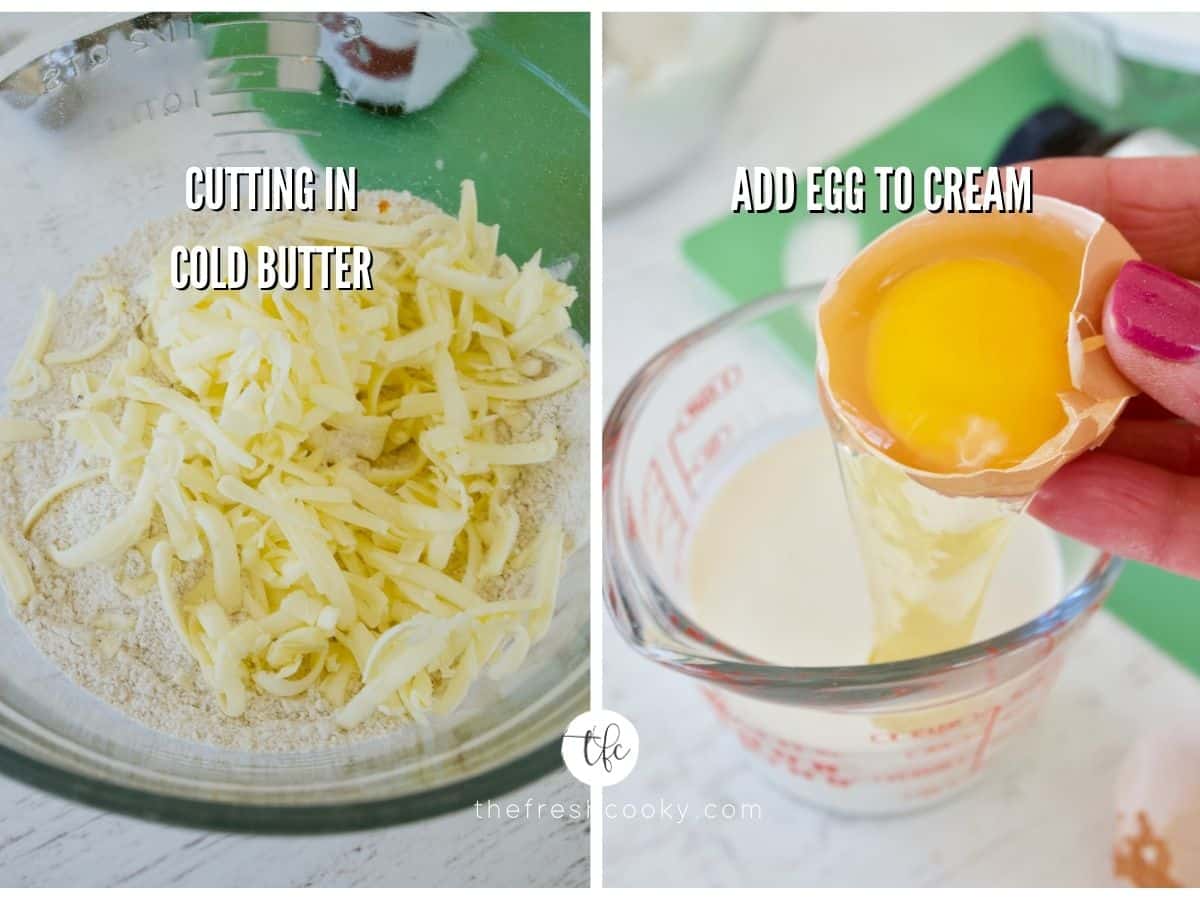
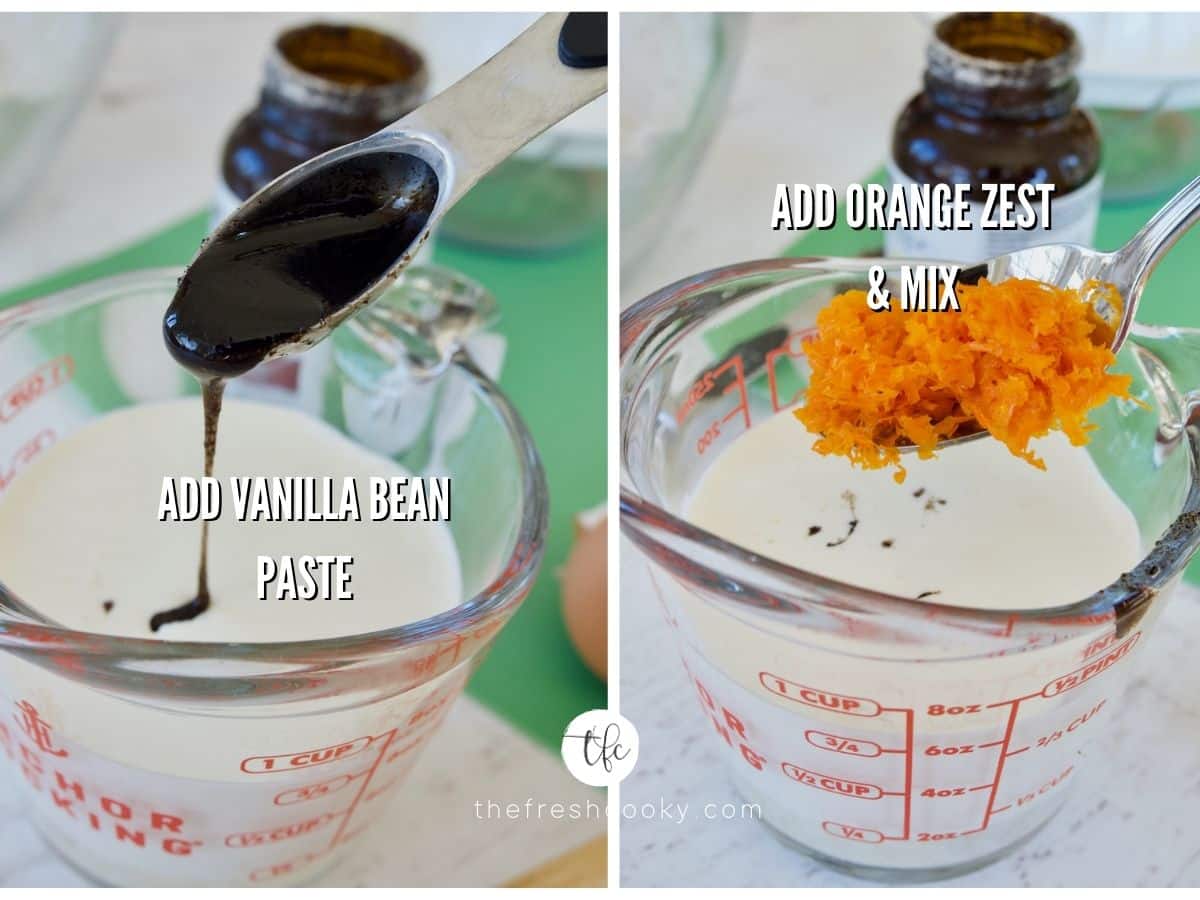
In a small bowl or measuring cup, whisk wet ingredients together; the heavy cream, vanilla bean paste, egg, orange zest and a splash of orange juice.
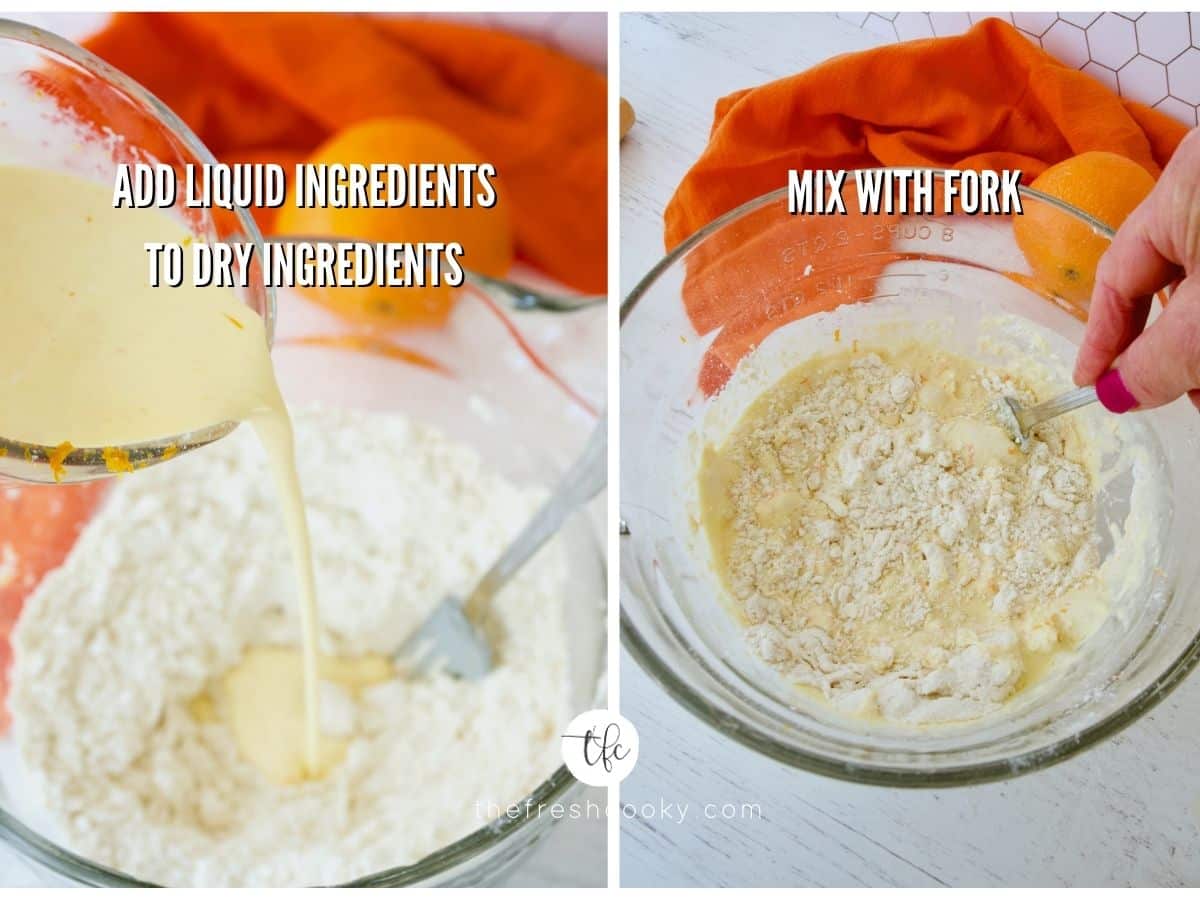
Make a small well in the center of the dry ingredients and then pour in egg mixture.
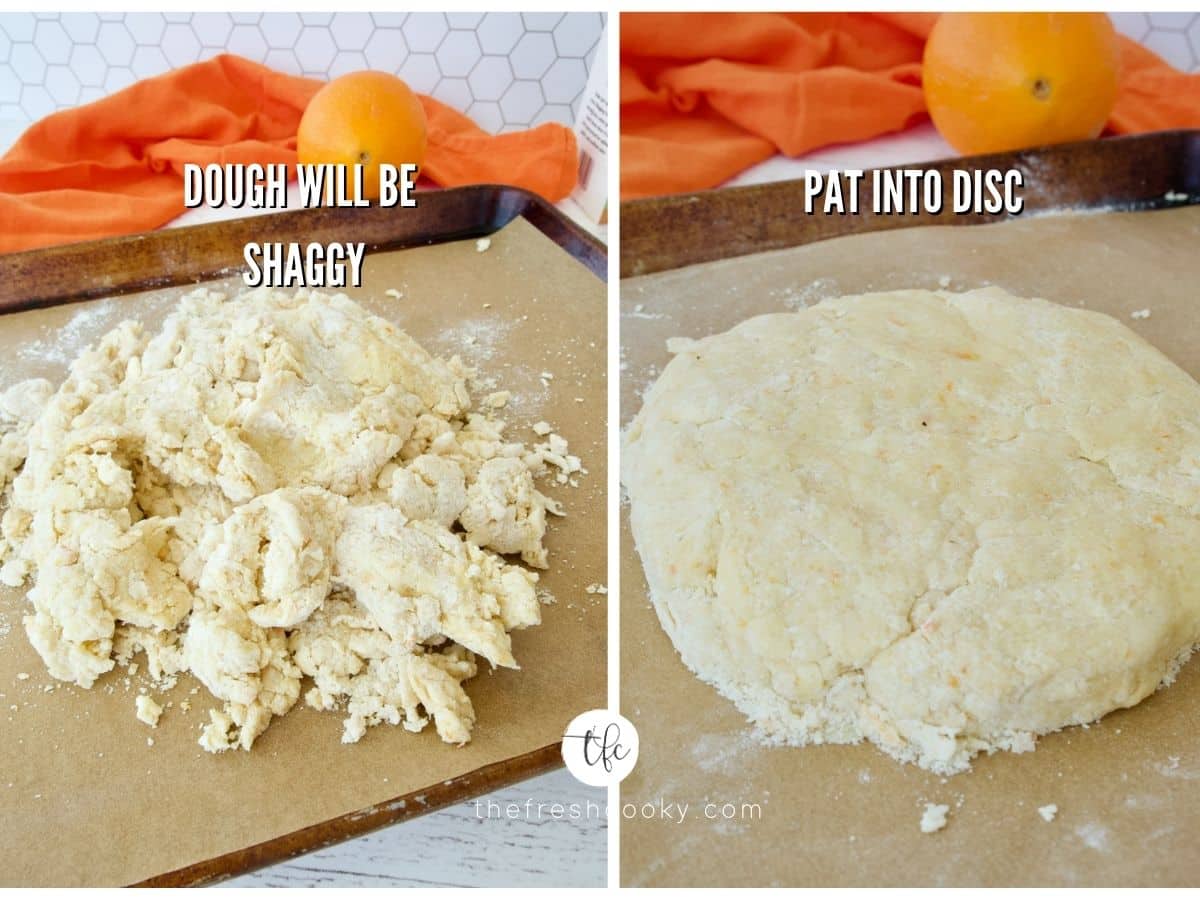
Gently mix with a fork until the dough just comes together, forming a shaggy dough.
Step 3 | Form Scones
Turn out the dough onto a parchment-lined cookie sheet or a lightly floured surface. Using the parchment paper to help shape and bring the dough together into a disc, about ½ – ¾ inch thick. Make one large dough disc or two smaller discs for mini Panera scones.
If the dough is really dry, add a little splash of orange juice or heavy cream (just a few dribbles and work it in quickly). See TIPS below.
Using a bench scraper or large knife cut the disc in half, then quarters, then again cutting the quarters in half; making 8 large scones (see below for mini scones).
Separate scones away from the other. Keeping them closer to one another will yield a more even-raised scone. Further apart they will appear more rustic, which was what I was going for in these orange scones.
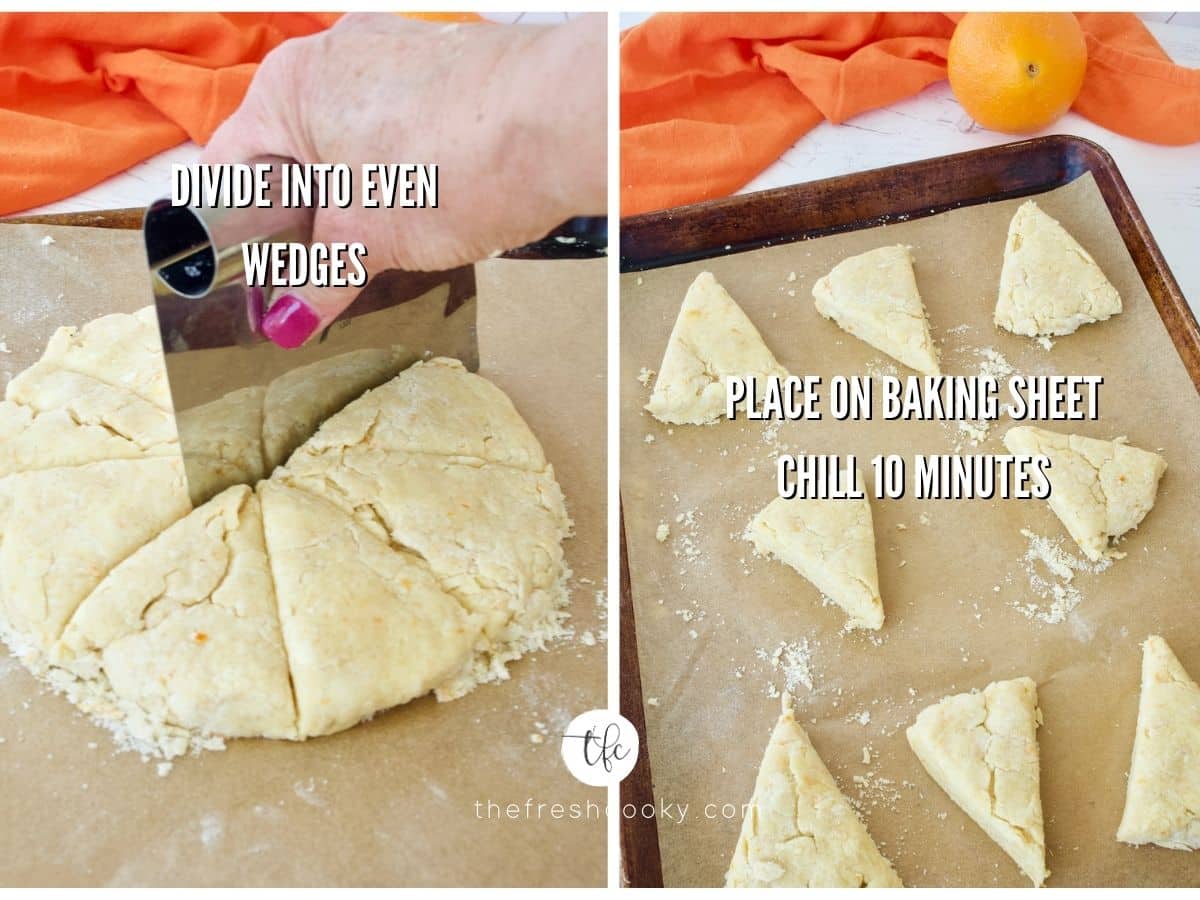
Step 4 | Freeze Orange Scones to Set
Freeze or refrigerate scones to firm the butter back up for about 10-30 minutes; now is a great time to preheat the oven to 400° F (204°C).
Bake the orangescones until lightly golden brown on the bottom, about 13-15 minutes, 13 will be softer and a little more tender, and 15 minutes will yield a more firm, dryer scone. Remove to a rack to cool completely.
Did you know all ovens heat differently? Many of them are off by 25-50 degrees, be sure to invest in a good (though cheap) oven thermometer, so you know if your oven runs hot or cold, then adjust your temperature accordingly.
How to Make Orange Butter Sweet Glaze
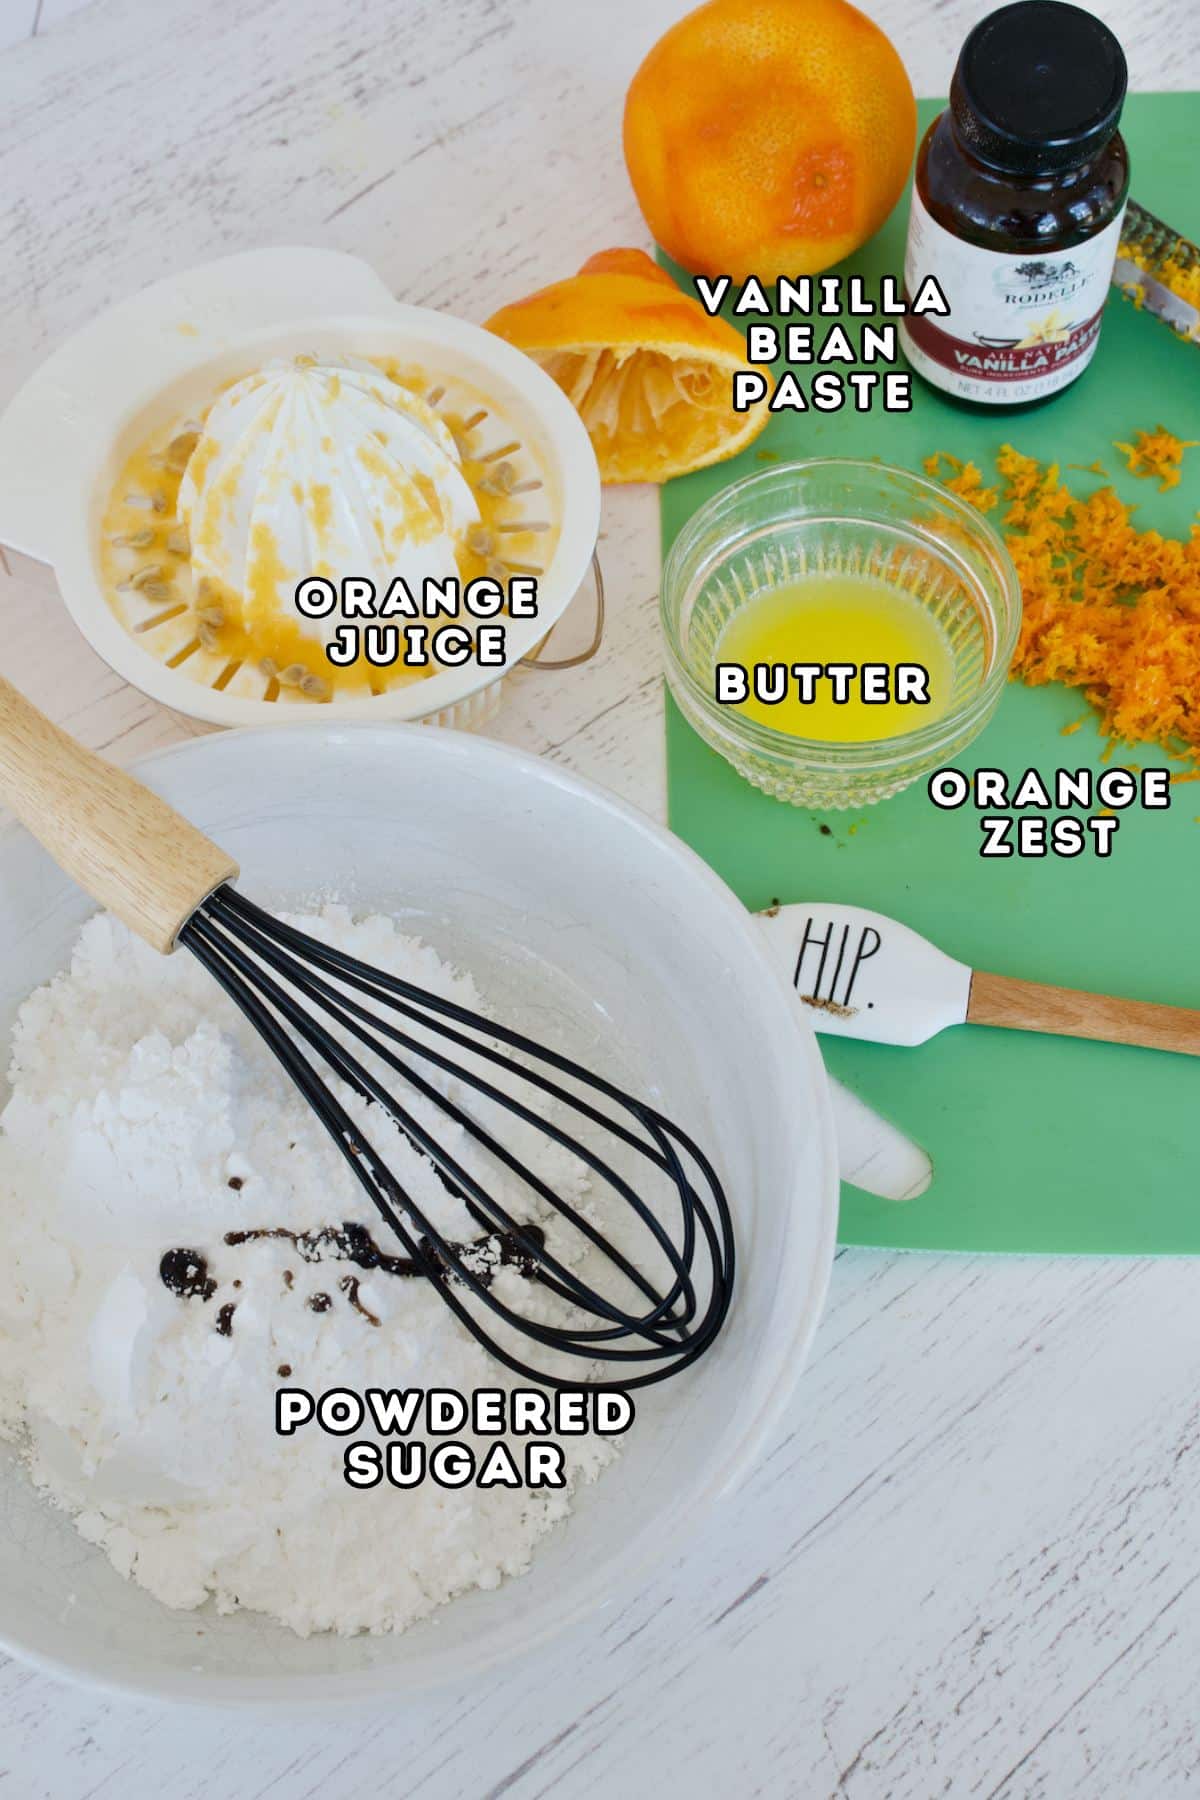
The orange glaze is optional (but amazing), gather the following ingredients:
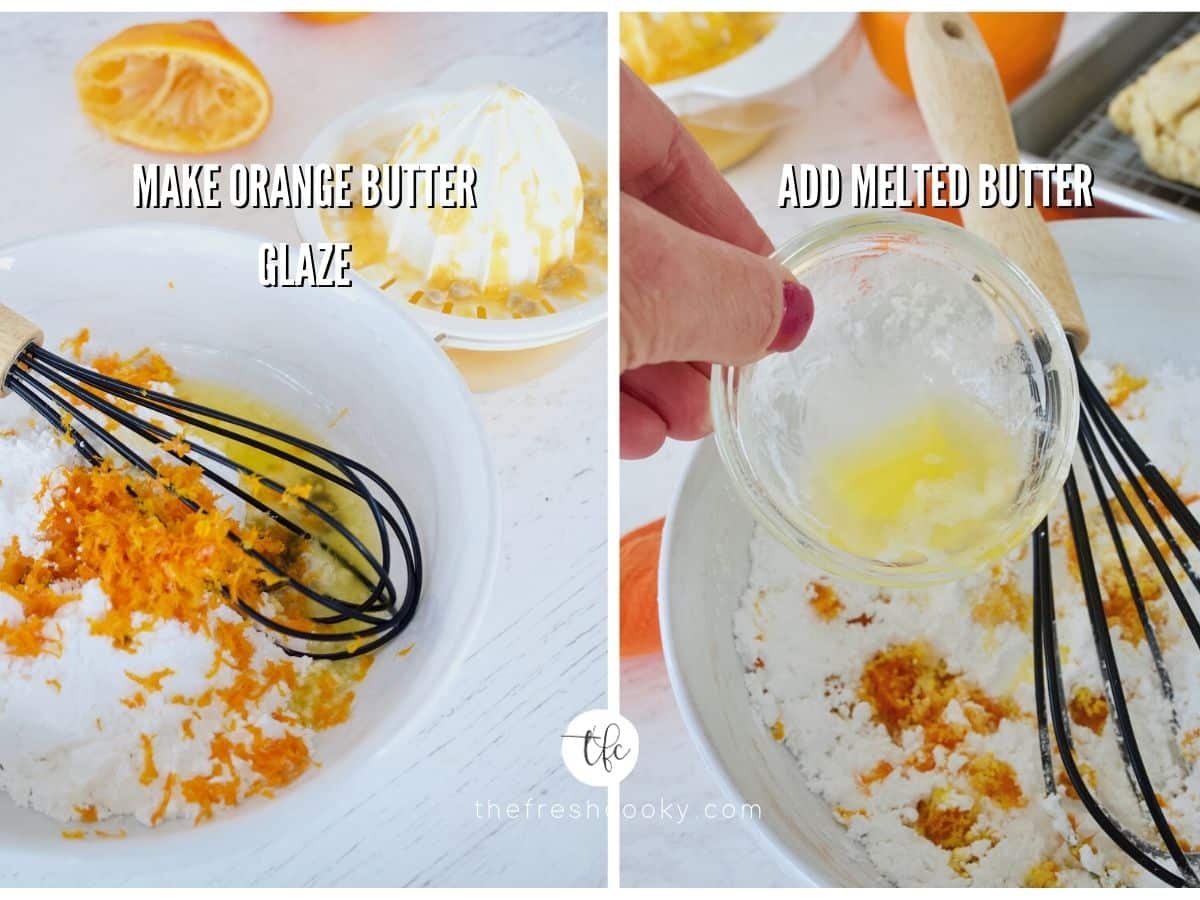
In a medium bowl mix together the powdered sugar, orange zest, melted butter, vanilla bean paste and orange juice; whisk until smooth.
You may use ¼ – ½ teaspoon of orange extract in place of the orange juice and orange zest, but I guarantee it won’t taste as good!
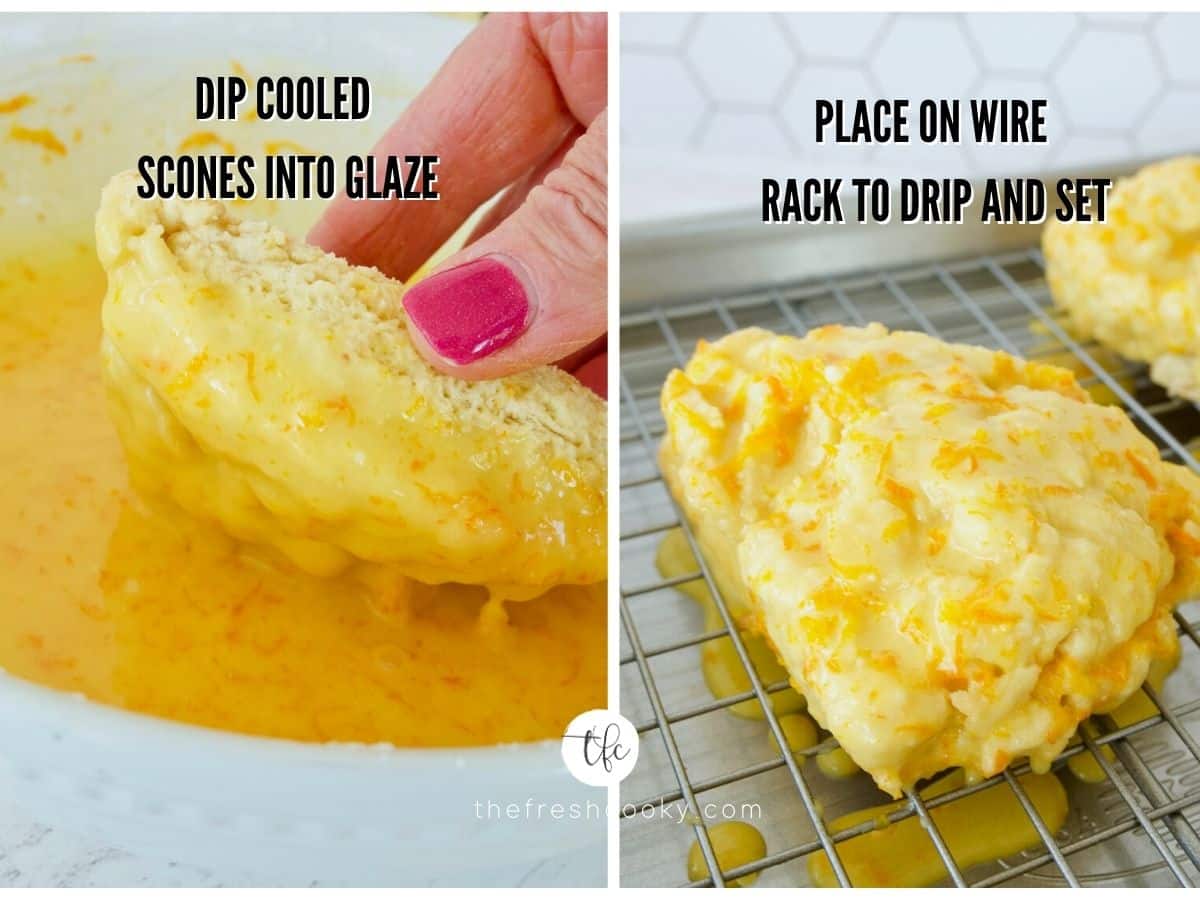
Once the scones are cool, one at a time, carefully pick up and dip the scone top into the orange glaze to coat, then return to the rack to set the glaze.
Alternatively, you can cool the scones completely and pour the orange glaze into a freeze bag, snip off the corner (just a bit), and swirl the glaze on top of your version of Panera’s orange scones.
Pro Glazing Tips
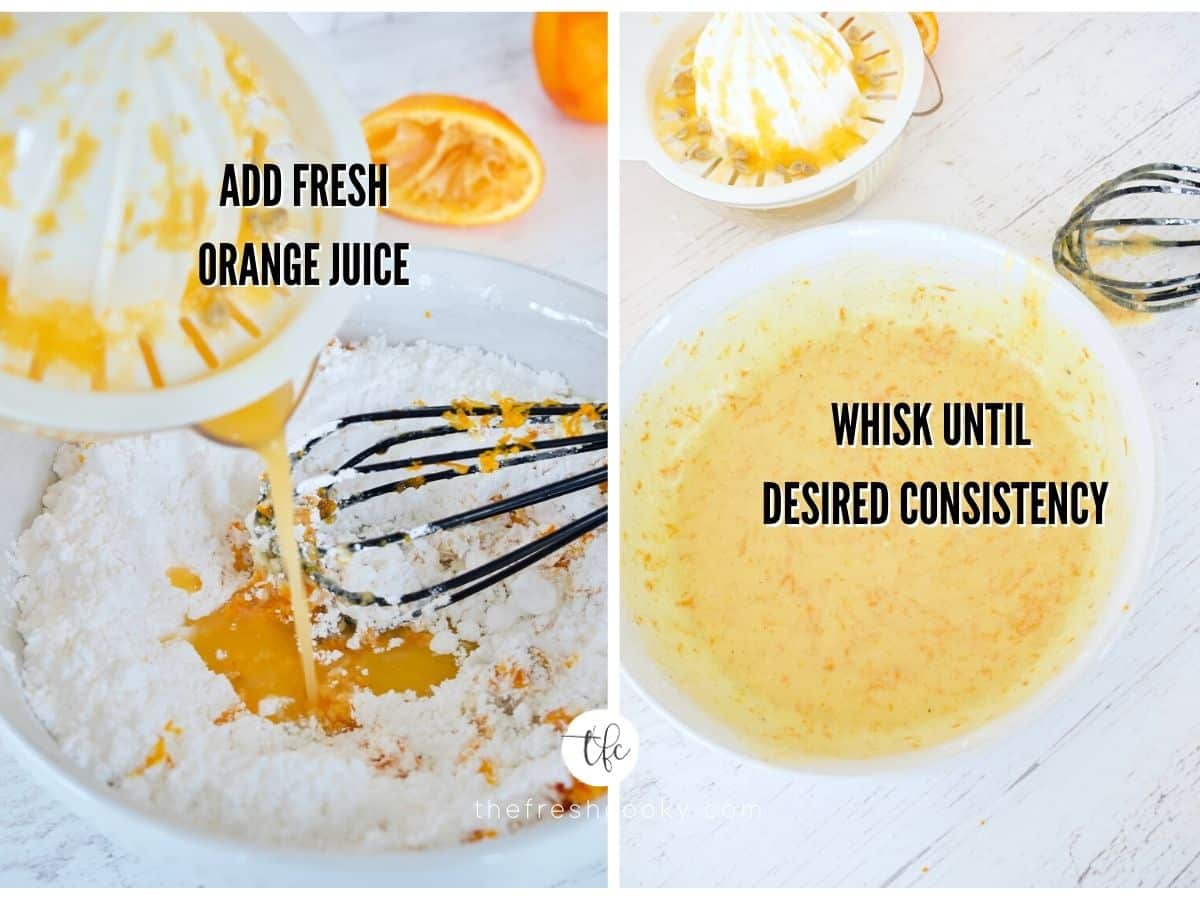
- Liquid | Whisk in a few tablespoons of juice at a time until the consistency is thick, yet pourable.
- Wire Rack | Using your same baking sheet or parchment, set a wire rack over the top then place scones on it to set the glaze.
- Leftover glaze | Using a spoon or spatula, add a little extra drizzle to each scone!
Variations & Substitutions
- Food Processor Orange Scones: Combine all dry ingredients in a food processer, and pulse to combine. Add the grated or cubed butter, pulsing just until it resembles a coarse meal. Pour combined wet ingredients in, pulse just a few times to wet dry ingredients, then turn onto a floured surface and proceed with the recipe.
- Make Ahead: Make the scones, cutting them into wedges, then wrap the dough disc tightly in plastic wrap, place in a freezer bag, and store in the freezer for up to 3 months. Bake from frozen (separating slightly) on a lightly greased baking sheet or parchment-lined cookie sheet.
- Make Blueberry Scone: Omit the orange juice and zest (replace with a little lemon zest instead) and stir in a cup of fresh or frozen blueberries carefully into the mixture at the same time as adding the wet ingredients.
- Sweeter Orange Scones: Some like their scones sweeter, add up to an additional ¼ cup sugar if sweet scones are desired.
- Cranberry Orange Scones: Pop over to my Cranberry Orange Scones post for all of the details!
Gluten-Free Orange Scones
I have had a lot of success replacing regular flour with a good cup-for-cup gluten-free flour (Bob’s Red Mill comes in a close second) in my baked goods!
- I use 1 ¼ cups GF Flour and plus ¼ cup almond flour and ¼ cup oat flour; not only do I believe they taste better, but the texture is better too.
- Gluten-free flours tend to soak up more liquid; use good judgment, and, if necessary, add more liquid a teaspoon or two at a time until you have a good consistency.
- Overbaked gluten-free baked goods are dry and yucky, so I always check my gluten-free scones 2-3 minutes before the lowest time. Keep an eye on them, and when they are puffed and no longer glossy, it’s probably safe to remove them. And if they are slightly undercooked, no worries; it’s much better than overbaked.
How to Make Mini Orange Scones
- When forming the dough discs, split the dough into two even portions on their own parchment sheets.
- Proceed with shaping into a smaller disc and cutting the same way, yielding 8 smaller petite scones per disc.
- Baking time and temp will be the same, but check them on the earlier side at about 12 minutes.
Expert Tips
- COLD BUTTER: I grate my butter using a standard box grater and place it in the freezer while assembling the rest of my ingredients.
- REAL BUTTER: I cannot stress this enough: it doesn’t matter if you use salted or unsalted butter, but make sure it is real, pure cream butter, no blends! It is not real butter if it is soft coming out of the fridge. And the higher quality the butter (e.g. European butter) the better the result. Cheaper butters contain water and that will impact your scones!
- COLD CREAM OR MILK | Unlike other baking recipes (chocolate loaf cake) that, like room temperature ingredients, scones do not! Keep the cream in the fridge until ready to use.
- DO NOT OVERWORK | Think of scones as the dainty, delicate cousin to yeast bread; whereas yeast bread thrives on kneading to activate the ingredients, scones will become tough and will not rise as well if the dough is overworked.
- USE A PASTRY CUTTER | To cut in the butter, using a pastry cutter keeps warm hands out, the beauty of grating the butter and freezing it allows you to quickly mix with your hands without warming the dough too much. And my hands are always cold anyway!
- LIQUID | Only add enough liquid to bring the dough together, having some extra flour is okay, the dough will look shaggy (see above picture).
- SHAPING | To quickly and easily shape your scone disc, use parchment paper (or wax paper would work, too) and fold it up on the ingredients, using the paper to press together and smooth the dough into the disc. This contains the floury mess and helps your hands not warm the butter too much.
- CHILL AGAIN | Once your scones are formed, place the entire pan in the freezer or fridge for 10-30 minutes. This gives the scone time to firm the butter back up, chilling it so the magic happens when it hits the hot oven.
Storing Orange Scones
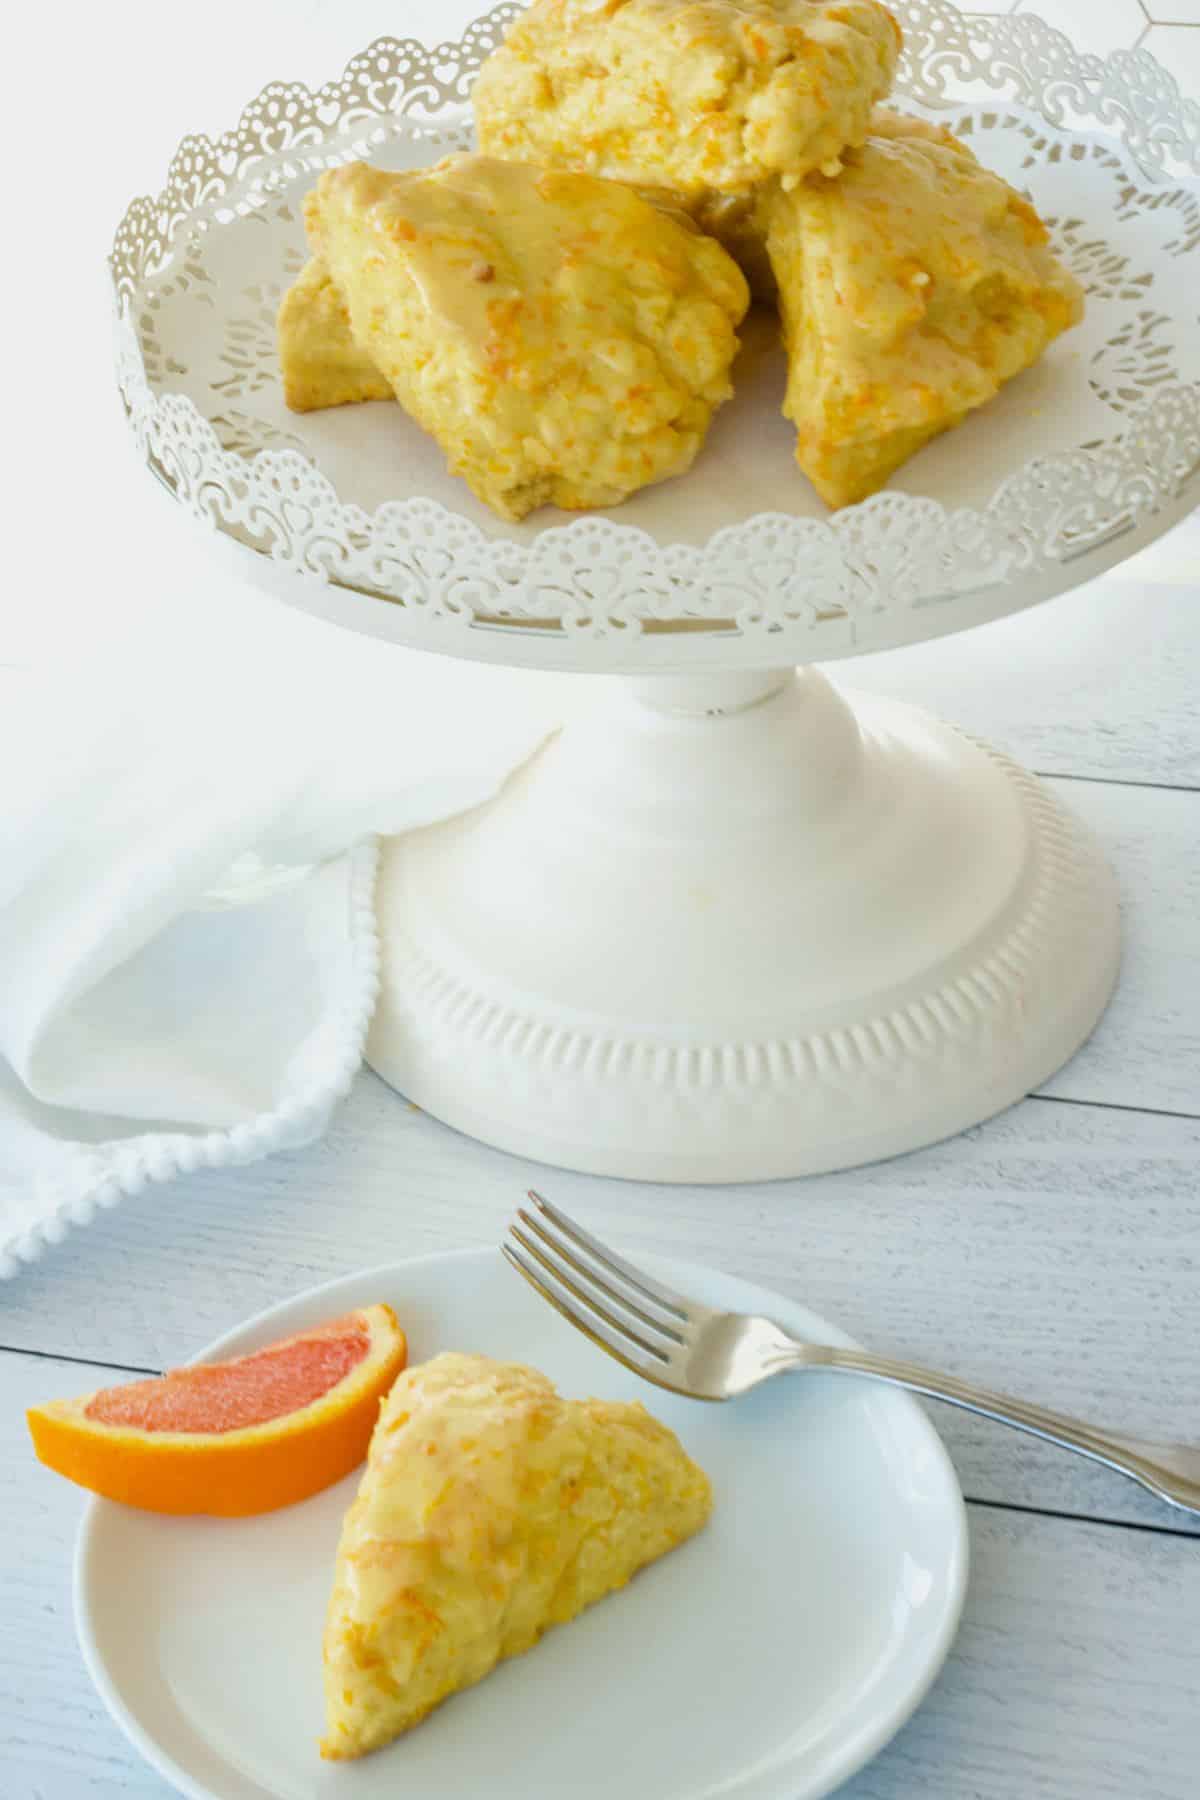
Store scones on the counter in an airtight container up to 5 days, or pretend you are a bakery and wrap them individually and place them in a pretty covered cake stand. Scones may also be frozen for 3-4 months and wrapped well.
Make-Ahead and Freeze Orange Scones
Scones are fabulous make-ahead treats! You can make the scones up to the point of baking, wrap well in freezer baggie and freeze up to 3-4 months. Bake as directed, possibly adding a little time at the end.
You may also freeze already baked scones, the same way, wrapped well in an airtight container up to 3 months. I recommend that you freeze un-glazed, but if that is your only choice, they will be fine.

Frequently Asked Questions
Make sure your baking powder is fresh; most baking powder and baking soda are fresh for about 6 months from opening.
To check place 1 teaspoon baking powder in a cup and add ⅓ cup hot tap water. If it starts to bubble, it’s good to go. If not, by new!
The short answer is yes! However, baking soda is three times more potent than baking powder, so reduce to about ¾ teaspoon of baking soda in this recipe. It also relies on acid to activate the soda; using orange juice, you should be fine.
Other replacements might not produce as fluffy and high rise in scones, but are usable: buttermilk (would be good if you are using baking soda), evaporated or dry (reconstituted) milk, canned coconut milk or other plant based milk will work, or you could even try yogurt or even plain water.
1. Make sure your oven heats accurately. Purchase an oven thermometer to be sure, then adjust accordingly.
2. Do not overwork your dough!
3. Instead of separating the scones completely, cut through them and use the bench scraper to just barely pull the scone away from the other one, this will give structure and rise to the scone, though you may need to bake a few additional minutes.
4. CHILL your scones, this firms the butter back up so that it doesn’t become a puddle as soon as it hits the oven heat!
Two reasons; your scones were not cooled completely and/or you thinned out the glaze too much. Simply add a bit more powdered sugar a tablespoon at a time until the glaze is the right consistency.
High Altitude Orange Scone Recipe
- Decrease baking powder to 1 ½ teaspoons.
- If above 5,000 feet, add an additional 1-2 tablespoons flour
- You may need to increase liquid, but do not overadd. The scones should really just barely hold together.
- Bake as directed, but begin checking them 2-3 minutes early.
Our favorite springtime baked goods!
- Lemon Blueberry Cookies – I’m telling you, these are amazing!
- Old Fashioned Rhubarb Cake – always a hit
- Lemon Blueberry Dump Cake Recipe – as easy as 1-2-3 dump
- Strawberry Brownies
When to make this recipe?
Try making these Better than Panera orange scones for Easter, Mother’s day, bridal or baby showers, a luncheon, tea party or anytime a bright, flavorful, low-sugar scone craving hits!
I hope you loved this easy orange scone recipe — if you did, would you share your creation on Instagram, Facebook and Pinterest? And be sure to comment below!
More from The Fresh Cooky
Like this recipe?
Don’t forget to give it a ⭐️⭐️⭐️⭐️⭐️ star rating and leave a comment below the recipe!
Video
Equipment
Ingredients
Orange Scones
- 1 ¾ cups all-purpose flour I use organic unbleached all-purpose flour
- ¼ cup granulated sugar I use all-natural cane sugar, regular sugar may be used (some say they like sweeter scones, add up to ½ cup total)
- 2 teaspoons baking powder reduce to 1 ½ teaspoons for high altitude
- ¼ teaspoon kosher salt
- 4 tablespoons salted butter cold, grate the butter and place in freezer or cut into small cubes, keep in fridge until ready to use)
- ½ cup heavy cream might need an extra tablespoon or two for high altitude
- 1 teaspoon vanilla bean paste replace with vanilla extract
- 1 large egg room temp is best
- 1 tablespoon Orange zest grated from one orange | I used large naval oranges
- 1-2 tablespoons orange juice fresh squeezed
Orange Vanilla Butter Glaze
- 1 cup powdered sugar
- ½ teaspoon vanilla bean paste or vanilla extract
- 1 tablespoon butter melted
- 1 orange zested
- ½ orange Juiced, use as much or as little to get a smooth consistency.
Instructions
Scones
- Line a baking sheet with parchment paper. In a large mixing bowl, whisk the flour (1 ¾ cups), granulated sugar (¼ cup), baking powder (2 tsp) and salt (¼ tsp) together.1 ¾ cups all-purpose flour, ¼ cup granulated sugar, 2 teaspoons baking powder, ¼ teaspoon kosher salt
- Toss frozen, grated butter (4 TBL) into flour mixture and using a pastry cutter or your hands quickly mix until it resembles coarse crumbs.4 tablespoons salted butter
- In a small bowl or measuring cup, whisk together the heavy cream (½ cup), vanilla bean paste or extract (1 tsp), egg (1), orange zest (1 TBL) and orange juice (1-2 TBL). Make a small well in the center of the dry ingredients and pour in the egg mixture. Gently mix together with a fork until the dough just comes together, forming a shaggy dough.½ cup heavy cream , 1 teaspoon vanilla bean paste, 1 large egg, 1 tablespoon Orange zest
- Turn out the dough onto a parchment lined cookie sheet, using the parchment to help form the dough into disc (about 8 inches), about ½ – ¾-inch thick. If the dough is really dry, add a little splash of orange juice or heavy cream.
- Using a bench scraper or large knife cut the disc in half, then quarters, then again cutting the quarters in half; making 8 large scones (see below for mini scones).
- Separate scones barely away from the other, closer to one another will yield a more evenly raised scone, further apart they will appear more rustic. Freeze or refrigerate scones to firm the butter back up for about 10-30 minutes, now is a great time to preheat the oven to 400° F (204°C).
- Bake scones until lightly golden brown on the bottom, about 13-15 minutes, 13 will be softer, 15 more firm. Remove to a rack to cool completely.
Orange Butter Glaze
- In a wide bowl (large enough to dunk a scone) mix together the powdered sugar (1 cup), orange zest (1 orange), melted butter (1 TBL), vanilla bean paste (½ tsp) anand whisk in just enough orange juice to get a smooth pourable consistency; whisk until smooth. Once scones are cool, one at a time, carefully pick up and dip scone top into the orange glaze to coat, then return to the rack to set the glaze.1-2 tablespoons orange juice, 1 cup powdered sugar, ½ teaspoon vanilla bean paste, 1 tablespoon butter, 1 orange zested, ½ orange
- Store scones on counter in airtight container up to 5 days, or wrap individually and place in a pretty covered cake stand. Scones may also be frozen 3-4 months wrapped well.
Notes
- Add Juice Slowly – Whisk in orange juice a little at a time until glaze is thick but pourable.
- Use a Wire Rack – Set over parchment-lined pan for easy clean-up.
- Glaze Slipping Off? – Scones may be too warm or glaze too thin. Let cool, and add more powdered sugar if needed.
- Extra Glaze? – Drizzle leftovers on with a spoon!
- Swap regular flour with 1 ¼ cups cup-for-cup gluten-free flour, plus ¼ cup almond flour and ¼ cup oat flour for better taste and texture.
- Gluten-free flours absorb more liquid—add more a teaspoon at a time if the dough feels too dry.
- Check scones 2–3 minutes before the suggested bake time. When they’re puffed and not glossy, they’re ready. Slightly underbaked is better than dry and overdone!
- Cold Butter – Grate and freeze before mixing.
- Real Butter – Use pure cream butter (no blends!).
- Cold Cream – Keep it chilled until ready.
- Don’t Overmix – Gentle hands = tender scones.
- Pastry Cutter or Grated Butter – Keeps dough cold.
- Add Liquid Slowly – Dough should be shaggy, not wet.
- Shape with Parchment – Fold and press to form disc.
- Chill Again – Freeze formed scones 10–30 mins before baking.
Nutrition


Yuri Clingerman
These scones are amazing and so fun to make. I used cara cara oranges and made mini scones. It was easy to make the glaze and dunk each scone. It turned out beautifully and has such a pleasant orange flavor.
Love that twist using Cara Cara oranges Yuri!!
Dee
This recipe is fabulous! I made them today and my husband and I really enjoyed them. I followed your recipe as written and they turned out perfect. Your instructions were very clear and easy to follow. Thanks so much for the recipe! This one is a real winner…
So glad you love them, Dee!!
Heather
I just tried this and my dough was way too wet. Tried adding flour back in but I was afraid I was overworking the dough and scrapped it. Will try again tomorrow. I’ve reread the directions multiple times and it says to just pour the egg mixture into the well but are you supposed to pour a little at a time, mix, and stop when you have a shaggy dough? I’m also confused about the 1-2 tablespoons of orange juice. Does this go into the egg mixture or ONLY if you find you need it once your dough has formed? Thank you! Excited to get this right!
Sorry about the first experience. Your dough should be pretty dry, maybe try adding a little extra flour, you should be fine as long as you aren’t man-handling the dough. Just pressing until it sticks together. Will be somewhat crumbly. And the orange juice goes into the liquid mixture. If anything I usually need to add more liquid. Are you using a different type of flour? Just play with it. If super wet hold back a couple tablespoons of the cream (before adding the egg and juice) and use that to bring it all together. Sorry I didn’t reply last night! You’ve got this!
Donna
I made these Glazed Orange Scones for the first time just yesterday!! Why have I waited so long?!… They were not difficult to make, and they turned out absolutely amazing!
I followed your instructions exactly on making them Gluten-free, and now we have a new very yummy GF treat we can enjoy and not feel cheated at all!! Hooray! Can’t say enough about how good they are. This morning I warmed up one scone in the microwave for 10 seconds, and then I savored every scrumptious bite! Great with my morning cuppa tea! The fresh orange flavor comes through beautifully!
I’m definitely going to make these again. And they’re being added to my menu for a ladies brunch I’ll be hosting at my house next month!
Oh Donna, this makes me so happy!! Thank you so much for your sweet comment!
Georgianne
GF is so expensive. I bake alot and have a neighbor that need GF baking. The cost is really unreasonable and hard to commit to for one or two people. I would love to bake for her but buying different kinds of GF flour isn’t good for me. I read that to make GF bread or anything that uses yeast I would need to but]y GF bread flour! Even Costco can’t help …their 5 lb 1:1 ratio GF flour can’t be used for bread! Very sad!!!!!! I also heard that GF flour changes the fluffy texture of homemade bread.
Wendi Shepherd
I have tried many different orange scones recipes, but I love this one by far the best. To add a little bit of pizzazz, I add a cup of white chocolate chips in to the mix.
I love that twist and pizzazz, Wendy!
Judy
The lightest and best tasting scones I’ve ever made. Every east recipe!
Thanks Judy!! 🥰🥰
Alicia Iniguez
Delicious absolutely Delicious!!!
So glad you loved them Alicia!
Linda
So delicious. I followed the recipe as stated. I used 1 tbls of orange juice. I skipped the glaze because we don’t like overly sweet pastries for breakfast. I simply coated each unbaked scone with the cream and sprinkled coarse sugar on top. Thank you for including the weight in grams for the flour. I shy away from recipes that state the amount of flour in cups instead of weight.
Thank you for your sweet reply Linda and the encouragement about weighing flour!
Amber H.
Highly reccommend this recipe as they are super fluffy, tender and delicious! I’ve made them many times now and in different flavors like orange and chocolate chip. Everyone always loves them!
Thank you Amber! I couldn’t agree more!
Polly king
These are good but a little too oily.
Followed the recipe and they are pretty but the texture is off, more gummy than cake or biscuit like. Good though
Wow never had that happen, sounds like maybe they didn’t bake long enough. But sorry you experienced this, Polly. Happy to help troubleshoot.
Chris Nelson
I am very excited to make these scones. I LOVE the directions. Thanks for adding the measurements to each step. So helpful!!!!!!
You’re welcome!
Amber
I’ve made these several times. They are yummy! The texture is so tender 😍
So happy you loved them Amber!!
Sue P.
Just took these out of the oven and ate one while it was still warm. So, so tasty!! I appreciate that you put the amounts in the instructions so we don’t have to check the ingredient list constantly.
My dough (using 1 T. OJ) was too wet to pat out, so I put them in paper baking cups. The texture is light and soft, so I think these won’t be as dense as other recipes are when eaten the next day. I like that!
I will definitely be trying some of your other scone recipes.
Oh sorry to hear your dough was so wet Sue, but sounds like you improvised really well and they sound yummy! Thank you for your kind comment!
Cecelia
I like this recipe, it is very adaptable, I was able to replace the flavorings with others to make a cherry chocolate scone that was deliscious. I recommend this recipe but to bake in individual scones to bake faster.
Thanks so much! I love your twist and yes the base is super adaptable!
Debbie
Best scones ever!!
Thank you, Debbie!!
Joyce D
These scones are not only delicious, they are easy to make! Using the parchment paper to flatten them-genius! Directions are clear and appreciate putting each step’s ingredients so I didn’t need to scroll back up to the list! Mine were a bit soft, didn’t cook well in the middle. (will only use 1 tbsp orange juice next time) I turned them around and baked a few minutes more and they were perfect! I will definitely make these again. Hope my son, whose birthday is today, will like them too! Thanks.
So happy you love my little trick Joyce, thank you so much for your kind comment!
PJ F
I made these today after trying a few other “copycats”. This was by far the best. Nailed it. Excited to try some of your other recipes. Also making these Lemon Rosemary scones. Amazing! Thank you!!!!
I love hearing that PJ! Thank you so much!
Erin Corbin
These look delicious and I can’t wait to try them! I have been looking for a copycat recipe for Panera Bread’s orange scones for years! I love everything about the scones – except the orange zest….. So my question is: if I were to omit the orange zest from the scones, would you recommend adding orange extract to the scone batter/ingredients itself?
Sorry about the delay Erin, yes, I would give orange extract a try, the zest really adds the orangey flavor — start small depending on the type of extract. Hope you love them as much as we do!
Wendi Shepherd
I love this recipe. I in fact, love Panera’s Orange scones, and have been looking for a recipe that is equal to or better than the Panera scones. I have finally found it in your recipe. I will continue to use this recipe for the rest of my baking days. Thank you!
Thank you so much, Wendy!!
Mary Ensman
Should I glaze the scones when I make them if I want to make them a few days ahead of my event? Or instead, do I glaze them the day I am going to be using them?
Hi Mary, I’d freeze them unglazed wrapped well. Then thaw and glaze them the day you’re using them. They should taste nice and fresh.