
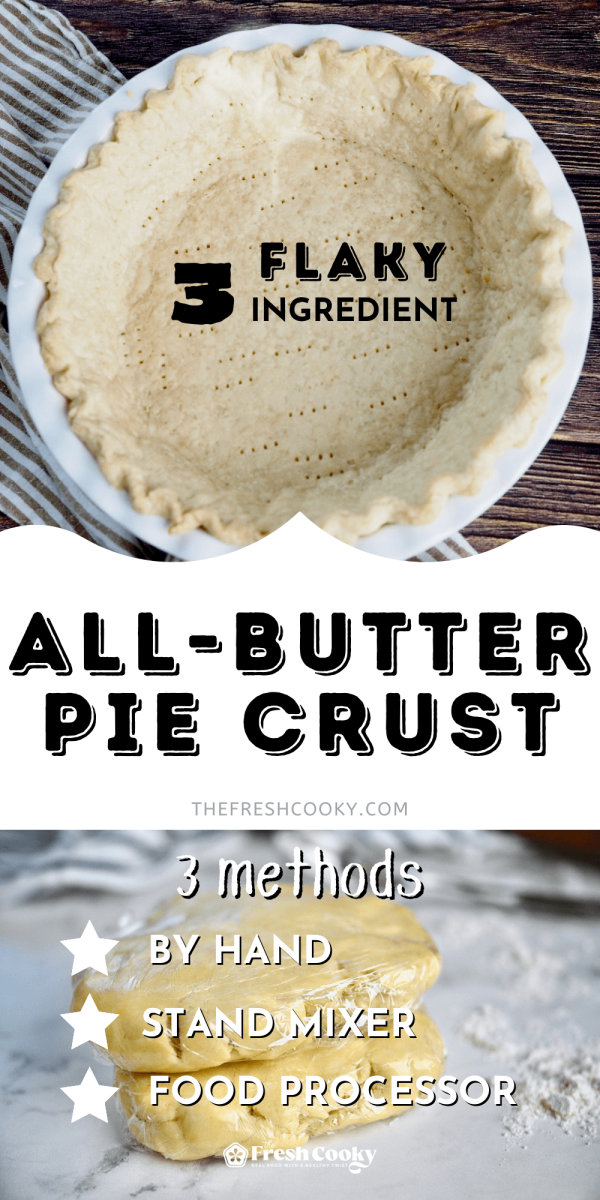
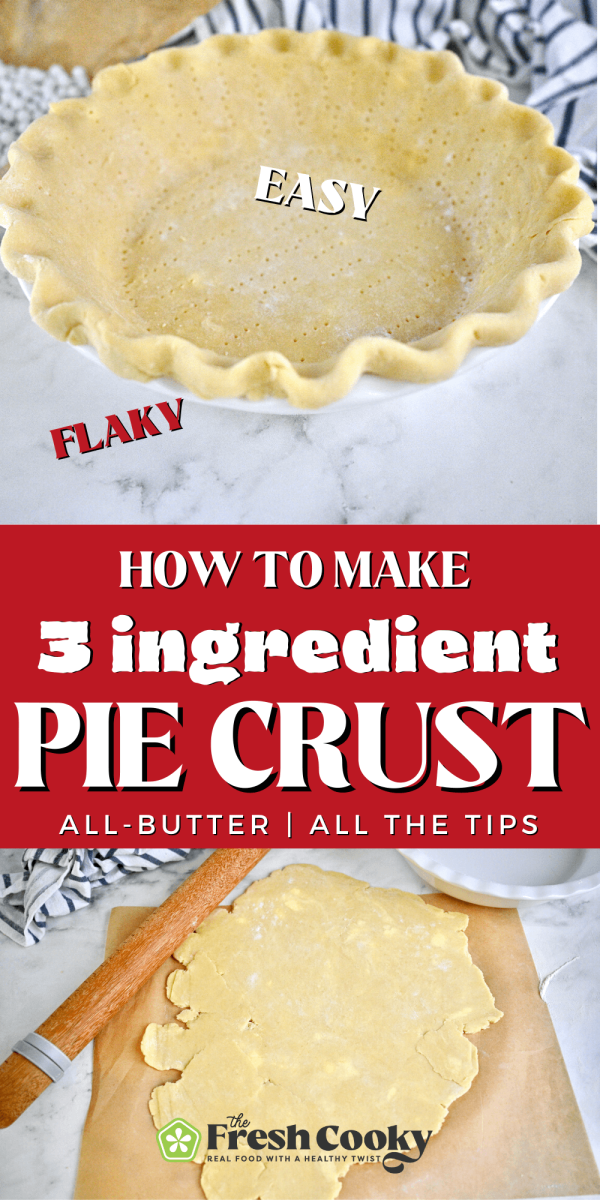
Master the ultimate butter pie crust with my simple 3-ingredient recipe! After years of baking, I’ve perfected this rich, flaky crust that’s perfect for any pie. With tips on rolling, shaping, and even fixing common issues, this guide will have you baking like a pro in no time.
I’ve been baking pies since I was about 8 or 9, learning the ropes from my mom and grandmother—both expert pie bakers. Back in those days, we’d use a bit of Crisco in our crusts. You can’t deny the flakiness shortening gives, but I’ve never been a fan of its ingredients. Over the years, I adapted our family recipe to an all-butter crust, keeping that perfect flakiness but with rich, natural flavor from real butter. This 3-ingredient butter pie crust has been my trusted favorite ever since.
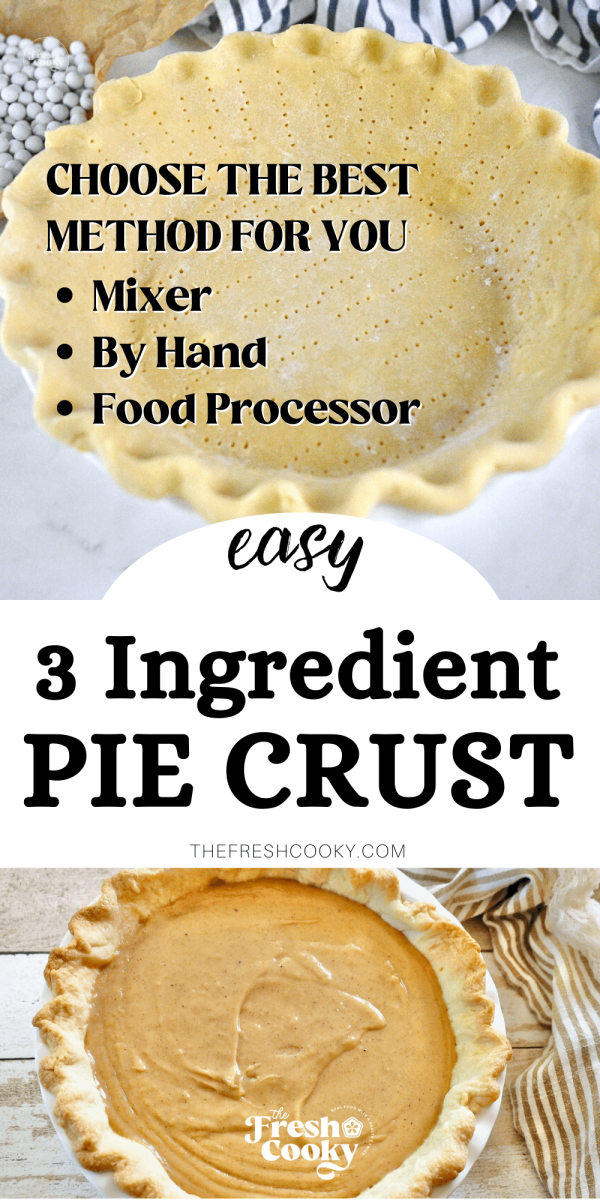
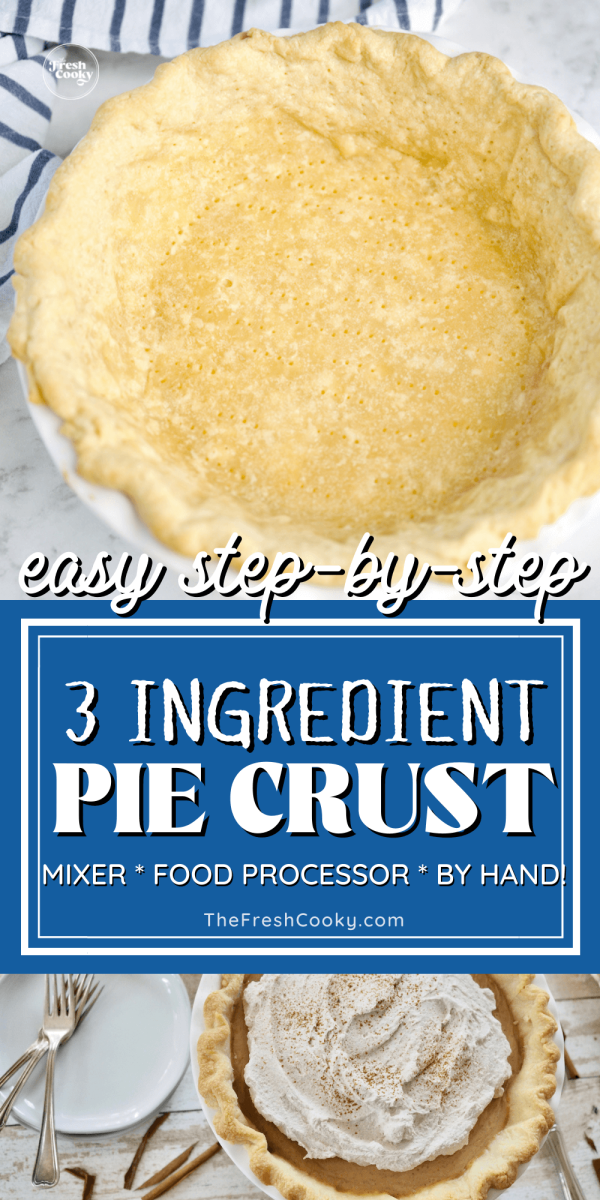
In this guide, I’ll walk you through my time-tested methods for making this crust, whether with a food processor, by hand, or with a stand mixer. So, no matter your equipment or skill level, you’ll easily achieve bakery-quality results. I’ll also share my best tips for rolling, blind baking, creating a lattice crust, and troubleshooting, so your crust turns out beautifully every time.
Success Tips for the Perfect Butter Pie Crust
- Use cold ingredients: Start with cold butter and, if possible, chill your flour and tools for extra flaky layers.
- Handle the dough gently: Overmixing can lead to a tough crust; work the dough just until it comes together and don’t add too much water.
- Rest the dough: Allow it to chill for at least an hour to relax the gluten, making it easier to roll out and preventing shrinkage.
- Roll evenly: Keep even pressure on the rolling pin to maintain uniform thickness, which helps the crust bake consistently.
- Par-bake for a crisp bottom crust: Blind baking helps avoid a soggy crust, especially for custard or cream pies.
- It’s okay if it falls apart a bit: You don’t need to have the perfect crust; what’s important is not overhandling it.
- Patch with care: If you have any tears, use a bit of extra dough or gently press together to seal—don’t worry, it bakes beautifully!
Why we love this Butter Pie Crust Recipe
- Tested | Over the years, I’ve tweaked the process to make the perfect all-butter pie crust.
- Imperfectly Perfect | I have pieced together and patched many a pie crust dough, still tastes just as good, don’t worry about how it looks.
- 3-ingredient pie crust | Doesn’t get much simpler! Flour, cold water and butter are your main ingredients, adding salt or sugar depending on your pie recipe.
- 3 Methods | Whether you prefer by hand, with or without a food processor or using your stand mixer, I have all three methods for you!
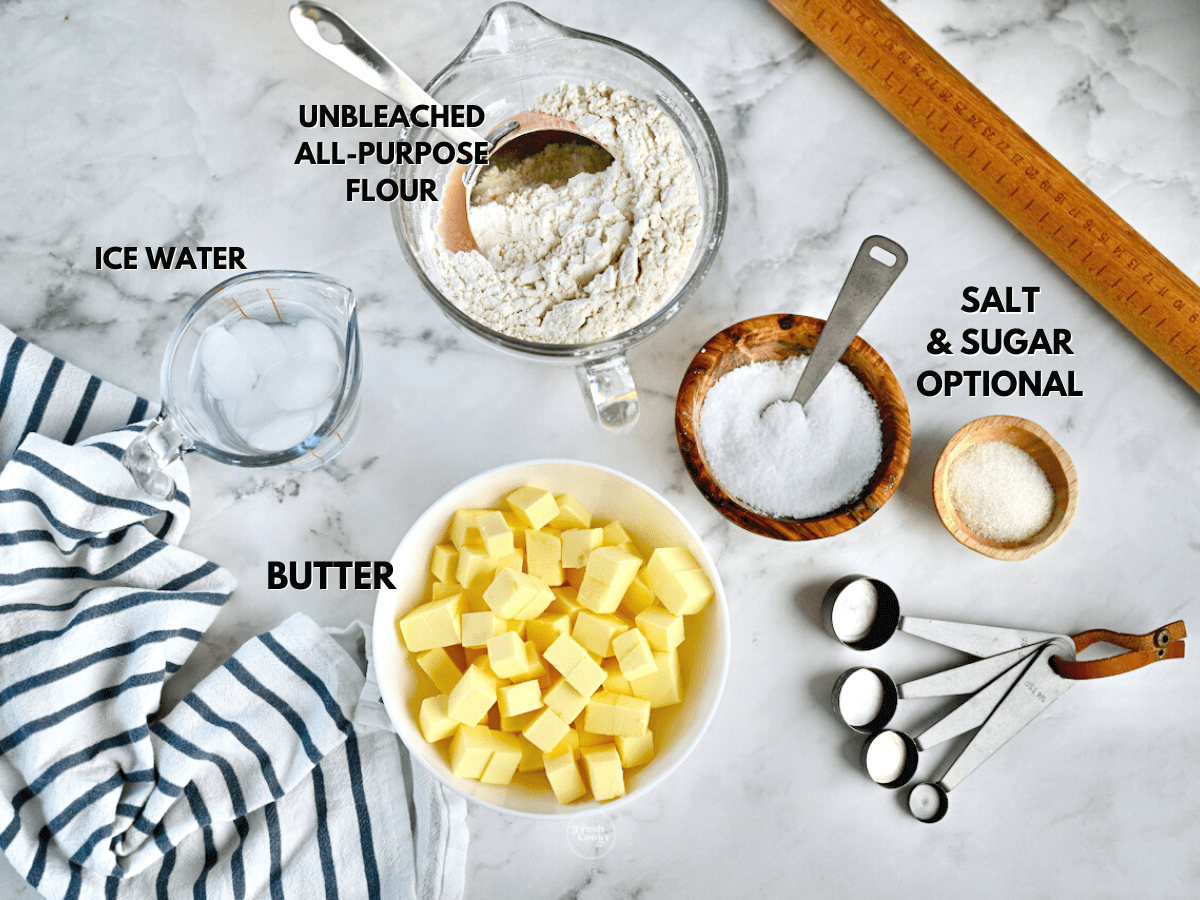
Easy All Butter Pie Crust Ingredients
- Unbleached all-purpose flour | I always use organic unbleached flour and have yet to test with bleached flour. You can also use pastry flour if you have it on hand.
- Butter | Use a good quality, COLD butter, salted or unsalted, I typically have salted butter on hand so that is what I use. I love to use Irish butter, like Kerrygold, makes a world of difference, but use the best you can afford. Use cold butter, not room temperature.
- Ice Water | Place a 4-6 ice cubes in a measuring cup with water, let them sit while you prep the rest of the ingredients. Then pour ice water amount into a mini measuring cup.
- Optional Ingredients | You might want to add a bit more kosher salt if you are using unsalted butter or add a little cane sugar if you are making a sweet pie crust.
Butter Pie Crust Tools
- Food Processor | this tool makes this all butter pie crust so much easier, but don’t worry, I’ll show you how to make pie crust without a food processor and with a stand mixer.
- Rolling Pin | I have an antique rolling pin that I use for my pies, but I just ordered one of these adjustable rolling pins so your thickness is uniform.
- Bench Scraper | is a handy tool when making a homemade pie crust recipe, use it to unstick dough from your rolling surface and to slice the dough into two pieces.
- Pie Weights | I’ve used dried beans for years, perfectly fine to use when blind baking your pie crust. But have recently bought pie weights.
Why I use Irish Butter for my Pie Crust
Because Irish butter have a higher fat content, which translates into a more tender and flaky — oh so amazing butter pie crust. I think it’s actually the trick to this recipe, makes rolling out a dream.
Do not use margarine or any butter that is soft coming out of the fridge, it will not work the same. Soft out of the fridge “butters” are actually butter blends.
Method 1 – How to make Butter Pie Crust in the Food Processor
Step 1 Food Processor Method | Pulse Dry Ingredients
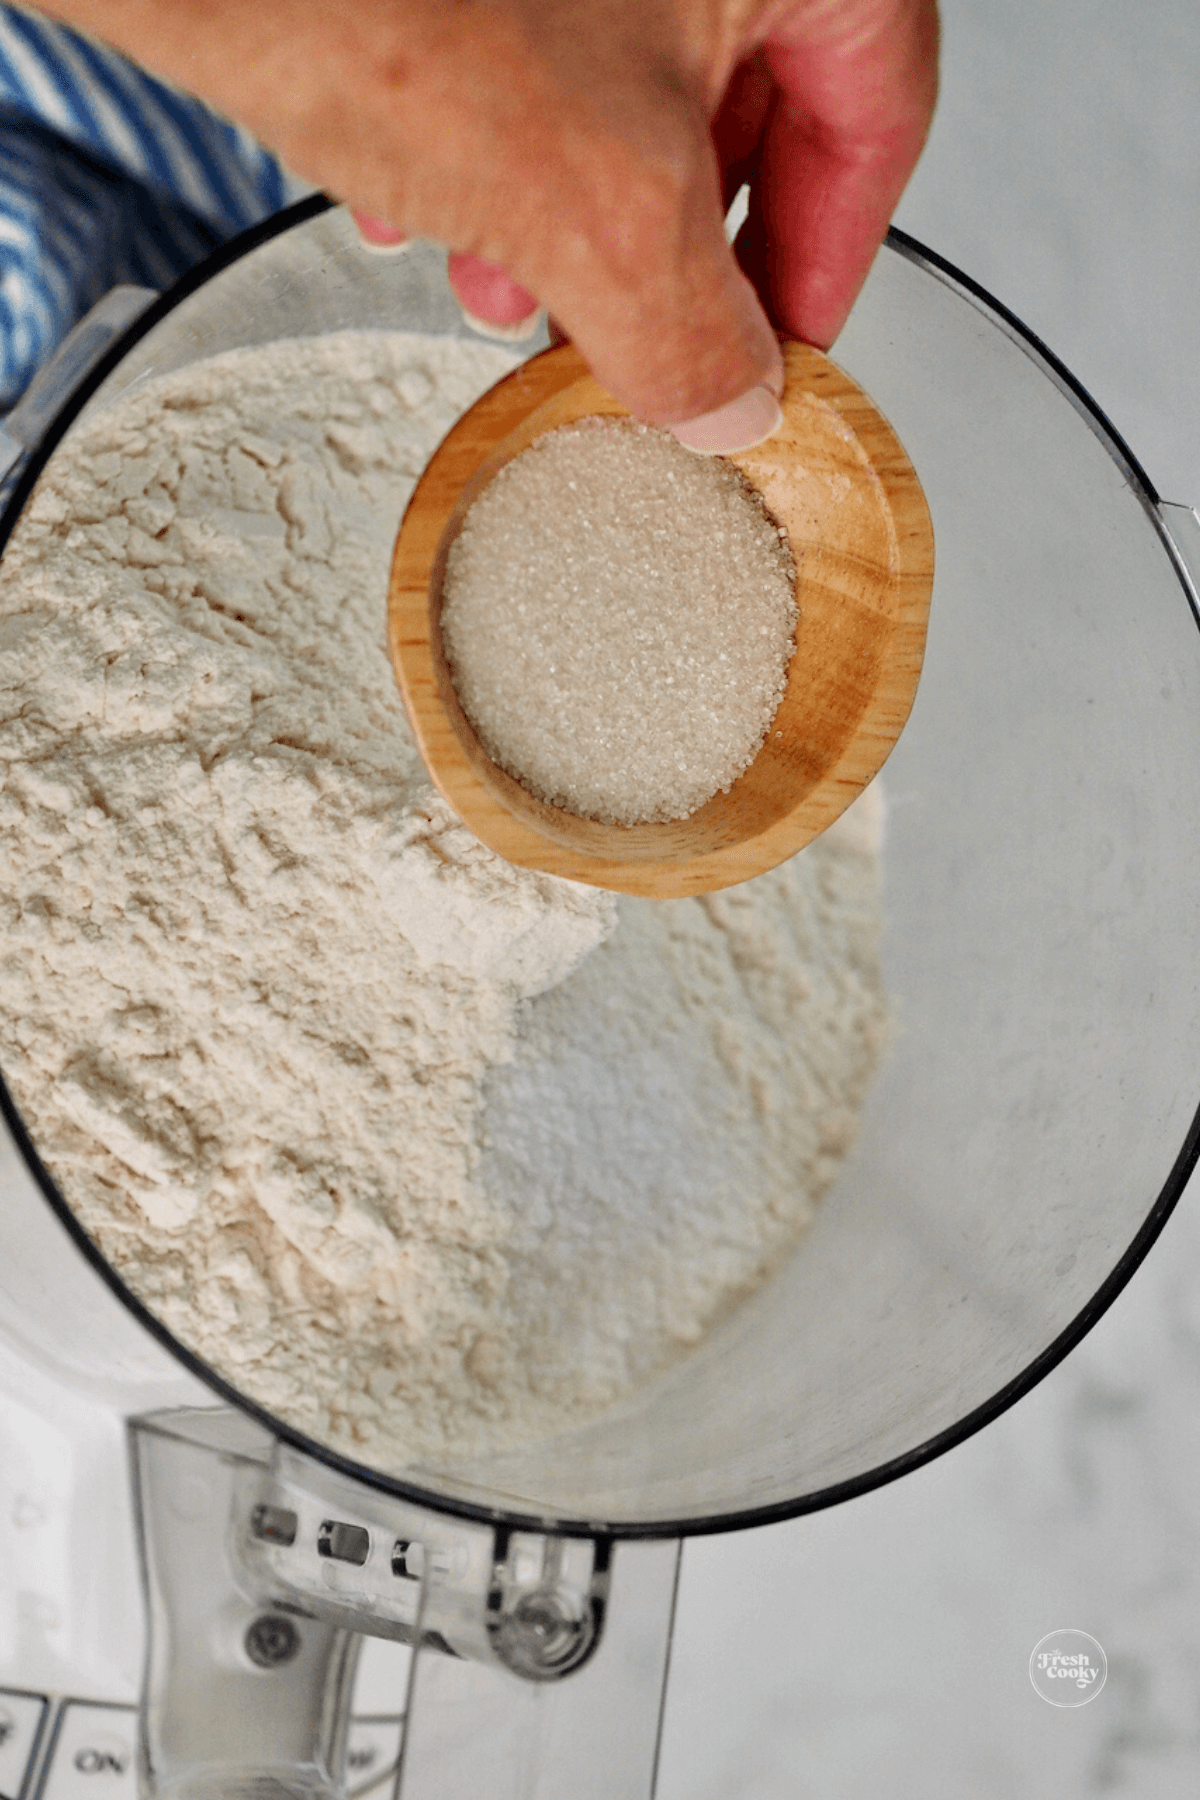
This is key! ==>> Start with 1 ½-2 cups of flour (reserving the additional cup), add kosher salt and sugar if adding to food processor. Pulse the dry ingredients a couple of times to combine.
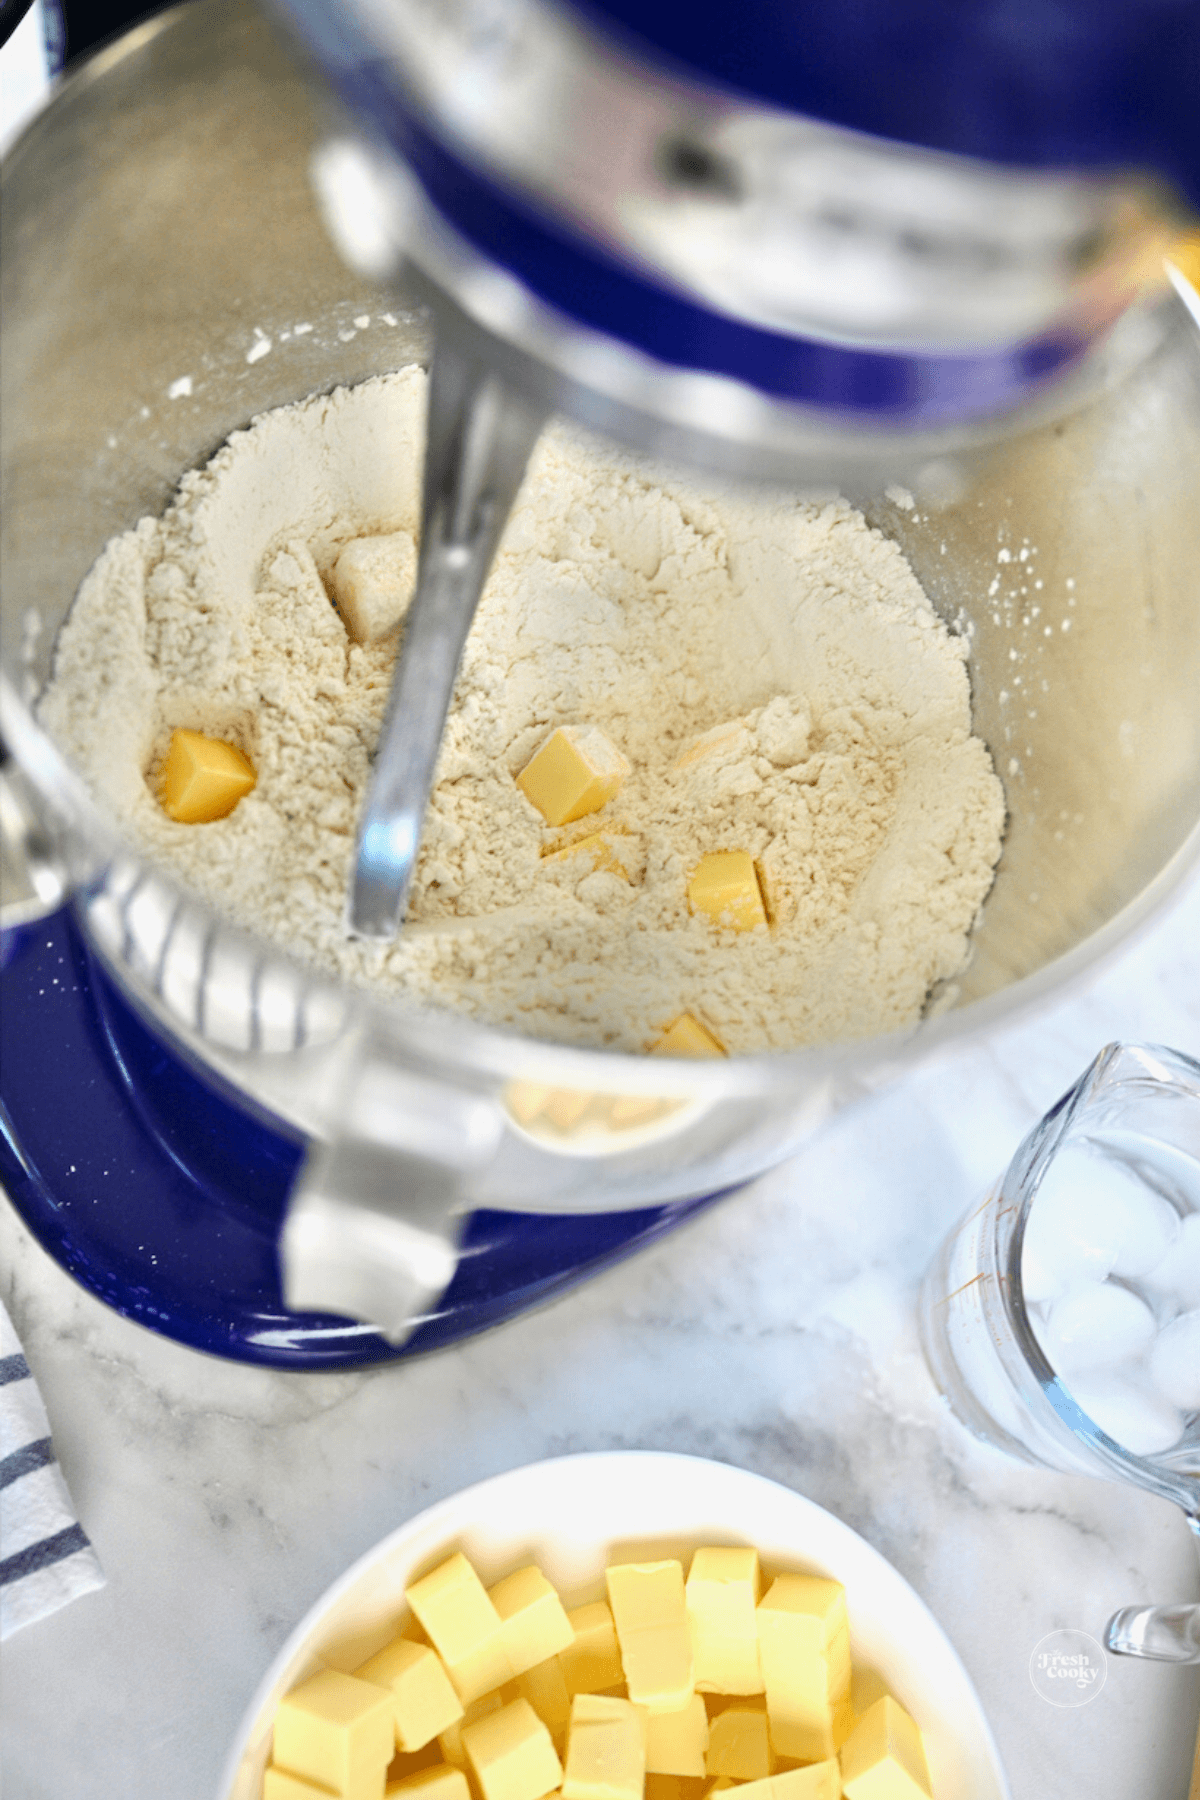
Step 2 Food Processor Method | Add cold, cubed butter
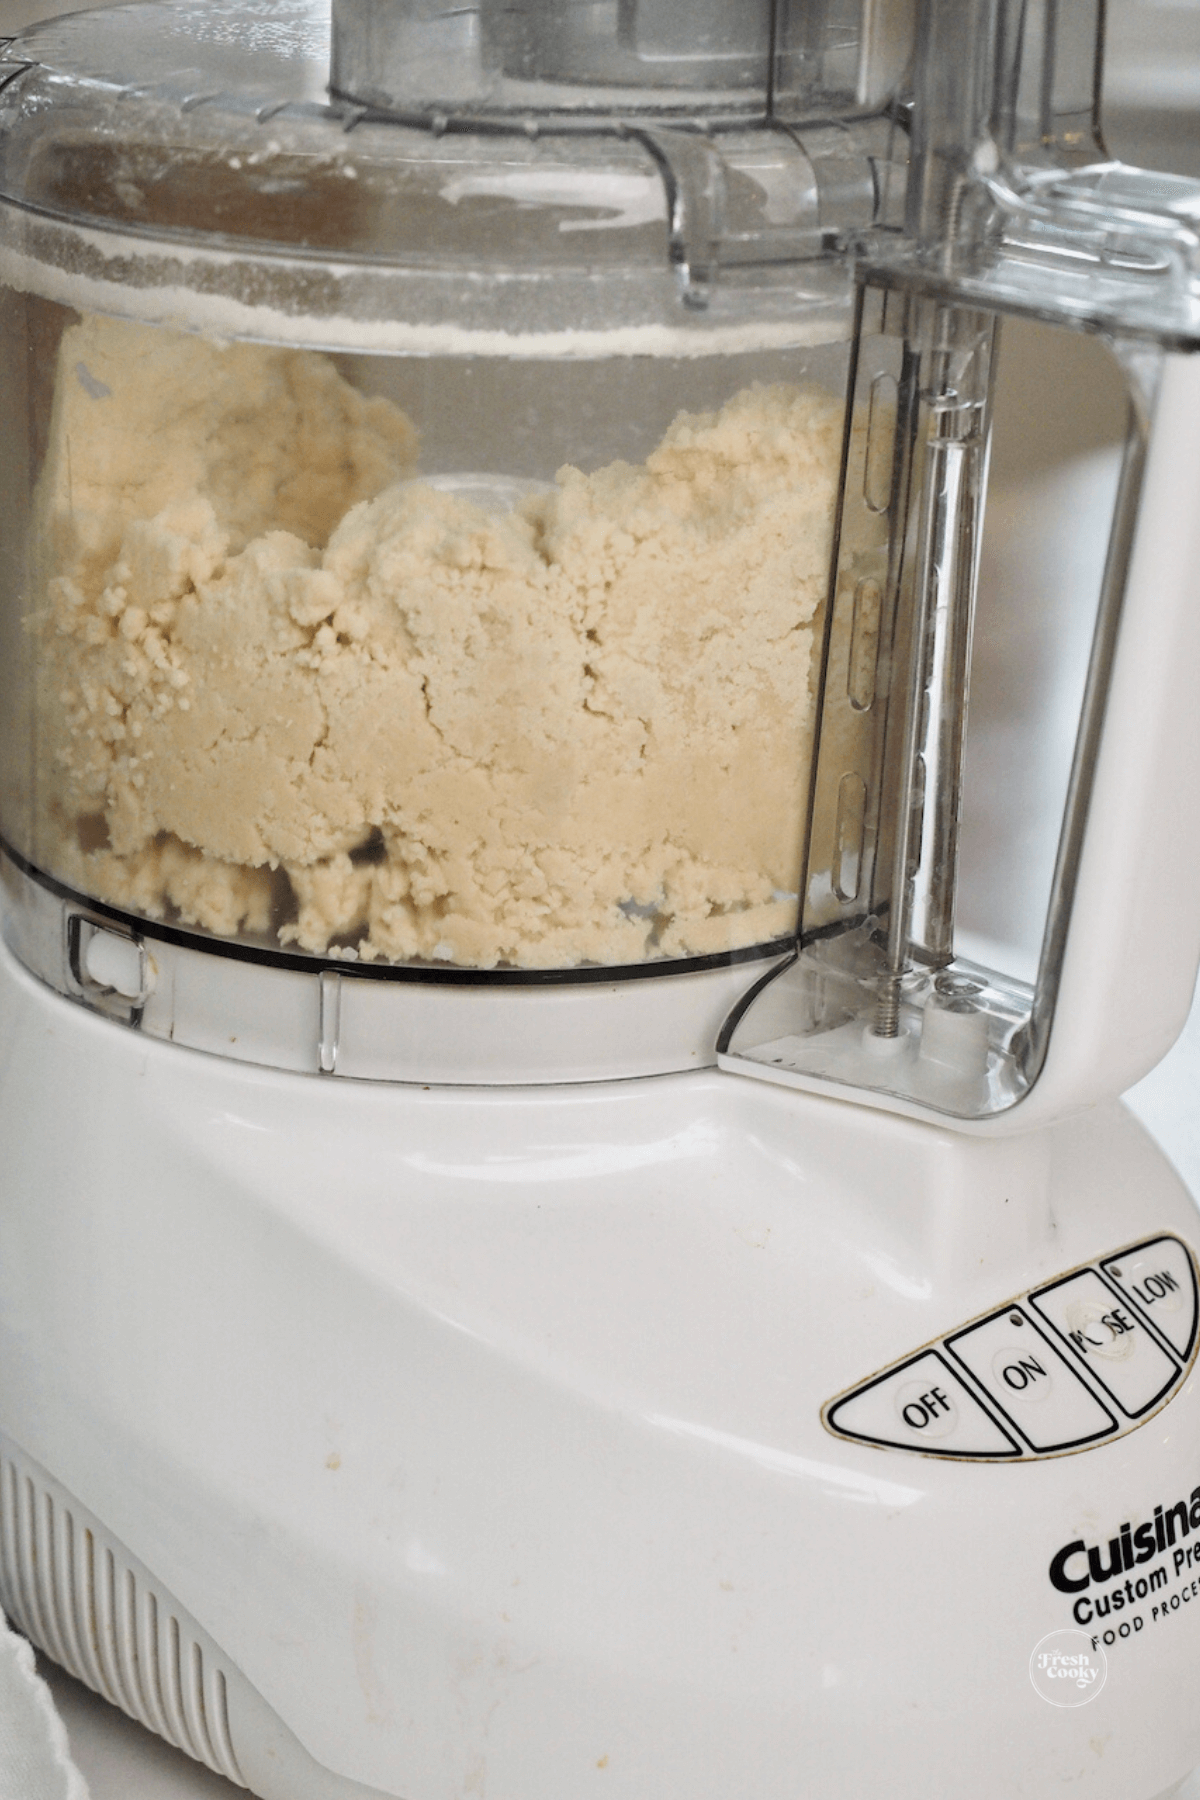
Drop cubed cold butter over the top of the flour mixture, as evenly as possible. Process the flour and butter mixture, pulsing until it begins to make a paste, some machines take longer than others. It will start as crumbs, then as you pulse it will become a clumpy paste. Don’t overmix it here.
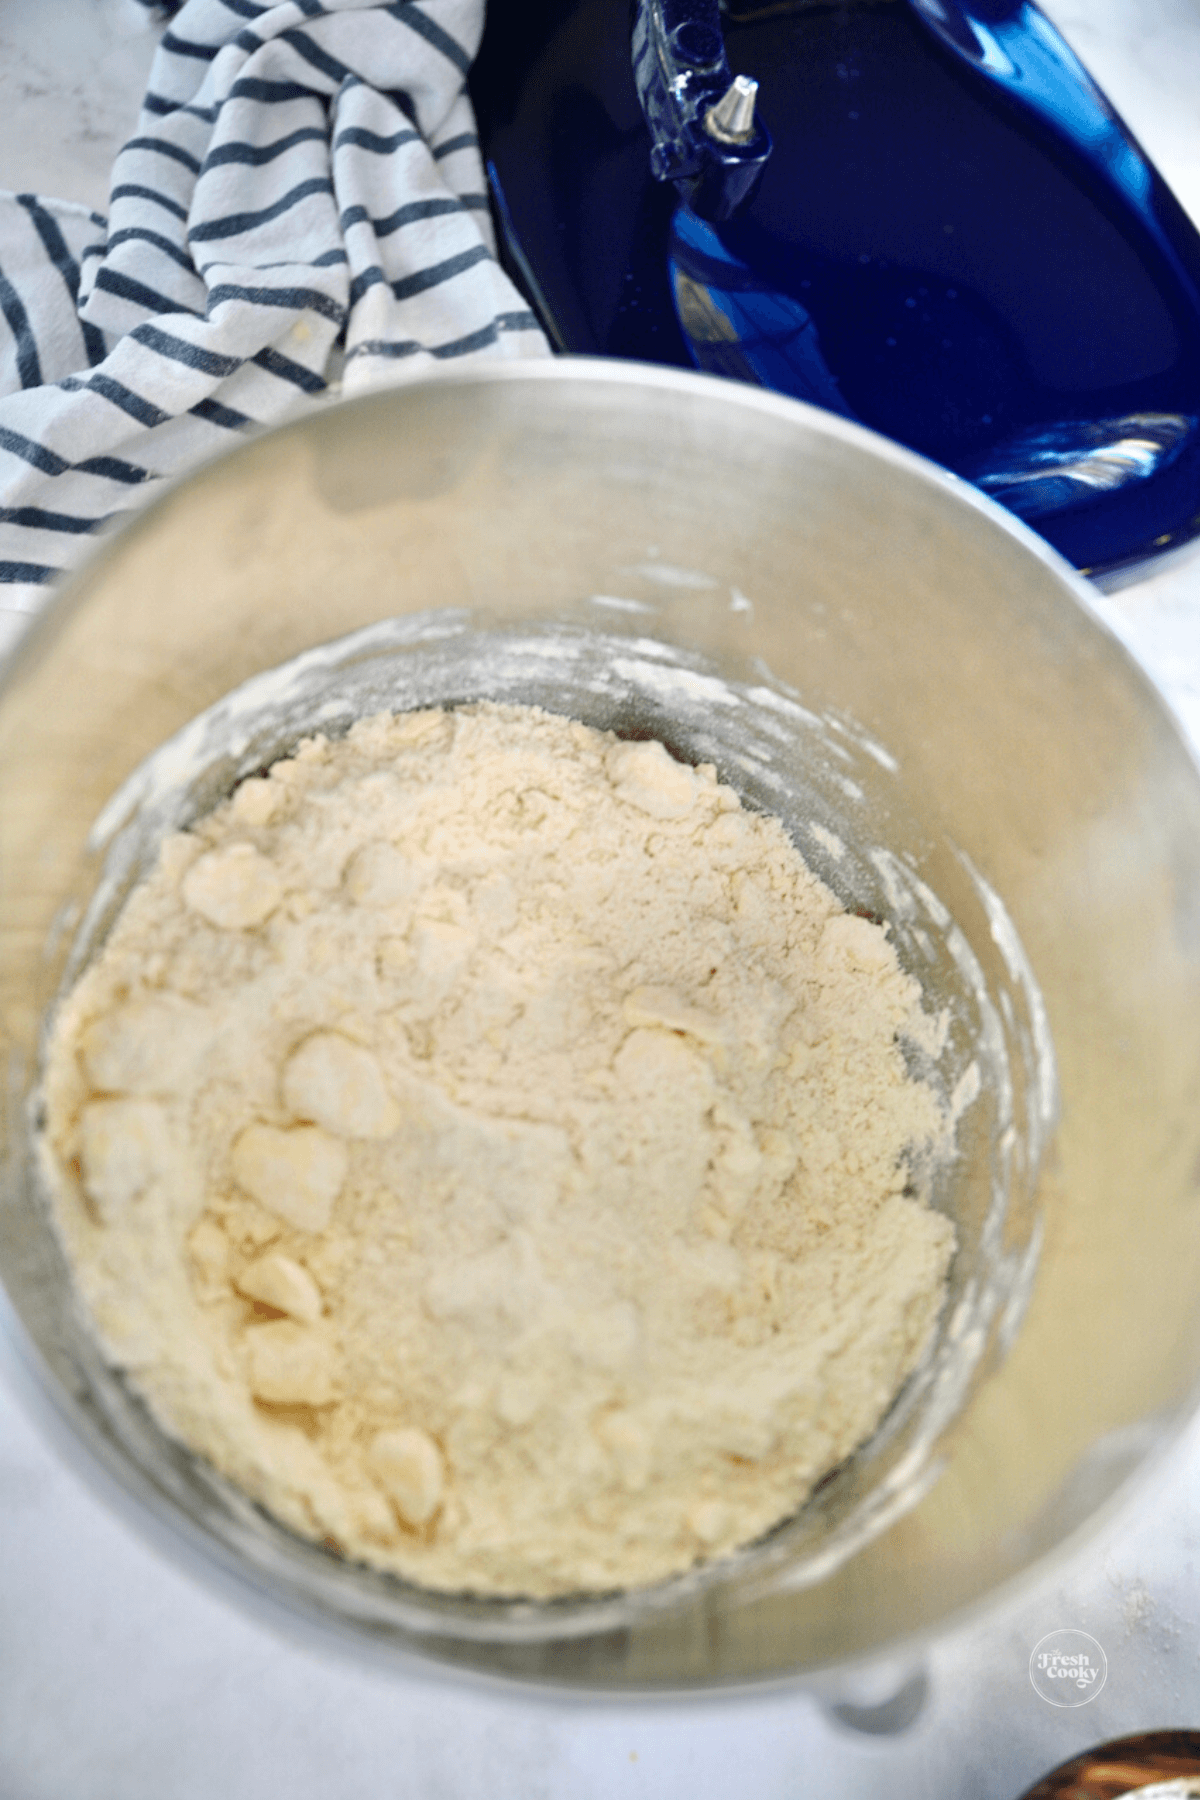
Step 3 Food Processor Method | Add remaining flour
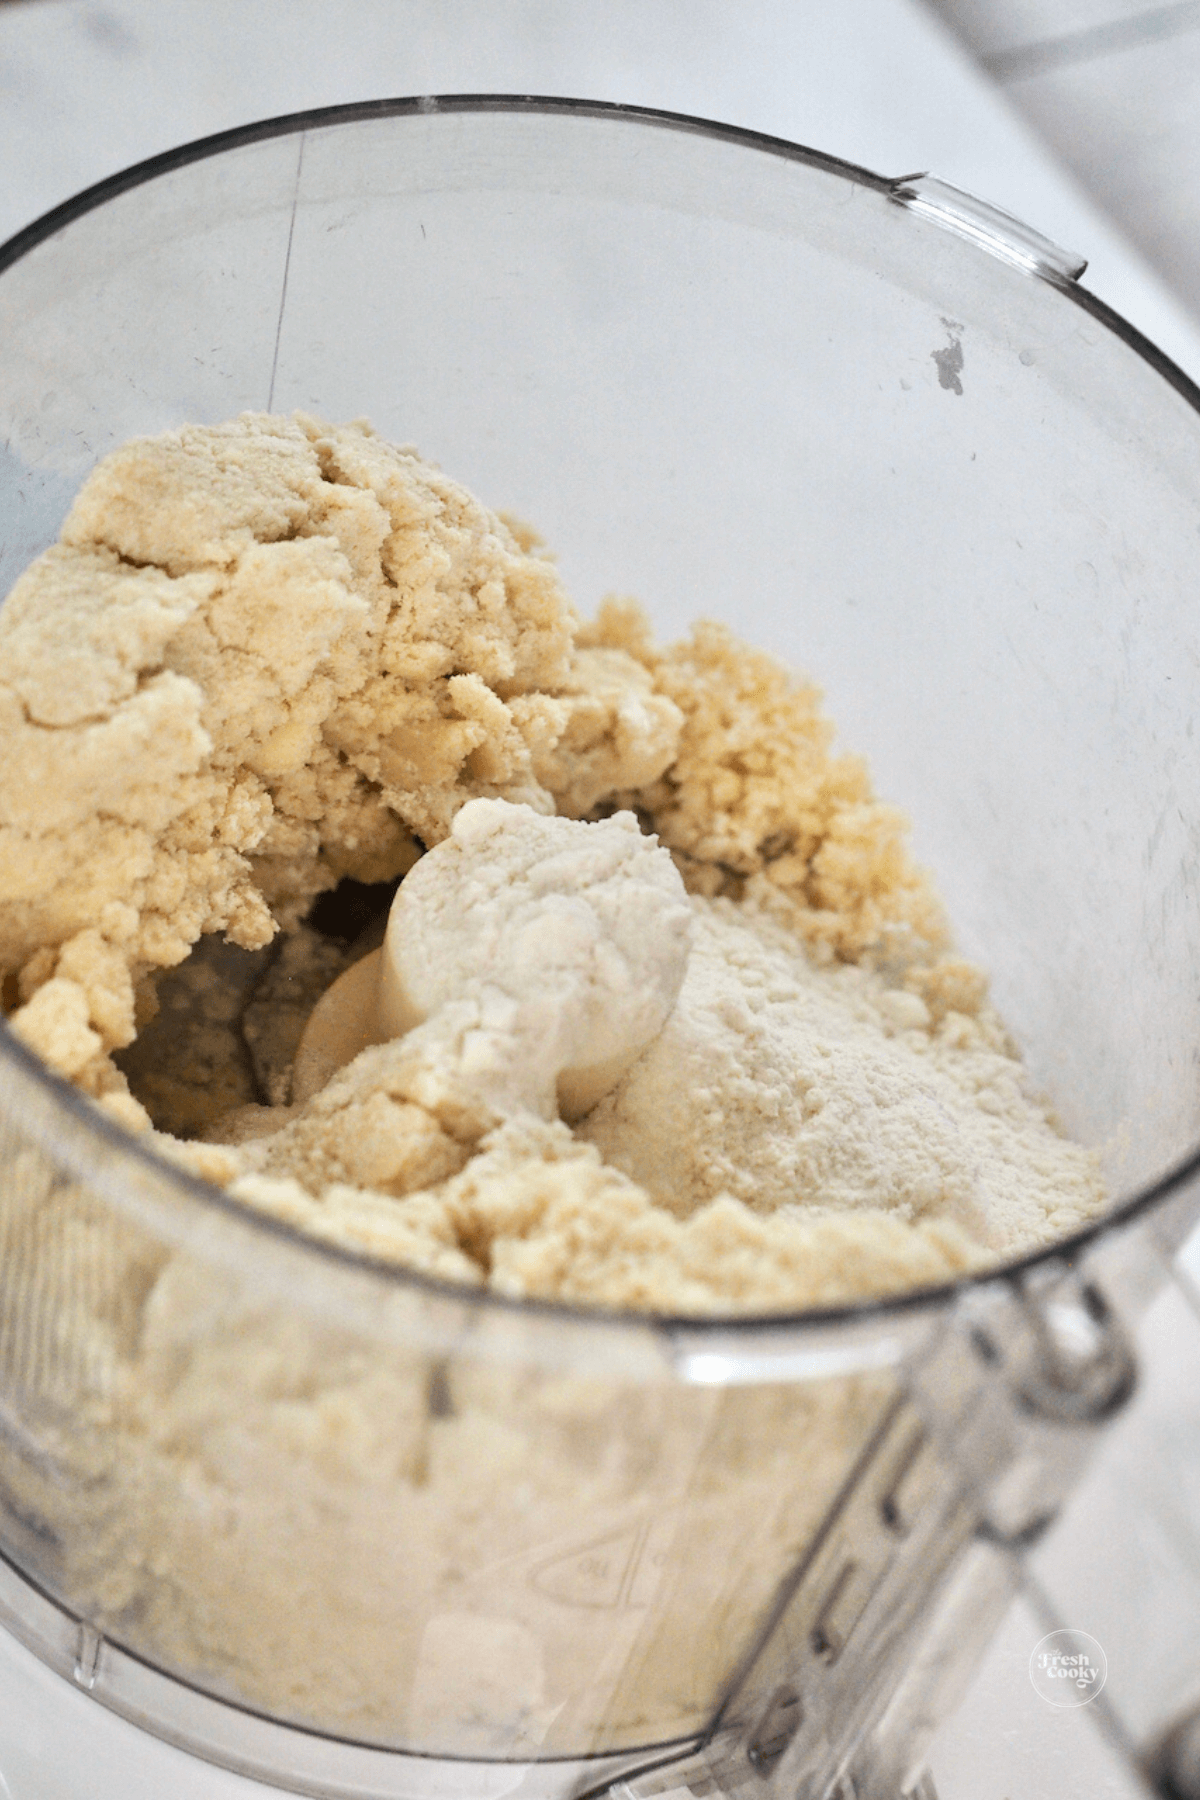
Scrape the sides and spread the paste mixture evenly back into the bowl of the food processor. Sprinkle remaining 1 ½ cups flour over the top, pulse 5-8 times on LOW until the mixture is crumbly and broken up.
Step 4 Food Processor Method | Transfer to bowl, add ice water
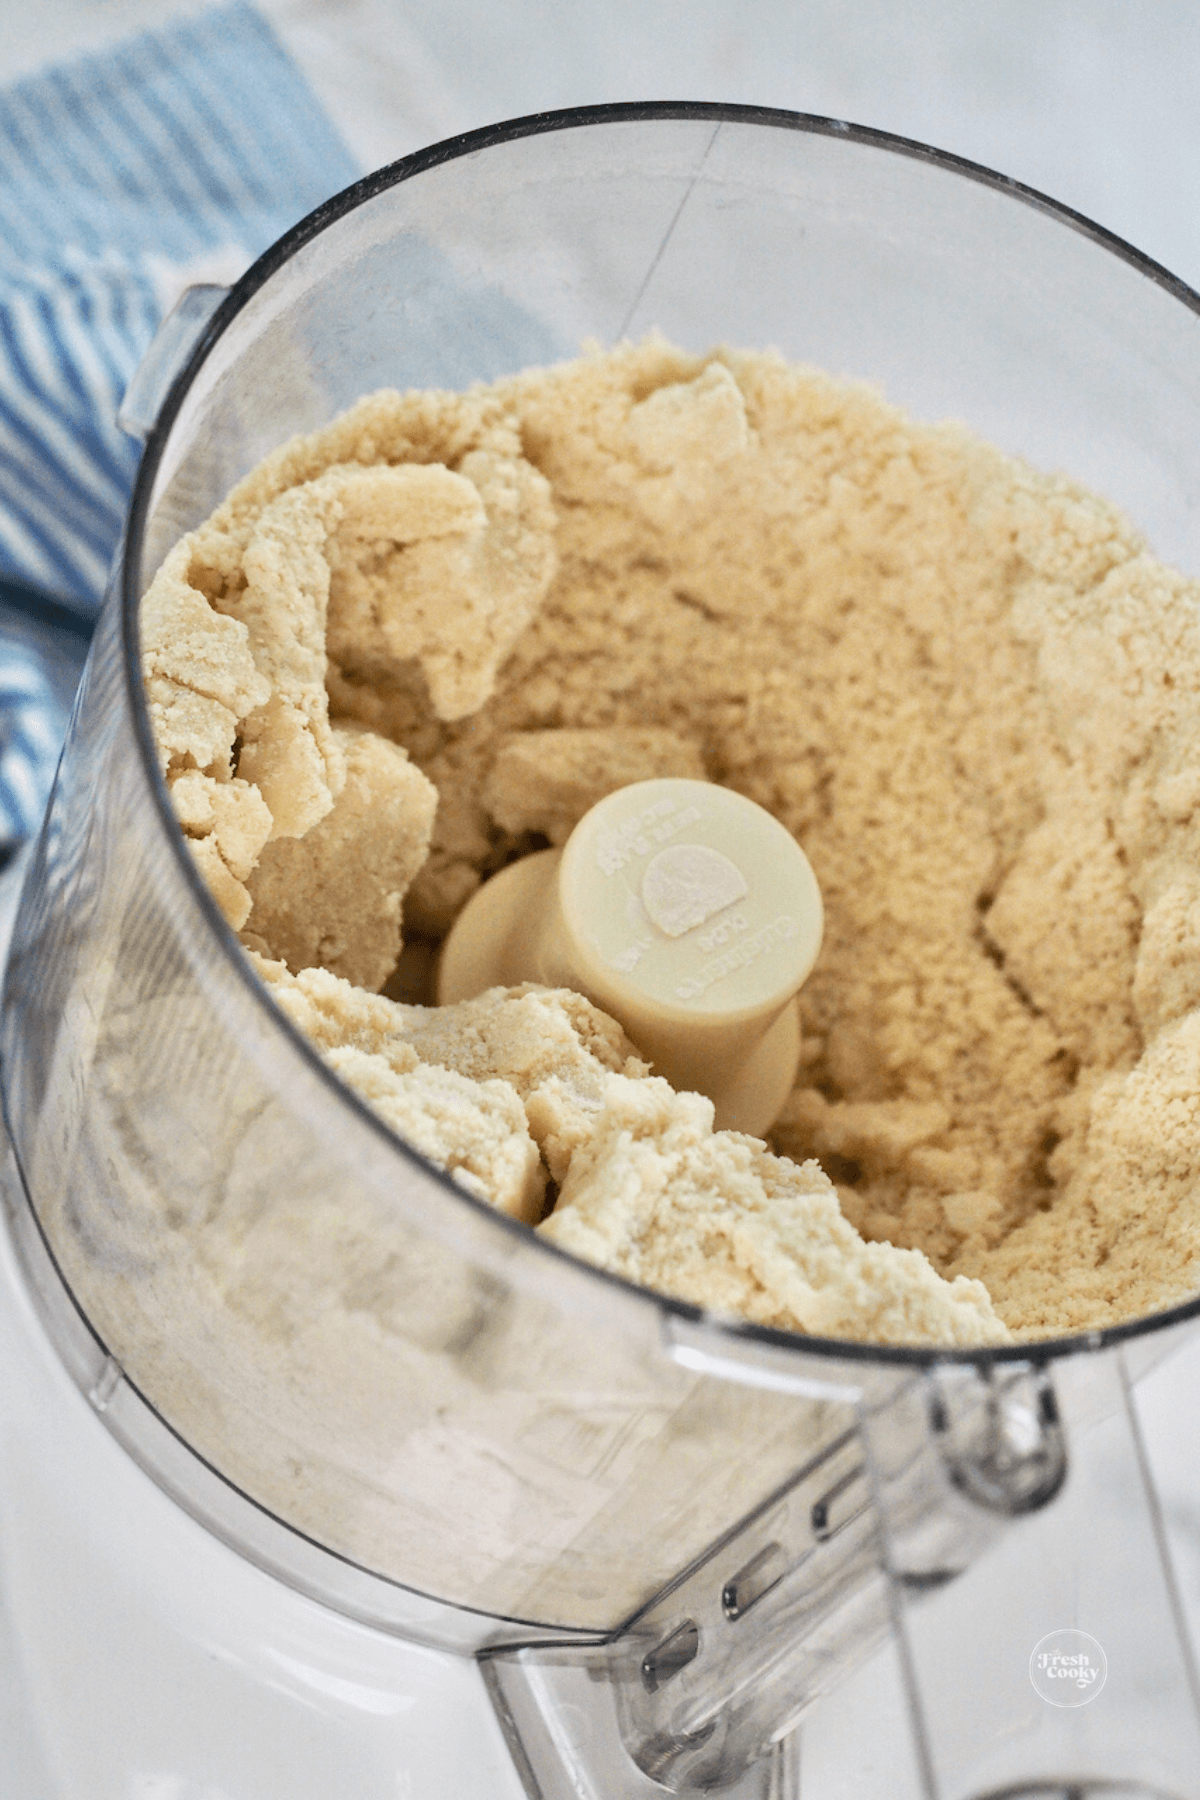
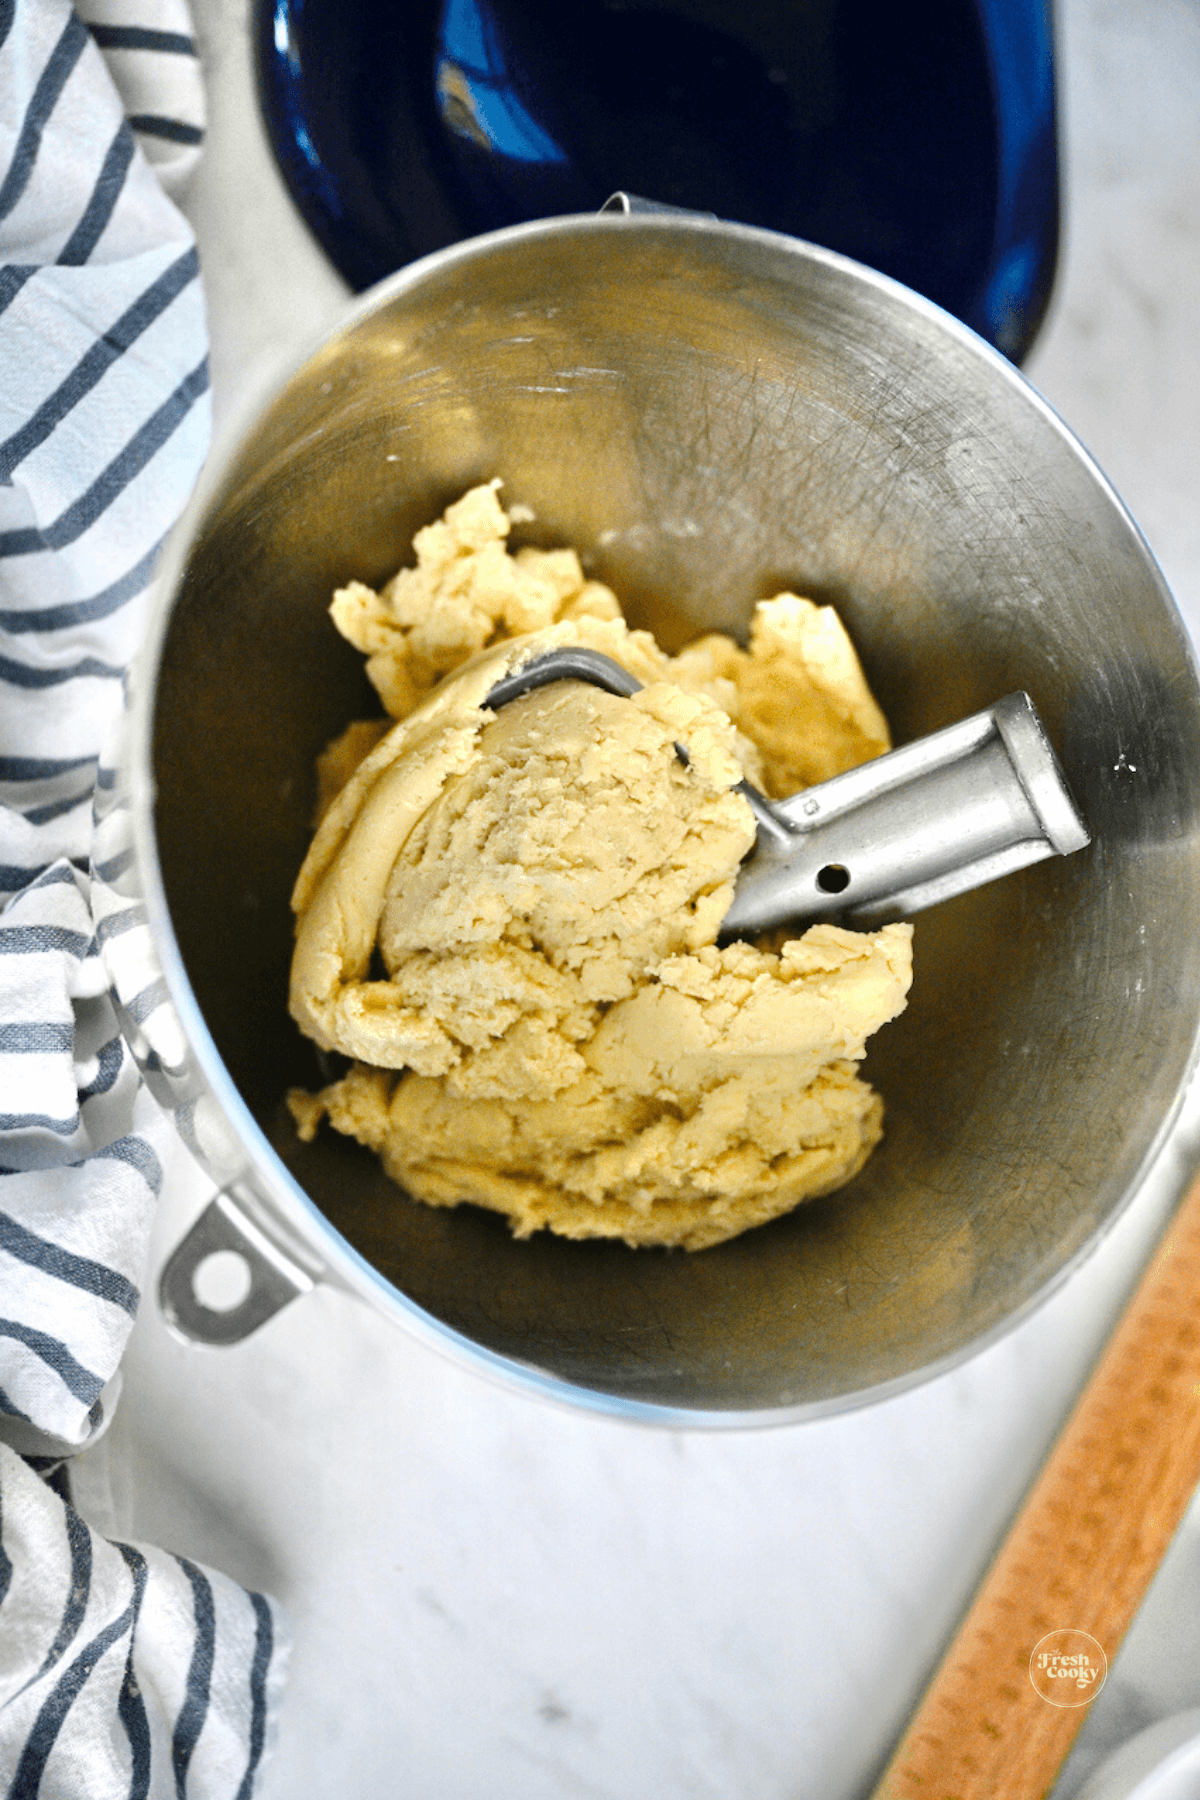
Transfer the crumbly dough to a large bowl, and sprinkle with ice water (start with 3 tablespoons of water), mix using your hands or pastry blender until the crumbs start making some larger clumps.
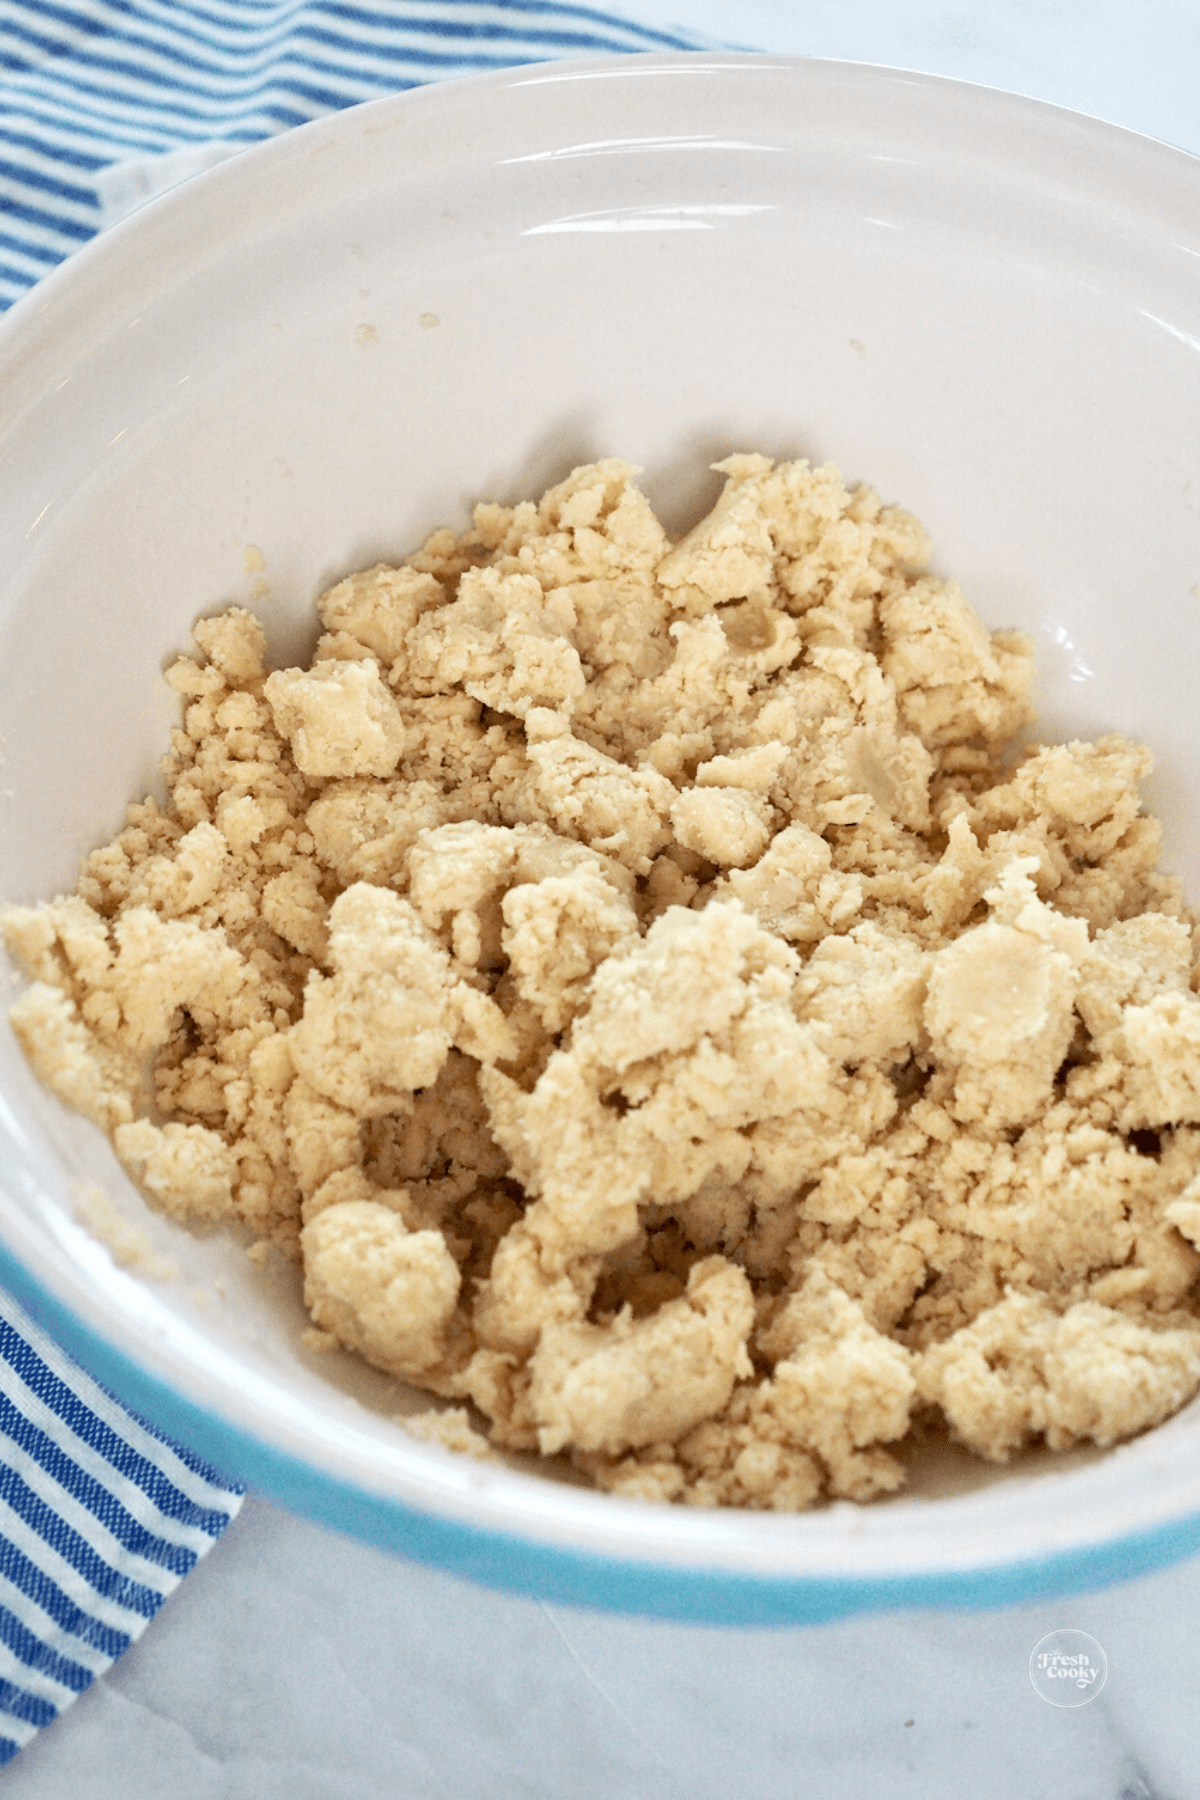
Give it a pinch, if the dough falls apart, you need to add enough water just to hold it together. Add just a teaspoon or two at a time, working it in, folding the dough over on itself until it comes together.
Step 5 Food Processor Method | Make Pie Discs
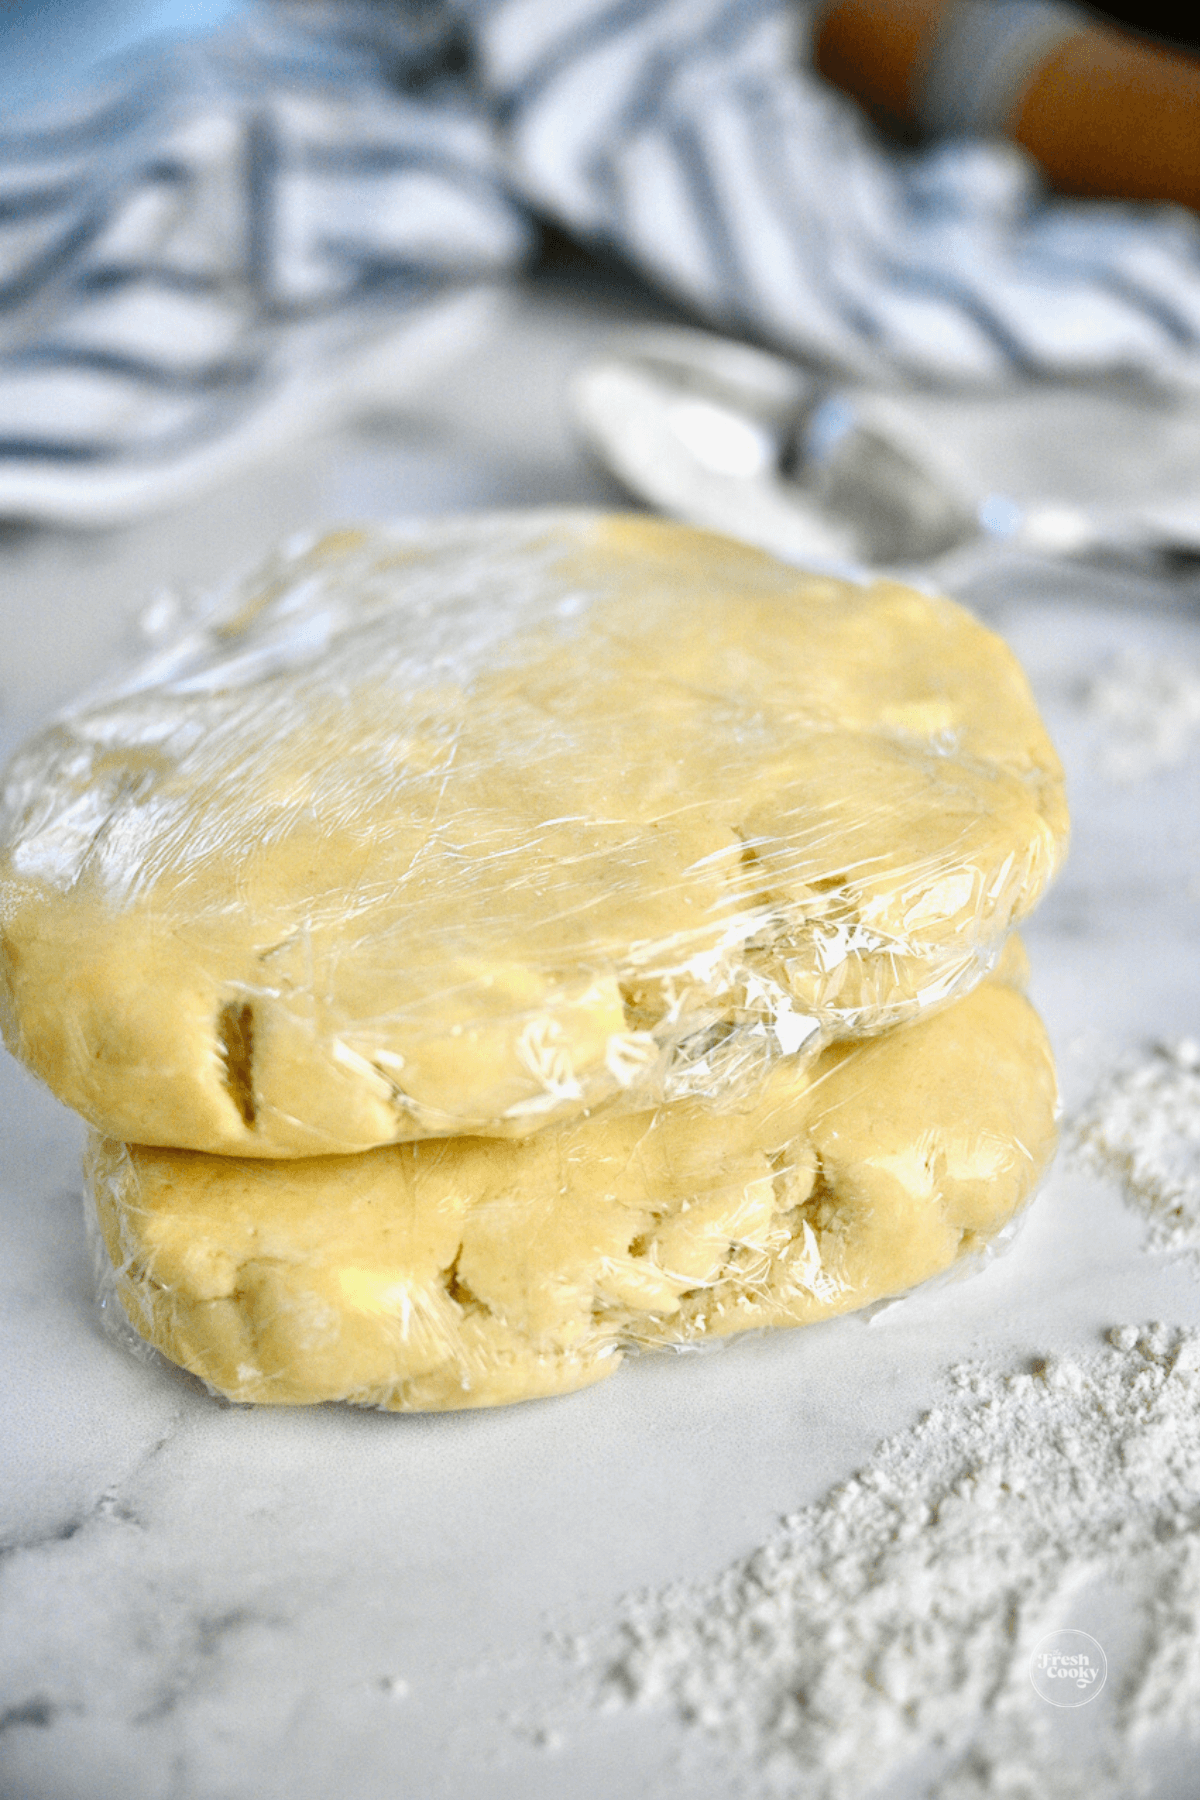
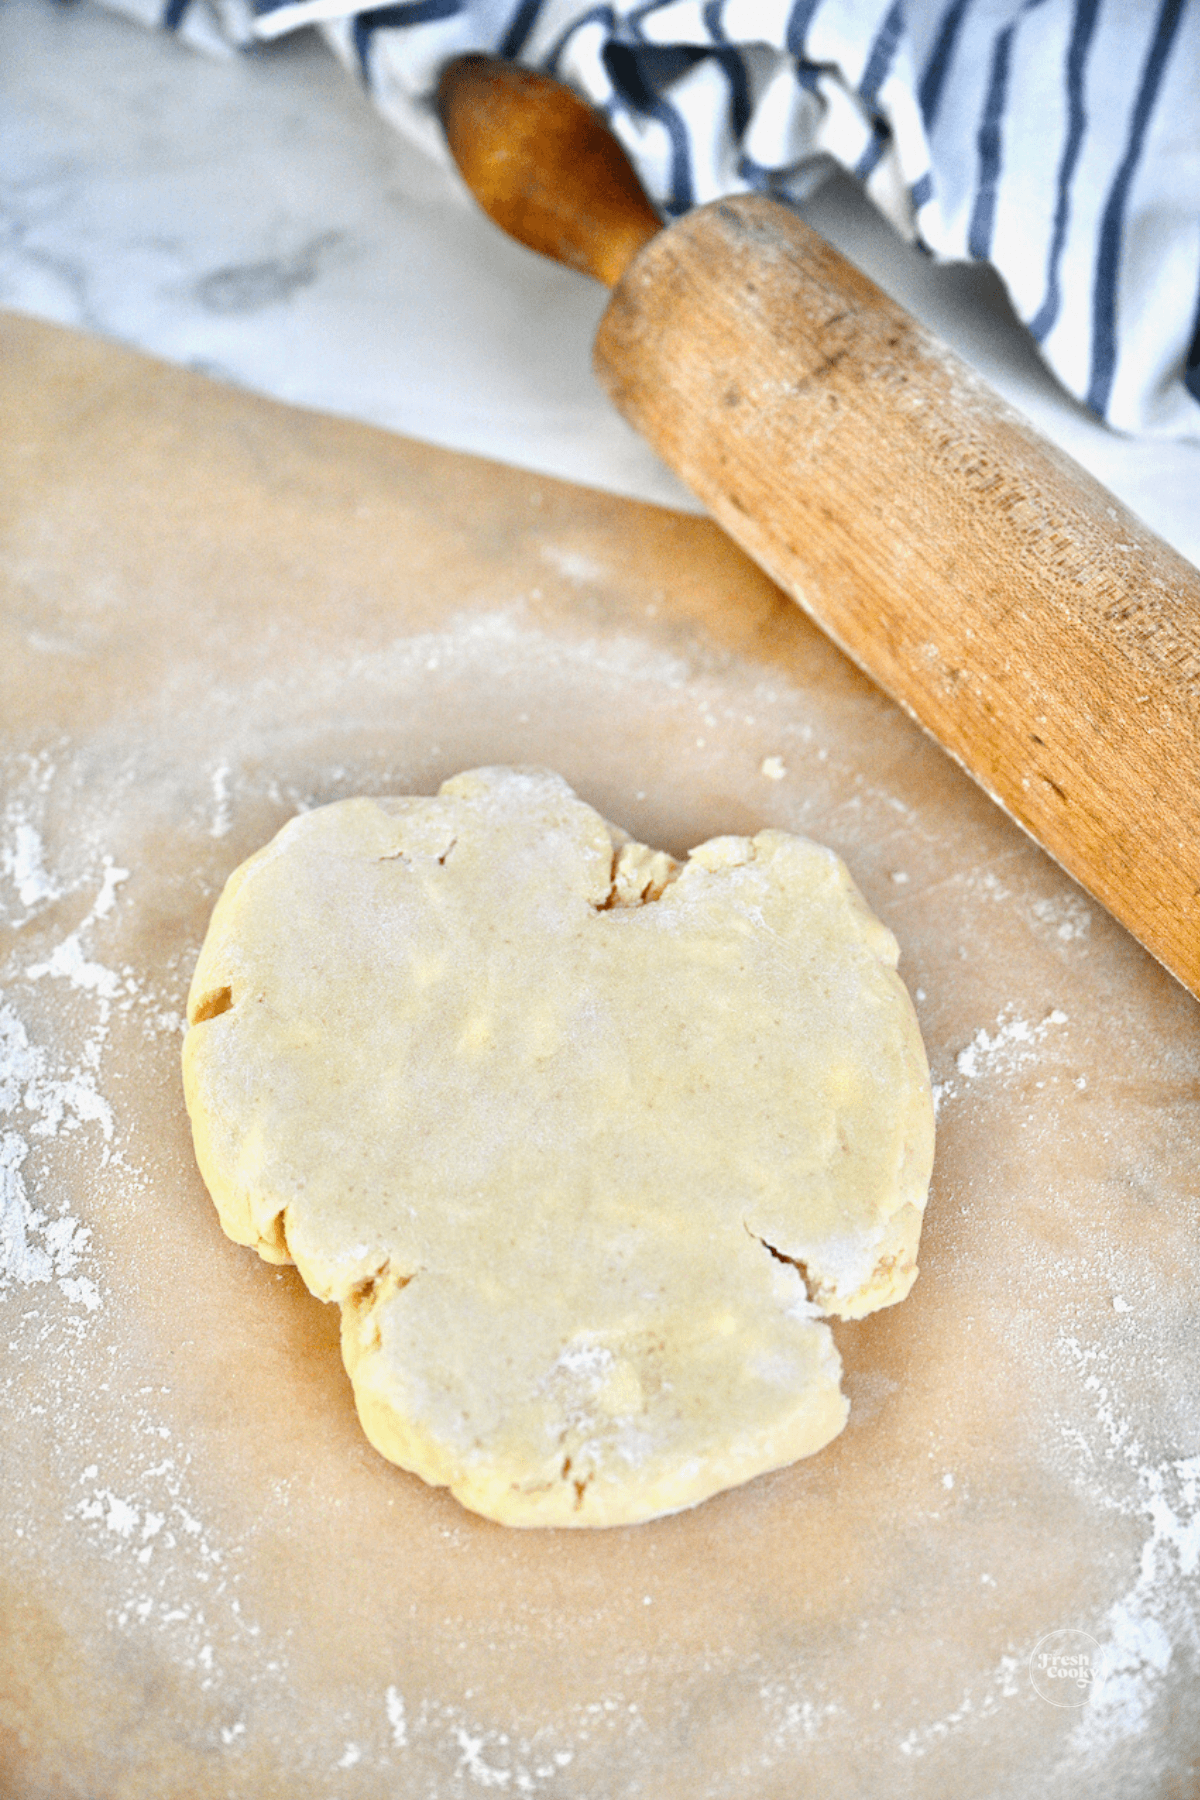
On a lightly floured surface, gently pull the dough together (lightly now) just until it forms a large ball. Divide the dough into two dough disks, one slightly larger than the other if making a 9” deep dish pie crust.
-Press into a 1 inch flat round dough disc and wrap (both discs) in plastic wrap. Chill for 30 minutes in the fridge. If you chill too long, it will become too hard to roll out, no worries. Just let it sit out for 15-30 minutes and then roll out.
When ready to roll out, dust the rolling surface (and the pie dough) with flour for savory pies and with powdered sugar for sweet pies.
Method 2 – How to make a pie crust without a food processor
No food processor, no problem, I have handmade pie crusts for decades without a food processor. See tips below for how to make with a stand mixer.
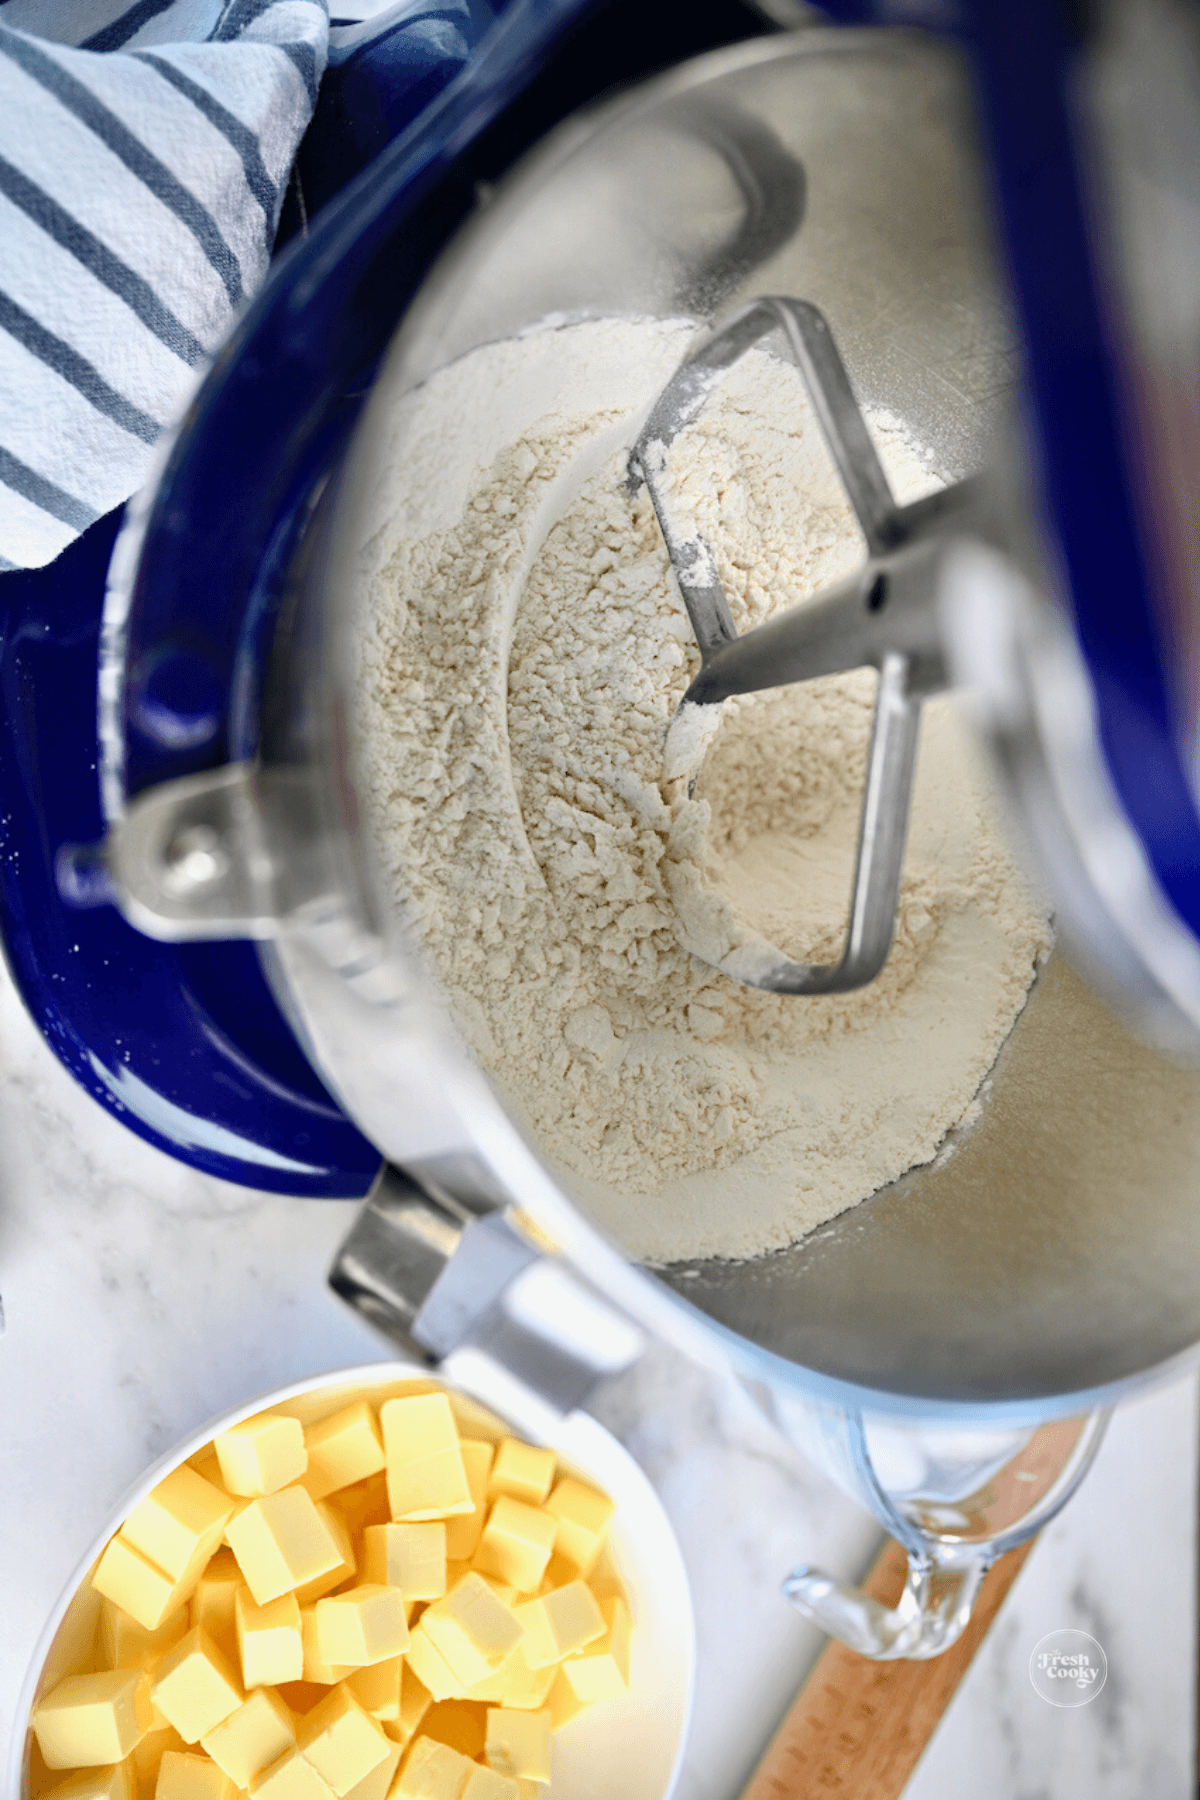
Step 1 without food processor method | Combine Dry Ingredients
In a large bowl add 1 ½ cups of flour, salt and/or sugar if using, mix to combine.
Place the cold, small cubes of butter (¼ inch cubes) on top of the dry mixture.
Step 2 without food processor method | Cut in Butter
Using a pastry blender (also called a pastry cutter) or two knives work the butter into the flour mixture until well combined; sprinkle ¼ cup of the remaining flour at a time, gently working in each time until all of the flour is incorporated, but the dough is still crumbly.
Step 3 without food processor method | Add Ice Water
Sprinkle the dough with 4 tablespoons of ice water, working into the dough until it just starts sticking together, only adding 1 teaspoon additional ice water at a time. Once the dough starts to hold together, stop adding water. Proceed with the recipe.
Method 3 – How to make a pie crust with a stand mixer
Want to make your pie crust in your stand mixer? You are in luck, it’s super simple too — no pastry blender involved!
Place cubed butter in freezer while you measure out the rest of your ingredients.
Step 1 stand mixer method | Combine dry ingredients
Combine the flour, salt and/or sugar if using in the bowl of the stand mixer fitted with the paddle attachment. Mix on low until combined.
Step 2 stand mixer method | Mix in butter
With the mixer on low, add a few pieces of cold butter to the flour at a time, it won’t really incorporate but you will have some bigger and smaller mashed up pieces.
Step 3 stand mixer method | Add ice water
Measure out your ice water, starting with 4 tablespoons, drizzle into the pie crust mixture with mixer on low, add a little more until the mixture forms a doughy ball.
Remove from mixer onto a lightly floured surface and form the dough gently into a ball (careful not to overwork the dough here). Divide into two balls, flattening out with hand. Wrap well and refrigerate for 30 minutes.
Proceed with rolling out.
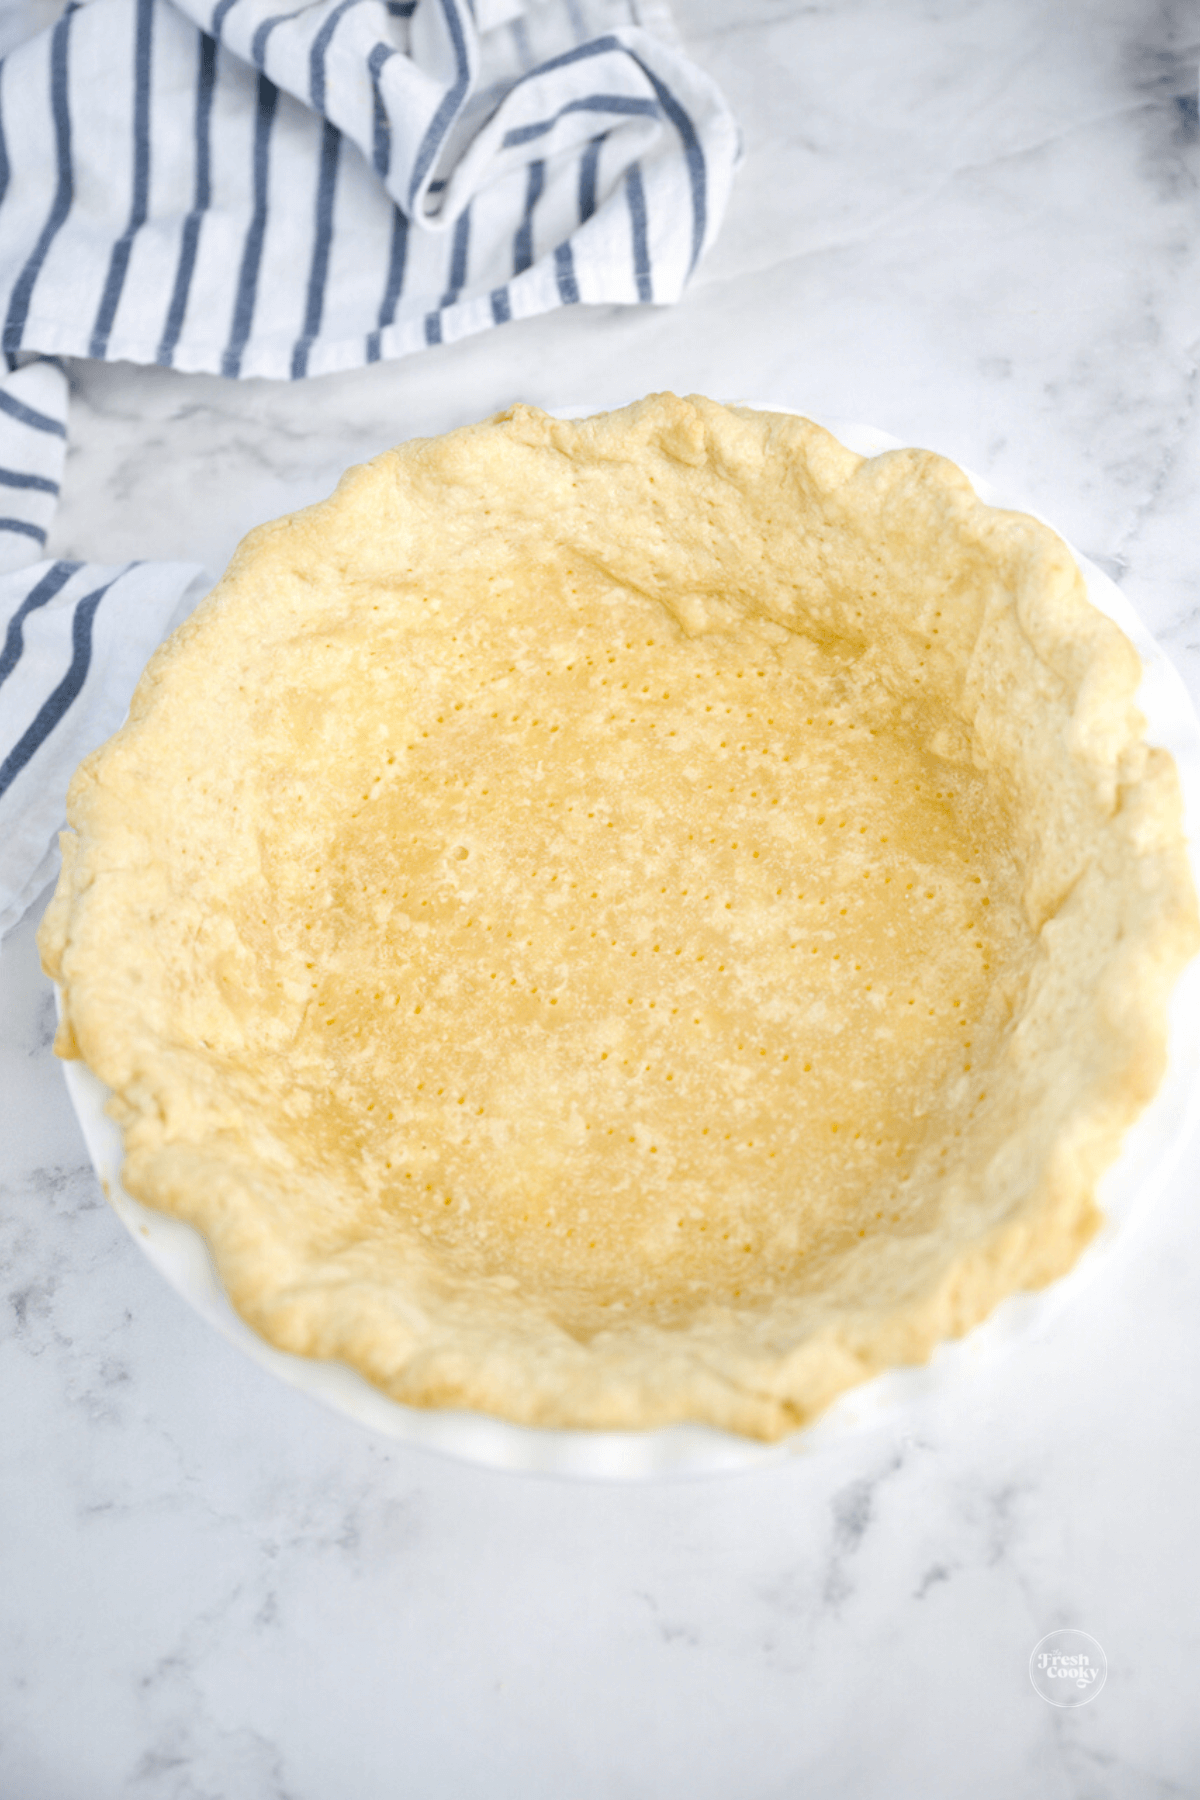
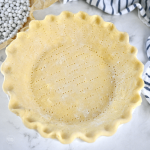
How to roll out pie crust
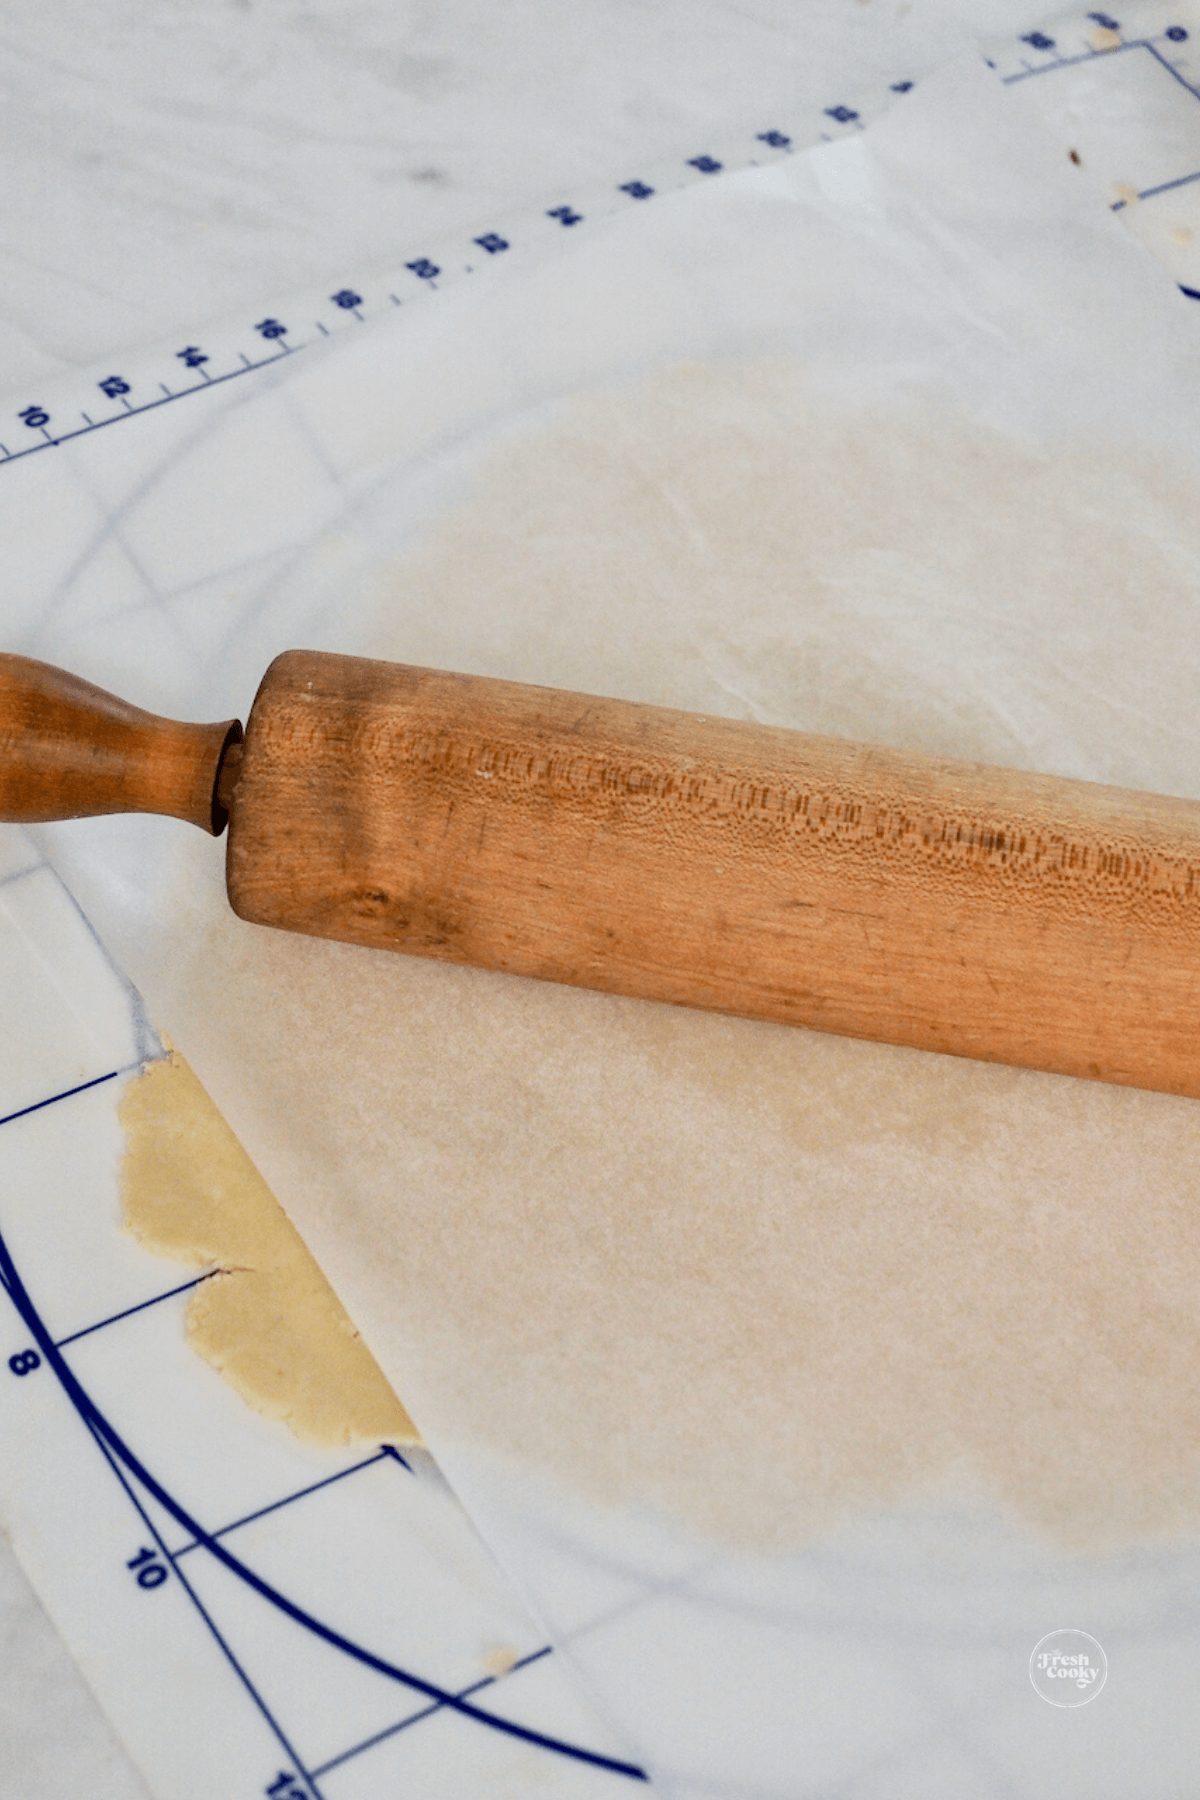
Roll* the dough into a 12” circle between ¼-⅛ thick. Sprinkle with a little flour or powdered sugar as needed.
*Place the dough disk between two sheets of parchment paper or wax paper for easier rolling and cleanup.
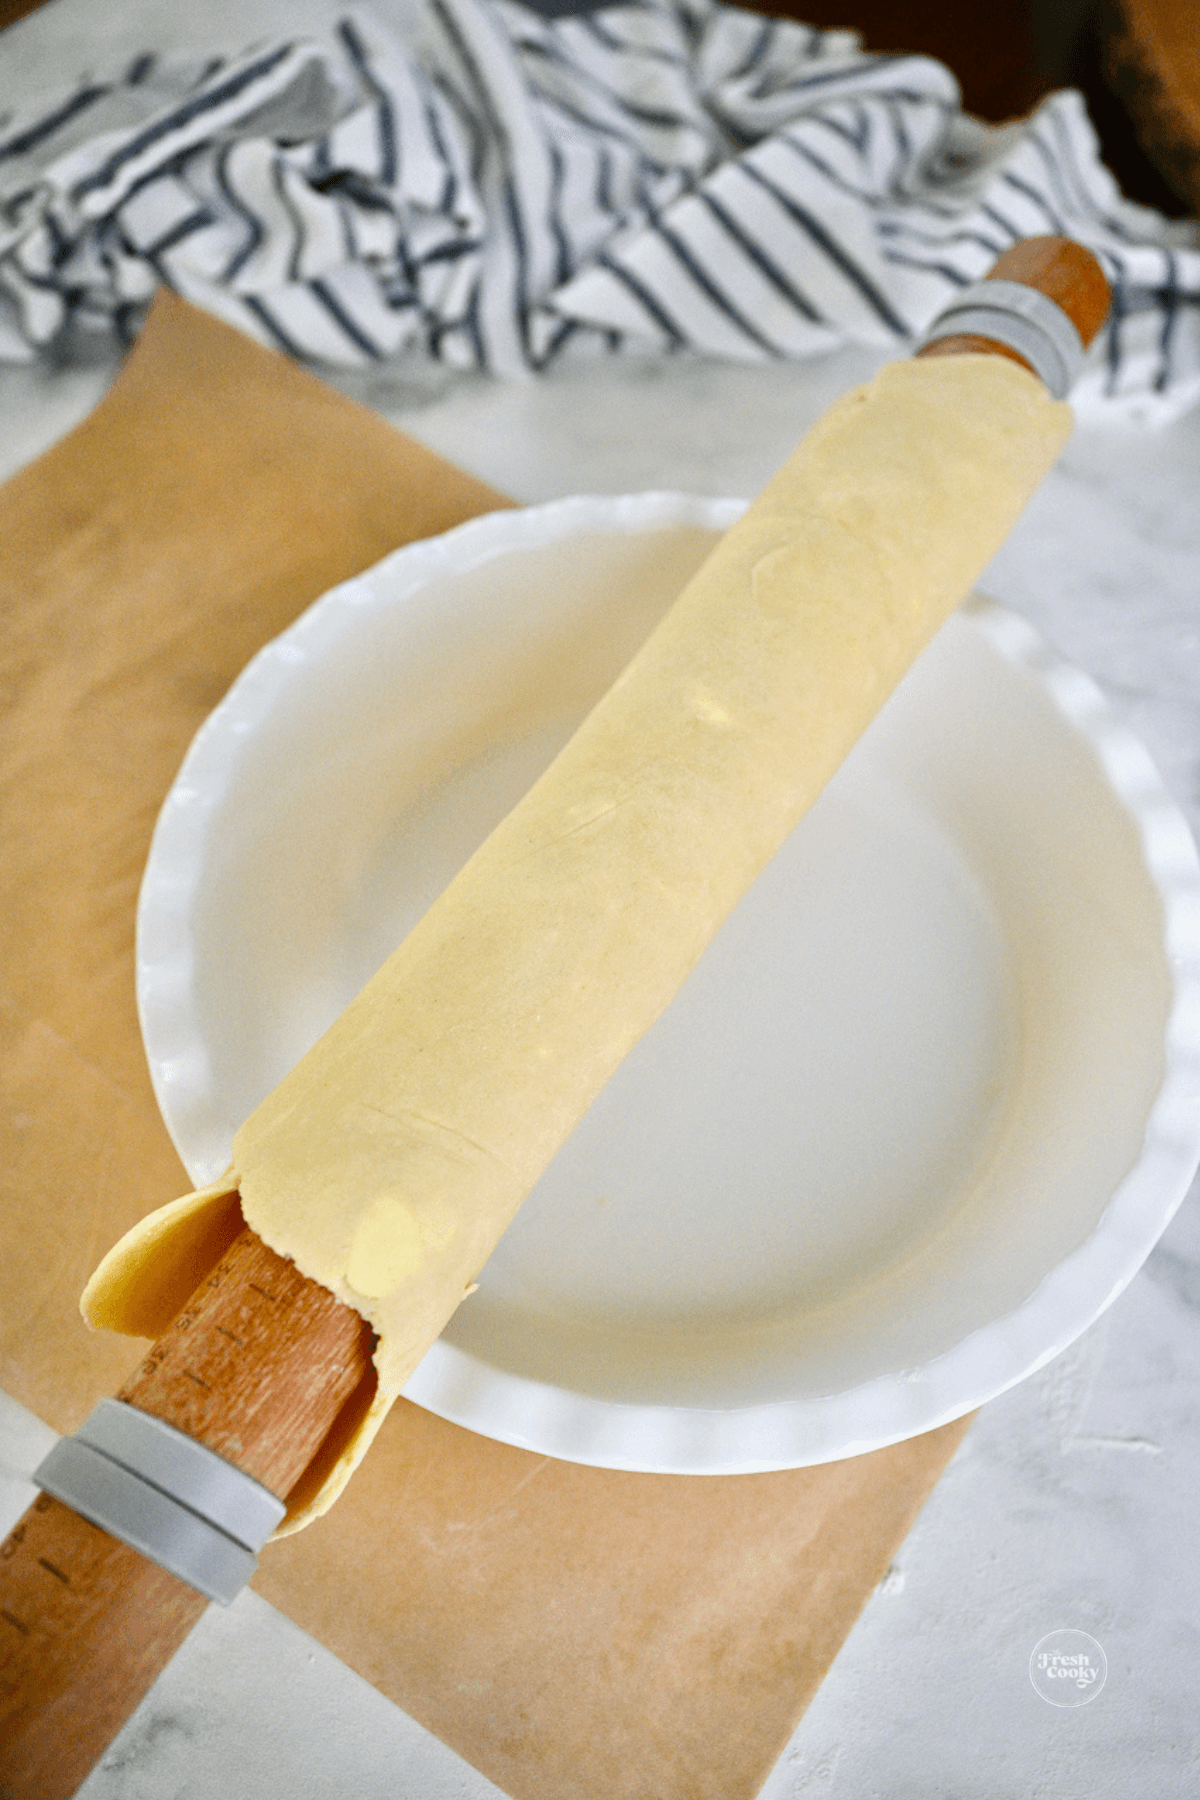
Make sure your rolled out dough will fit the pie pan you are using; invert the pie dish over the top of the dough, the pie shell should have at least a 1-2 inch excess.
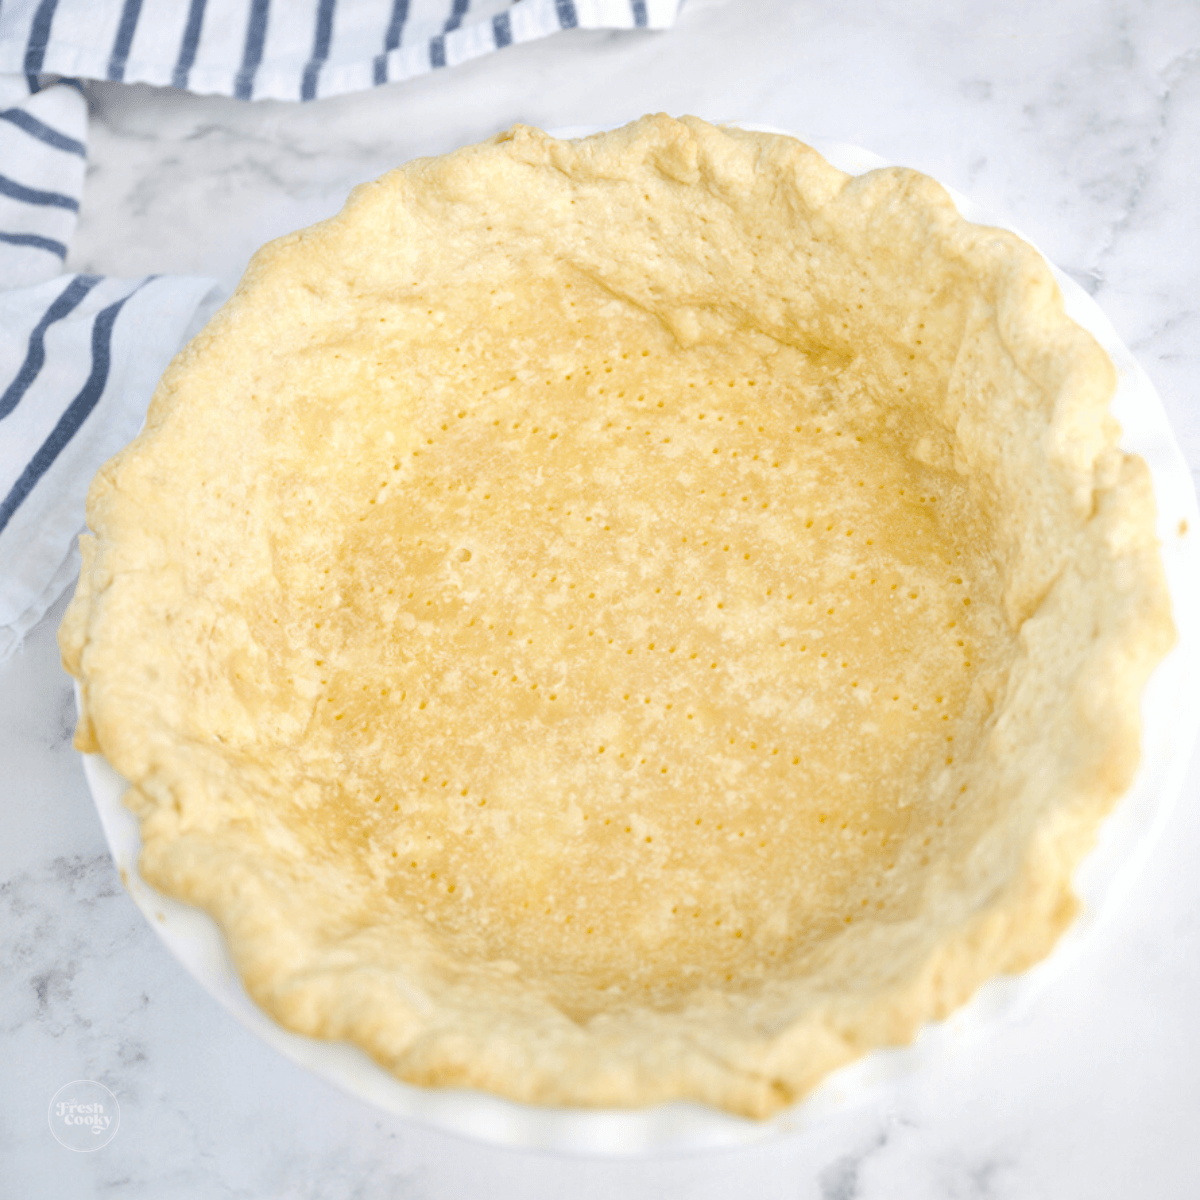
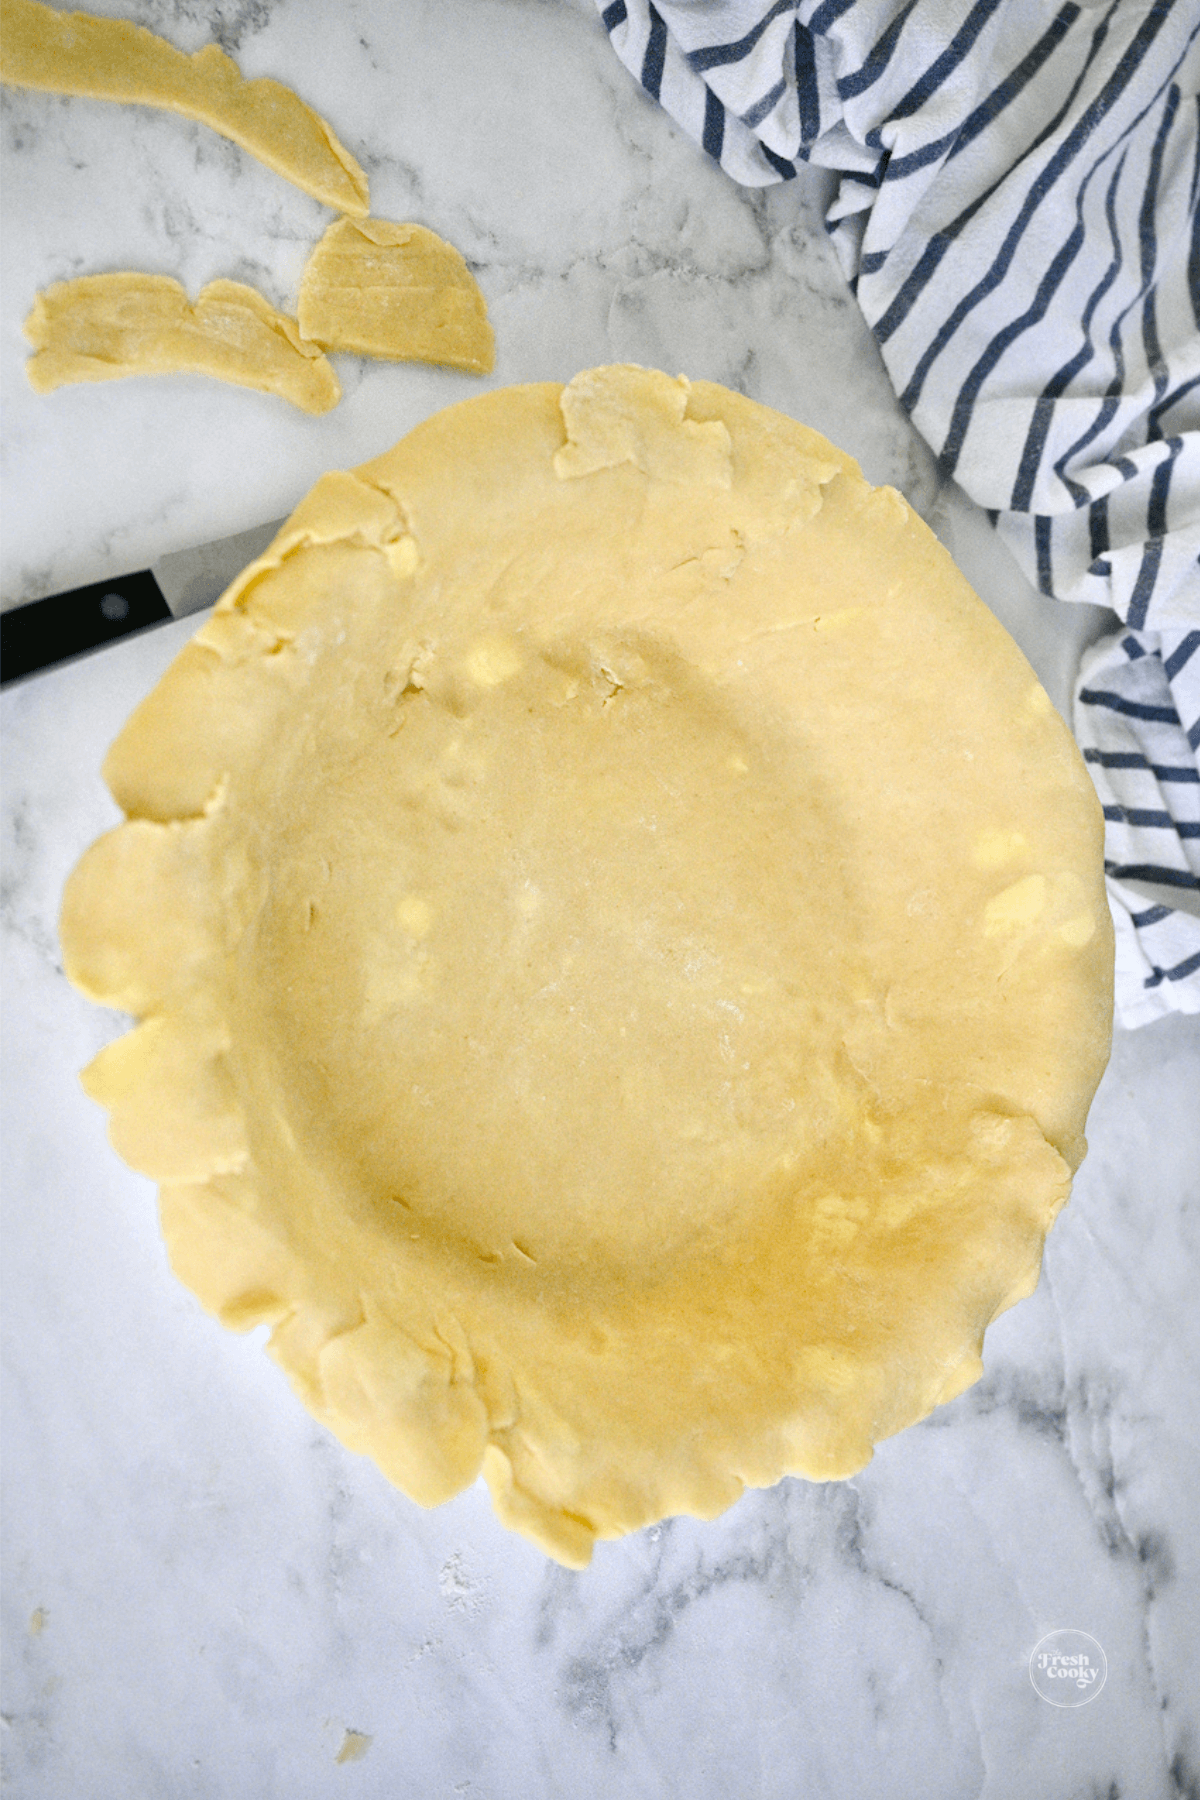
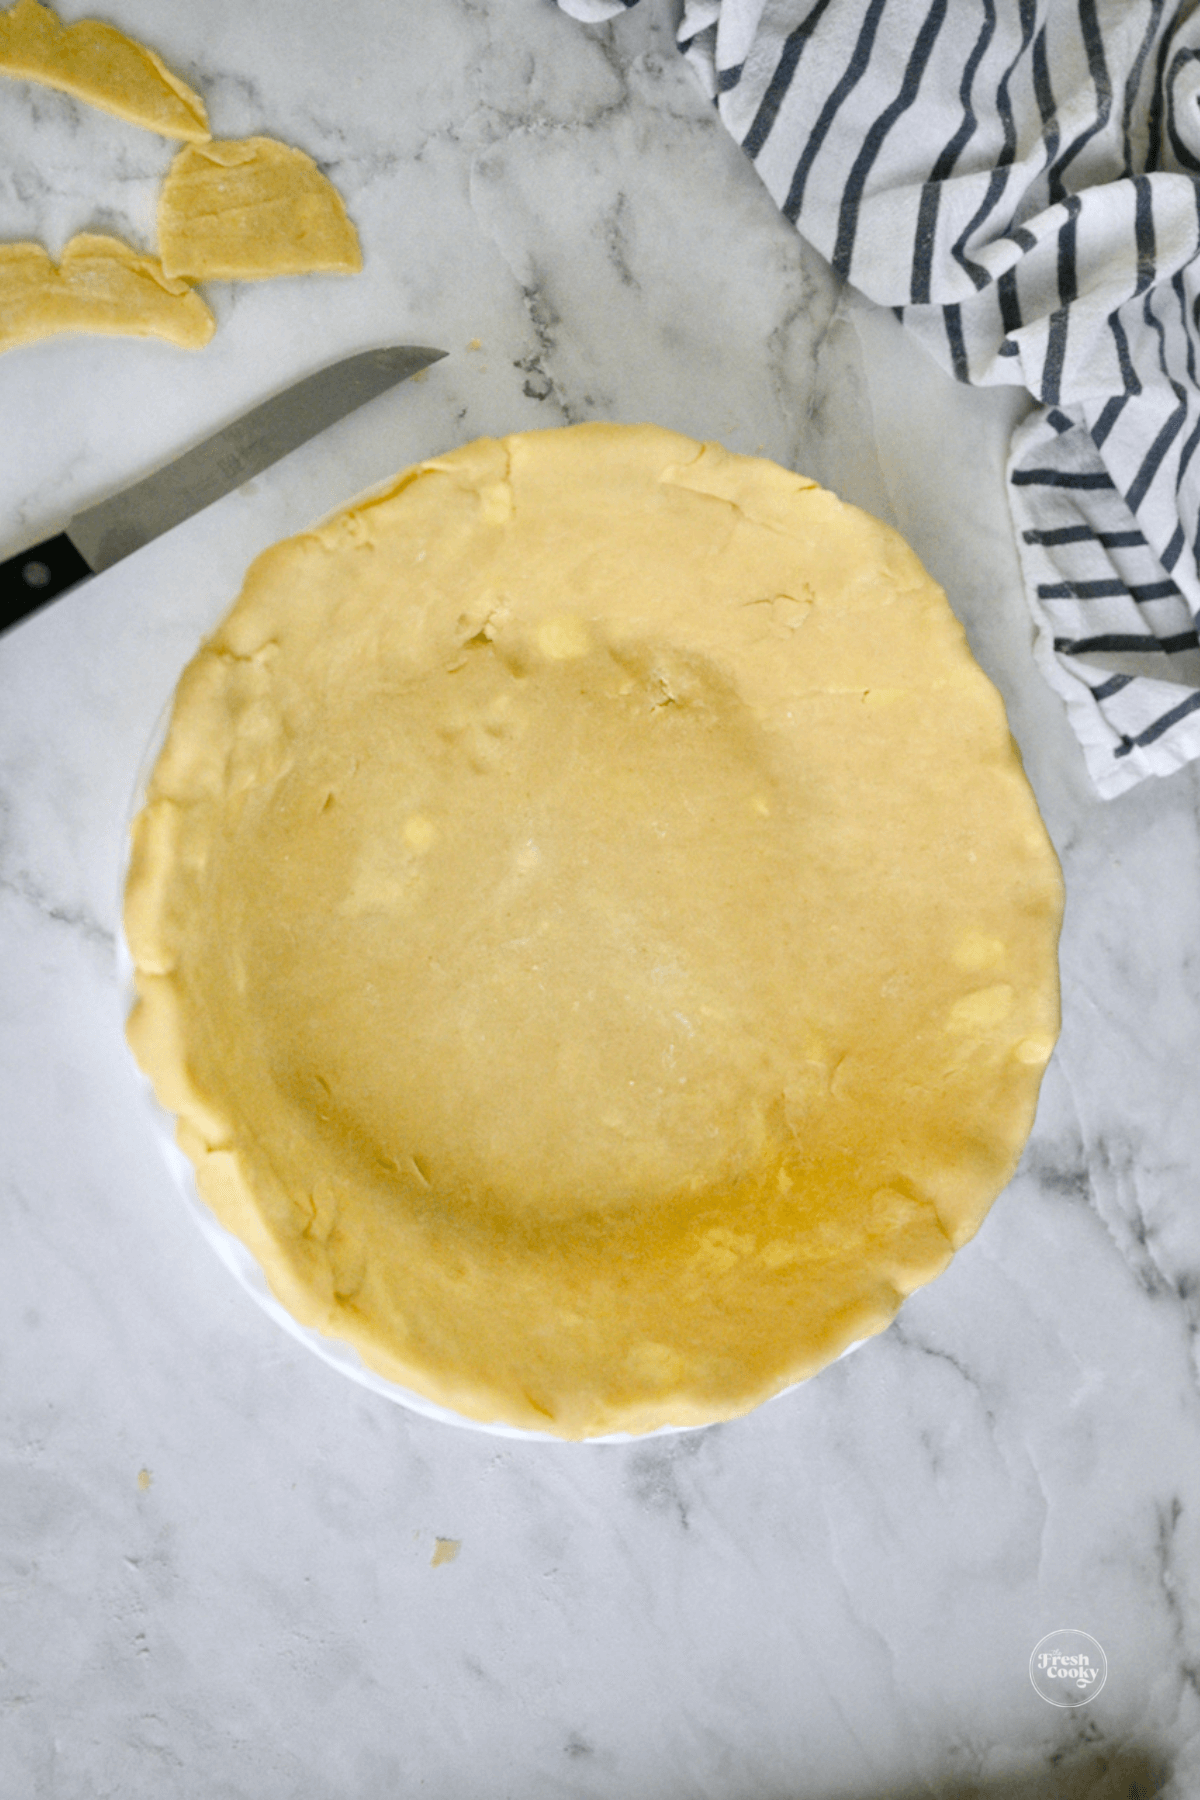
Roll the pastry dough carefully onto the rolling pin, then roll out onto the top of the pie dish, using your fingers to gently press it into the pie plate. Trim the dough with a sharp knife or scissors to about a ½ – ¾ inch outside the rim of the dish.
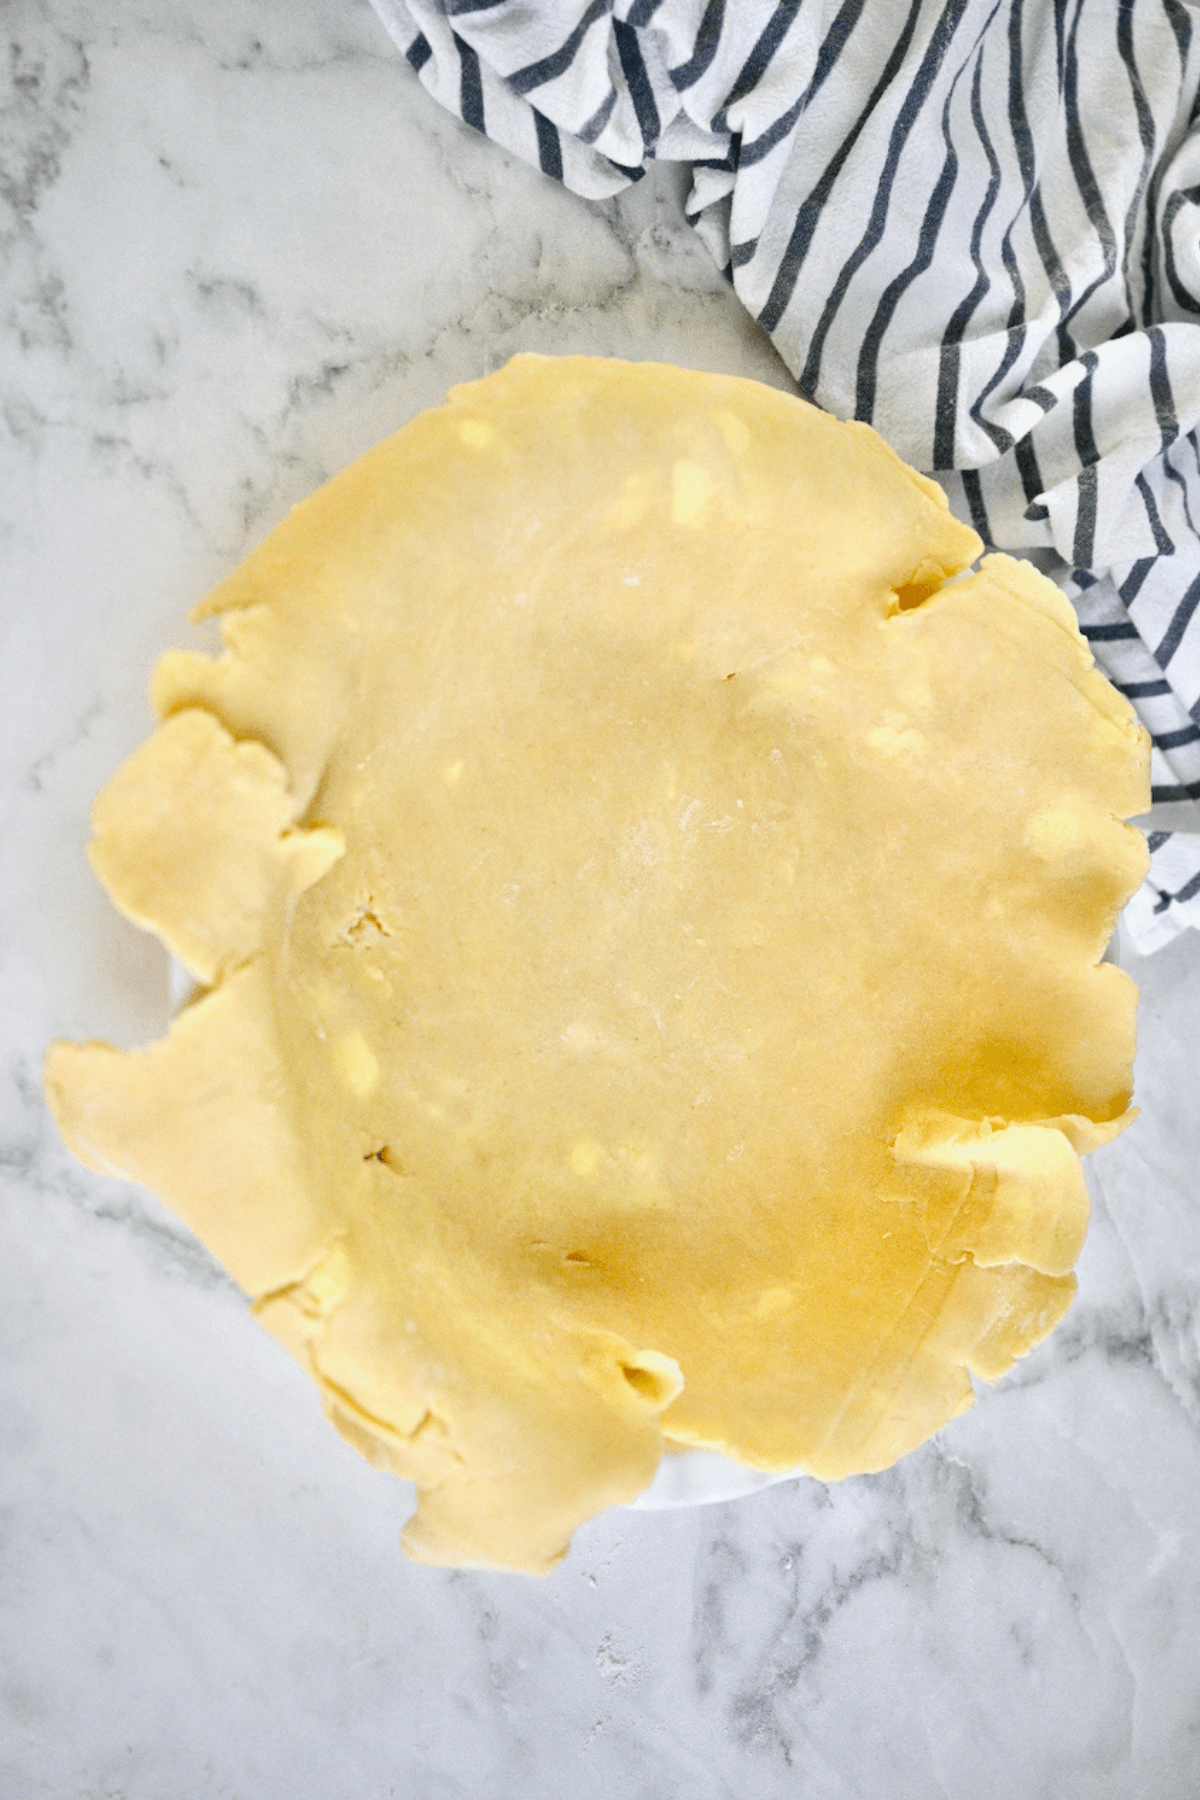
Butter Pie Crust Recipe Tips
- When making a sweet pie, like this Butterscotch Cinnamon pie, use powdered sugar (instead of flour) when rolling the butter crust! It will give the pie dough a sweeter profile.
- Cold, Cold and More Cold | Make sure your butter is firm and cold.
- Work Quickly | The quicker you work the less time your hands will heat up the dough.
- Chill Some More | When in doubt, chill a bit more.
How to fix a torn pie crust
If you have holes, tears, splits or gaps in your dough, have no fear, tear a patch piece of pie dough that will fit the area and using a bit of water on your finger, rub the area you are patching, then press the patch onto that space.
It’s okay if it doesn’t look perfect, the flakiest pie crust is what we’re after here. Believe me, no one will care when they see your creation!
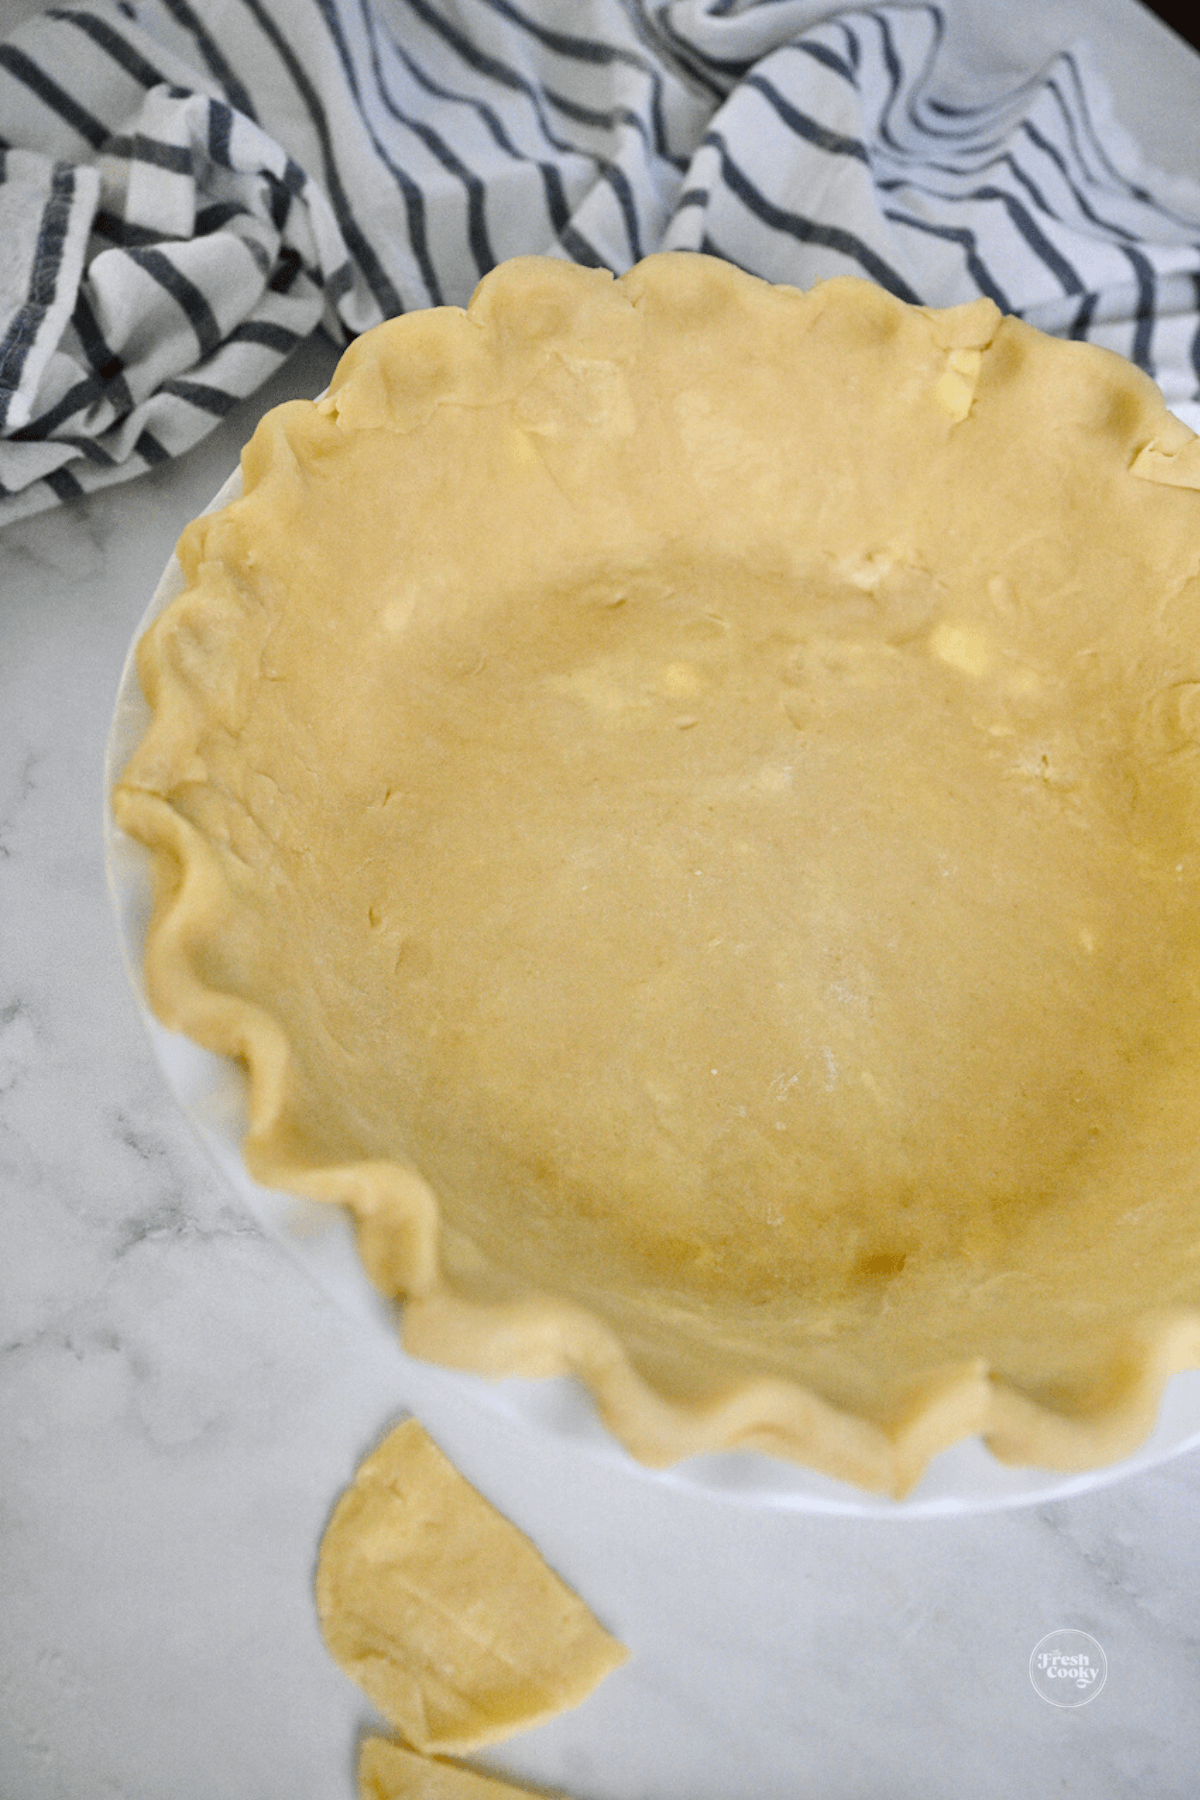
How to flute a pie crust
If making a single crust, roll pie crust onto pie plate, then fold the edges under making a smooth rimmed border. Then using two knuckles on the outside and one finger or knuckle between the knuckles on the inside, make a fluted crust.
Or use a fork and press into the crust creating a pretty design. Again, don’t worry about what this looks like, just make sure it’s fairly uniform in thickness.
How to flute a double pie crust
Place the dough disc between two sheets of parchment paper and roll the dough into a 12-13” circle between ¼ – ⅛ thick. Be sure to have at least 1 inch excess hanging over the pie plate. Alternatively, you may use a pastry mat sprinkled with flour or powdered sugar.
Roll the pastry dough carefully onto the rolling pin, then roll out onto the top of the pie dish, using your fingers to gently press it into the pie plate.
For double crust pie, place pie crust in the freezer for 15 minutes if you have time.
Roll out the top crust making sure it fits the top of the pie dish. Set a damp paper towel or tea towel over the top of the pie crusts.
Fill the bottom crust with desired pie filling and top with a second crust, trimming the edges to ¾ inch and folding under, making sure to press the two seams together well, you might use a little water to help seal.
Then using two knuckles on the outside and one finger or knuckle between the knuckles on the inside, make a fluted crust, by pressing gently to form a fluted crust.
Optional | Sprinkle with a little Demerara or coarse sanding sugar for sweet pies. Bake as directed in your recipe.
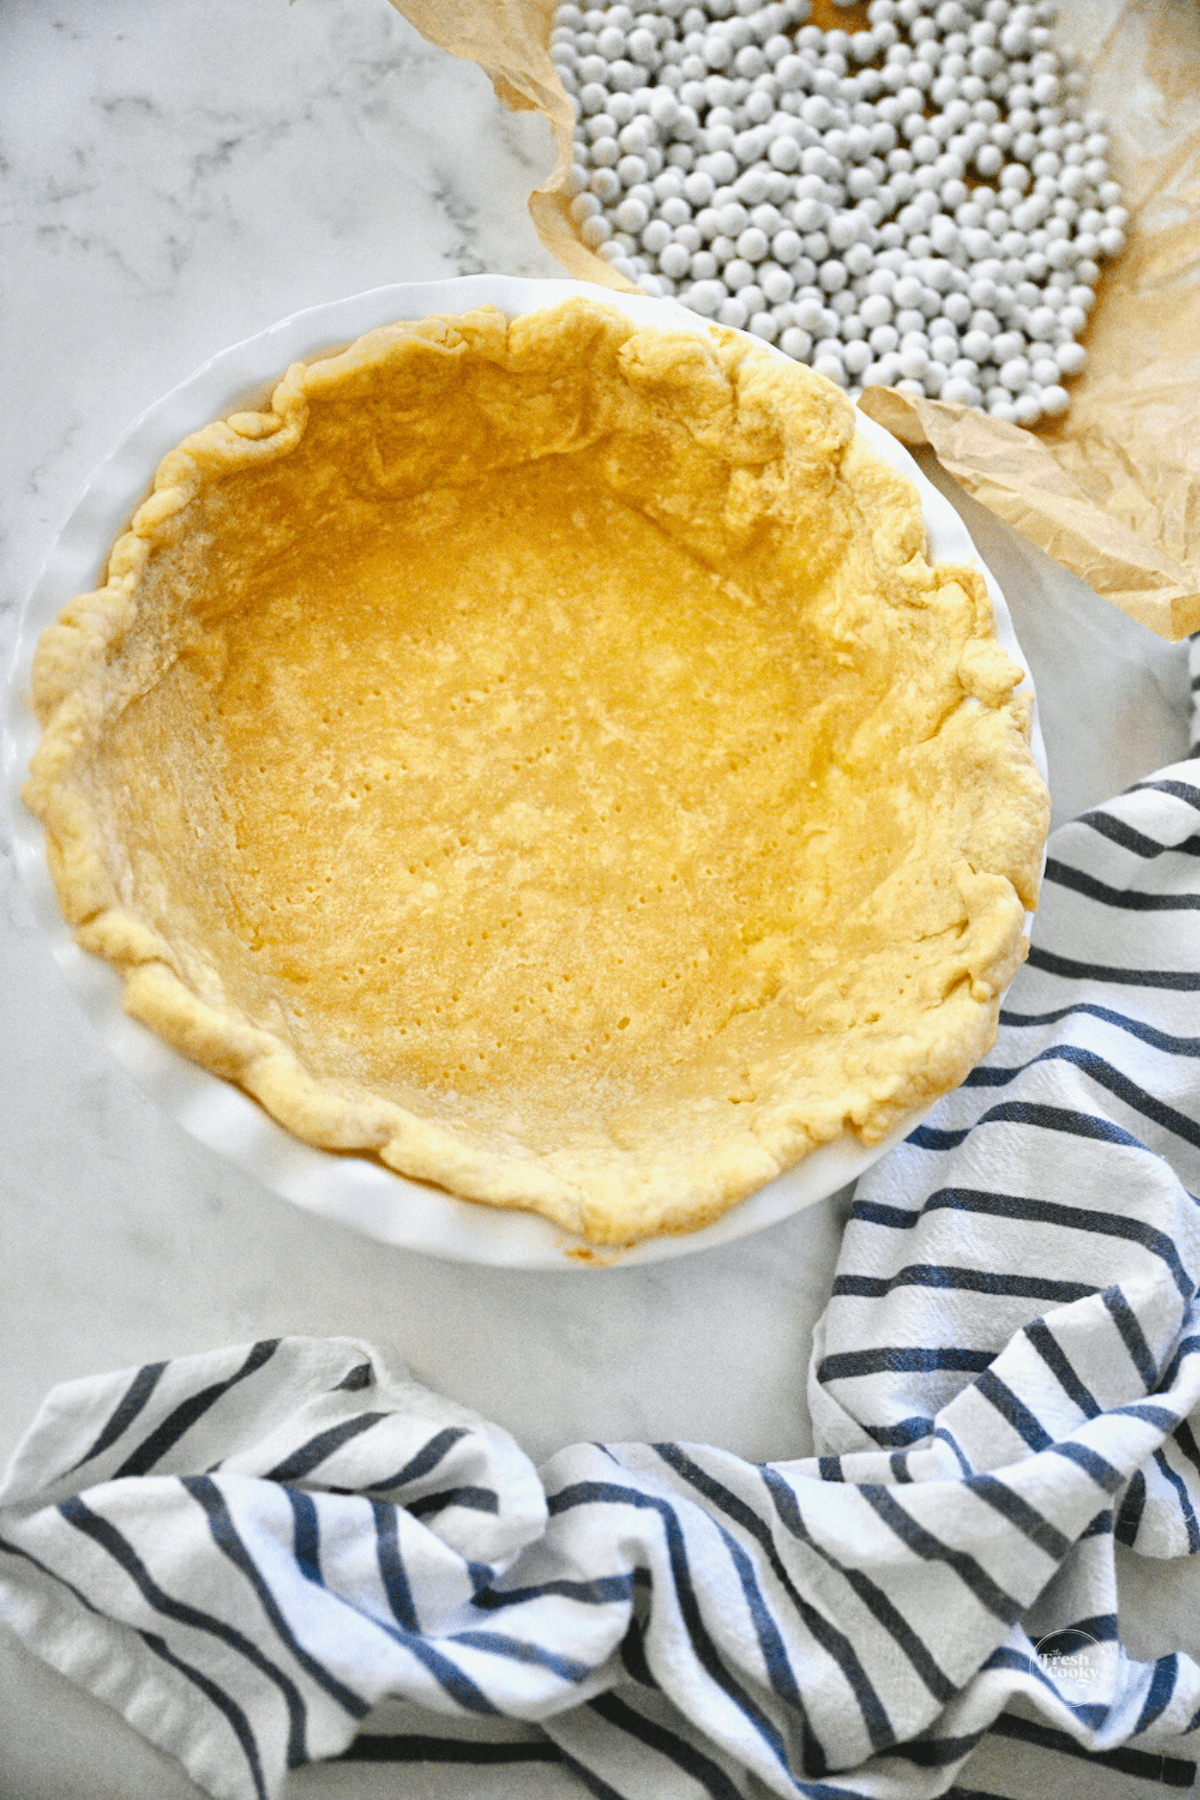
How to Blind Bake a Pie Crust (Par-Bake)
For single crust pies that will still be baked (like pumpkin pie), you will want to par-bake your crust to avoid a soggy crust.
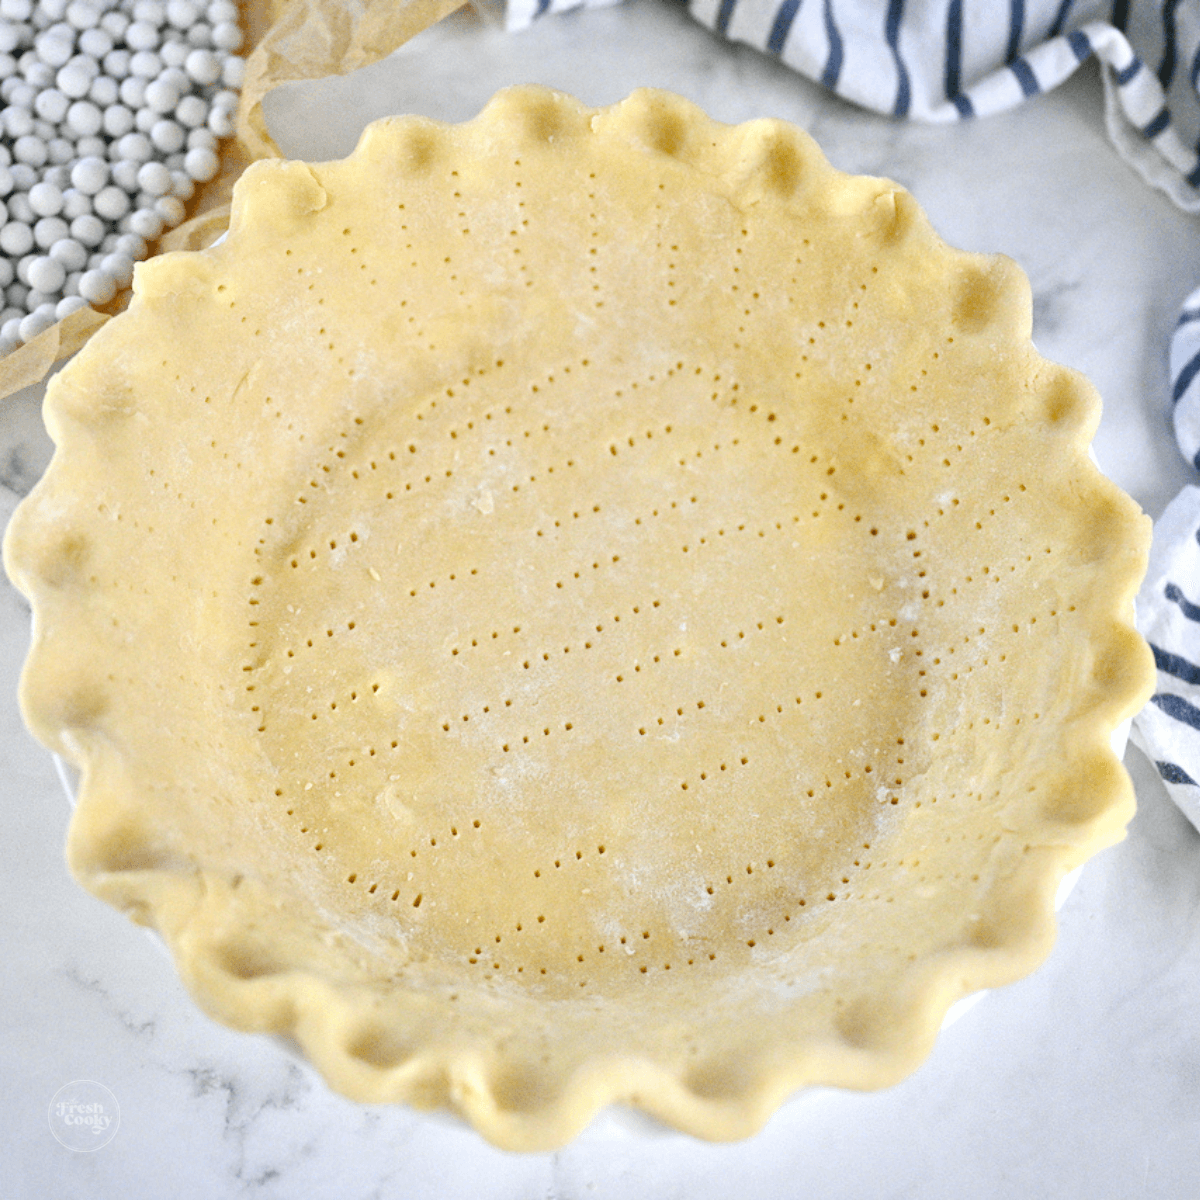
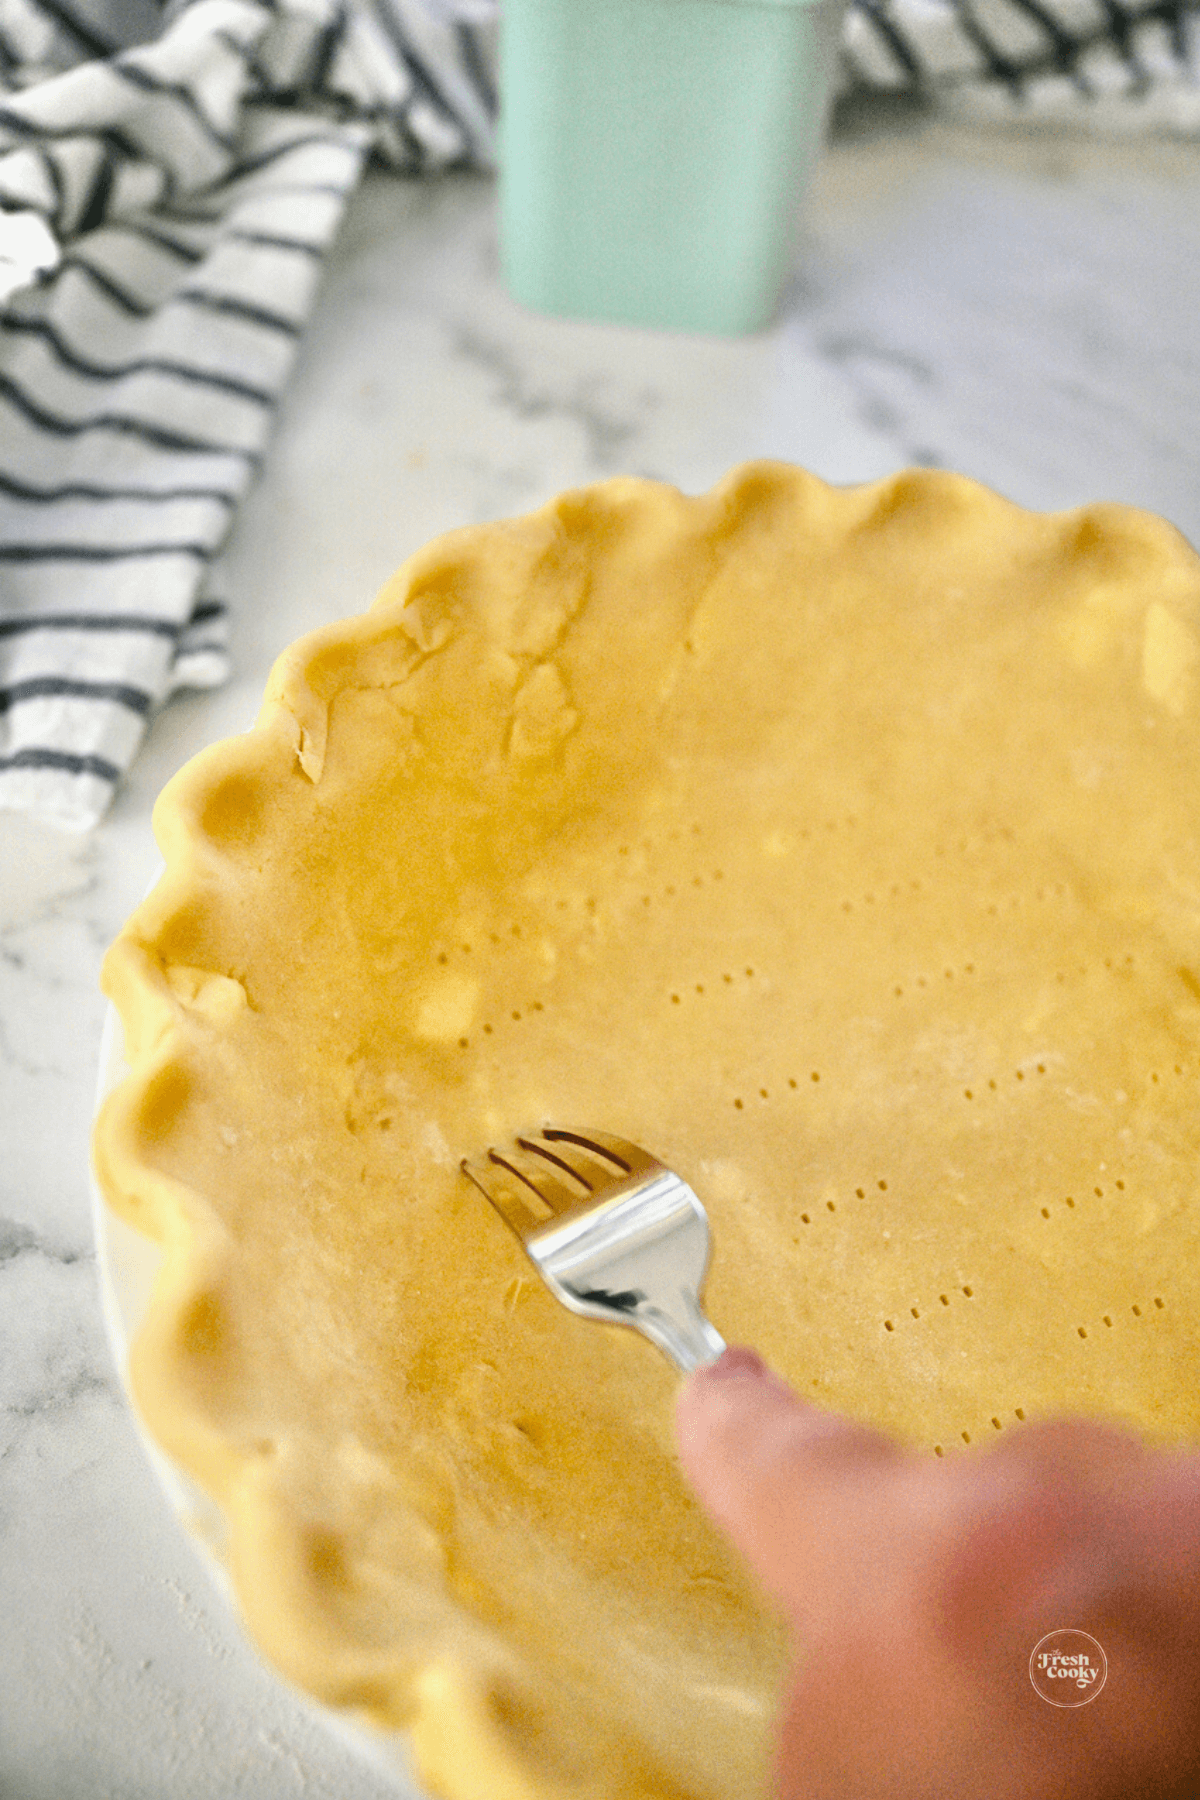
Pierce the entire pie crust including the bottom and sides with a fork, this is called “docking”. Freeze your pie crust (in the plate) for 30-60 minutes before baking, while freezing, preheat the oven to 425° F (220 ° C), placing a foil-covered baking sheet on a rack set in the lower third of the oven.
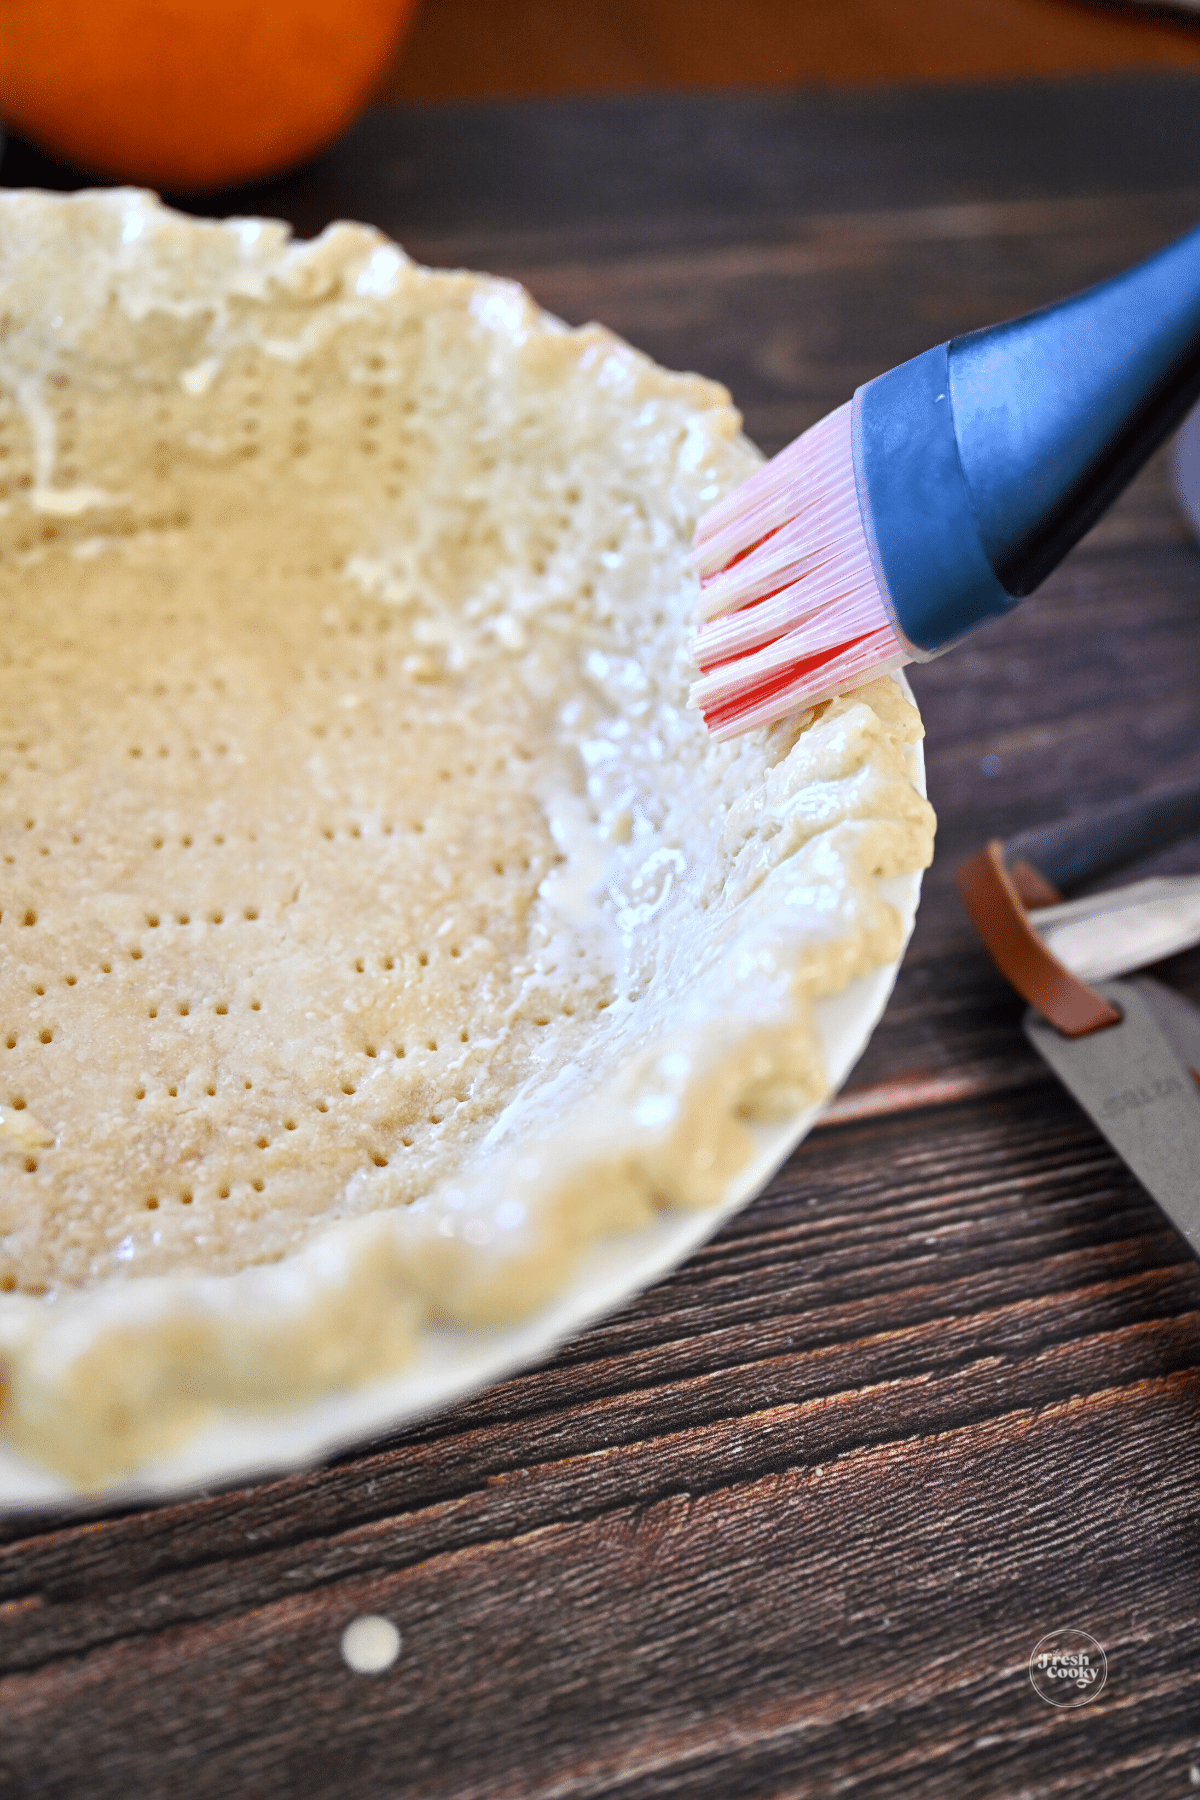
If desired, brush the rim of the crust with egg wash for a glossy golden finish. Crumple some tin-foil or parchment paper and carefully lay in the chilled crust. Add pie weights, dried beans or rice to weigh down the crust.
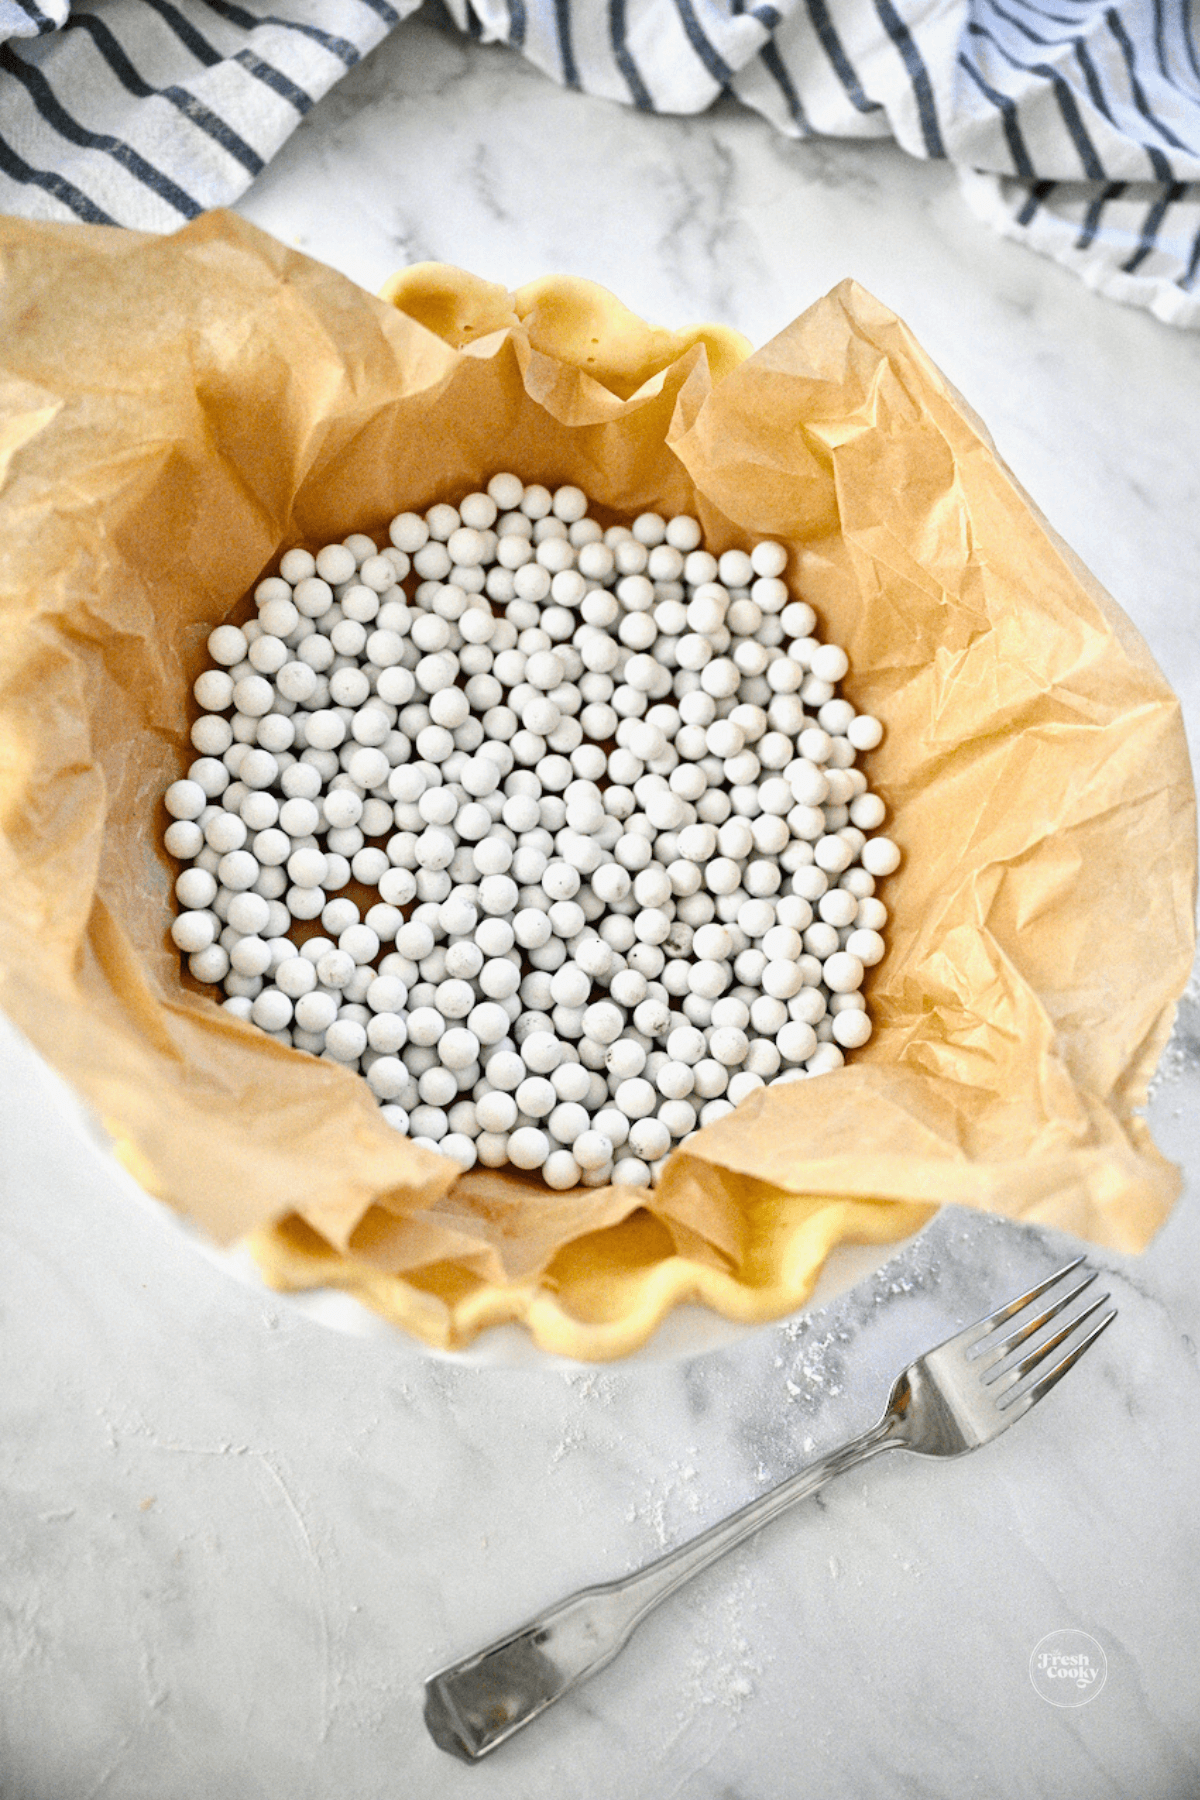
Bake for 15-20 minutes or until the pie crust no longer sticks to the parchment or foil. Remove pie weights carefully and proceed with your recipe.
How to Pre-Bake Pie Crust | for Custard Pies
Proceed as with the par-baked instructions, when you get to the 15-20 minute mark, carefully remove the foil or parchment and the pie weights, returning the pie crust to the oven to bake for an additional 12-15 minutes, until the crust is golden brown. Remove from the oven and cool completely before filling with something like my Butterscotch Cinnamon Pie filling!
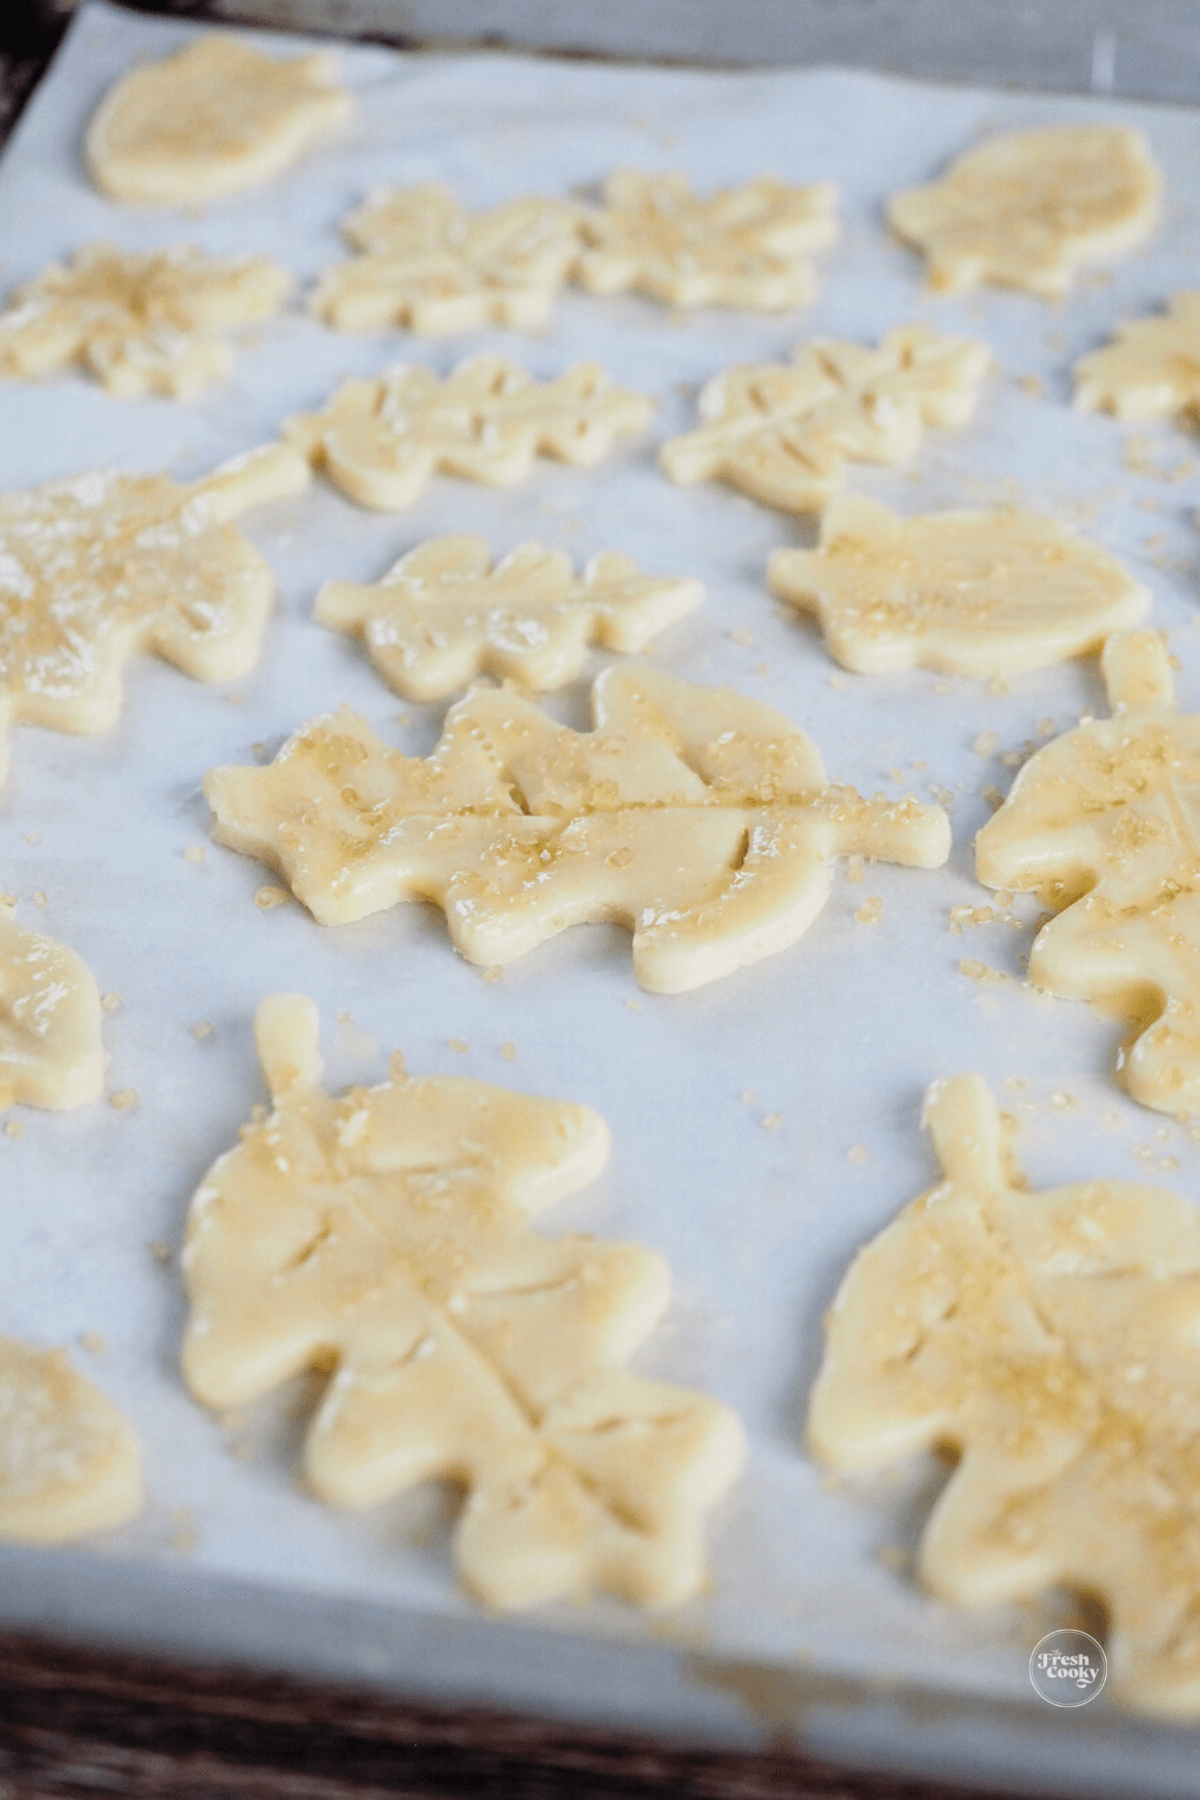
What to do with leftover pie crust – make cut outs!
The best part, okay, maybe not, but still yummy! Make some pastry cut outs, or cinnamon sugar bites!
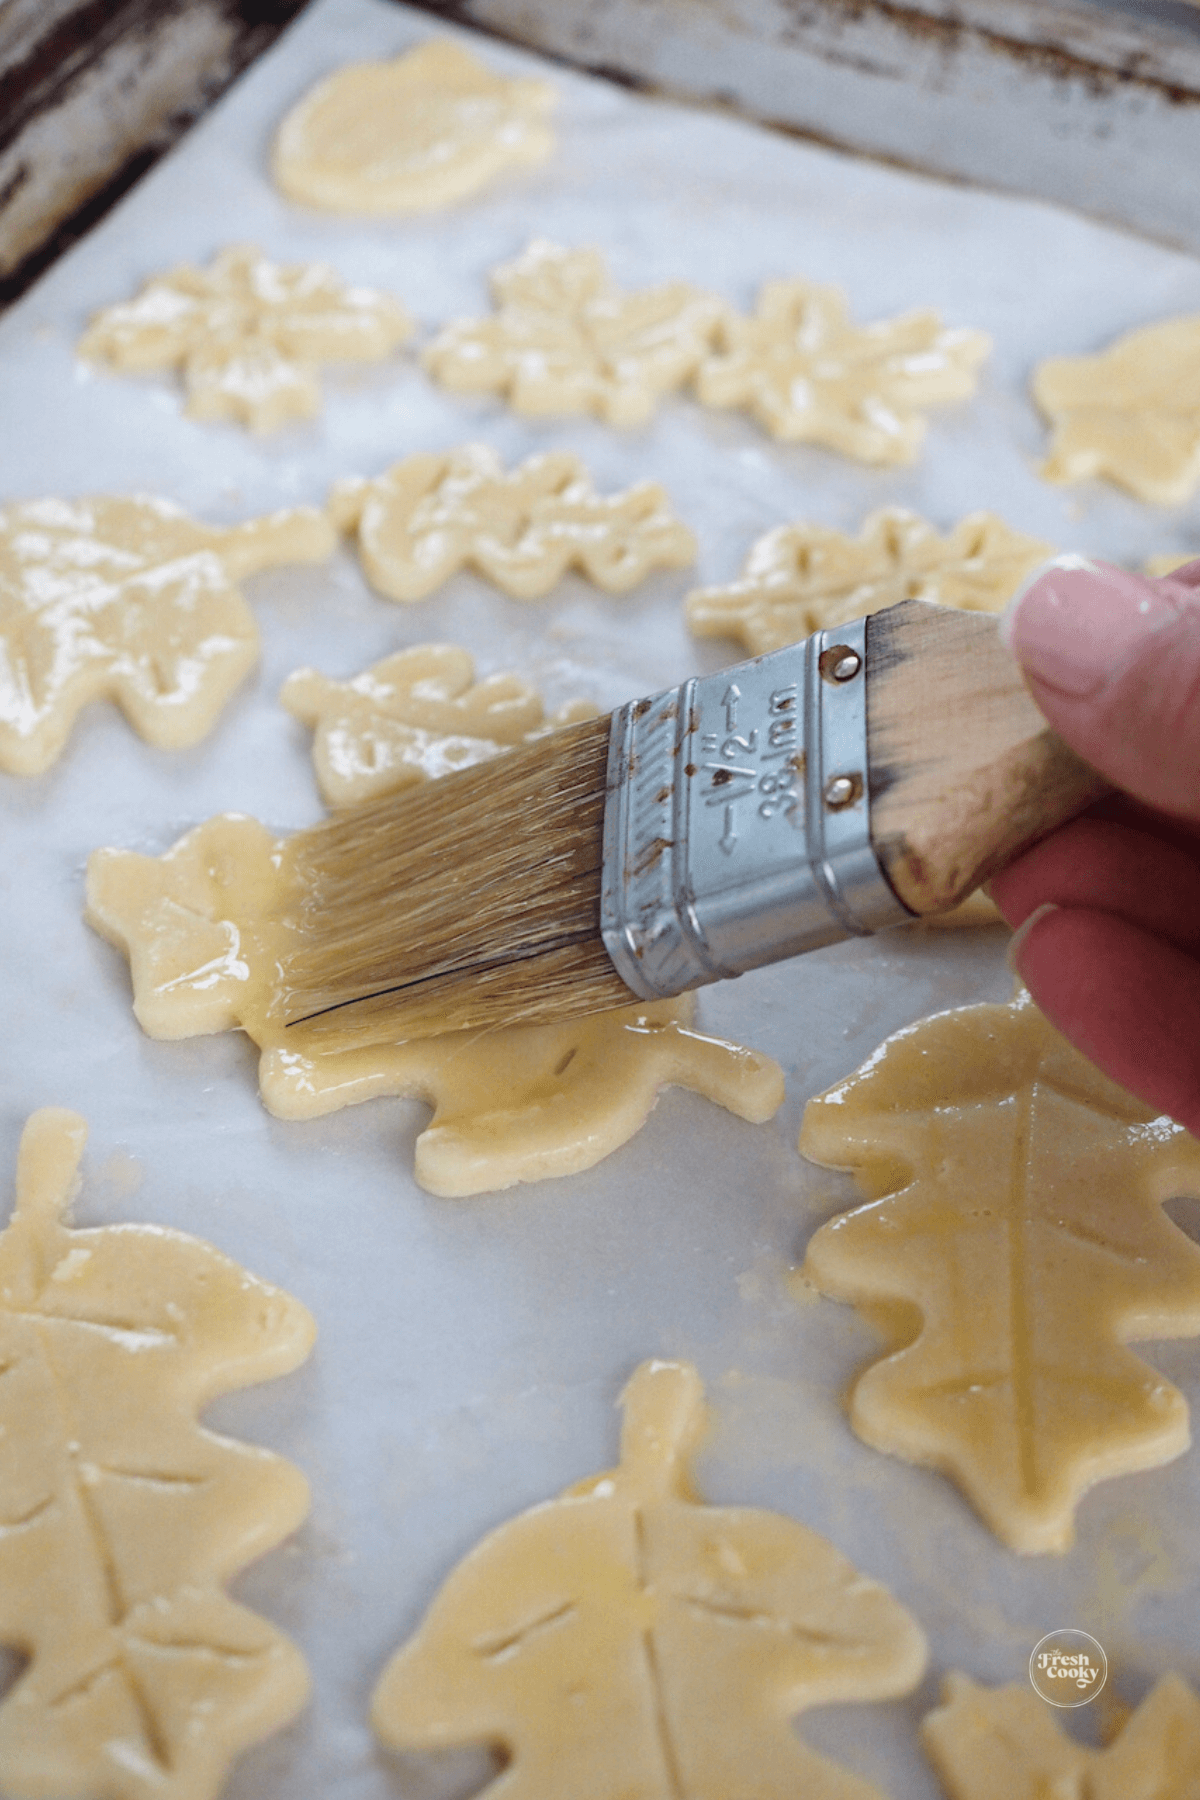
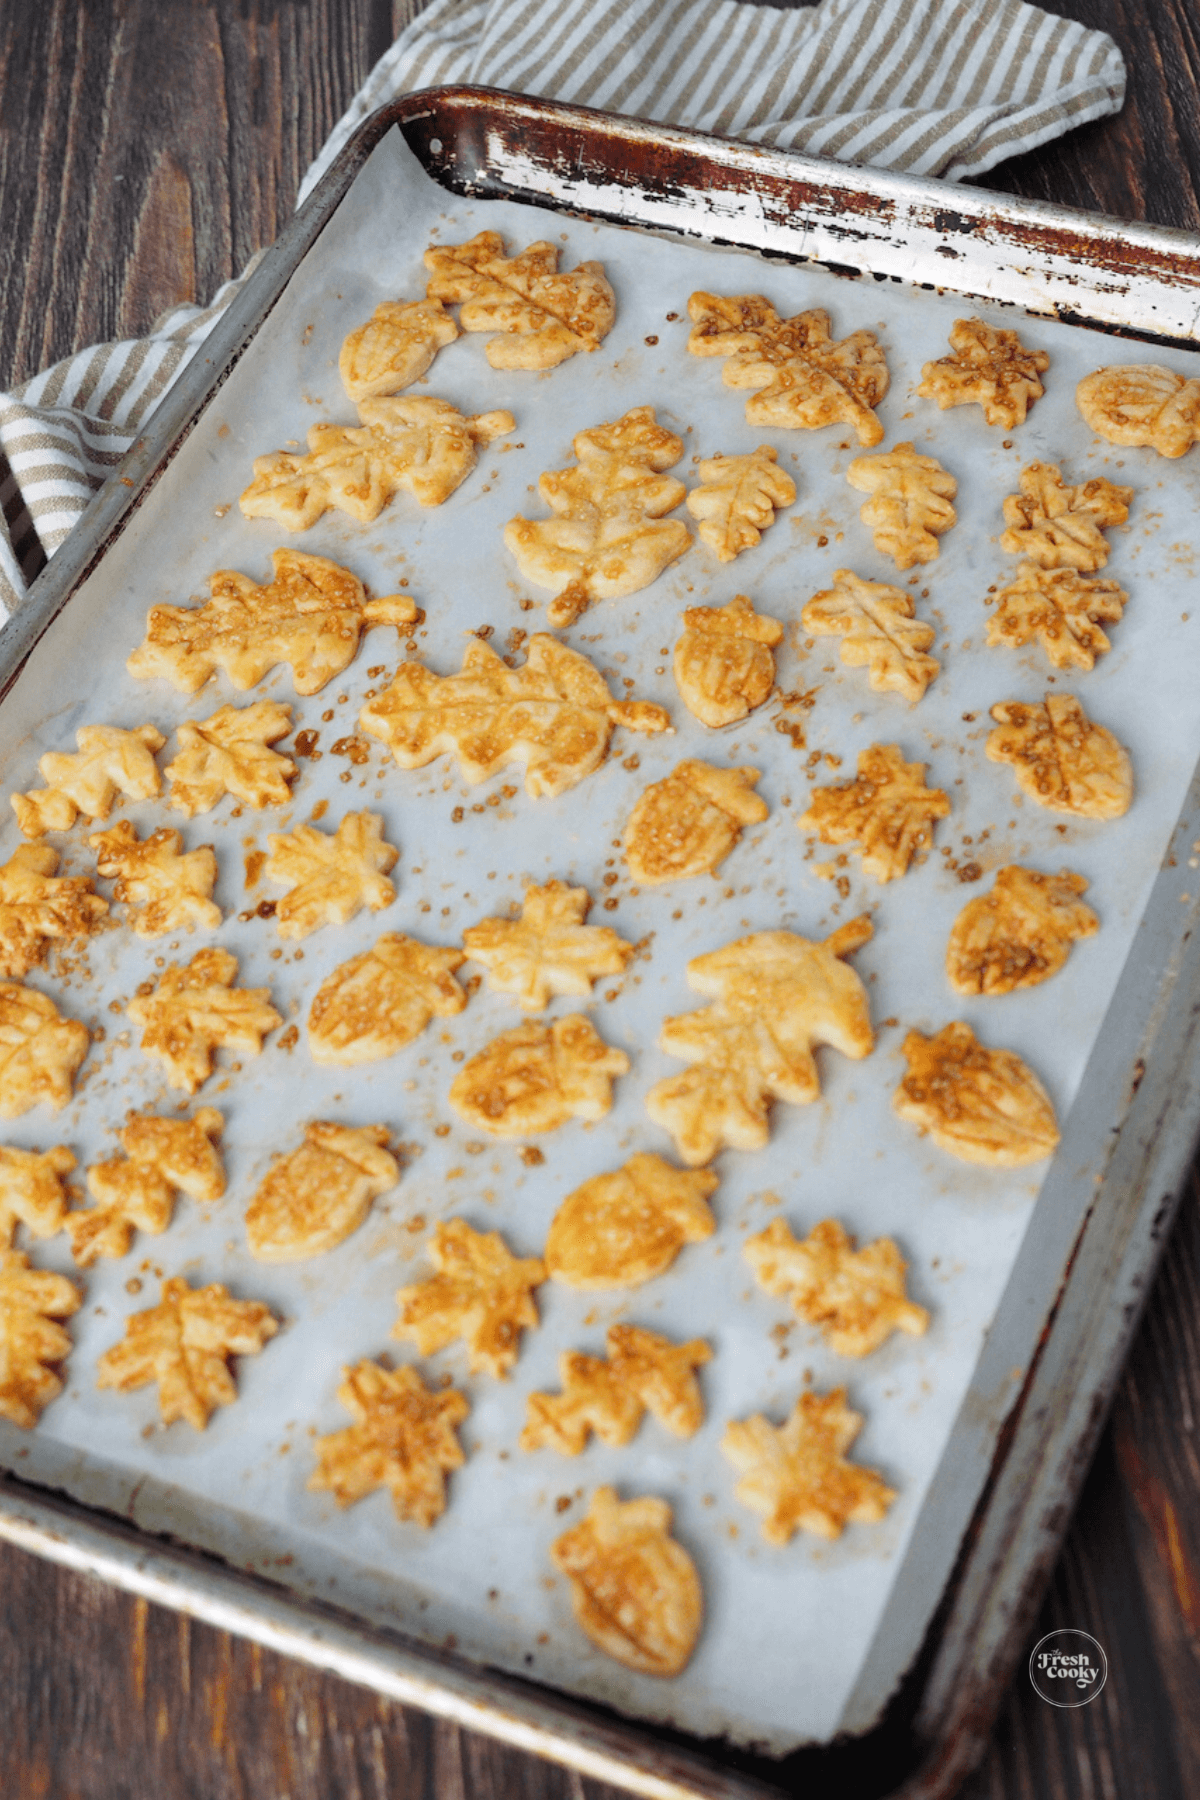
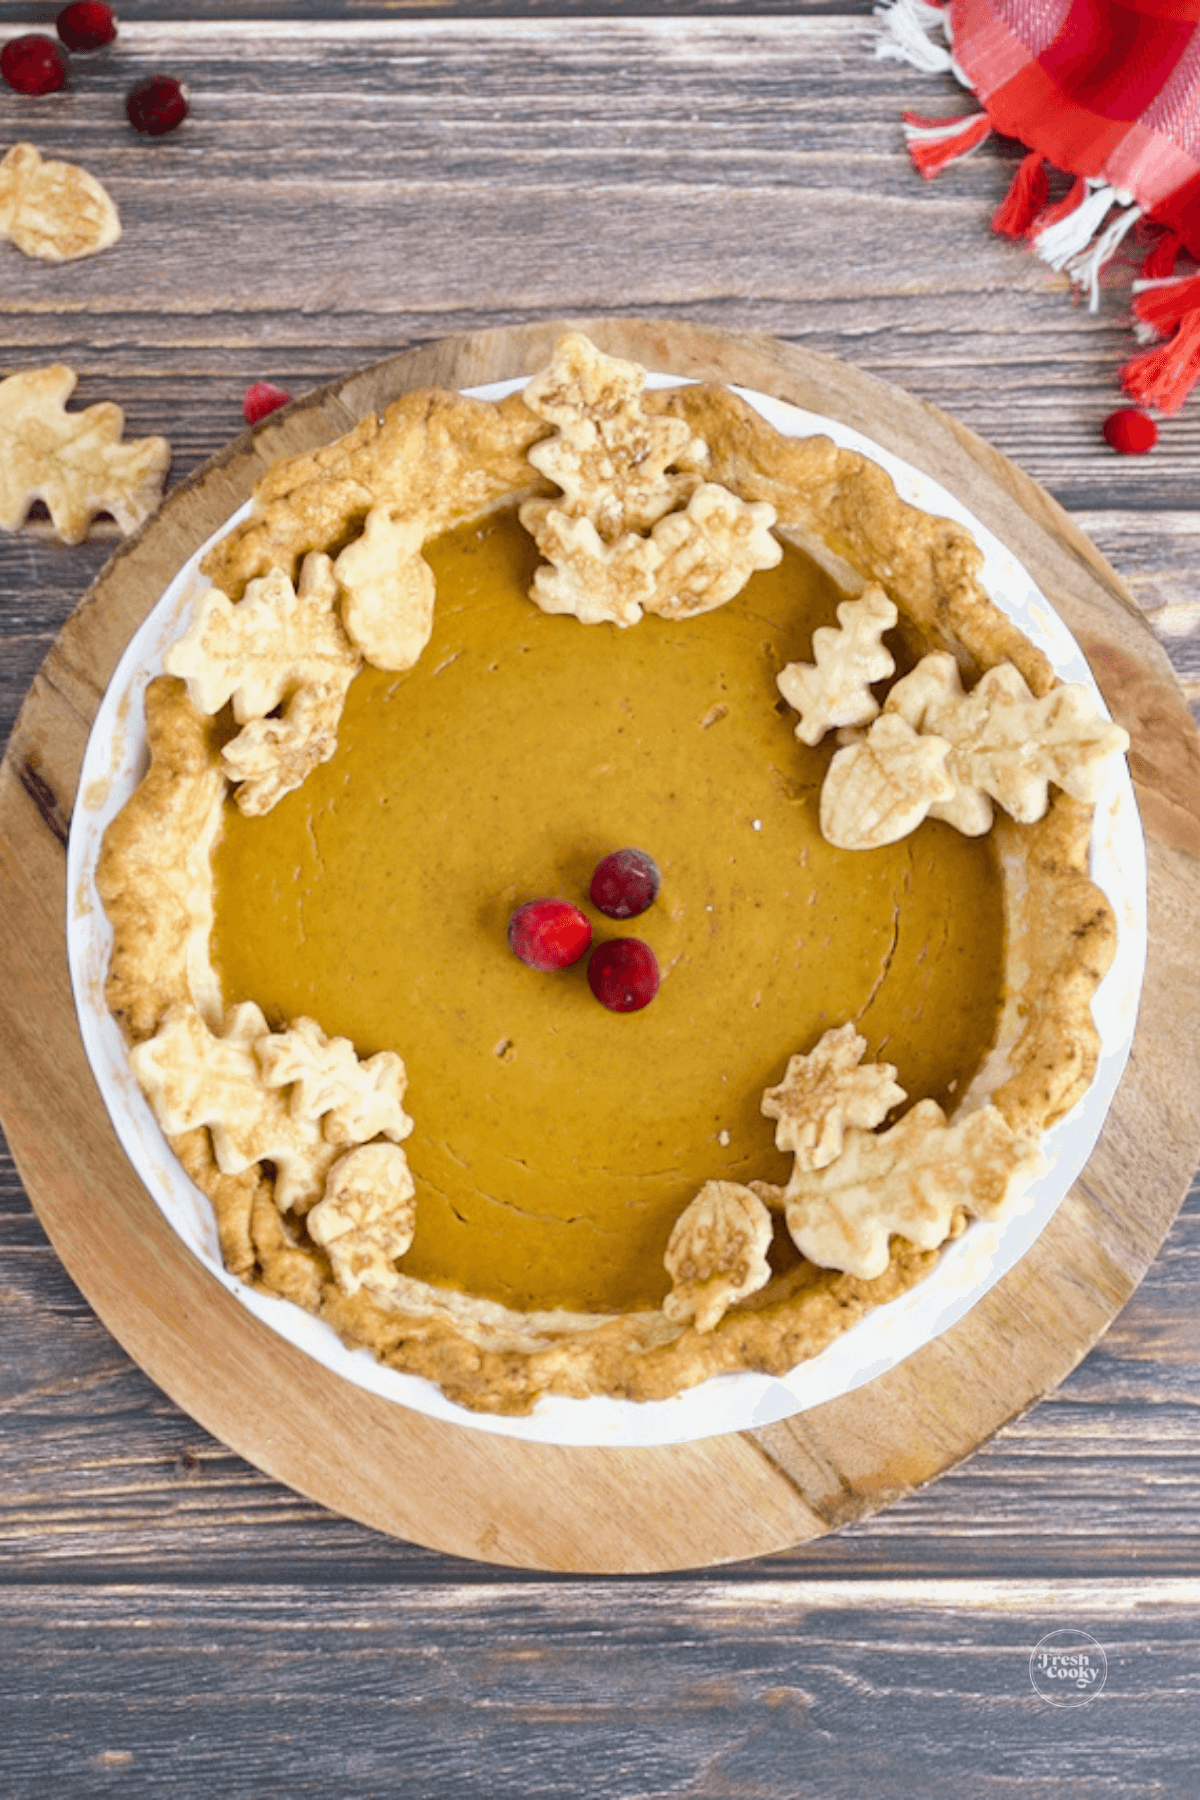
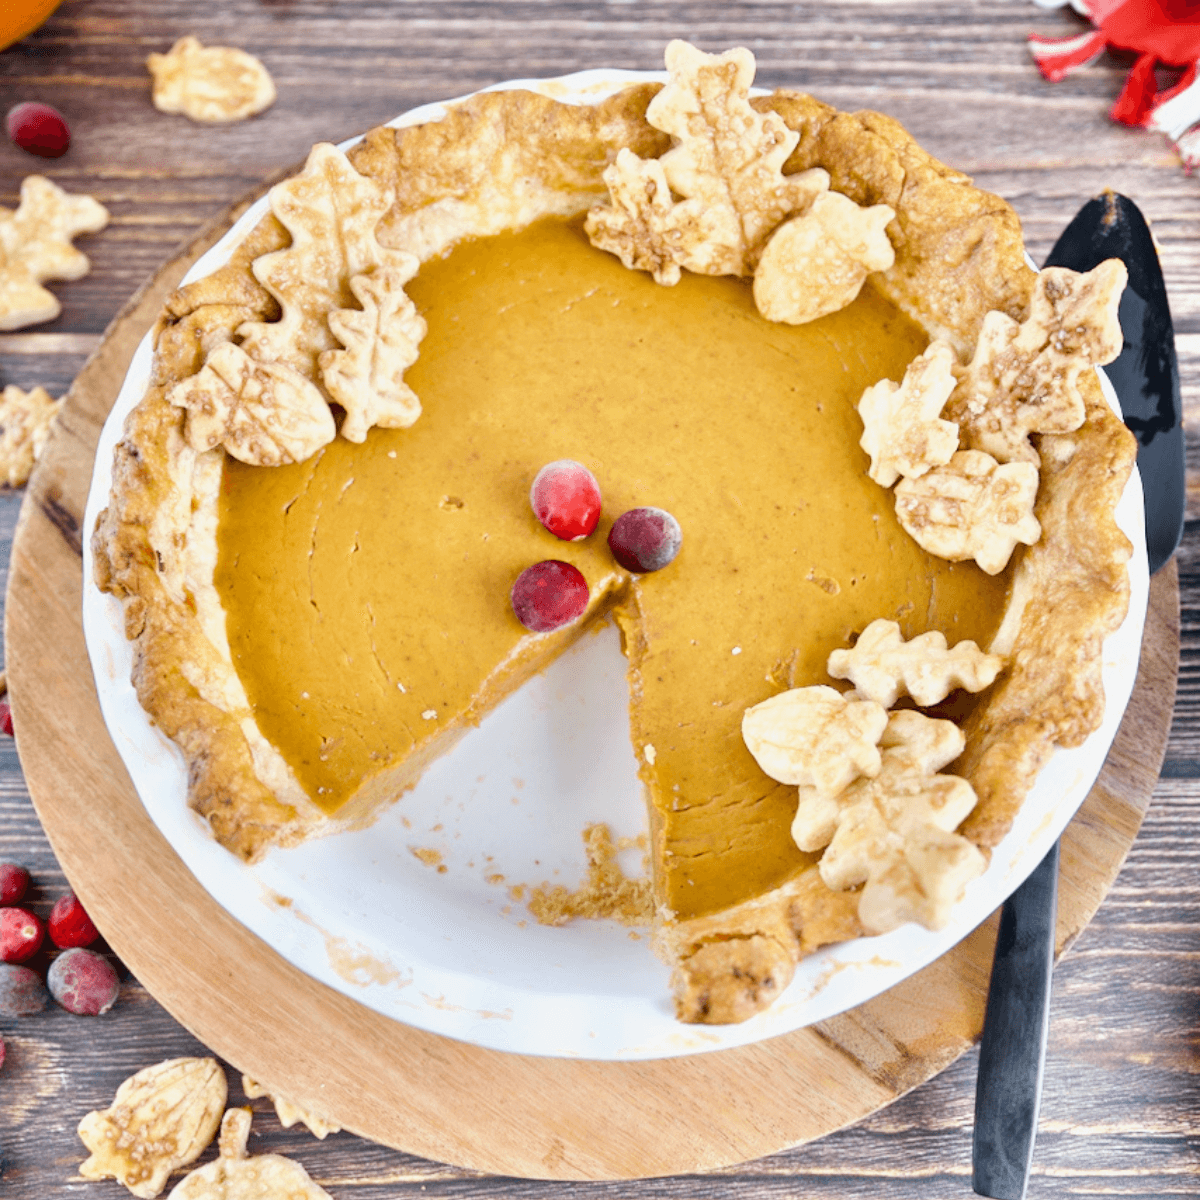
- Roll out the dough and use a cookie cutter, like these fall leaves that I made. If you want them glossy, brush with egg wash and a little sprinkle of sugar. Bake at 425 for 15-20 minutes.
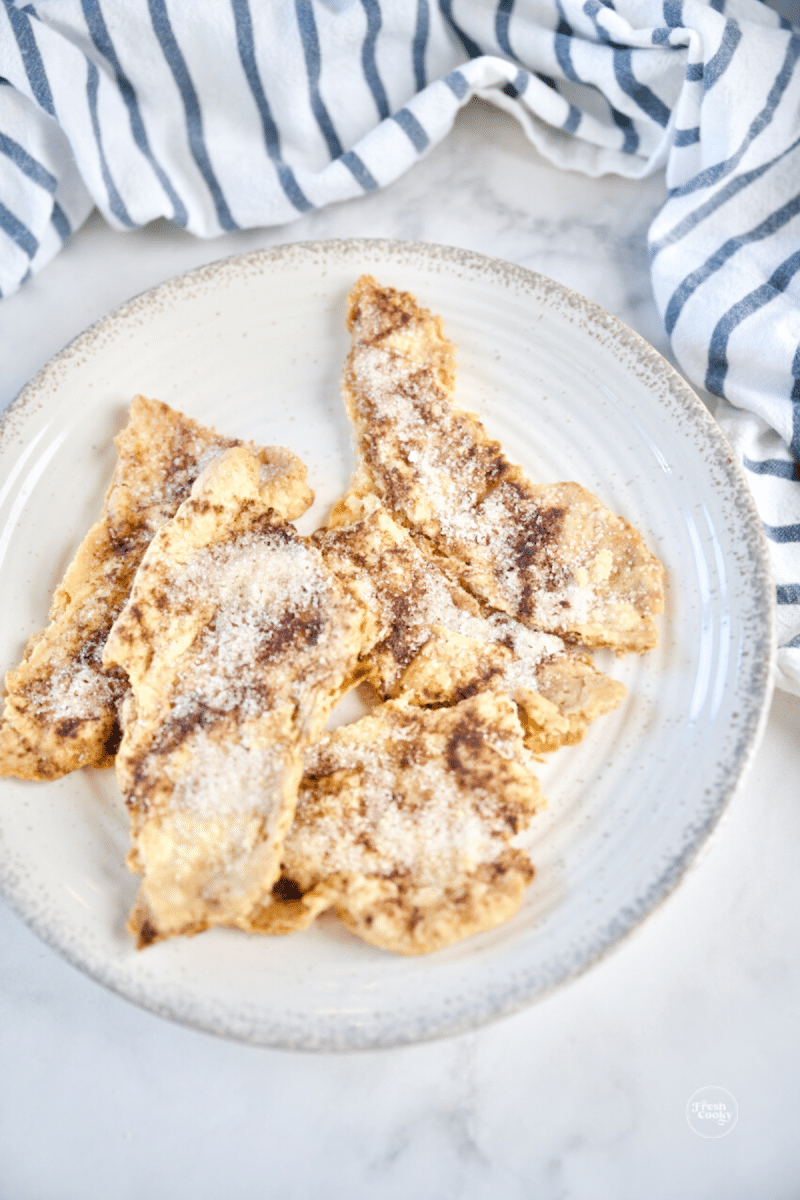
- Or roll out pieces or scraps, then sprinkle with a little cinnamon sugar or even better, and sprinkle with cinnamon sugar. This is how my mom always used up our scraps or the extra piece of pastry if only baking a single crust pie. Bake at 425 for 15-20 minutes.
All Butter Pie Crust Recipe FAQs
Ways to use your no fail pie crust recipe
- Bake your favorite quiche in this perfect flaky pie crust.
- Fill with apple pie filling, pumpkin pie filling, coconut cream pie — any pie filling you desire!
- Make yourself a turkey pot pie, ham pot pie, chicken pot pie or Shepherd’s pie (use this filling).
- Bake hand-pies or tarts.
Storage for 3 Ingredient Pie Crust
Pie dough may be made and formed into discs (double wrapped in plastic) and sealed well in an airtight container for up to 5 days in the fridge. Be sure to remove from fridge for 60 minutes before rolling.
Freeze | Pie dough may be frozen up to 3 months, better at 2 months and make sure it’s really well sealed as the pie dough will absorb fridge and freezer odors quickly! Ew!
Store unbaked or baked pie crust (cooled), double wrapped in plastic wrap and then placed in baggie in fridge or freezer.
What to make with pie crust
Pumpkin Custard Pie Recipe (Costco Copycat)
This pumpkin custard pie recipe is spot-on for a Costco pumpkin pie recipe! With a buttery crust, creamy custard filling; this is the best pumpkin pie, perfect for Thanksgiving dinner!
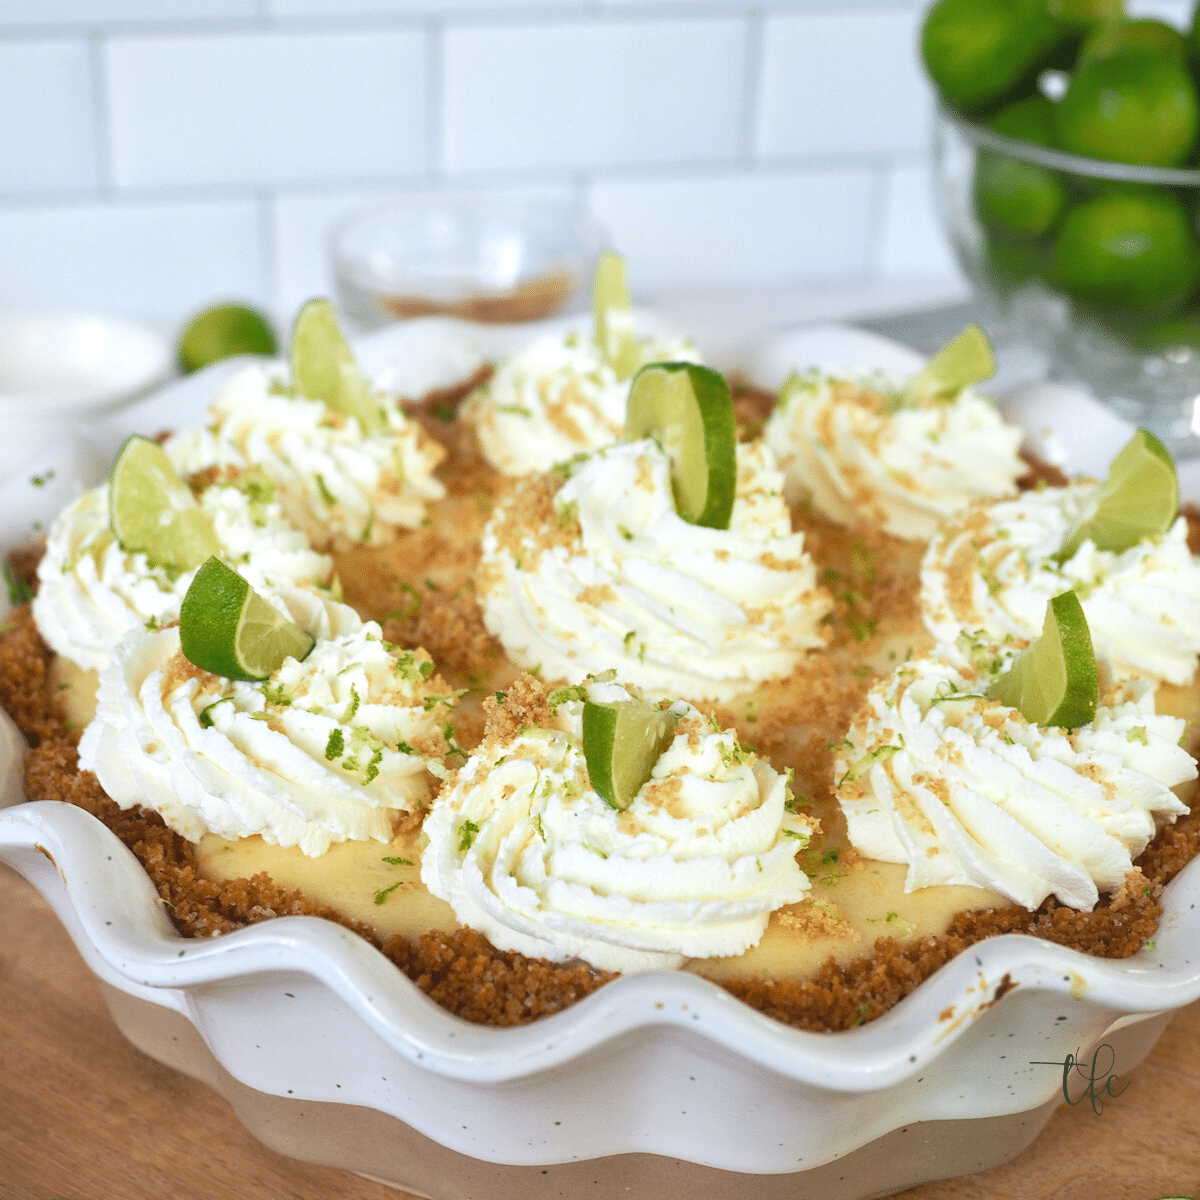
The Best Key Lime Pie Recipe (Award-Winning)
Describe your BEST Key Lime Pie…is it citrusy, sweet-tart, creamy — with the perfect sweet to-pucker ratio; light and easy with a crisp not-to-sweet graham cracker crust? Look no further…you found it!
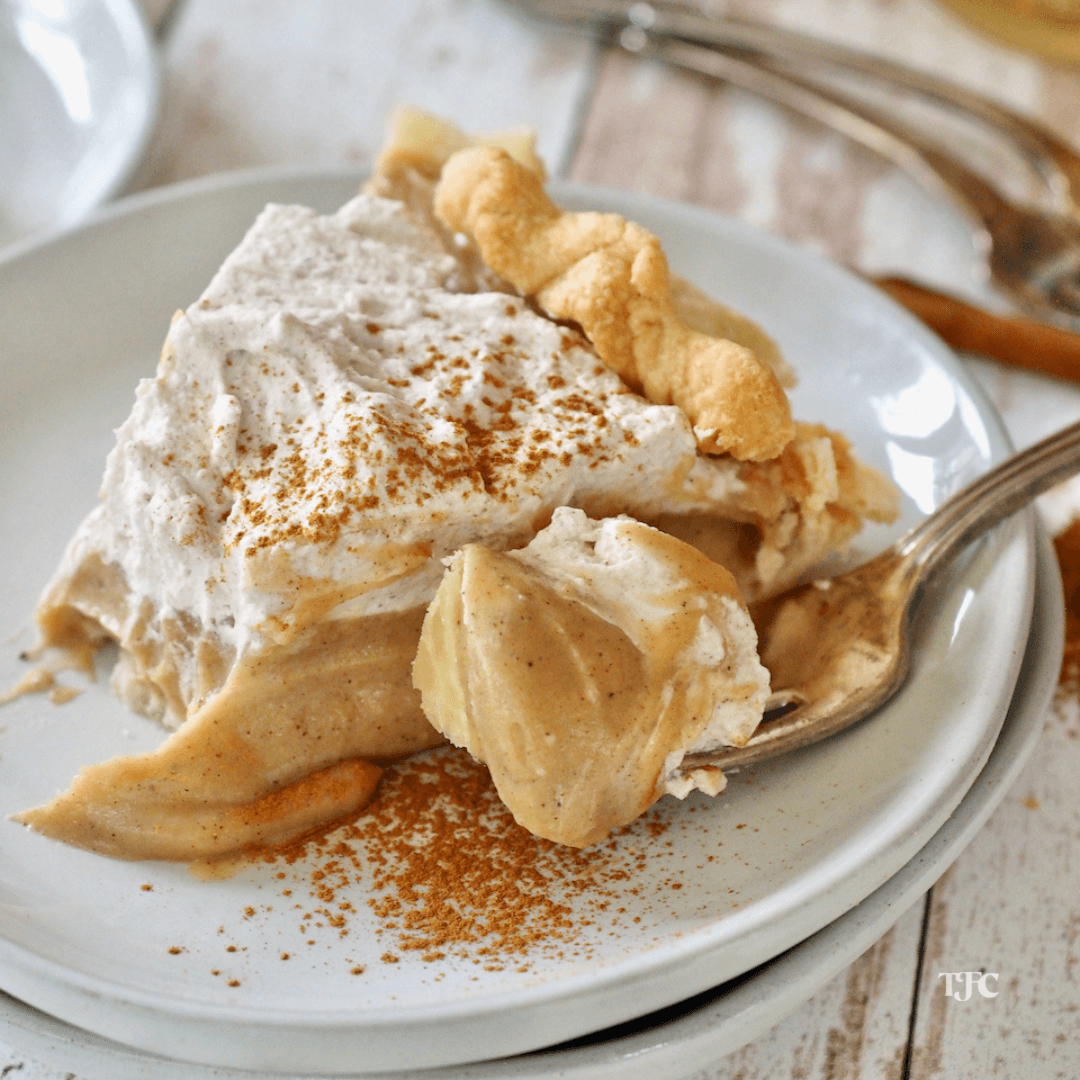
Butterscotch Cinnamon Pie Recipe
The rich buttery brown sugar flavors mixed into a creamy homemade butterscotch pudding nestled in a flaky pastry crust. This Butterscotch Cinnamon pie recipe is Heavenly!
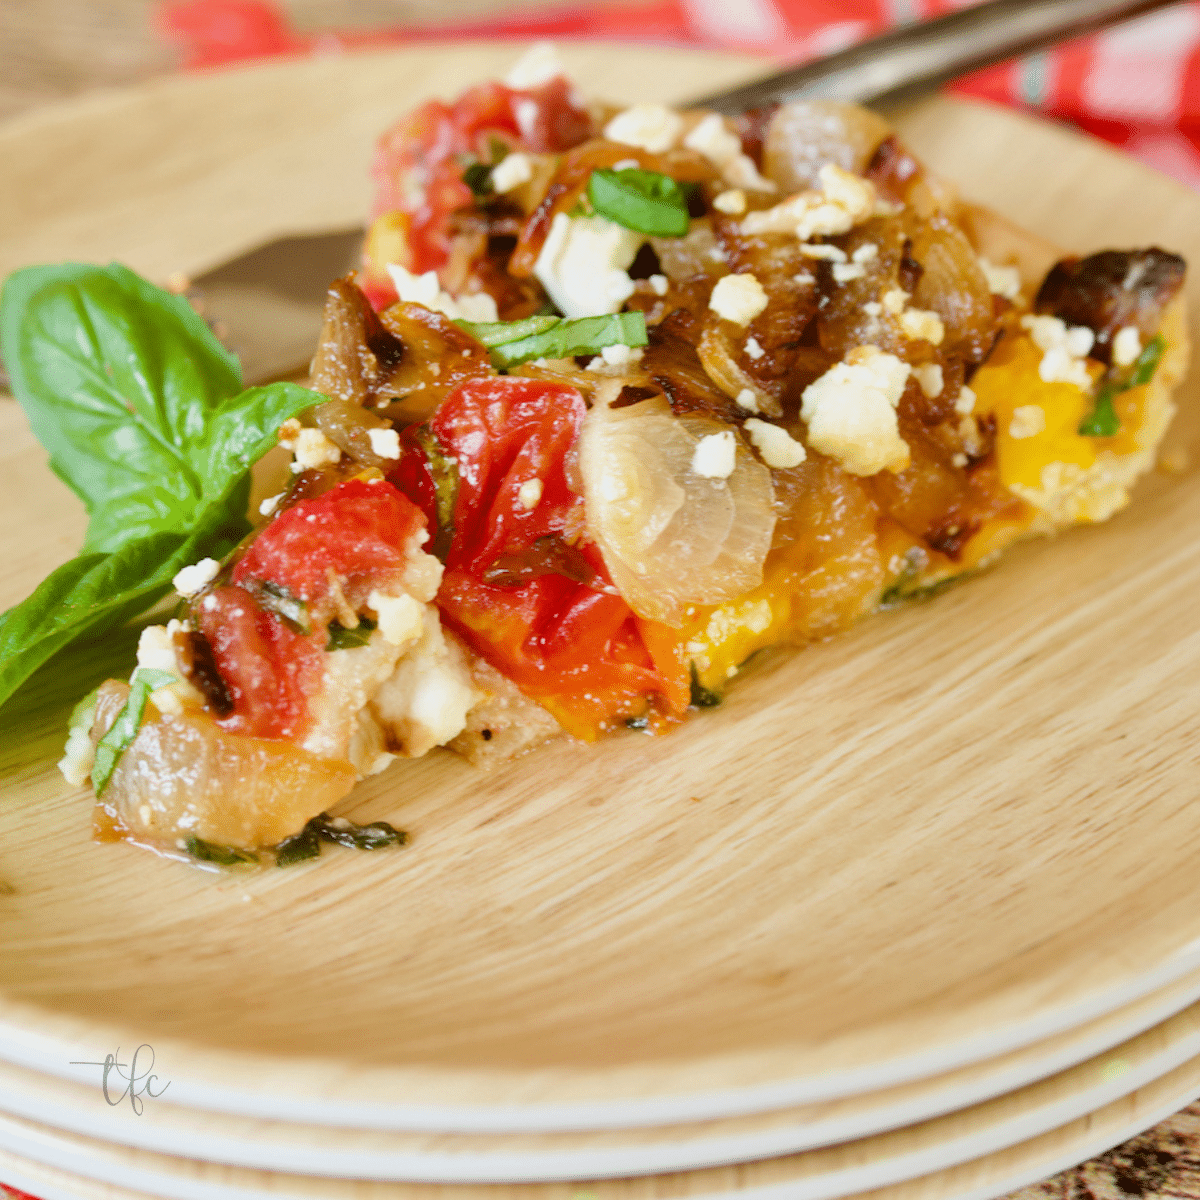
Heirloom Tomato Pie
This delicious Heirloom Tomato Pie recipe features caramelized onions, goat cheese, fresh basil and bacon! A hearty appetizer, perfect for summer entertaining, this tomato pie highlights summers freshest produce! Easily make gluten free or omit the bacon for a vegetarian dish.
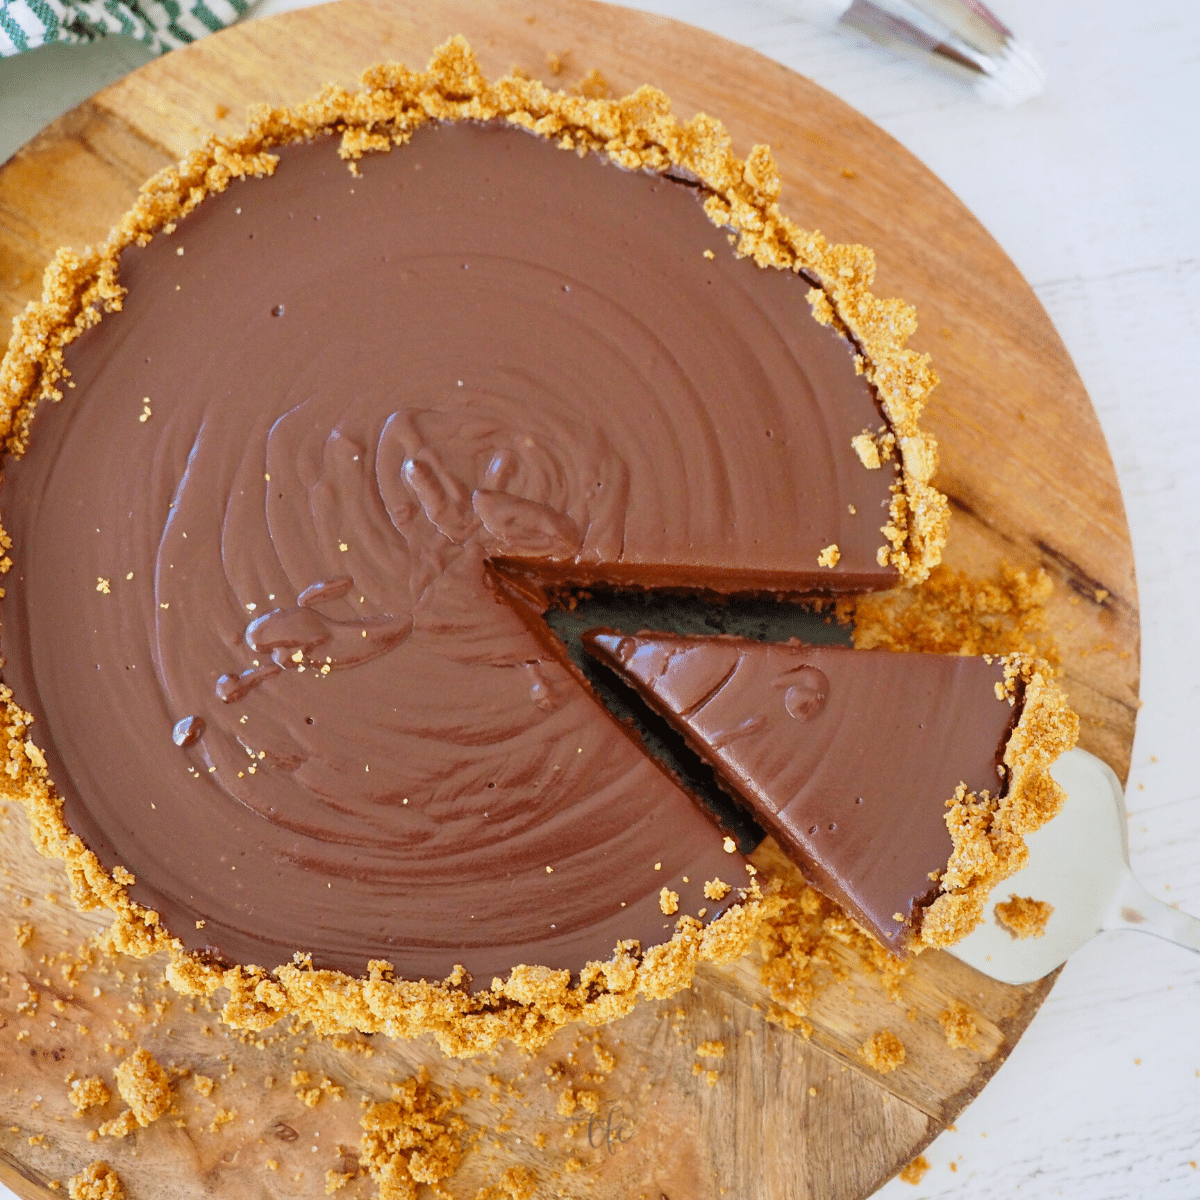
No Bake Chocolate Pie
It’s pie season! I have the easiest, most scrumptious no bake chocolate pie recipe for you with options for personalization. My mouth waters just thinking about the silky smooth texture and rich flavor in this dessert!
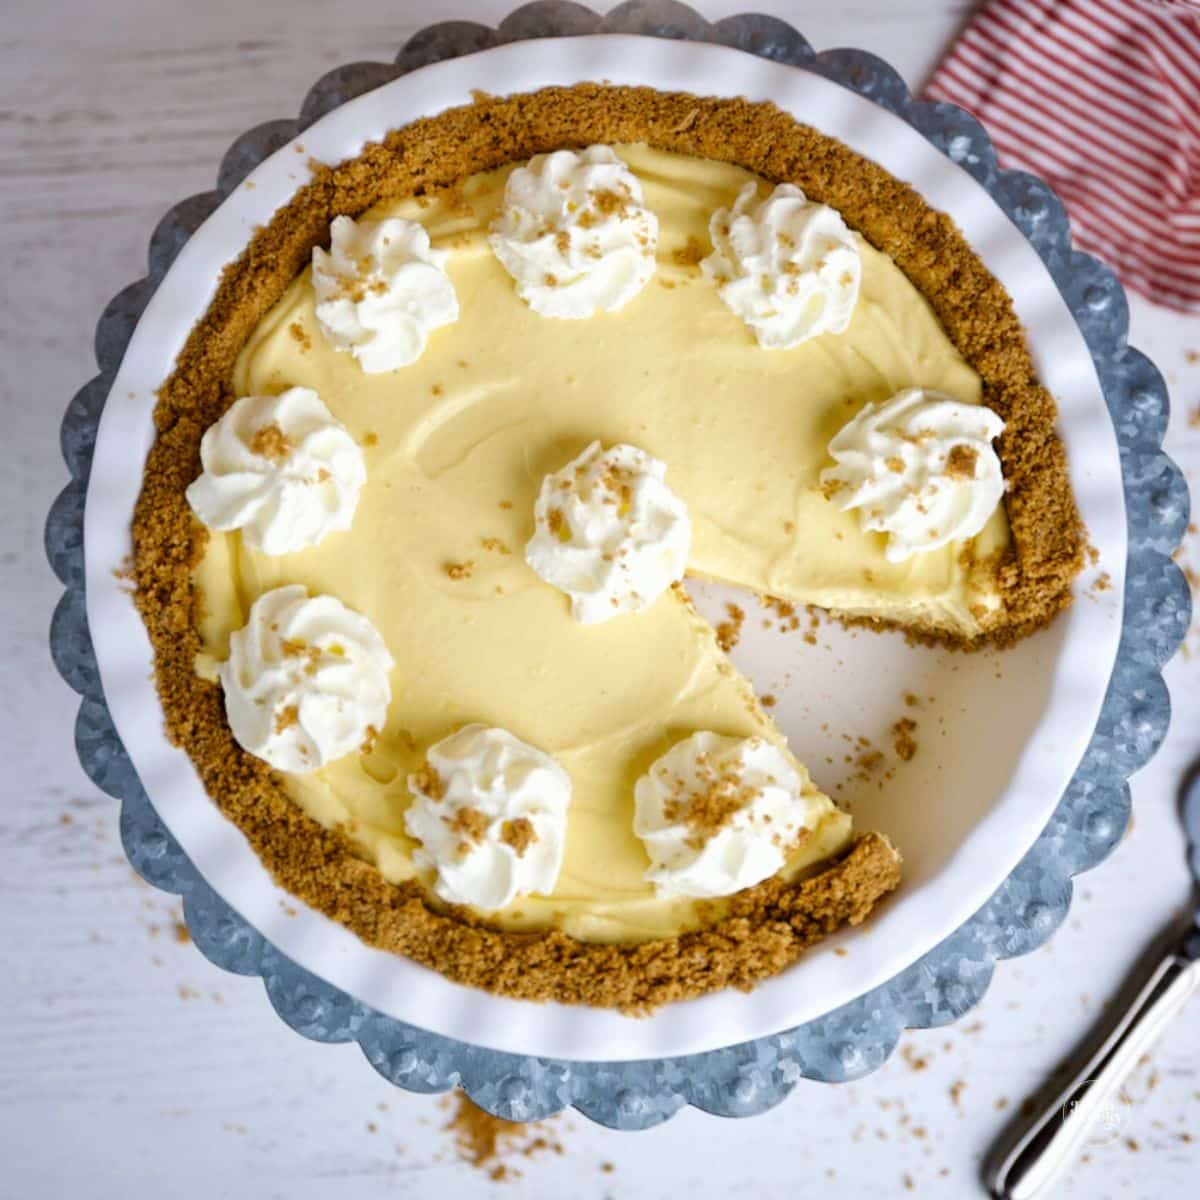
Easy No Bake Eggnog Pie Recipe
A lighter than air, creamy no bake eggnog pie is for serious eggnog lovers and cream pie eaters alike! With a simple graham cracker pie crust and a few simple ingredients, it will become a family favorite no bake pie recipe too! Loaded with holiday flavor, the perfect dessert for the holiday season.
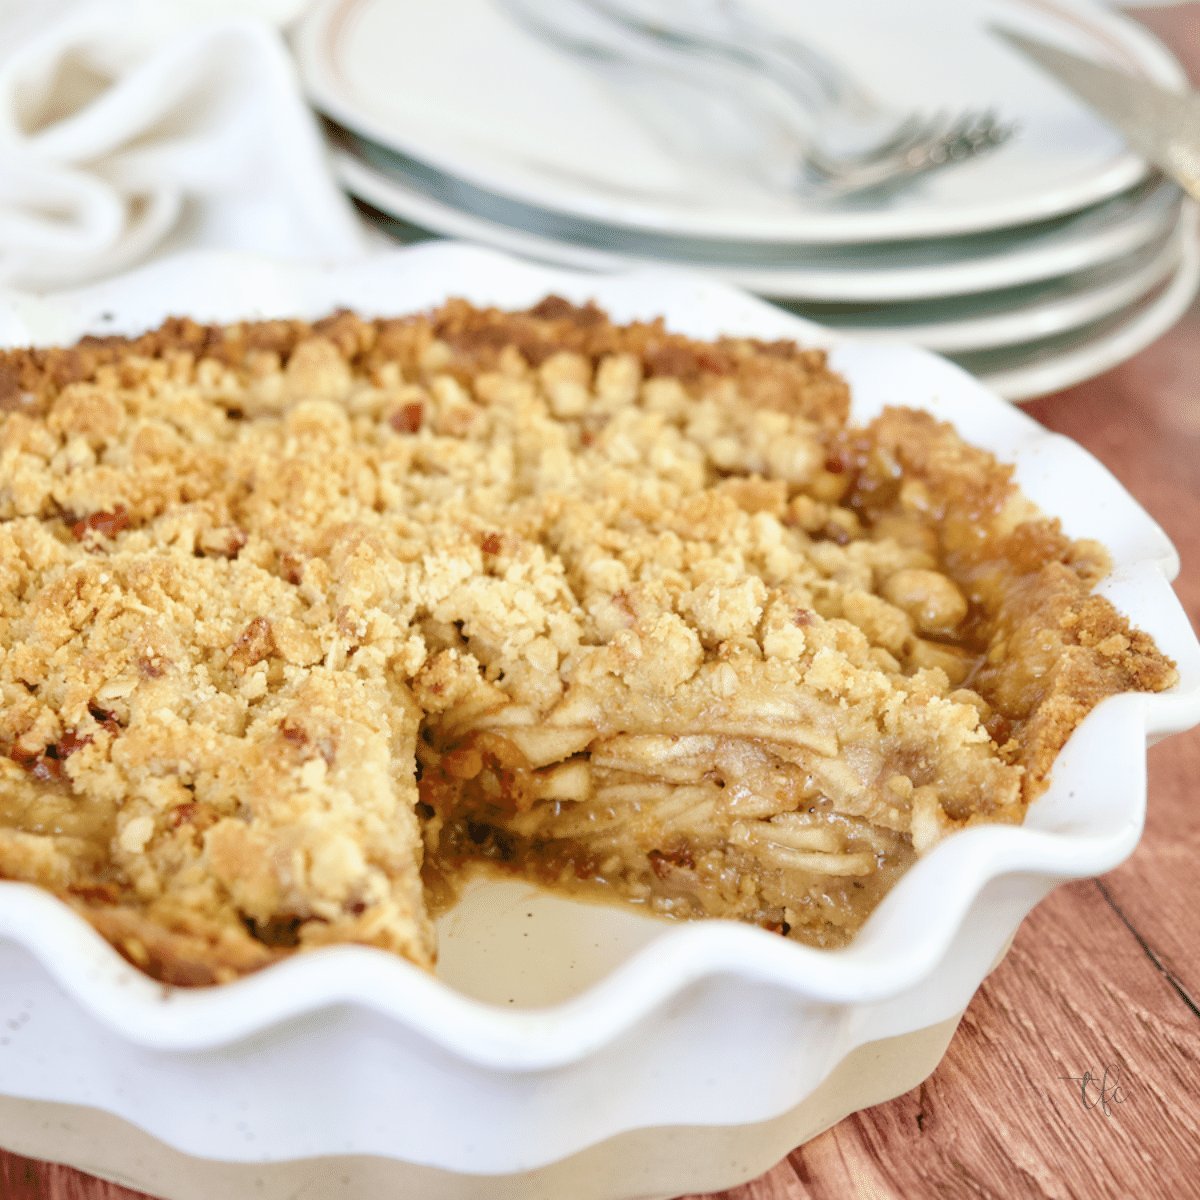
Easy Gluten-Free Apple Pie Recipe with Crumb Topping
This gluten-free apple pie will rock your socks off; with the crust and crumble topping made from the same dough, this is an easy, fail-proof pie.

It’s okay if it’s not the perfect pie crust
I guarantee you when it comes time to dig into this pie, nobody will care if it shrunk, is pieced together or isn’t crimped perfectly. They will just care how it tastes, and this all-butter pie crust tastes AMAZING!
I hope you loved this 3 ingredient pie crust — if you did, would you share your creation on Instagram, Facebook and Pinterest? And be sure to comment below!
Like this recipe?
Don’t forget to give it a ⭐️⭐️⭐️⭐️⭐️ star rating and leave a comment below the recipe!
Ingredients
- 2 ½-3 cups unbleached all-purpose flour Use less for smaller double crust pie, more for 2 9" deep dish pie crusts
- 16-22 tablespoons Irish butter salted, COLD, cut into small cubes (use the lesser amount for smaller pie crusts, more for two full) 2 sticks + 6 tablespoons
- ¼-½ cup ice water Place desired amount of water in measuring cup, add 5-6 ice cubes.
Optional
- ½-3/4 teaspoon kosher salt ½ teaspoon if making regular crust, use ¾ if using unsalted butter
- 2-4 teaspoons sugar Add desired amount if making sweet crust
Optional Egg Wash for Glossy Crust
- 1 large egg beaten
- 1 tablespoon cream
Instructions
Food Processor Pie Crust Method
- This is key! Start with 1 ½-2 cups of flour (reserving the additional cup), add salt and sugar if adding to the food processor. Pulse a couple of times to combine. Use more flour if making 2 deep dish pies, less if single curst.
- Drop cold, cubed butter over the top of the flour mixture, as evenly as possible. Process the flour and butter mixture, pulsing until it begins to make a paste, some machines take longer than others. It will start as crumbs, then as you pulse it will become a clumpy paste.
- Scrape the sides and spread the flour mixture evenly back into the bowl of the food processor. Sprinkle remaining 1 cup flour over the top, pulse 5-8 times on LOW until the flour is mixed back into, the mixture will be crumbly and broken up.
- Transfer the dough to a large bowl, and sprinkle with ice water (starting with 4 tablespoons), mix using your hands (best way!) until the crumbs start making some larger clumps. Give it a pinch, if the dough falls apart, you need to add a little more ice water. Add just a teaspoon or two at a time, working it in, folding the dough over on itself until it comes together.
- On a floured surface, gently knead the dough (lightly now) just until it forms a ball. Divide the dough into two portions, pressing each into a round disc, about 1 inch thick and wrap (both discs) in plastic wrap. Chill for 30 minutes in the fridge. If you chill too long, it will become too hard to roll out, no worries. Just let it sit out for 15-30 minutes and then roll out, instructions below.
No Fail Pie Crust | Stand Mixer
- Place cubed butter in freezer while you measure out the rest of your ingredients.
- Combine the flour, salt and/or sugar if using in the bowl of the stand mixer fitted with the paddle attachment. Mix on low until combined.
- With the mixer on low, add a few pieces of cold butter to the flour at a time, it won't really incorporate but you will have some bigger and smaller mashed up pieces.
- Measure out your ice water, starting with 4 tablespoons, drizzle into the pie crust mixture with mixer on low, add a little more until the mixture forms a doughy ball.
- Remove from mixer onto a lightly floured surface and form the dough gently into a ball (careful not to overwork the dough here). Divide into two balls, flattening out with hand. Wrap well and refrigerate for 30 minutes. Roll out dough (instructions below).
Pie Crust By Hand | Without food processor
- In a large bowl add 1 ½-2 cups of flour, salt and/or sugar if using, mix to combine.
- Place the small cubes of butter, in bowl — try for ¼ inch cubes for making a crust by hand. Using a pastry cutter, your fingers or two knives work the butter into the flour mixture until well combined, sprinkle ¼ cup of the remaining flour over the mixture, working each time until all of the flour is incorporated, but the dough is still crumbly.
- Sprinkle the dough with 4 tablespoons of ice water, working into the dough until it just starts sticking together, only adding 1 teaspoon additional ice water at a time. Once the dough starts to hold together, stop adding water. Proceed with the recipe.
- See notes for how to par-bake (blind bake) or make crusts. Or follow instructions on your pie recipe.
Notes
Nutrition


MG
I followed directions exactly including freezing for a half hour before baking and it completely collapsed during pre-bake. Ugh!
Hi MG, I am so sorry to hear that! I never like hearing when a recipe didn’t turn out. Was it filled, or were you blind baking it? Did you use dry beans or pie weights if you were pre-baking it? Plus you should prick it all over so that it doesn’t puff up, including the sides. Also, if you overwork the dough or stretch it too much when putting into the pie plate that can do it too. If you had a filling and baked it that way, it could be because it wasn’t anchored well on the pie plate too. But, again I never like hearing this, pie shells can be a bit fuzty at times, I’d love to help you troubleshoot! But again, I’m so sorry!
Julia
I’ve always had trouble with pie crust but this one is so easy and turned out lovely. Thank you
So glad to hear that Julie, always makes me smile! Have a beautiful week!
Michelle
This pie crust sounds so simple! I can’t wait to try this Thanksgiving
You will love it!
Lima Ekram
Great tips – really needed some guidance on blind baking and this was really helpful!
So glad it helped!
kushigalu
Love this simple 3 ingredient pie crust recipe. Thanks for sharing
You are welcome!
Angela
Love this recipe! It’s just what I was looking for this holiday season. All butter crusts are the best!
They are the best! Thanks so much Angela!
Ashley Riddle
This was the most delicious recipe. Bookmarking and can’t wait to make this again!
YAY!
Michaela Kenkel
This is a really great pie crust recipe!!
Thank you so much Michaela!
Aimee Mars
I wasn’t sure how this was going to turn out as it was something very new for me. I followed the directions and it was so easy – and delicious!
YAY! Always love it when it works out well for my readers!
Tayler
This pie crust is absolutely perfect! Perfectly flaky and so buttery!
Thanks Tayler!
Kim
I love the flaky texture this pie crust gets. And so easy to make with what I already had on hand. It’s a great recipe!
Thank you so much!
Stephanie
I am definitely going to try the stand mixer method. My husband keeps complaining because I made him buy me a KitchenAid that just takes up space on the counter! I’ll shut him up with pie 🙂
Haha, you crack me up. I think pie is the answer to many things! 🙂
Mirlene
All the 3 methods helped. Sometimes I dont want to grab my mixer so I just end up doing the hand method!
Fabulous! So glad that it worked so well for you!
Lynn Spencer
Thanks for this very helpful tutorial! This has always been a challenge for me.
So glad that it helped Lynn!
Mindy
BEST homemade pie crust! This has become my go-to recipe. Used it for a few of my pies and everyone loved it. No more store-bought pie crust for me!
Well you made my day Mindy! Thanks!
Lynn
I’ve never made an all butter pie crust, but this was a great recipe! So flaky and the flavor was amaaaaazing. Thanks!
So glad you enjoyed it!
Sheila Thigpen
Thanks to all your tips I am no longer intimidated about making pie crust from scratch!
So glad to hear that Sheila!
Megan
Your instructions and tips are very thorough. It makes me less worried about pie season!
Yay! Thanks for making my day!
Debi
I’ve never been a fan of making my own crust. Just so much work. But this was so tasty I may have to change my tune. Thanks for this recipe!
So glad you tried it Debi!