

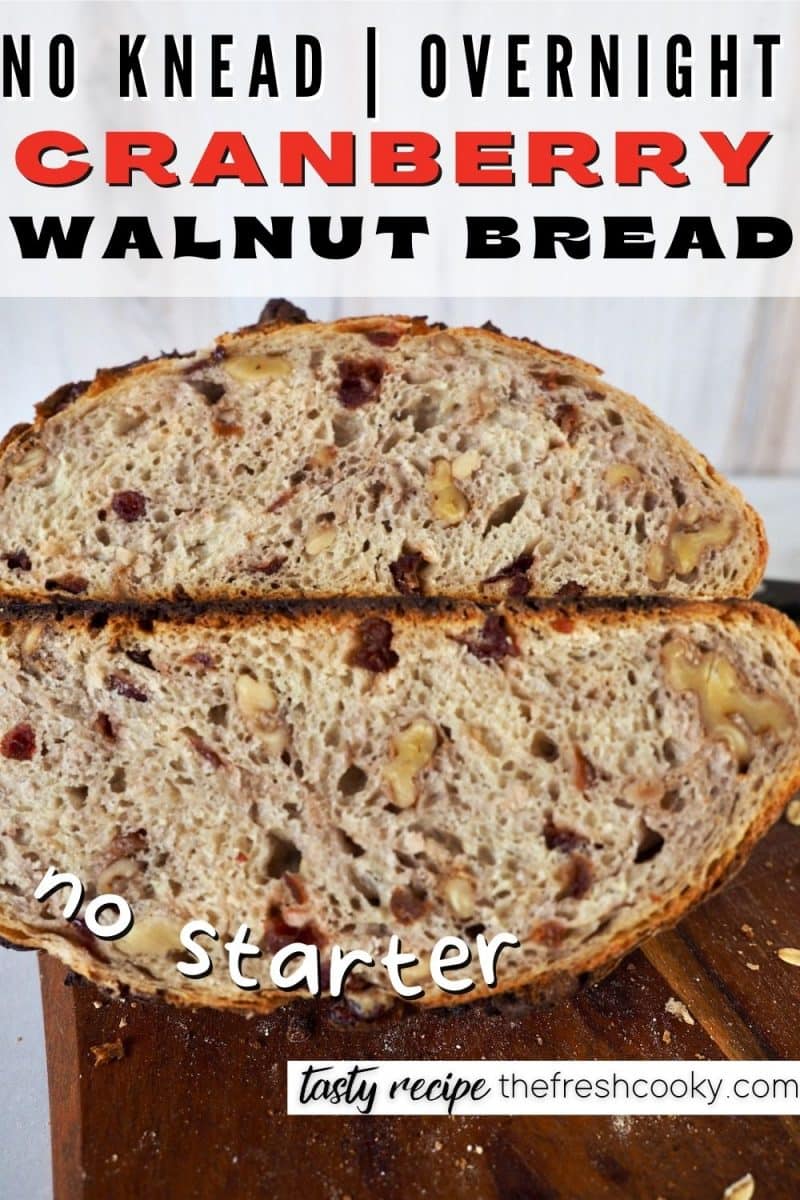
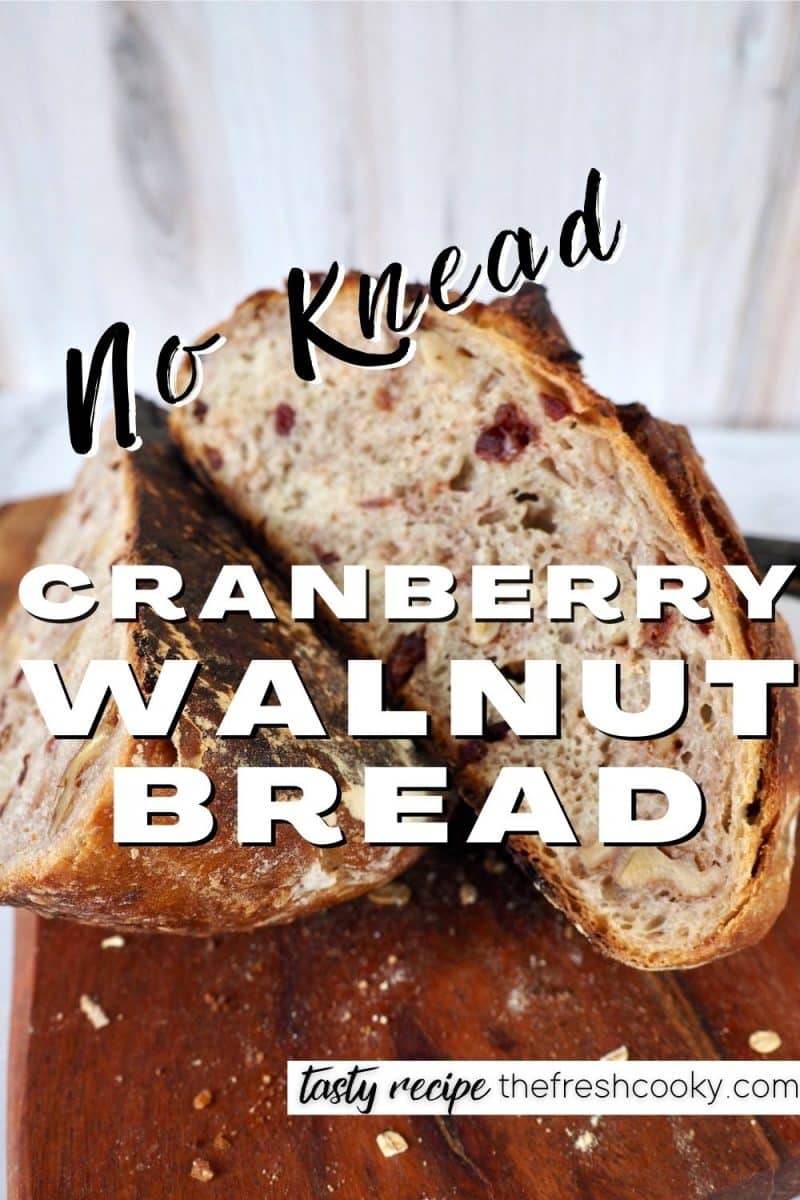
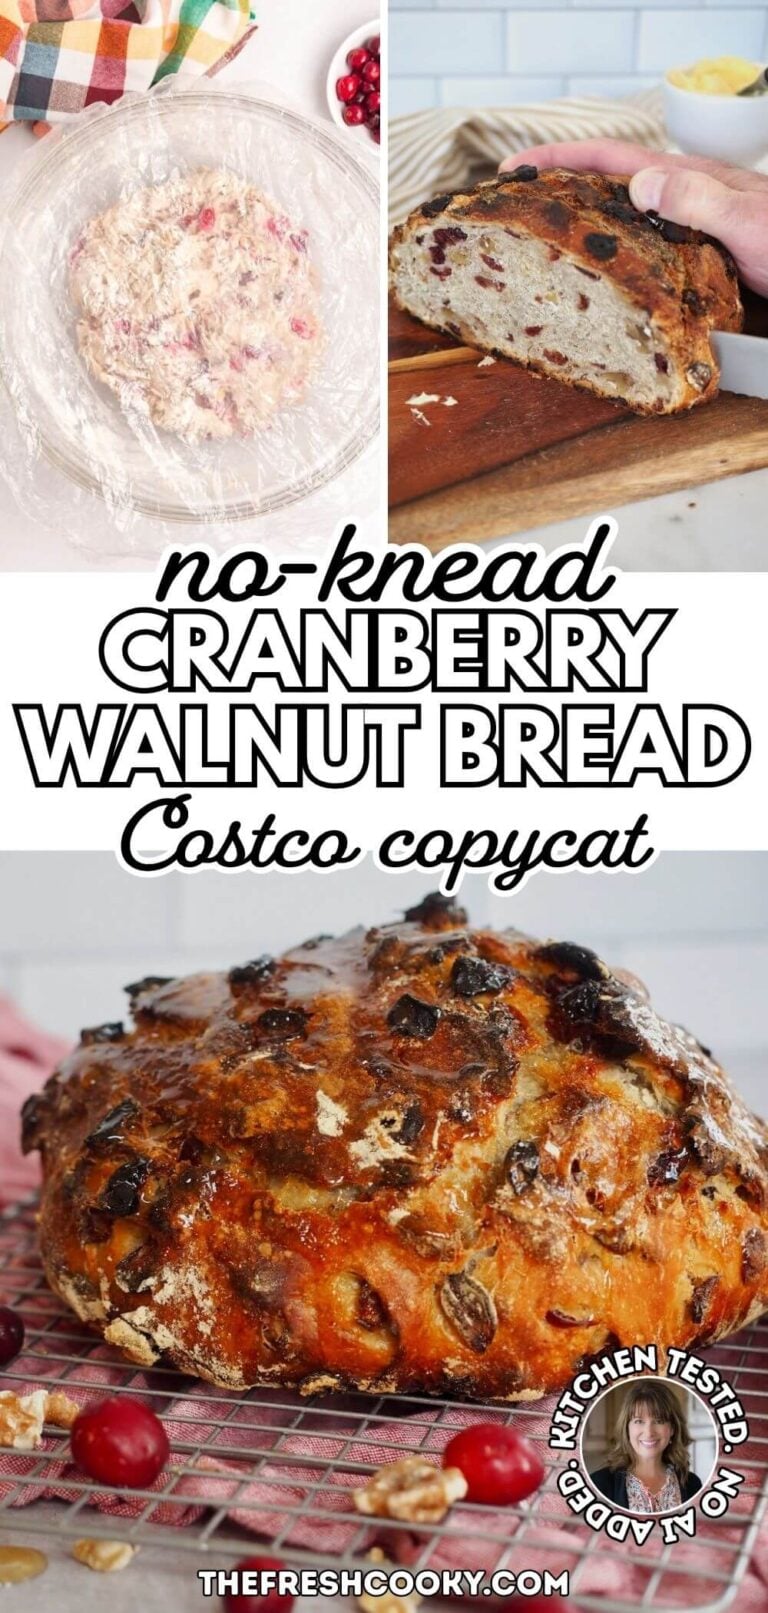
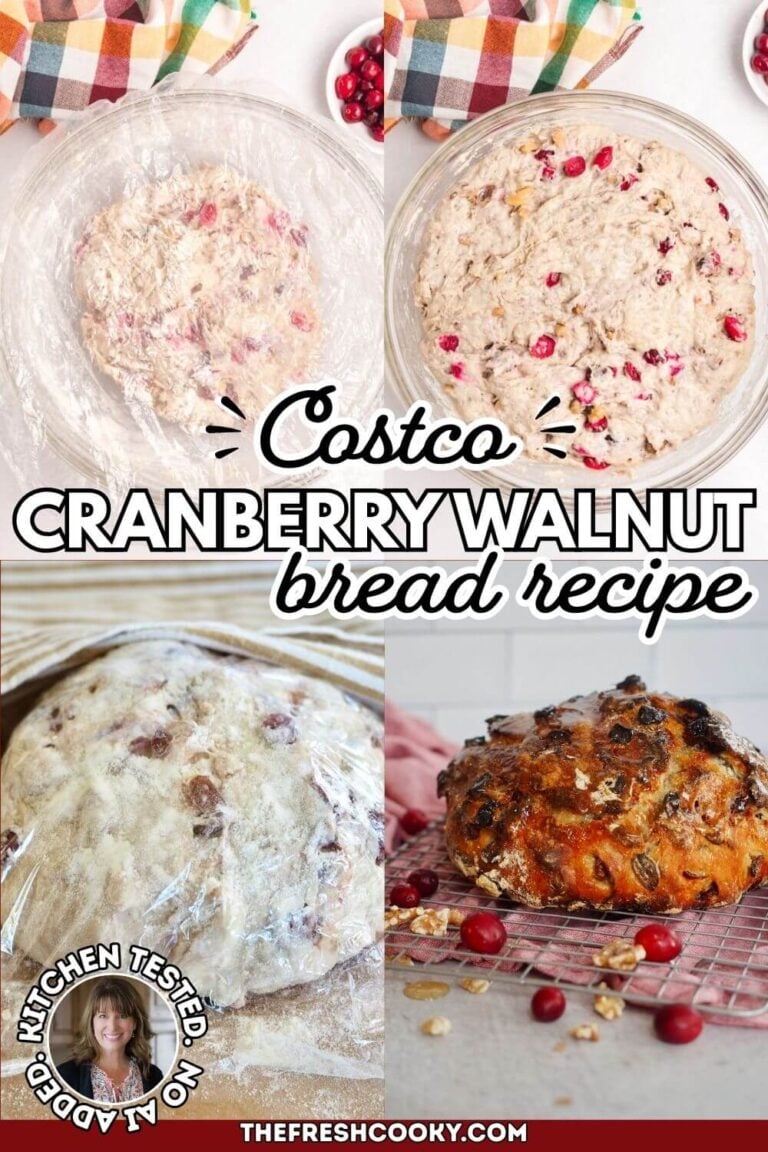
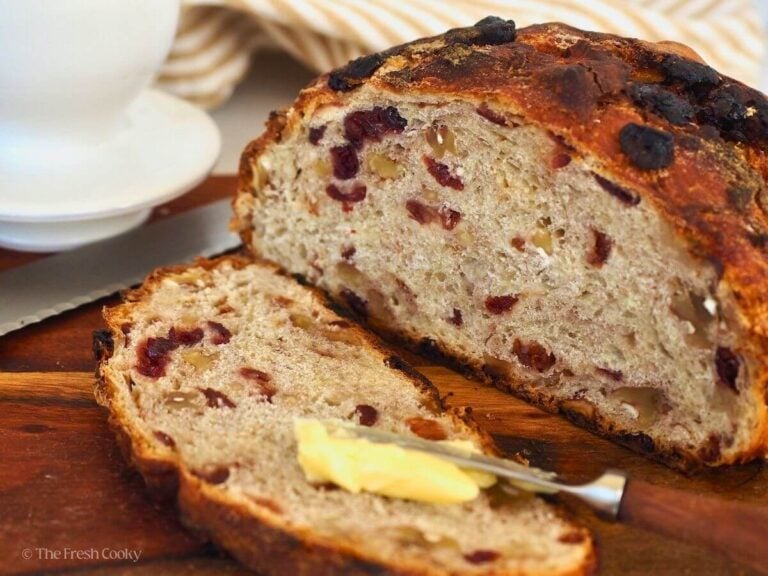
This no-knead cranberry walnut bread recipe is my homemade take on the big round Costco boule. I baked them side by side, and mine has a better chew and more cranberries and walnuts in every slice. Ten minutes of stirring, an overnight rise and a hot Dutch oven do the rest.
⭐️⭐️⭐️⭐️⭐️ Connie said: “Came out great! This is the second time making this bread. Definitely not the last. We love this bread and gobble it up. It’s torture to wait for it to cool.” ~ Connie
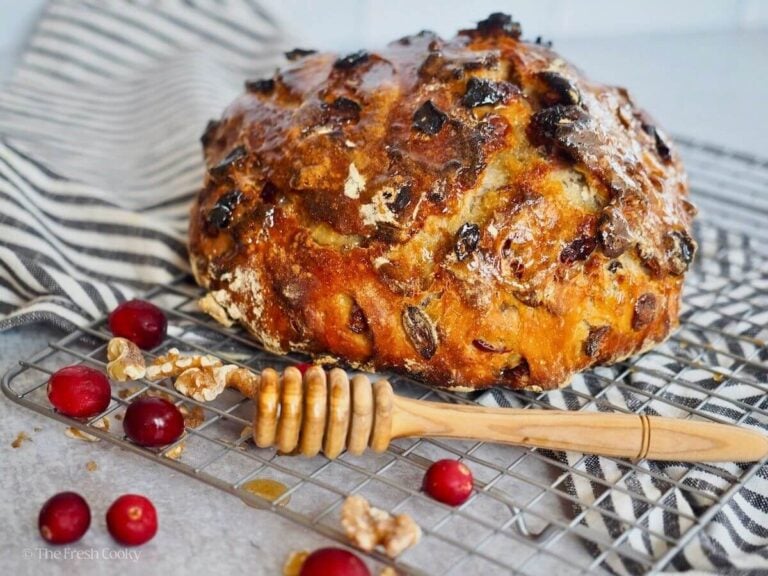
Recipe update, October 2026: I’ve baked this bread for years, and your comments helped me make it even better. Here’s what’s new:
- Lower bake temp. Preheat to 450°F, then drop to 425°F when the dough goes in. It helps keep the bottom from getting too dark.
- Less time with the lid off. 10 to 15 minutes, until the crust is deep golden brown.
- Warm water, not hot. About 100 to 105°F, or cool water in a hot summer kitchen.
- New tips. The best places to let your dough rise, a same-day version and gluten-free notes.
Same 7 ingredients. Same bread you love.
I Baked Mine Next to Costco Cranberry Walnut Bread. Mine Won.
My love affair with this bread started on a family vacation to Maine, visiting my husband’s family. We stopped at When Pigs Fly in Freeport, the town where L.L.Bean is. We tried their cranberry walnut loaf and loved it. Except my oldest, who has a tree nut allergy, so I bake a nut-free loaf when he’s home.

I came home to Colorado and started experimenting. Hundreds of loaves later, most of them handed over the fence to neighbors; this is the one I landed on.
Then I bought the big round Costco cranberry walnut bread boule and baked mine right next to it. We tasted them side by side, and mine won. Here’s why:
- Better chew. The long, slow overnight ferment builds a chewier crumb and deeper flavor than a quick bakery rise.
- More cranberries and walnuts. I use a full cup of each, so nearly every bite gets both.
- Simpler ingredients. Costco’s loaf lists 15 ingredients, including dough conditioners and enzymes. Mine has 7, and honey stands in for sugar.
- Year-round. No waiting for it to show up in the bakery case each fall.
Because I bake in Colorado, I’ve also included my high-altitude tips, and my team of volunteer recipe testers has tested the recipe at sea level.

Why You’ll Love This No-Knead Cranberry Walnut Bread
- No kneading, no mixer, no starter. It’s the perfect beginner loaf if you’re new to bread baking. All you need is a wooden spoon and 10 minutes.
- It works around your schedule. Mix the dough after dinner, bake it the next morning or afternoon. If life gets busy, the dough can wait in the fridge.
- A real bakery crust. The hot Dutch oven traps steam, so the crust bakes up crackly and golden.
- Barely sweet. A quarter cup of honey balances the tart cranberries without turning it into dessert.
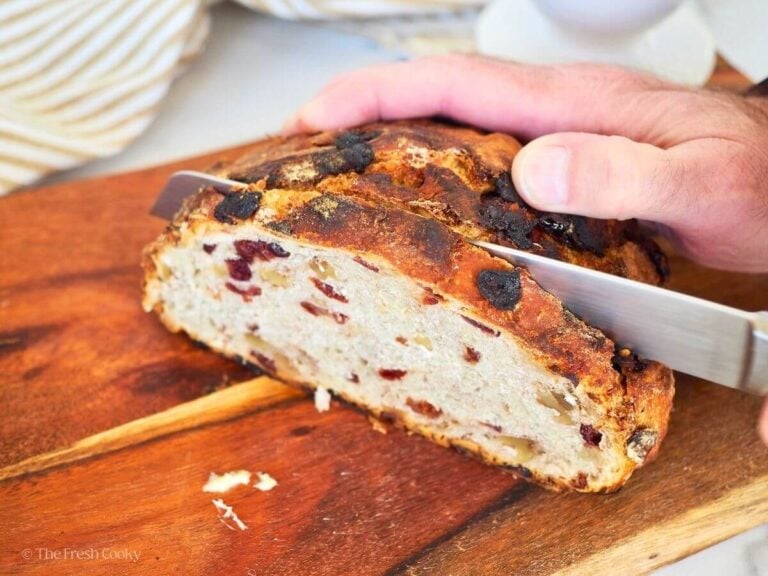
Cranberry Walnut Bread Recipe Ingredients
- All-purpose flour: No fussy flour here! I use unbleached organic all-purpose flour. You can also use bread flour, yielding a slightly chewier loaf.
- Instant Yeast: You can use either instant or active dry yeast, but I highly recommend instant yeast (“rapid rise” or “quick rise” yeast) for this recipe. My go-to is Saf Instant Yeast. It’s a reliable favorite. You only need ½ teaspoon since the long rise time does the work.
- Kosher Salt: Kosher salt isn’t quite as salty as table salt, so it brings out the flavors without overdoing it.
- Chopped Nuts: Use walnuts or pecans or your favorite nut here, roast and cool them ahead of time if desired.
- Dried or Fresh Cranberries: I have used both, and I like both; fresh definitely have more of a tart bite to them, but they are delicious.
- Water: Use warm water, about 100 to 105°F. In a hot summer kitchen, use cool water instead so the long rise doesn’t over-proof. An instant-read thermometer works great for this!
- Honey: I like raw and unfiltered honey. I always encourage people to buy local honey; it can help with allergies!
Get the full recipe in the recipe card below.
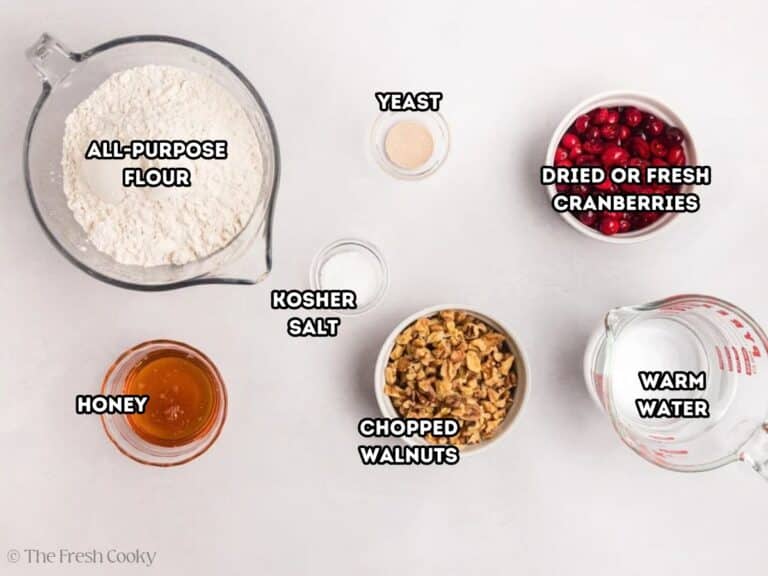
How to Make Cranberry Walnut Bread
This is a yeast bread, not a quick bread, so don’t let the 18 hours scare you. You’re only busy about 10 minutes the night before and 10 more the next day. The rest is just waiting.
Step 1: Mix Dry Ingredients
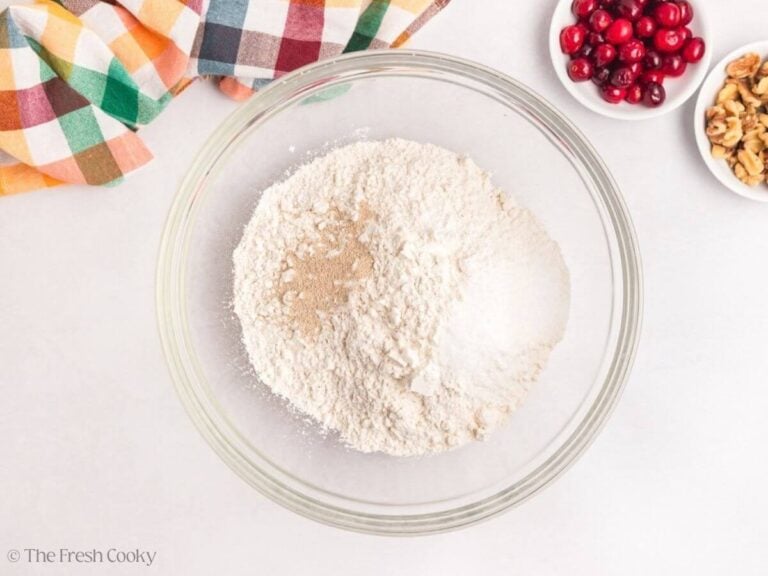
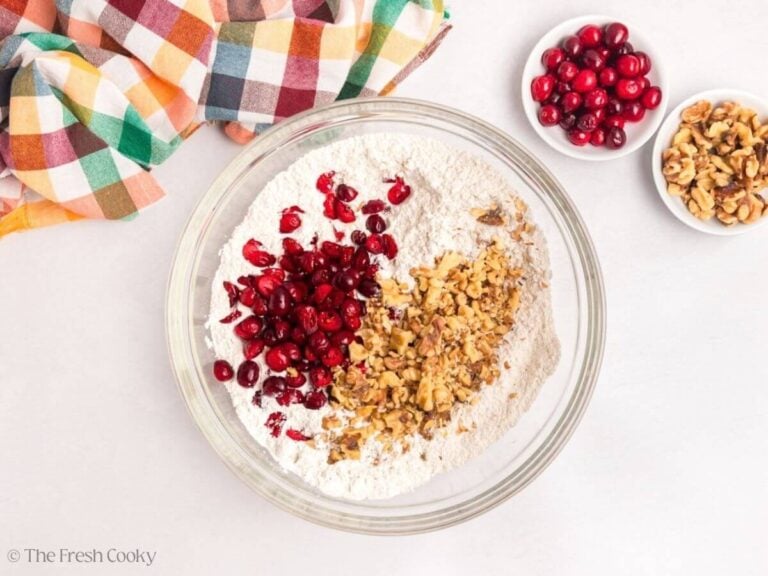
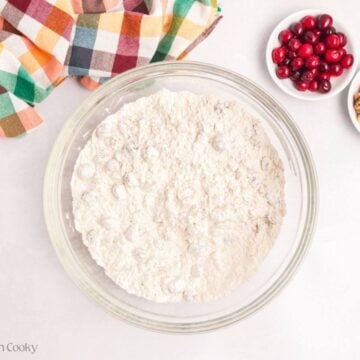
The evening before, assemble your dough. In a large bowl, whisk the flour, salt and yeast together. Then stir in the walnuts and cranberries with a wooden spoon.
Step 2: Add Liquid Ingredients
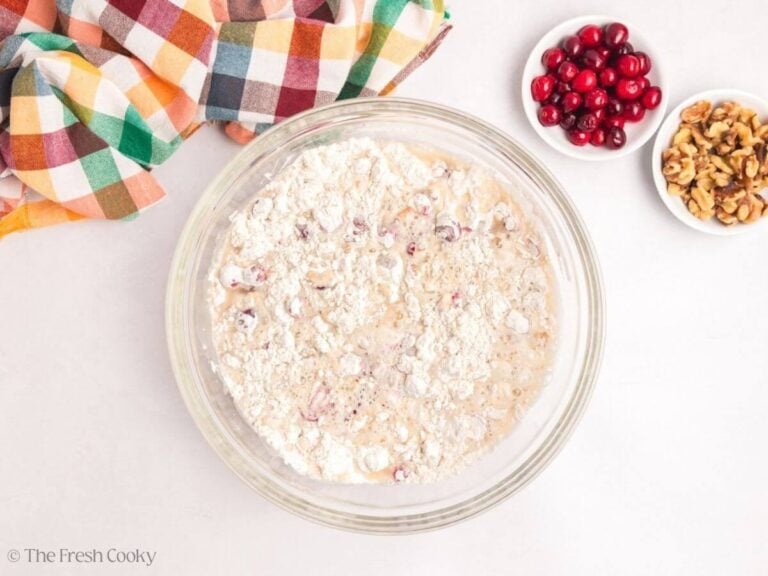
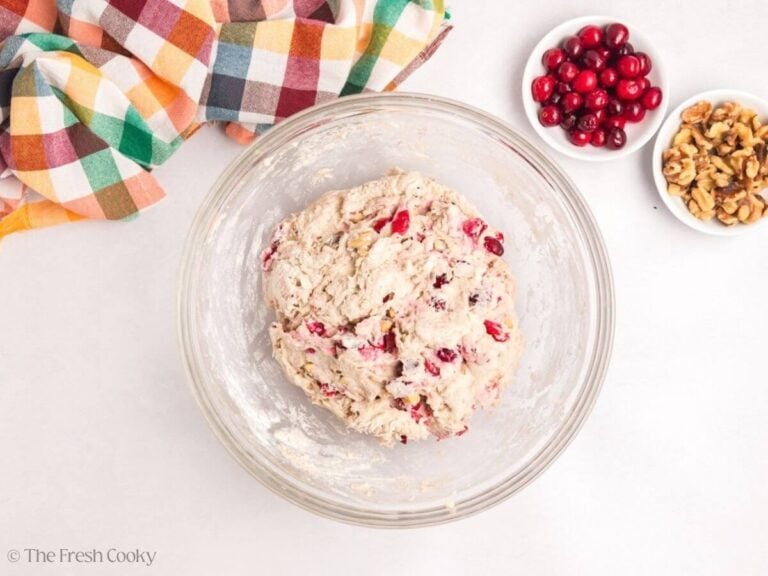
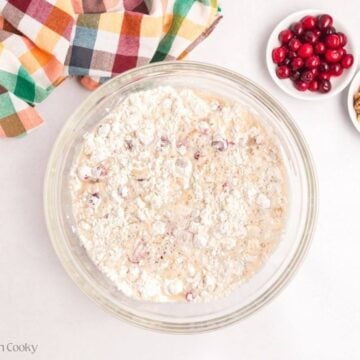
Stir the honey into the warm water. Add it to the flour mixture and stir until no dry flour is left. The dough will be very sticky.

Step 3: Cover and rise
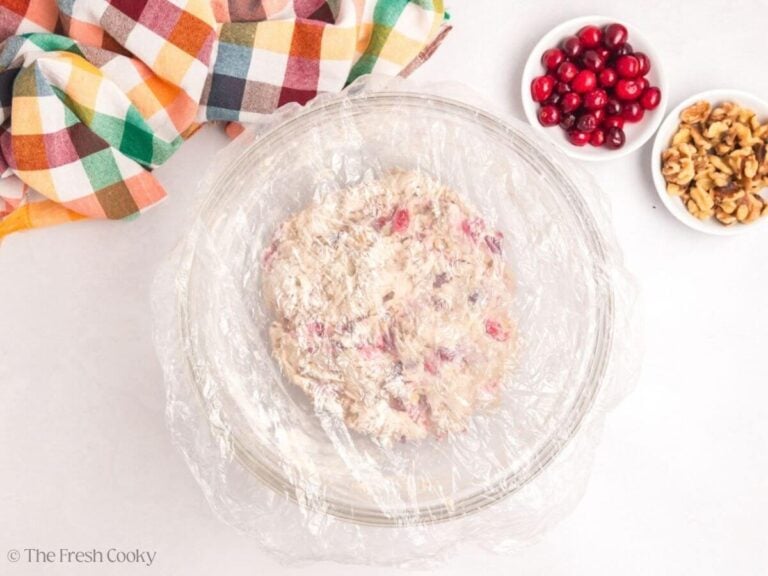
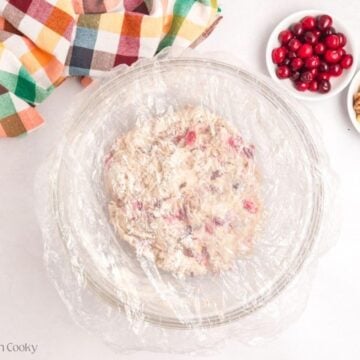
Cover the bowl tightly with plastic wrap. Set it in a warm area, away from drafts, for 12 to 18 hours (yes, hours!).
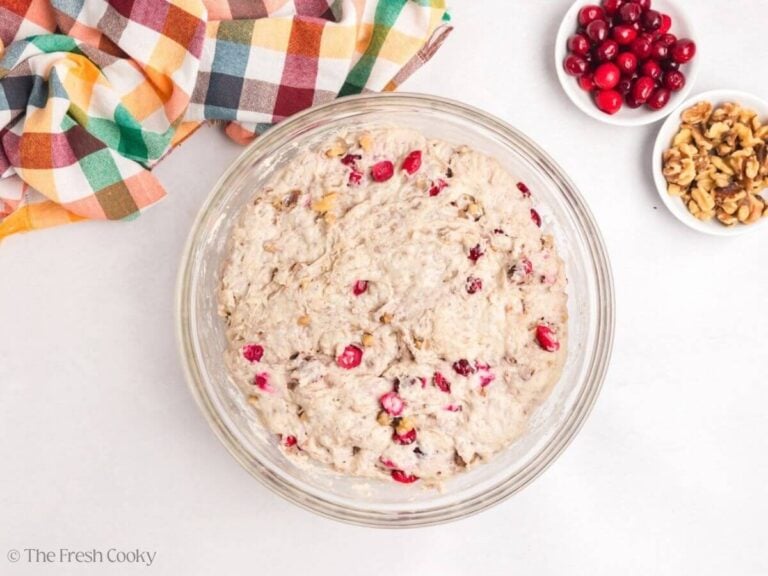
Allow it to rise until doubled in size. If your house is warmer, this may happen sooner. It should be nice and bubbly on top.
Best Places to Let Your Dough Rise
This bread dough is happiest around 70 to 75°F. Watch the dough, not the clock. It’s ready when it has doubled and the top is bubbly.
- Oven with the light on. Keep the oven off and just flip on the light. Many ovens hold right around 75°F. Some oven lights run hotter, so check with an oven thermometer the first time. Mine is much too hot to use the lights.
- Warm oven trick. Heat the oven to 100°F, then turn it off. Set a bowl of hot water on the rack, add your dough next to it and close the door. Don’t peek.
- Your oven’s proof setting. If your oven has one, it’s made for exactly this.
- Microwave. Heat a bowl of water in the microwave until it’s hot to the touch. Set your covered dough inside with it, close the door and leave it alone.
- Too warm? Use the fridge. In summer, or anytime your kitchen runs above about 80°F, the dough can double in just a few hours and over-proof. Then it won’t rise in the oven. If it doubles early, slide the covered bowl into the fridge and bake it when you’re ready.
Step 4: Shape and rise again
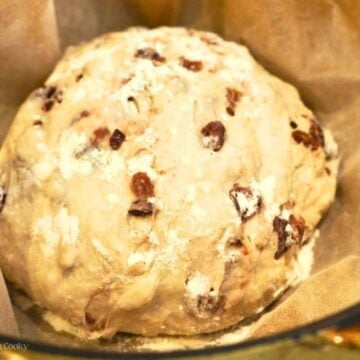
Once the dough has doubled in size and is bubbly like shown below, preheat your oven to 450°F.
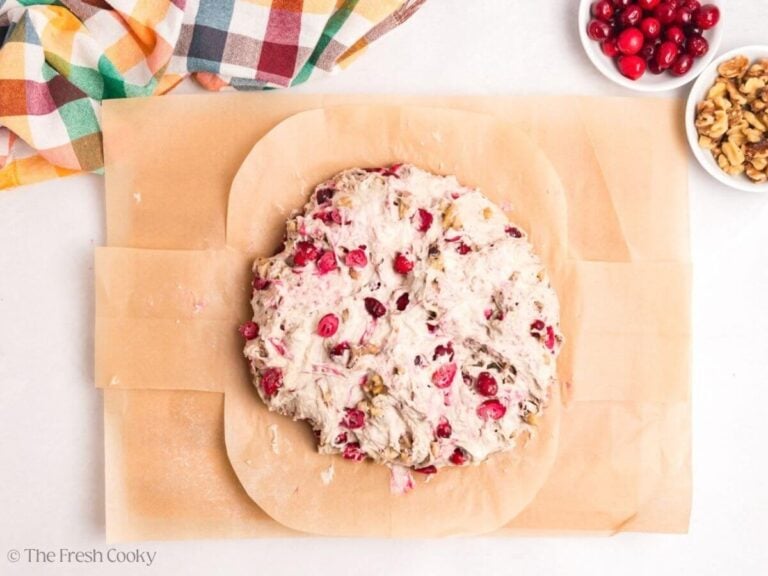
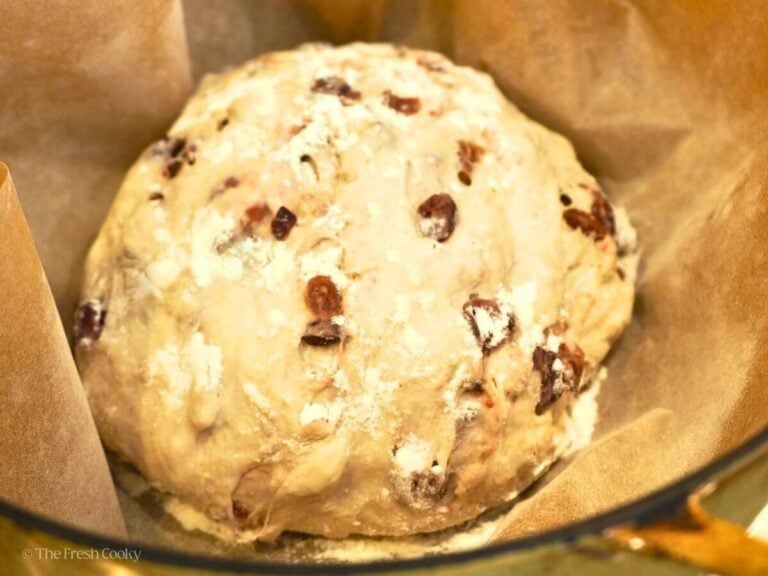
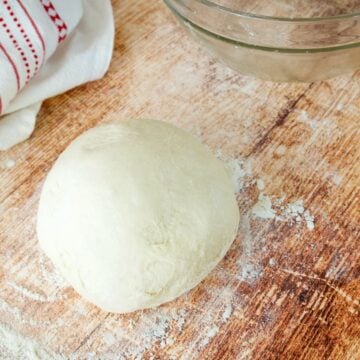
Carefully transfer the dough onto a flour-dusted piece of parchment paper using floured hands. It will be floppy and sticky (a very scientific term, of course!). Fold the edges into the center, then flip the dough over so the folds are on the bottom. Gently shape it into a ball.
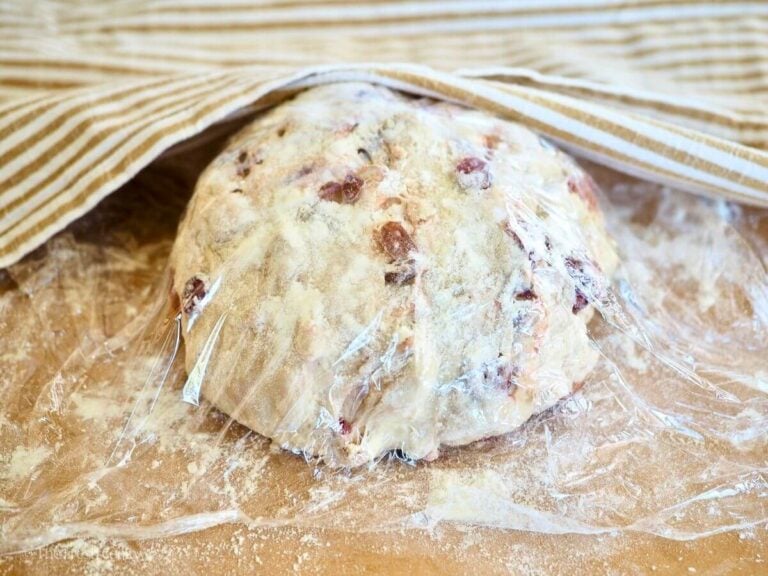
Cover the shaped dough with plastic wrap (sprinkle a little flour on top of your dough if it’s still really sticky). Let rise for another 30 to 45 minutes, allowing your oven to preheat with the Dutch Oven inside!
Remove the plastic wrap. Don’t worry if the dough doesn’t look like it has risen too much; it will puff up once it hits the heat of the oven. And if desired, score the top with a knife or lame.
Step 5: Bake
CAREFULLY (it’s really hot!) remove the pot from the oven and set the lid aside. Use the excess parchment paper as a sling to gently lower the dough, seam side down, into the Dutch oven. Lower the oven temperature to 425°F. Cover with the lid (also hot!) and return to the oven for 25 minutes. No peeking while the bread bakes! This is when the crust develops.
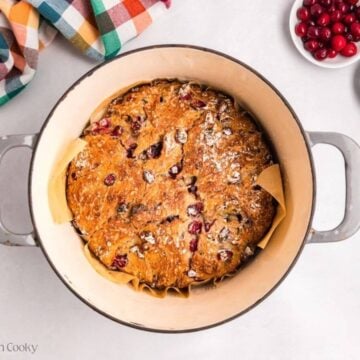
Remove the lid and bake another 10 to 15 minutes, until the crust is a deep golden brown, almost mahogany. The center should read 200 to 210°F (93 to 99°C), but go by color too. A loaf can hit 210°F before the crust and crumb are fully set. Using the parchment paper, carefully lift the bread out of the Dutch oven and set it on a wire rack to cool completely.
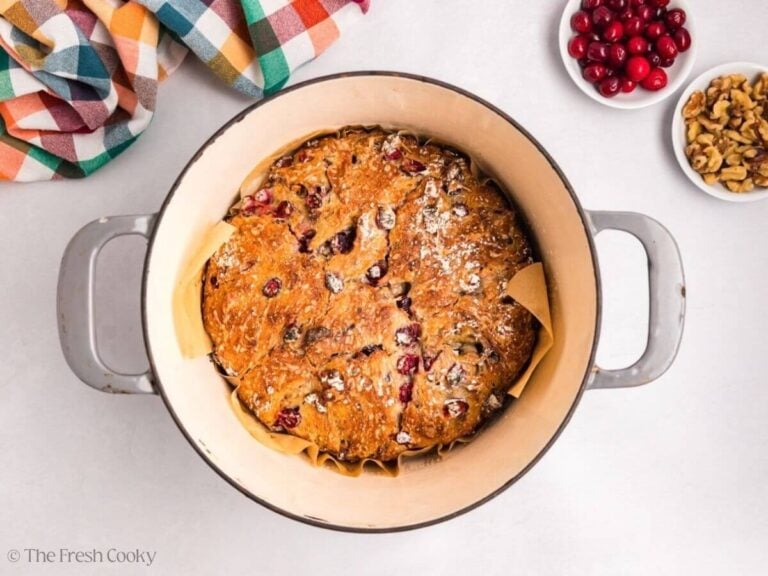
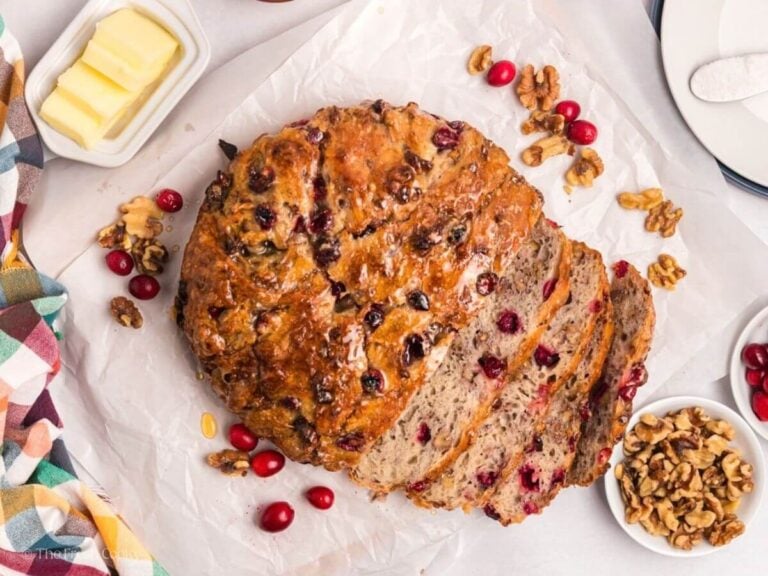
Don’t cut into the bread until it has cooled. Breads continue to bake while cooling, and if you cut into one too soon, it could become gummy inside.
If desired for a softer, sweeter crust, brush with a little honey.
Same-Day Cranberry Walnut Bread (No Overnight Rise)
No time for an overnight rise? Use a full packet of yeast (2¼ teaspoons) instead of ½ teaspoon. Stir 1 tablespoon of apple cider vinegar into the honey water. It adds the same little tang you get from a slow overnight ferment.
Mix the dough the same way. Let it rise in a warm spot, 75 to 78°F, for 1½ to 2 hours, until more than doubled. Mine took the full 2 hours in a cooler kitchen. On a warm day, it’ll rise faster, so start checking early. Then shape and bake as directed.
How to Bake Cranberry Walnut Bread without a Dutch Oven
You won’t need a loaf pan for this one. It bakes free-form as a round boule.
Baking stone or steel method:
- Place a baking stone or steel on the center rack and an empty cast-iron skillet or heavy metal pan (never glass) on the rack below, offset to one side. Preheat to 450°F (230°C).
- Slide the shaped loaf, parchment and all, onto the stone.
- Wearing a good oven mitt, carefully pour about 3 cups of boiling water into the hot skillet and shut the door fast to trap the steam.
- Bake 35 to 40 minutes, until deeply browned and the center reads 200 to 210°F.
Sheet pan method: No stone? Use a heavy, rimmed baking sheet on the center rack with the same steam pan underneath. The bottom crust will be a bit softer, but the loaf will still be delicious.
Heavy-lidded pot method: Any oven-safe pot with a tight lid (an enameled roaster, a heavy stockpot with metal handles) works much like a Dutch oven. Preheat it the same way. A reader had good luck with a roaster!
Success Tips for the Cranberry Nut Bread
- Check your yeast. If your jar has been open a while, proof a little in warm water with a pinch of sugar. No foam in 10 minutes means it’s time for a new jar. I keep mine in the freezer.
- Don’t fight the sticky dough. It should look wet and shaggy. Skip the extra flour; that moisture is what makes the open, chewy texture.
- Check early in a warm kitchen. If the dough doubles before 12 hours, bake it, or refrigerate it and bake in the morning.
- Preheat the pot fully. Give the Dutch oven at least 30 minutes in the oven. A lukewarm pot means a pale, flat loaf.
- Always line with parchment paper. The parchment paper helps you transfer the dough to the Dutch oven, but it also keeps it from sticking!
- High altitude: I bake at 5,280 feet. If your dough rises too fast, use a scant ½ teaspoon of yeast (about ⅓ teaspoon). Add 1 to 2 tablespoons of water if the dough looks stiff instead of shaggy.
- Cool completely. Let the bread cool on a wire rack before slicing to ensure the interior sets properly.
Cranberry Nut Bread Substitutions
- Nut-free: When my oldest (who has a tree nut allergy) is home, I leave the nuts out and add an extra ½ cup of dried fruit or sometimes chocolate chips. Pepitas or sunflower seeds add crunch without tree nuts.
- Other nuts: Pecans, almonds or hazelnuts all work in this cranberry nut bread. Pistachios are a great swap too. Give them a rough chop.
- Other dried fruit: Try dried cherries, dried blueberries, raisins, chopped apricots or dates. Chocolate chunks are fun too!
- Fresh cranberries: Chop them roughly instead of using whole cranberries, so they spread through the loaf. They’re more tart and a bit juicier, so the crumb near each berry will be moister.
- Warm spice: Add 1 teaspoon cinnamon for a loaf that tastes like Christmas morning. Swap the cranberries for raisins, and you’ve got a cinnamon raisin bread.
- Orange zest: Add the zest of 1 orange with the dry ingredients. Reader Lisa swears by it, and so do I!
- Whole wheat: Swap up to 1 cup of the flour for whole wheat. It gives a heartier, nuttier loaf. Don’t go past 1 cup. Whole wheat soaks up more water, so any more and you’d need to adjust the liquid too.
- Warm spice: Add 1 teaspoon cinnamon for a loaf that tastes like Christmas morning.
- Vegan: Use maple syrup instead of honey.
Storage Tips for No-Knead Cranberry and Walnut Bread
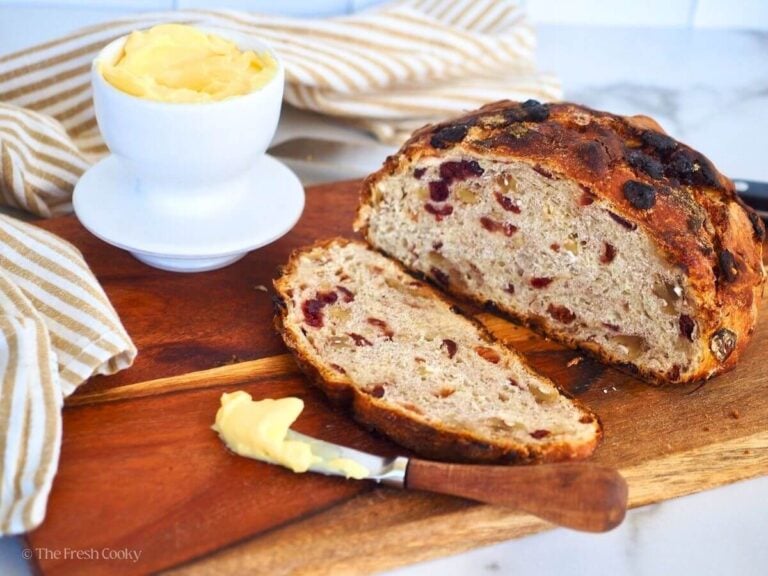
Room temperature: Store the cooled cranberry walnut bread cut side down on a board, or in a paper or linen bread bag, for 2 to 3 days. A plastic bag keeps it softer, but the crust will lose its crunch.
Skip the refrigerator. The fridge actually makes bread go stale faster. Freeze it instead.
Freeze the bread: Wrap the completely cooled loaf (or slices) tightly in plastic wrap and foil, then tuck it into a freezer bag or airtight container. Freeze up to 3 months. Thaw on the counter, then warm in a 350°F oven for 5 to 10 minutes to bring the crust back.
Ways to Use and Gift Cranberry Nut Bread
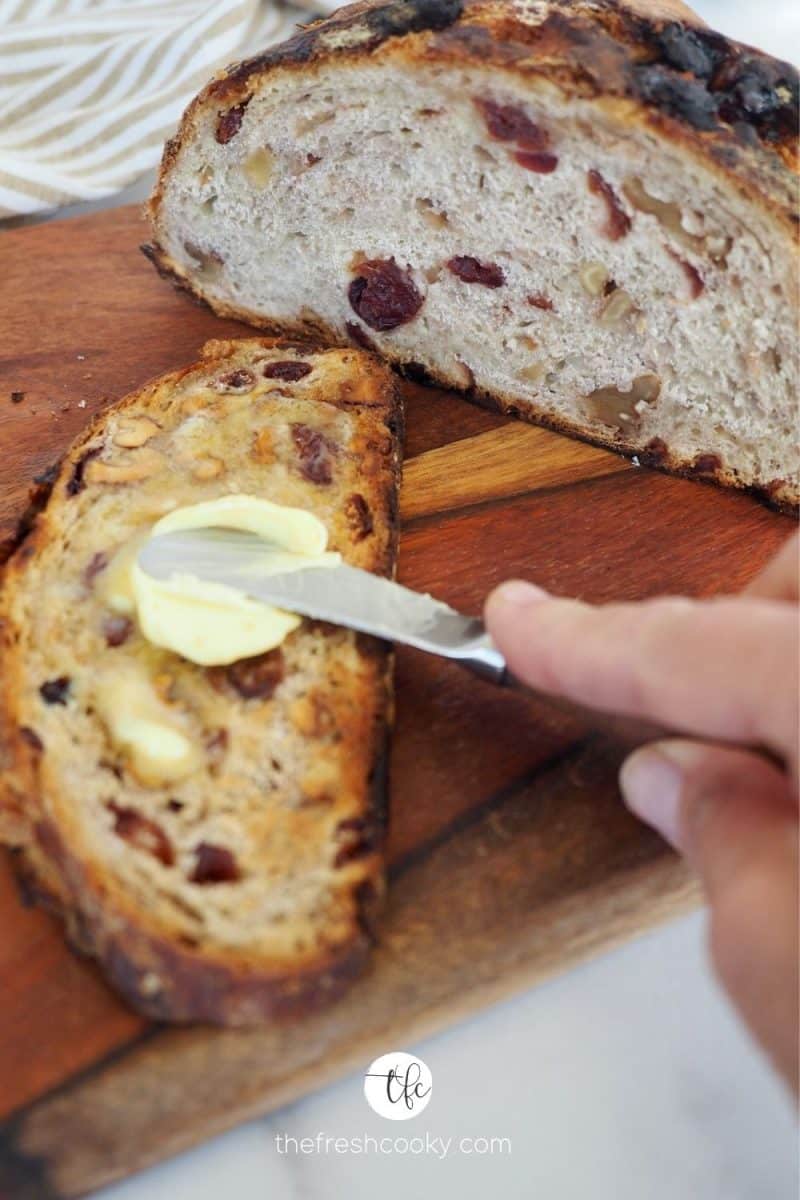
- Toasted with butter: Our favorite! Toast a thick slice until crispy and slather it with grass-fed European butter or my whipped honey butter and jam. You’ll need a napkin.
- Leftover turkey sandwiches: Pile on turkey and a spoonful of my fresh cranberry relish, then toast or grill. AMAZING. For softer lunchbox slices, try my whole wheat sandwich bread recipe.
- Cheese board: Thin, toasted slices are perfect with brie, goat cheese or sharp cheddar.
- French toast or bread pudding: Day-old slices are perfect for soaking up custard. Try it in my chocolate bread pudding.
- Stuffing and croutons: Cube and dry the last bits for my Thanksgiving stuffing or homemade croutons.
- As a gift: Let the loaf cool completely, wrap it in parchment, tie it with baker’s twine and add my free Christmas gift tags or From the Kitchen of tags. Bake it the day before you give it so it’s at its best.
Frequently Asked Questions
Costco’s Kirkland Signature label lists flour, water, walnuts, cranberries, sugar, whole rye grains, durum flour and semolina, cultured durum flour, salt, yeast and sunflower oil, plus dough conditioners, ascorbic acid and enzymes. My copycat keeps it to 7 pantry ingredients, with honey instead of sugar.
It isn’t labeled sourdough. It’s a yeast bread, with a little cultured durum flour that adds some tang. My overnight ferment gives you that same deep, slightly tangy flavor without a sourdough starter.
Yes! Bread flour has more protein, so your loaf will be a little chewier and rise a touch higher. Use the same amount.
Yes, use the same ½ teaspoon. Stir it into the warm honey water first to dissolve, then add it to the flour.
Absolutely, I’ve baked it both ways. Roughly chop fresh or thawed frozen cranberries. They’re more tart and release a little juice, so expect a slightly moister crumb around the berries.
No. They plump up on their own during the long rise.
That’s how this no knead cranberry bread works! The high moisture lets the gluten develop on its own over time, so you never have to knead. Flour your hands, not the dough. And gently pull it into a tight ball, watch the video to see how.
If it doubles early, bake it or move it to the fridge to slow down. Warm kitchens (above about 85°F) and high altitude both speed things up and can lead to over-proofing.
Usually it’s old yeast or a chilly kitchen. Test your yeast, and give the dough a warmer spot (70 to 75°F is ideal), like your oven’s proof setting.
Your pot may be too close to the heating element, your oven may run hot, or your Dutch oven may be dark inside, or might be too thin. Move the rack up, lower the temperature 25°F, and check your oven with an oven thermometer. Many ovens run 25°F hot or cold, so get to know yours.
Anything from 4 to 6 quarts works. Smaller pots make a taller, rounder loaf, while larger pots make a wider, flatter one.
Usually the dough didn’t rise long enough, often from a cool kitchen or tired yeast. Wait until it doubles and looks bubbly, no matter what the clock says. Adding extra flour to the sticky dough, slicing it warm, or pulling it before the center hits 200°F can also make it dense.
I haven’t tested it. The long, slow rise and the hot Dutch oven give this loaf its chew and crackly crust, and a bread machine won’t do either. If you try it, pick the longest cycle so the dough ferments as long as possible, and make sure your machine can handle 3 cups of flour.
Yes! Use a full packet of yeast (2 ¼ teaspoons) and stir 1 tablespoon of apple cider vinegar into the honey water. Let it rise in a warm spot for 1½ to 2 hours, until doubled. See the same-day section above.
Yes, I’ve made it with gluten-free flour. Fair warning, it bakes up heavier and denser than the regular loaf. Mine was still delicious, especially toasted. Next time, I plan to try a packet of yeast and a warm-spot rise instead of the overnight rise. Give it the full bake time so the center cooks through.
Two reasons: slicing it too soon, or not baking it long enough. Bread keeps baking as it cools, so give it at least 2 hours. Bake until the crust is a deep golden brown, not just when the thermometer hits 200°F. Already cut into a gummy loaf? Toast the slices. They’ll still taste great.
Like this recipe?
Don’t forget to give it a ⭐️⭐️⭐️⭐️⭐️ star rating and leave a comment below the recipe!
Video
Equipment
Ingredients
- 3 cups all-purpose flour + 3 tablespoons; May also use bread flour for a chewier loaf
- ½ teaspoon instant yeast make sure your yeast is fresh, see notes if using active dry yeast
- 2 teaspoons kosher salt
- 1 cup walnuts chopped, or use pecans or your favorite
- 1 cup dried cranberries or replace with fresh, rough chopped
- 1 ½ cups water warm, about 100 to 105°F
- ¼ cup honey + more for brushing if desired
Special Equipment Needed
- 4 to 6 qt (or larger) Dutch Oven make sure your Dutch oven is safe up to 500° F. See notes if no Dutch oven.
Instructions
- Add flour, yeast and salt to large bowl (large enough for dough to double), then stir together. Toss cranberries and walnuts and stir well to coat in the flour mixture.3 cups all-purpose flour, ½ teaspoon instant yeast, 2 teaspoons kosher salt, 1 cup walnuts, 1 cup dried cranberries
- Pour honey into warm water and stir to combine. Pour honey water into flour mixture. Stirring to combine, it will be sticky, that’s okay!1 ½ cups water, ¼ cup honey
- Cover the bowl with plastic wrap and let it rise until doubled, 12 to 18 hours (yes, hours!). This slow rise gives the bread its chewy texture and flavor.
- NEXT DAY Once the dough has risen, and dust a piece of parchment paper with flour; with floured hands, gently scrape the dough away from the bowl and onto the parchment paper, the dough will be stringy and floopy.
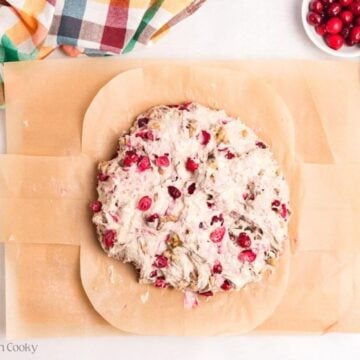
- Gently shape the dough into a round or oval shape, by pulling the outside towards the center, without overhandling it. Try and shape it as tight as possible without man-handling the dough. It will feel different than other breads, kind of fluid, that's alright! Cover the shaped dough with a piece of plastic wrap (sprinkle a little flour on top of your dough if it's really sticky) and then with a tea towel. Let rise for another 30-45 minutes while your oven preheats.
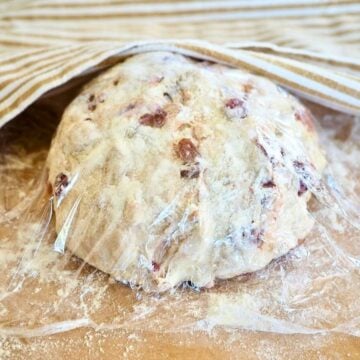
- Adjust your oven rack so that the Dutch oven sits several inches above the bottom, but still has plenty of clearance on the top. PLACE DUTCH OVEN with LID INSIDE THE OVEN TO HEAT WITH THE OVEN. Preheat oven to 450°F (230°C) You will reduce the temperature as you put it in the oven. See notes for dark Dutch ovens.4 to 6 qt (or larger) Dutch Oven
- Remove the plastic wrap, don’t worry if it doesn’t look like the dough has risen too much, it will puff up once it hits the heat of the oven.
- Reduce heat to 425°F.CAREFULLY (it's really hot!) remove the pot from the oven, set the lid aside and using the excess parchment paper as a sling, transfer bread dough to the Dutch oven, cover with lid (it's hot too!) and place back in hot oven, no peeking!! This is when the crispy crust develops.
- After 25 minutes, remove the lid (remember it’s still hot!) and bake another 10 to 15 minutes, until the crust is a deep golden brown, almost mahogany. Brush with honey while warm, if desired.How to test for doneness: Go by color first. Then check that the center reads 200 to 210°F (93 to 99°C) on an instant-read thermometer, and the bottom sounds hollow when you tap it.
- Cool on wire rack. Resist cutting into the bread until it has mostly cooled, breads continue to bake while cooling and if you cut into it too soon it could make it gummy inside. I recommend at least 2 hours.
Notes
- Yeast and water: Instant or active dry yeast both work, same ½ teaspoon. Use warm water, about 100 to 105°F. In a hot summer kitchen, use cool water so the long rise doesn’t over-proof.
- Rise time: Watch the dough, not the clock. It’s ready when it has doubled and the top is bubbly. In a warm kitchen (above 80°F) or at high altitude, that may take only 8 to 10 hours. If it doubles early, refrigerate it until you’re ready to bake.
- Same-day bread: Use a full packet of yeast (2¼ teaspoons) and stir 1 tablespoon of apple cider vinegar into the honey water. Rise in a warm spot, 75 to 78°F, for 1½ to 2 hours, until more than doubled.
- High altitude: I bake at 5,280 feet. If your dough rises too fast, use a scant ½ teaspoon of yeast (about ⅓ teaspoon).
- Dark bottom crust: Set the rack one level above the bottom. Lower the oven 25°F if your Dutch oven is dark inside or you’re using convection. An oven thermometer will tell you if your oven runs hot.
- Storage: Keep at room temperature for 2 to 3 days. Skip the fridge; it makes bread stale faster. Freeze up to 3 months.
Nutrition








Jan
We loved this bread! It was so easy to make and the taste was delicious. I used bread flour and the texture was so good. It got a little too dark on the bottom so next time I will follow the note regarding this and lower oven temp to 425 degrees.
Thank you Jan!! Love hearing this!!
Ellen Nowicki
Fabulous recipe. We love Publix Bakery cranberry walnut bread but the closest is 90 minutes away. I searched internet for recipe I could make at home. Printed 5 recipes but made this one first. It is so tasty and recipe is so easy to make no need to try other recipes! I used an envelope of regular yeast which I dissolved in 1/2 cup of the warm water and added 1/2 teaspoon sugar. Added this after it had bloomed to four mixture when water and honey was added. Baked in covered roaster. Thanks for great recipe
Sooo happy you found this too, Ellen! Thank you for your sweet comment! Happy baking!
Marilyn
I would love to make this as it looks beautiful! Can I make this in my breadmaker?
Hi Marilyn, I’ve never tried it. You won’t have the same outcome as the long slow rise is what gives it its characteristic chew and flavor. But if you give it a try let me know how it goes. It also might be a little too much ingredients for your bread machine. Maybe compare to other recipes as to how much your machine can handle. Let me know!
Connie
Came out great! This is the second time making this bread. Definitely not the last. We love this bread and gobble it up. It’s torture to wait for it to cool.
Thank you so much Connie! So glad you love it as much as we do! And I know it’s hard to wait for it to cool, but so important if not, you’ll have gummy bread and nobody likes gummy bread.
Kim Skattebo
It was so good we ate half the loaf at one time! Very easy!
Been there done that Kim!! Thank you so very much!
Linda Vliet
Perfect every time !
Yay!! So glad you love it Linda! Thank you!!
Gail
Followed recipe exactly. Used new yeast. Bread rose double in bulk within a few hours but I waited the 12 hours to shape and bake per instructions. No spring from the bread when I took off lid after first 30 minutes. Did not rise during baking process at all. What could have gone wrong?
Hi Gail, Sorry to hear that. Breads can be very temperamental when it comes to kitchen heat, it might have over-proofed if your kitchen was overly warm in these warm summer months, especially if it doubled in just a few hours. Assuming you made it using all-purpose flour and not gluten-free flour? But my hunch by your description of it being doubled in just a few hours, tells me it overproofed. I will add a note to the recipe about kitchen temperature, if you home was on the warmer side, you could have shortened the proofing time or placed it in the fridge to cold-ferment and proof overnight.
Gail
Made this again today in cooler weather. Let rise 13 hours. When I baked it the bottom was very dark, almost burnt. Should I lower the temperature? If so, to what?
Sorry to hear it was so dark, due to the honey that happens to me too at times. But I’ve never felt like it tasted burnt. Try lowering it by 25 degrees. And either use a silicone sling or fold 2-3 pieces of parchment paper and place it in the bottom of your pot. Plus make sure that it’s not sitting on the bottom of your oven. Raise the rack up one level, if you can and still fit your Dutch oven. Your oven might also run hot. Many many do! I’d recommend you put an oven thermometer in your see how hot it gets. The adjust accordingly. Happy baking Gail!
Becky Evertz
I tried this recipe using half white wheat flour and half whole wheat flour. I used yeast from a new jar and warm water. It didn’t seem to rise as much as I thought it should. Due to cooler outdoor temps in MN our indoor temp is a little cooler. Could this have made a difference?
For sure Becky, ideal rising temps are about 70-75 degrees and our homes this time of year are usually not that warm. Some oven lights are warm enough to keep it at that temp. But some oven lights can be too hot. If you have a proof setting on your oven or even some Instant pots have them that’s a good way to do it too. The whole wheat flour may have also played into it not rising as much, as it’s absorbs more liquid resulting in a lower rise. If you try that again it might help to add another 1/4-1/2 tsp of yeast and a little more water. Hopefully it still tasted great.
Becky Evertz
Thank you for the suggestions. We really like this bread and it’s an easy recipe. I will make some changes on the next loaf and let you know how it turns out.
So glad you liked it! Play around with it, and let me know your findings. Have a great day!
Marta
Thank you so very much for your prompt reply! I have had a heck of a time adapting my fave baking recipes to my high altitude location. My husband has been an angel though; he’s eaten my flat cakes & burnt cookies…LOL. You have made my day, Kathleen! Regards, Marta
Awe, thank you, Marta! One of the tricks is add a few extra tablespoons of flour, reduce your leavening, increase your oven temp by 25 degrees and some recipes require a bit more liquid. Bake for less time and you’ll have him singing your praises!
Marta
Hello Kathleen! I can’t wait to try this & many of your other recipes. I just have a question about them. I’m a recent California transplant to Albuquerque, New Mexico which is about 5,000 ft above sea leavel. Since you live “high” in Colorado, I was wondering if all of your recipes would turn out here without any adjustments? Thank you for your help and Happy Holidays!
P.S. I’m going to try your “Best High Altitude Chocolate Chip Cookies” first! This could just save my marriage….just kidding……Marta
Welcome, Marta! Yes! But when I have adjustments in the recipe use the adjustments!! But all of my recipes have been tested at sea level and altitude (5280). Some don’t need modifications!! You will love this bread and the chocolate chip cookies!! I’m all about saving marriages!! Let me know how they turn out!!
Marilyn
Hi, Can this be made in a bread maker. If so, how many pounds would say for the bread and the temperature and anything else I would need to know. Thank you. Marilyn
Hi Marilyn, I’ve never tried it, it’s a pretty standard loaf size, I’d say give it a try and see how it goes. You won’t get the same flavor as the overnight rise gives it a sourdough type flavor.
Marilyn
Thank you for responding so quickly.
Merry Christmas to you and your family!
Marilyn
You bet, Marilyn! Merry Christmas to you too!
charlene
I live on Cape Cod, Massachusetts
I make a Cape Cod Pilgram Sandwich. Turkey, French meat stuffing, Whole Berry Cranberry sauce mixed with Mayonnaise. I have also used bread stuffing with Store bought cranberry/nut bread. I can’t wait to make this with your homemade bread. Thanks for sharing.
Oh my goodness that sounds amazing Charlene! I hope you love the bread as much as we do!
Susan Ketterman
Super easy recipe. The bread is fantastic and I love the texture. I used fresh cranberries because that’s what I had on hand. What about making a savory version with olives and herbs? Would that work?
Thank you Susan!! I’ve loved making it with fresh too!! And absolutely you can make it savory! It would be delish with olives and herbs! I would probably do less olives than cranberries since they are stronger, maybe 2/3-3/4 cup? And your favorite herbs, dried probably a teaspoon and fresh probably around 1 tablespoon. It would be yummy with roasted garlic too! Let me know how it turns out!
candace
I left the dough to rise for 24 hours by mistake. Is it ruined or can I still bake it?
Hi Candace, no it might have a bit more of a sour-dough taste, but it should be perfectly fine! Let me know how it bakes up!
Lisa
This turned out Awesome!! I made a few changes, Im in southern Colorado.. I used the entire pkg of yeast, put it in 120 degree water with a Tbsp of sugar. . added some orange zest and set it on the window sill in the sun. . .took an hour to double in size. . put it in the parchment and into the oven only 10 min later. . . came out AMAZING. . . I it every week now for my family ..they LOVE it!!!
Dennis
My first attempt was not the greatest, good but not great. I left a comment asking for help and Kathleen responded with lots of suggestions to make my experience much better. Next try was greatly improved and really good. From there I started experimenting and now have my version of the prefect breakfast bread. Substituted whole wheat flour, increased yeast to 3/4 teaspoon, used 1 cup each dried cranberries, walnuts and fresh blueberries! I also increased the water to 2 cups. The temperature probe and cooking to 190-200 degrees made the crust perfect. Fresh cranberries are also wonderful but then I add an extra 1/4 cup of honey.
Shirley
I used Bob’s Red Mill Gluten Free 1-1. Was so excited to try this recipe.
Was dry & heavy so disappointed was making for friend
Who is gluten free.
Barbara
How can you substitute the regular packet type dried yeast for the instant that you use? A 1 for 1 substitution doesn’t seem reasonable.
One packet is equal to 2 ¼ teaspoons, you would only need ½ a teaspoon — you can pour it out or dip in a half teaspoon measure. I would fold the balance of the yeast packet up, put in a ziplock and keep in your fridge, maybe with a note that you used ½ teaspoon or there is still 1 ¾ teaspoons left. The yeast I used is similar to packet yeast, it’s just in bulk. Does that answer your question? I hope? If not, let me know.
This recipe does not call or need a whole packet since you let it rise for so long, there is a natural fermentation process (like sourdough, only simpler) you do not need as much yeast, it does the job with just that little bit!
Barbara
Thank you so much for your quick and informative reply. I’m anxious to try this recipe.
You are very welcome, I am excited to hear what you think!
Bob
Has this been tried with 3 hour initial rise and hotter water
Hi Bob,
I have not tried it, but let me know if you do!
Kathleen
Lynn Spencer
I’d say I”m going to make this for Thanksgiving Day, but I’m thinking it’ll get made before then! Thanks for the recipe and the ‘how to!
You definitely need to make this before! And you’ll make it again and again hopefully!
Michaela Kenkel
Can I tell you how excited I am for cranberry season!? I have already added this to my Thanksgiving menu!
Yay! Makes me happy! Thanks so much!
Julie Menghini
This made my bread loving heart go pitter patter. I made this for our Sunday morning breakfast, and my family devoured it! What a delicious and easy recipe.
Ha, love that my heart goes pitter patter when I make bread too! Thank you so much!
Julie Menghini
This made my bread loving heart go pitter patter. I made this for our Sunday morning breakfast, and my family devoured it! What a delicious and easy recipe.
Deb Clark
This was easy to make and the aroma of the baking bread is mouthwatering! YUM!!!
Debi
My husband has been all about the no knead bread lately. I’ll share this recipe with him so he can make it soon.
I hope he enjoys it!