


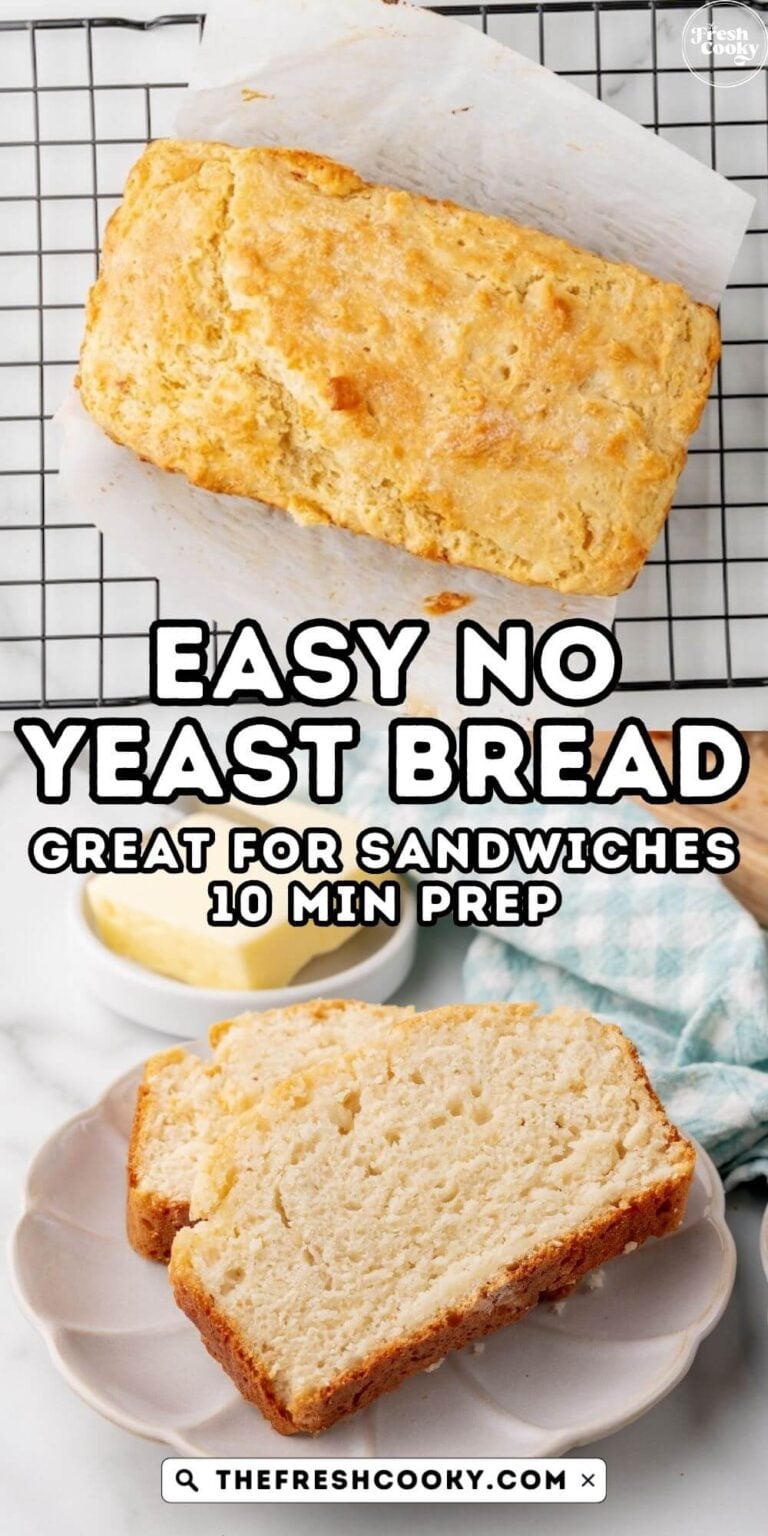
This No Yeast Bread was a fun recipe to develop and to recipe test all different ways. With just a handful of pantry staples and no stand mixer required, you can make a quality loaf of bread without the hassle of using yeast. It’s so much more delicious than store-bought bread, I guarantee it!
Adrienne said: “I patiently waited for the bread to cool to slice and it was delicious!!! I followed the recipe with no changes…my only issue was a slightly odd rise and blowout, if you will, of one side. It ended up being a little wonky, but sliced beautifully and has a lovely flavor and texture. It would hold up very nicely as a sandwich bread and I love the inclusions/variations you suggest. This is a great loaf for them!” ~ Volunteer recipe tester
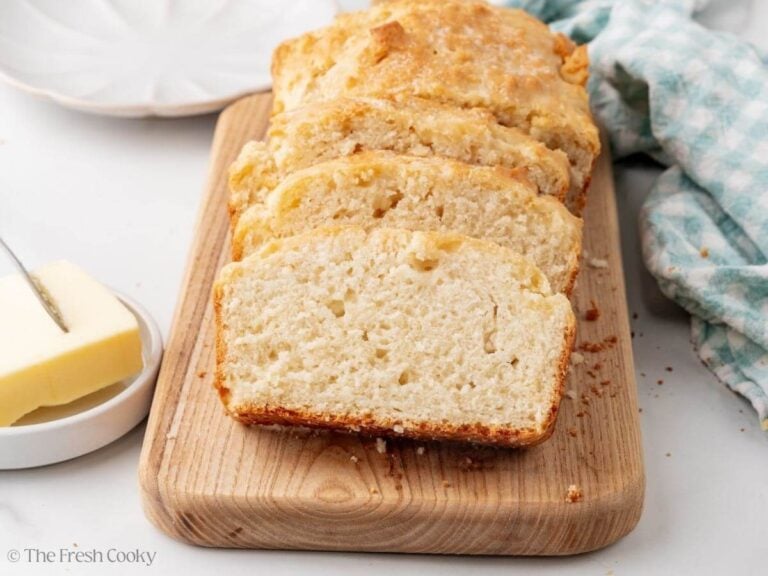
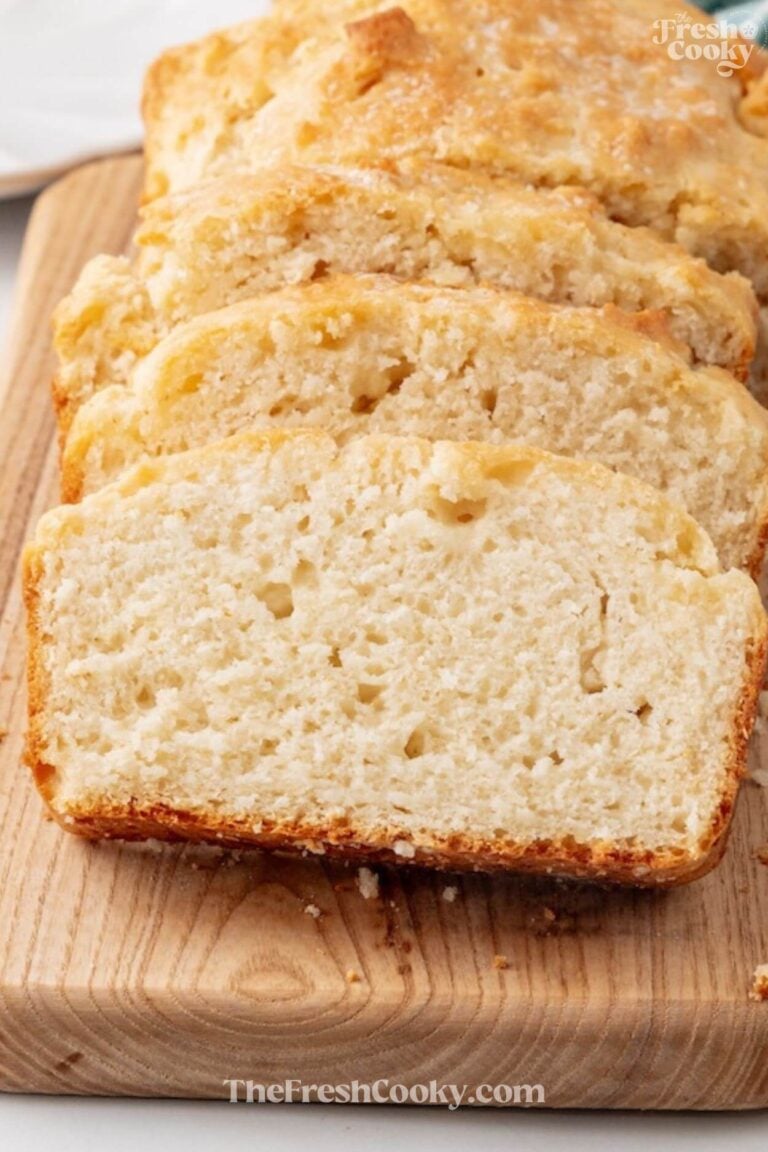
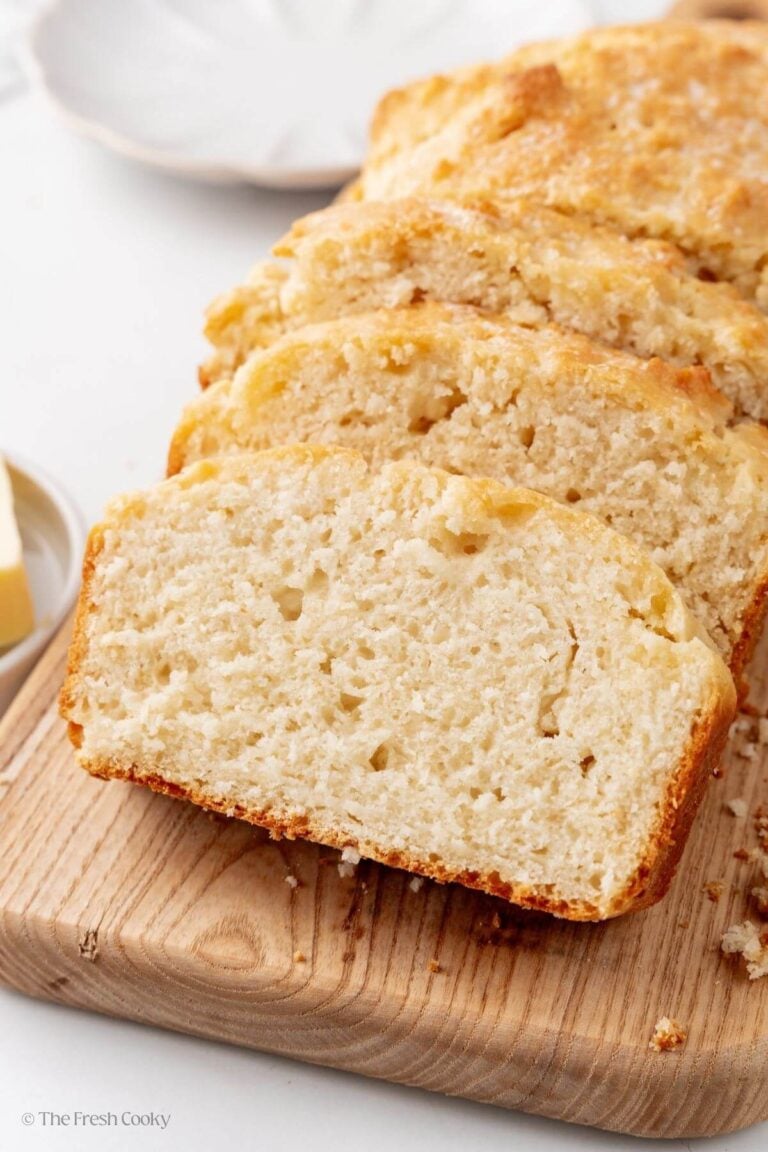
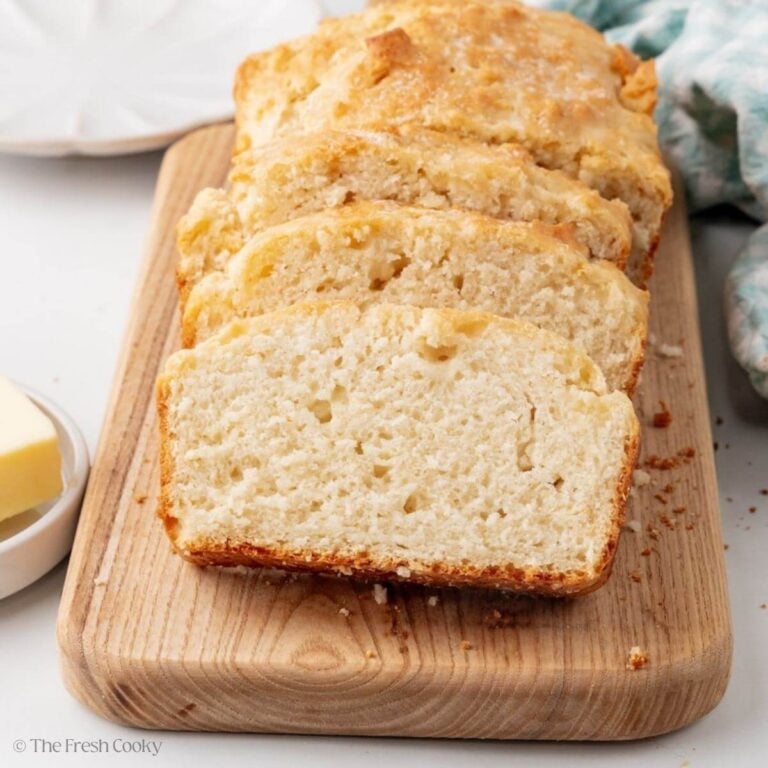
When developing this No Yeast Bread recipe, I went a little crazy recipe testing all of the different liquids, types of flours, and ingredient temperatures, but the bottom line is that this turned out tender and delicious. It kind of reminds me of Irish soda bread, but without the buttermilk tang, and is much more tender. No yeast, no kneading!
Now I’ve been making this bread without yeast weekly at our house. It’s delicious toasted with butter, as sandwich bread in a pinch, for dinner warmed with honey butter, as French toast in the morning, and absolutely delish as grilled cheese.
Why You’ll Love this Recipe
- Homemade bread without the hassle! This truly is the simplest a bread recipe can get right at home. With no yeast and no mixer, all you need is a couple of bowls and a spatula for pillowy, soft bread. All beginner bakers, this is the recipe for you to try!
- Great for meal prepping for the week. It’s the perfect bread to make for sandwiches, serve as toast in the morning, or turn into garlic bread at dinner! Very versatile and so delicious.
- If you have any leftovers, just freeze them! I like to pre-slice my loaf to make it easy to defrost a single serving in a pinch.
Ingredients
- All-purpose flour: The structure for the bread. If you are living in a high altitude, add 2 tablespoons.
- Baking powder: The leavening agent that gives the bread rise; for the light and fluffy texture of the bread without using yeast. If you are at high-altitude, reduce to 2 ¾ teaspoons.
- Granulated sugar: I like to use all-natural cane sugar, a little bit goes a long way to add a hint of sweetness to the dough.
- Kosher salt: All bread recipes need salt to bring out the flavors of the other ingredients. If you want to use table salt, reduce to ¾ teaspoon.
- Whole milk: You will want to warm the milk slightly to help activate the leavening agent and also to create a softer texture and golden brown crust.
- Oil: Adds moisture into the dough, I like avocado oil, but you can use any oil, even light olive oil.
- Butter: This is optional, but I like to melt it to brush on top of the bread right before it finishes baking for a rich flavor and a glossy sheen on top.
Get the full recipe in the recipe card below.

Kathleen’s Tip: I use a higher starting oven temperature (like you do with muffins) for lift, then lower the temperature for a slower, even bake to get that tender, “sandwich bread” feel without yeast.
How to Make No Yeast Bread
Step 1 – Preheat Oven & Prep Pan
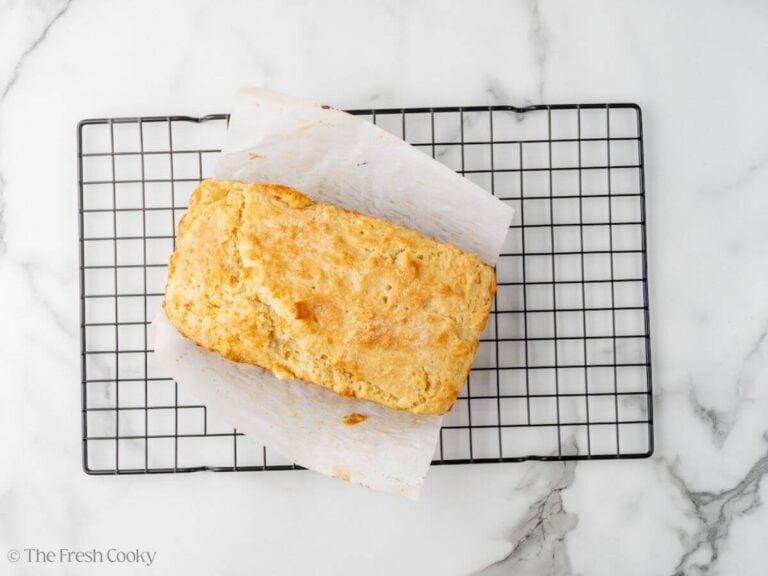
Preheat oven to 425°F (220°C). Lightly grease a 9×5 loaf pan with a bit of oil, then line it with parchment paper, leaving some overhang for easy lifting. (I love using parchment liners!)
Step 2 – Warm the Milk
In a small saucepan or microwave-safe bowl, warm the milk until it’s just warm to the touch. It shouldn’t be hot. If it gets too hot, just allow to cool until warm.
Pro Tip: Warming the milk slightly helps tenderize the loaf by gently altering the milk proteins.
Step 3 – Combine the Ingredients
Place the flour, baking powder, sugar, and salt in a mixing bowl and mix until well combined.
Make a well in the center of the dry ingredients and pour in the oil and warm milk. Mix with a wooden spoon until the flour is fully incorporated. The dough will be sticky and thick, but still stirrable; this is exactly how it should look.


Step 4 – Transfer the Dough to the Pan
Transfer to Pan: Using a rubber spatula, scrape the dough into the prepared loaf pan and smooth the surface.

Step 5 – Bake
Bake at 425°F for 15 minutes, then reduce the heat to 350°F (190°C) and bake an additional 30 minutes. Brush the top with melted butter during the last 5 minutes of baking.
Check for Doneness: Bread is done when an instant-read thermometer inserted into the center reads 200–205°F (93–96°C). If you don’t have a thermometer, insert a skewer or toothpick into the deepest part of the bread; it should come out clean or with a few moist crumbs (no wet batter). If still wet, return to the oven and bake 5–10 minutes longer.

Step 6 – Cool, then Slice
Remove the bread from the oven and lift it out of the pan using the parchment. Cool on a wire rack for at least 45 minutes if you want clean slices and a loaf that doesn’t crumble or get gummy.

Expert Tips
- Best type of milk to use. When developing this recipe, I tested water, whole milk, oat milk, and almond milk. Whole milk produced the most tender loaf, followed by the plant-based milks. The water version worked, but wasn’t as soft or tender, and the flavor felt a bit flat. Lower-fat milks should also work fine.
- Make sure the milk is warm. Even though there’s no yeast here, warm milk helps create a more golden crust and a softer crumb, thanks to slight protein denaturing. It’s a tiny step with a big payoff.
- Unbleached all-purpose flour is best. You can swap up to half of the flour for whole wheat—just add a few tablespoons of extra milk since whole wheat absorbs more liquid. Don’t use self-rising flour unless you omit the baking powder.
- What inspired this no yeast bread recipe. This bread without yeast is loosely based on my beer bread, but it’s lighter, with a more sandwich bread-like texture, and quicker to make too!
- This is not a bread recipe that can easily become gluten-free. A simple cup-for-cup swap won’t work well here. Most gluten-free versions require eggs or additional structure, so this one isn’t ideal for gluten-free adaptation.
- Make it dairy-free. Use any unsweetened dairy-free milk in place of cow’s milk. In testing, I liked oat milk the best for dairy-free.
- Avoid over-baking the bread. This will make it dry and chewy. Use a thermometer and when it reaches 200-205ºF in the center of the loaf, it’s finished baking.
High Altitude Tips:
At ~5800 ft (my altitude):
- Increase flour by 2 tablespoons
- Decrease baking powder to 2 ¾ teaspoons
- Start checking for doneness 5 minutes early
Above 7,000 ft:
- Reduce baking powder to 2 teaspoons
- After the initial high-temp bake, decrease the temp to 375°F (190°C)
- Check for doneness a bit earlier.
Variations
Here are some other flavor combinations I’ve made for my family that they loved! Feel free to get creative, this bread is easy to customize.
- Cheddar & Herb Bread: Stir 1 cup shredded sharp cheddar and 1–2 teaspoons dried herbs (Italian seasoning, rosemary, dill, or chives) into the dry ingredients for a savory, cozy loaf that pairs beautifully with soups or casseroles.
- Honey-Oat Bread: Add 2 tablespoons of honey to the warm milk and sprinkle 2–3 tablespoons of rolled oats over the top before baking for a lightly sweet, rustic loaf with a soft crumb.
- Cinnamon-Sugar Swirl: Mix 2 tablespoons sugar with 1–1½ teaspoons cinnamon. Add half the batter to the pan, sprinkle with the cinnamon-sugar, top with the remaining batter, and gently swirl with a butter knife. This is perfect for breakfast or an afternoon treat.
- Garlic-Parmesan: Stir ½ cup grated Parmesan and ½–1 teaspoon garlic powder into your dry ingredients. Brush with garlic butter after baking for an aromatic, savory loaf.
Storage
Room Temperature: Store the yeastless bread in an airtight container or wrapped tightly at room temperature for 2–3 days; it keeps its tender crumb best this way.
Refrigerator: Refrigerate only if necessary; it can dry out more quickly. Wrap well and plan to warm slices before serving.
Freezing:
- Whole Loaf: Cool completely, wrap in plastic wrap and then foil (or a freezer bag). Freeze up to 3 months.
- Slices: Slice the cooled loaf and separate slices with parchment squares before freezing, perfect for grabbing just one at a time.
Reheating:
- Single Slices: Warm in the microwave for 10–15 seconds or toast lightly for a crisp edge and soft center.
- Whole Loaf: Wrap in foil and warm in a 300°F (150°C) oven for 10–15 minutes, just until just heated through again.

FAQs
Make sure you don’t over-mix the ingredients when making the dough. Also don’t overbake the bread either, this will make it dry and chewy.
Using a leavener like baking powder is best. The baking powder helps the dough to rise and still be light and fluffy in texture without the hassle of yeast.
You want to store it in an airtight container or better yet wrapped in plastic wrap or a large ziptop bag to prevent the air from drying it out.
It’s usually because the outside of the loaf sets before the inside has finished rising. As the bread continues to expand in the oven, the pressure looks for the weakest spot—often the side of the loaf—so it splits there instead of rising evenly on top. This can happen if the oven stays too hot for too long, if the pan is filled a bit too full, if there’s slightly too much baking powder (especially at high altitude), or if the loaf is baking too close to the oven wall, where heat is uneven. The good news is that a split loaf is still perfectly safe and delicious—it just has a rustic look. To help prevent it, reduce the oven temperature right on time, measure leavening carefully, use the correct pan size, and bake the loaf in the center of the oven. And honestly, even when it happens, I call it “character”—add some butter and enjoy.
More Delicious Bread Recipes
Serve up this delicious 7-ingredient bread just like you would any normal bread, peanut butter and jelly, jam and butter, you get the idea. I promise you will be sold on the taste! It goes great with soups and stews to name a few!
Like this recipe?
Don’t forget to give it a ⭐️⭐️⭐️⭐️⭐️ star rating and leave a comment below the recipe!
Video
Equipment
Ingredients
- 3 cups all-purpose flour I use unbleached, organic flour. High altitude add 2 tablespoons
- 3 teaspoons baking powder reduce to 2 ¾ teaspoons for high altitude, 2 teaspoons above 7,000 feet
- 2 teaspoons granulated sugar I use all-natural cane sugar
- 1 teaspoon kosher salt reduce to ¾ if using fine table salt
- 1 ½ cups whole milk warmed slightly (see notes)
- 3 tablespoons oil I like avocado oil, use any oil, even light olive oil
- 1 tablespoon butter melted (optional)
Instructions
- Preheat oven to 425°F (220°C). Lightly grease a 9×5 loaf pan with a bit of oil, then line it with parchment paper, leaving some overhang for easy lifting. (I love using parchment liners!)
- In a small saucepan or microwave-safe bowl, warm the milk until it’s just warm to the touch. It shouldn't be hot. Note: Warming the milk slightly helps tenderize the loaf by gently altering the milk proteins.1 ½ cups whole milk
- Place the flour, baking powder, sugar, and salt in a mixing bowl and mix until well combined.3 cups all-purpose flour, 3 teaspoons baking powder, 2 teaspoons granulated sugar, 1 teaspoon kosher salt

- Make a well in the center of the dry ingredients and pour in the oil and warm milk. Mix with a wooden spoon until the flour is fully incorporated. The dough will be sticky and thick, but still stirrable; this is exactly how it should look.3 tablespoons oil
- Using a rubber spatula, scrape the dough into the prepared loaf pan and smooth the surface.
- Bake at 425°F for 13-15 minutes, then reduce the heat to 350°F (190°C) and bake an additional 30 minutes. Brush the top with melted butter during the last 5 minutes of baking.1 tablespoon butter
- Bread is done when an instant-read thermometer inserted into the center reads 200–205°F (93–96°C). If you don’t have a thermometer, insert a skewer or toothpick into the deepest part of the bread; it should come out clean or with a few moist crumbs (no wet batter). If still wet, return to the oven and bake 5–10 minutes longer.
- Remove the bread from the oven and lift it out of the pan using the parchment. Cool on a wire rack for at least 45 minutes if you want clean slices and a loaf that doesn’t crumble apart.


Notes
- Whole Loaf: Cool completely, wrap in plastic wrap and then foil (or a freezer bag). Freeze up to 3 months.
- Slices: Slice the cooled loaf and separate slices with parchment squares before freezing, perfect for grabbing just one at a time.
- Single Slices: Warm in the microwave for 10–15 seconds or toast lightly for a crisp edge and soft center.
- Whole Loaf: Wrap in foil and warm in a 300°F (150°C) oven for 10–15 minutes, just until refreshed and tender again.
- Best Milk: Whole milk gives the softest, most tender loaf. Plant-based milks (especially oat) work well; water works but produces a drier, less flavorful bread. Lower-fat milk should be fine.
- Warm the Milk: Use milk that’s just warm to the touch. This small step helps create a softer crumb and more golden crust.
- Flour: Unbleached all-purpose flour works best. You may replace up to half with whole wheat flour; add a few extra tablespoons of milk. Do not use self-rising flour unless you omit the baking powder.
- Recipe Inspiration: This no-yeast bread is loosely based on my beer bread, but lighter, quicker, and more sandwich-style in texture.
- Gluten-Free: Not recommended. This recipe doesn’t adapt well to simple gluten-free flour swaps.
- Dairy-Free: Use any unsweetened dairy-free milk; oat milk was my favorite in testing.
- Avoid Overbaking: Bread is done at 200–205°F in the center. Overbaking will make it dry.
- See the post for more details, variations, and additional ideas!
Above 7,000 ft: Reduce baking powder to 2 teaspoons. After initial high-temp bake, bake at 375°F (190°C), checking for doneness around 35 minutes.
Nutrition


Debbie
Should I use high altitude measurements at 5100′?
I would Debbie, but it’s also pretty forgiving.
Jules
I was so intrigued by this recipe that I couldn’t wait to try it. Wow, the texture and flavors are amazing!
Awe, thanks Jules!!