

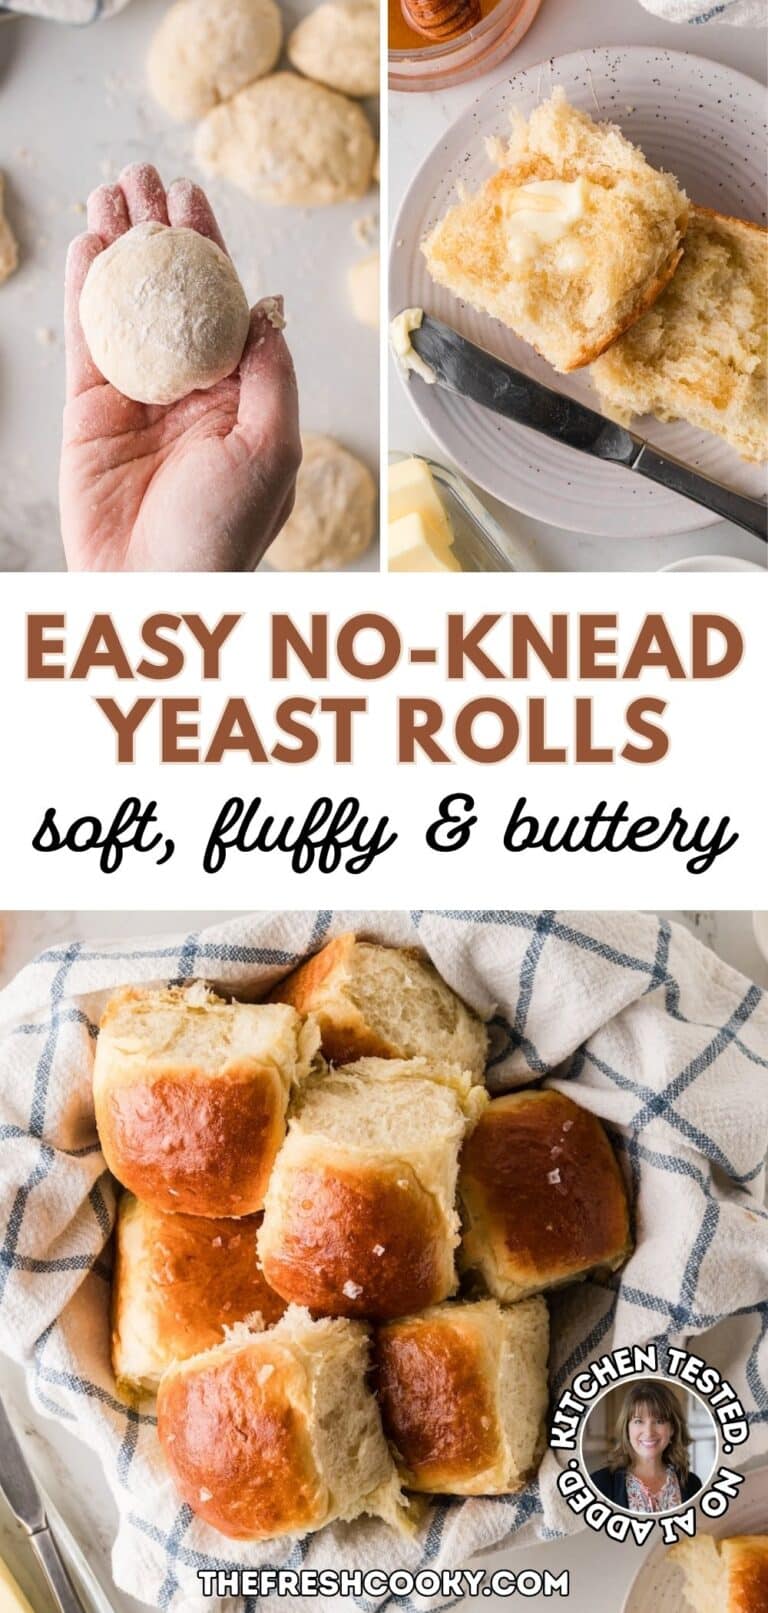
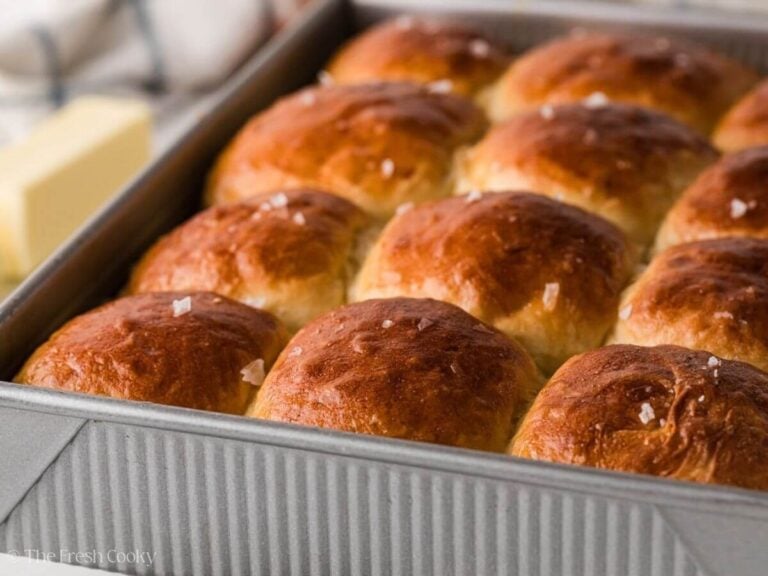
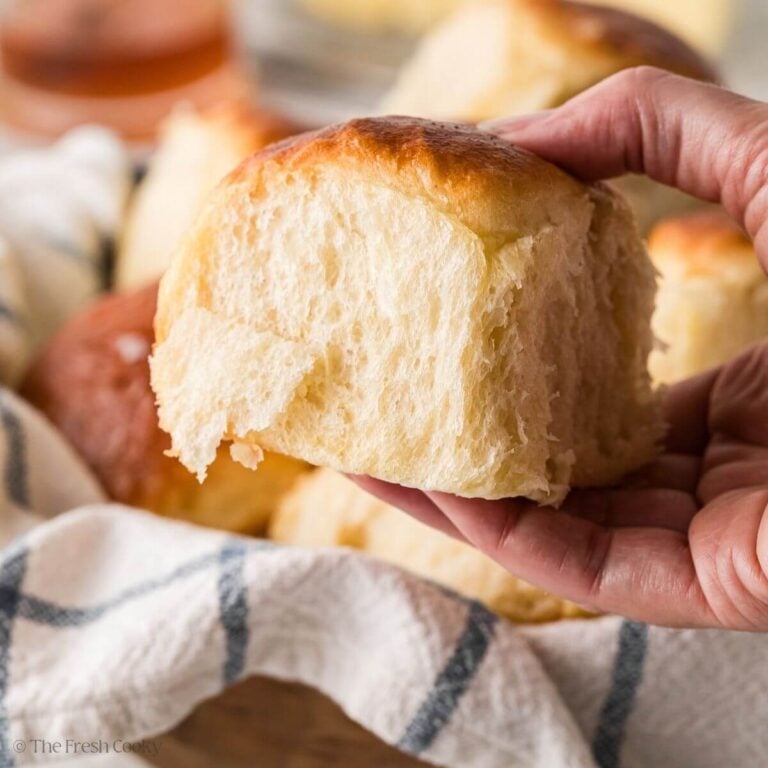
This is the dinner roll recipe I’ll be making for every holiday from now on. No kneading. No mixer. Just a bowl, a wooden spoon, and a little patience while the yeast does its thing. They bake up big, soft, and fluffy, with pull-apart sides made for a swipe of butter and a drizzle of honey.
⭐️⭐️⭐️⭐️⭐️ Adrienne, a volunteer recipe tester, said, “These are really, really good! They have a pleasant, slightly sweet yeasty flavor and are pillowy soft, even the next day. Such a versatile and super easy bake!”
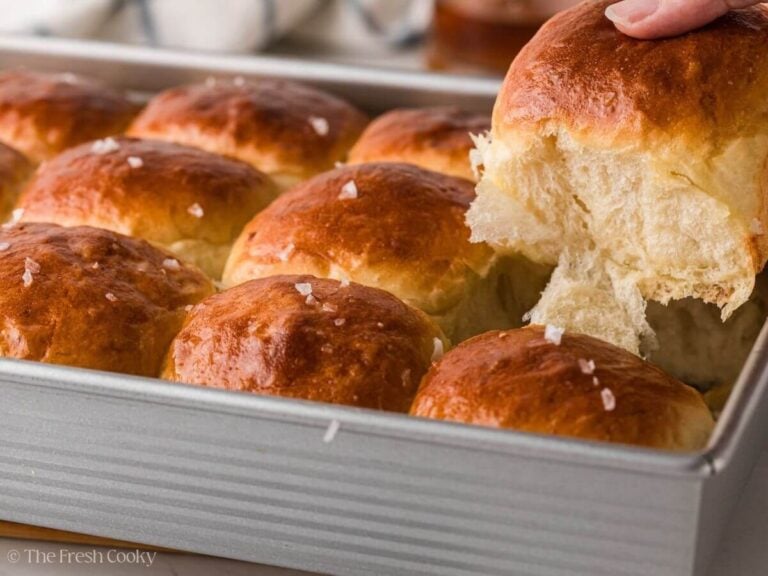
These Thanksgiving Rolls Will be the Perfect Addition to Your Table
I’ve made my Homemade Yeast Rolls in the bread machine for years. They get kneaded, and I honestly didn’t think anything could beat them. Well. These no knead dinner rolls just did.
My husband went nuts over them. Then our son showed up for dinner and put away more than his share.

By the end of the night, my husband wanted them out of the house. Self-control was not happening. So I packed them up and sent them home with our son. I did make him leave a couple behind, and we had them with soup the next night.
Here’s what sold me. These are the best homemade dinner rolls I’ve made in years. They’re big, super soft, and fluffy, kinda like a mega-sized Hawaiian King Roll. The dough comes together with a spoon in about 2 minutes. Bake them close together in a 9×13 pan for those soft, pull-apart sides everyone fights over. Come November, these are officially my new Thanksgiving rolls, and they’re coming to Christmas dinner, too.
I bake everything here in Denver at 5,280 feet. Then my team of volunteer recipe testers across the country, like Adrienne and Callee for these rolls, bakes my recipes at sea level and other altitudes, so they’ll turn out wherever you are.

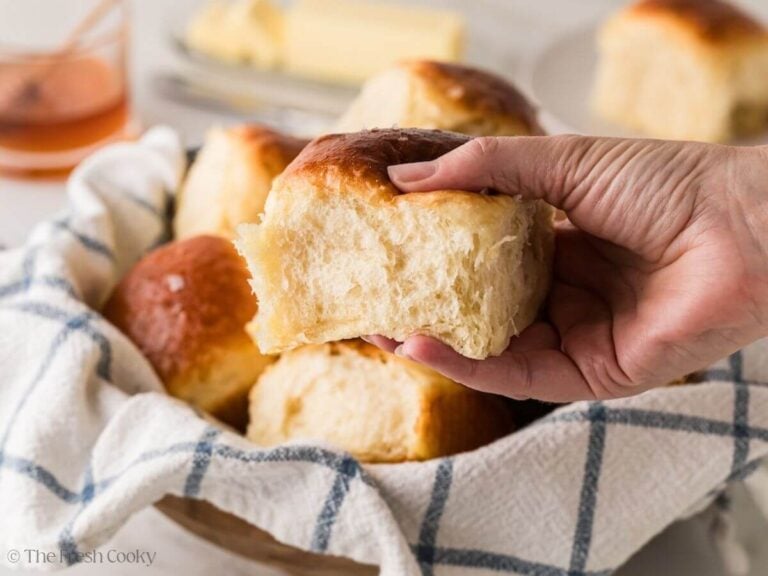
Why You’ll Love This Easy Dinner Roll Recipe
If you’ve been scared off by yeast, or you’re hunting for the best dinner rolls recipe for a beginner, start here.
- No kneading, no stand mixer. A bowl and a sturdy spoon are all it takes. A long, slow rise does the work your arms would normally do.
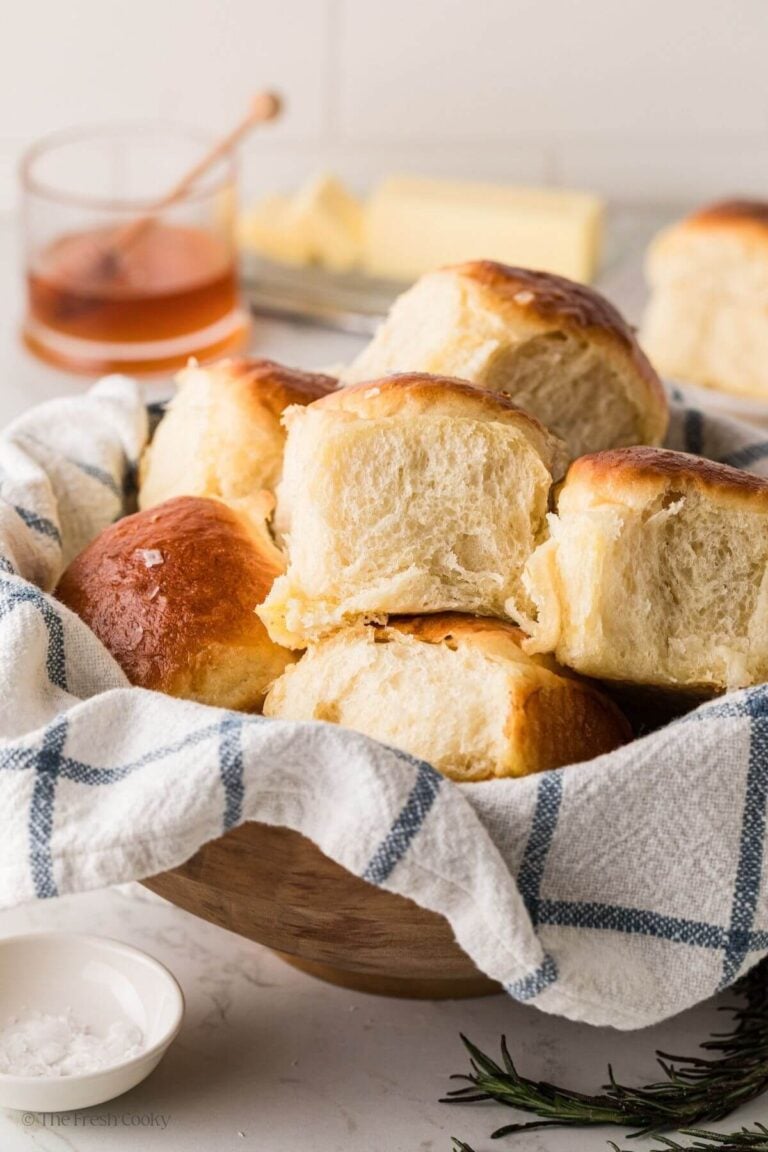
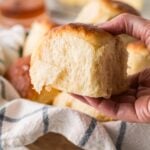
- Big, soft, and fluffy. These are generous rolls. Twelve of them fill a 9×13 pan, and the insides are light and feathery. Adrienne, one of my volunteer testers, nailed the size: bigger than a Hawaiian roll, smaller than a hamburger bun, and perfect as a dinner roll or a small sandwich roll.
- Soft sides or golden sides, your call. Bake them snug in a 9×13 for soft pull-apart sides, or spread them out on a sheet pan for a golden crust all the way around. Adrienne went straight for the 9×13. She’s a middle-piece girl who skips the ends of everything, brownies, bread, you name it.
- Make-ahead friendly. Shape them the night before, tuck them in the fridge, and bake the next day. One less thing on Thanksgiving morning.
- Just a touch of honey. Enough sweetness to taste homemade, not like dessert.
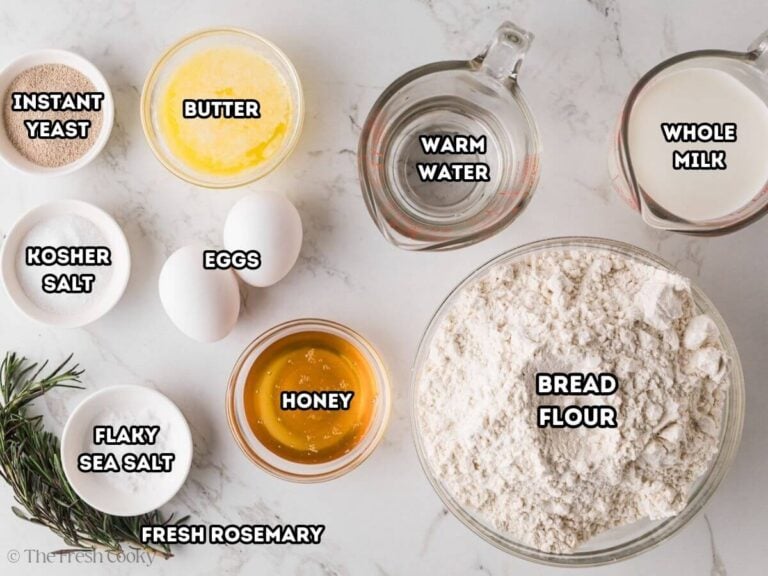
- Eight pantry ingredients. Flour, yeast, honey, water, milk, eggs, butter, and salt. That’s it.
Dinner Roll Recipe Ingredients
- Bread Flour: More protein than all-purpose, which gives these rolls their tall rise and tender, fluffy texture. I use King Arthur bread flour. All-purpose works, too; the rolls just won’t be quite as fluffy. Spoon the flour into your measuring cup and level it off. Scooping straight from the bag packs in extra flour, and that’s the number one cause of dense rolls.
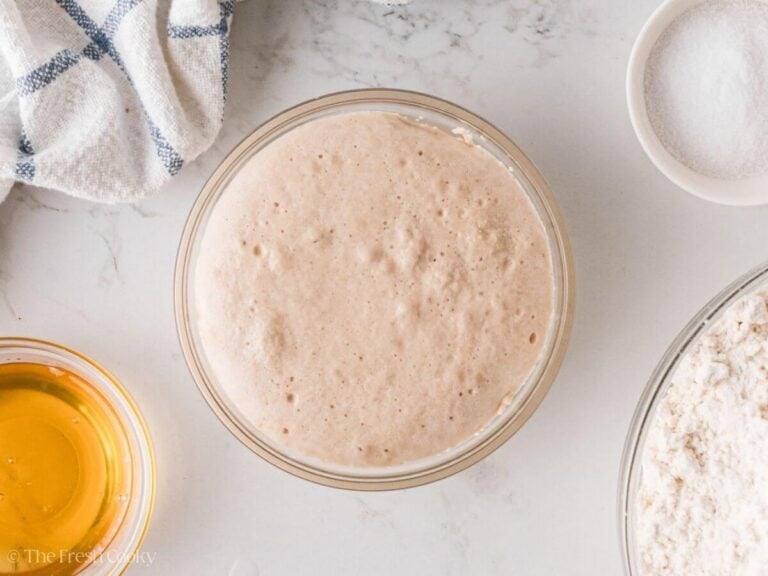
- Instant Yeast: I use Saf instant yeast, and Adrienne used Fleischmann’s Instant Yeast. Both worked beautifully. If you buy packets, each ¼-ounce packet holds 2 ¼ teaspoons, so you’ll need 2 packets to get 3 teaspoons. Always use fresh yeast and check the expiration date. Proofing it first tells you it’s alive. If it doesn’t get foamy, toss it and grab a new packet before you waste the flour. Active dry yeast works, too (see the FAQs).
- Honey: Feeds the yeast and adds a soft, sweet note. One tablespoon goes in with the yeast, and the rest goes in with the milk.
- Whole Milk: Warmed to 105°F to 110°F. Whole milk makes a richer, softer roll.
- Eggs: Two large eggs at room temperature, so they don’t chill the dough and slow down the rise. If you forgot to set them out, let them sit in a bowl of warm water (not hot) for about 10 minutes.
- Butter: I use salted. Unsalted butter works, too. I add ¼ teaspoon of salt per stick. This dough only uses half a stick, so add about ⅛ teaspoon more salt. Melt 4 tablespoons for the dough and let it cool a bit so it doesn’t scramble the eggs. Save 1 tablespoon to brush on the hot rolls, plus a little soft butter for greasing the pan.
- Kosher Salt: Don’t skip it. Salt is what makes bread taste like bread.
- Optional Toppings: An egg yolk wash for glossy tops, then flaky sea salt or fresh minced rosemary after baking.
Get the full recipe in the recipe card below.
How to Make Dinner Rolls
These are quick yeast rolls with only about 10 minutes of hands-on time. The rest is rising time, so go peel some potatoes.
Step 1 | Proof the Yeast
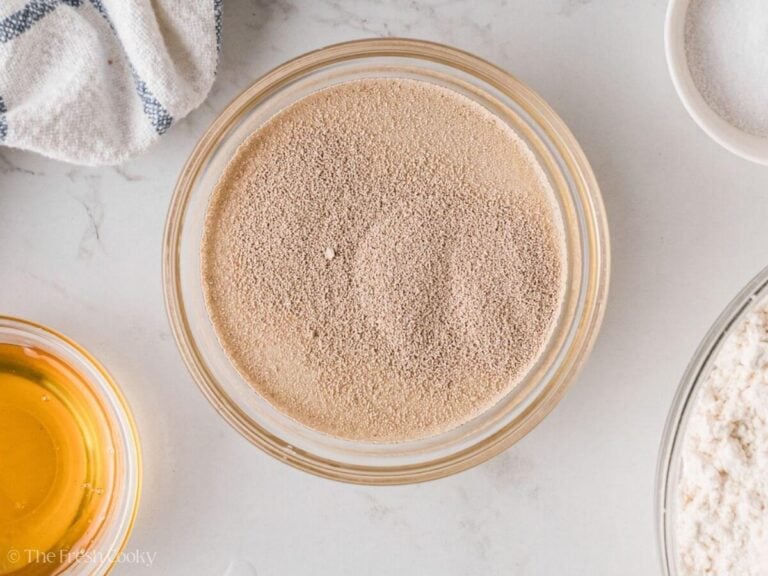
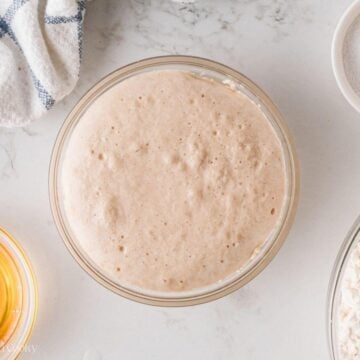
In a small bowl or glass measuring cup (that’s what I use), stir together the warm water, yeast, and 1 tablespoon of the honey. Let it sit for 5 minutes, until foamy and yeasty-smelling.
Use a thermometer here. Water hotter than about 120°F can kill the yeast, and water that’s too cool makes it sluggish.
Step 2 | Mix the Dry and Wet Ingredients
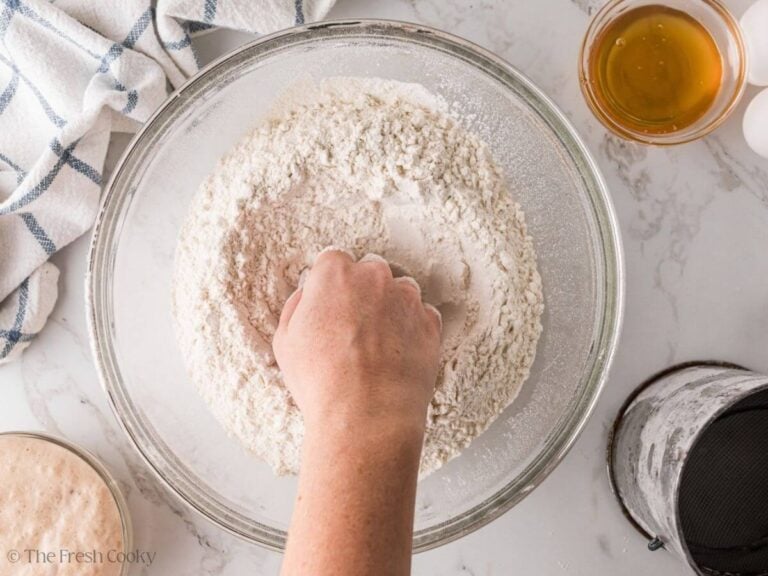
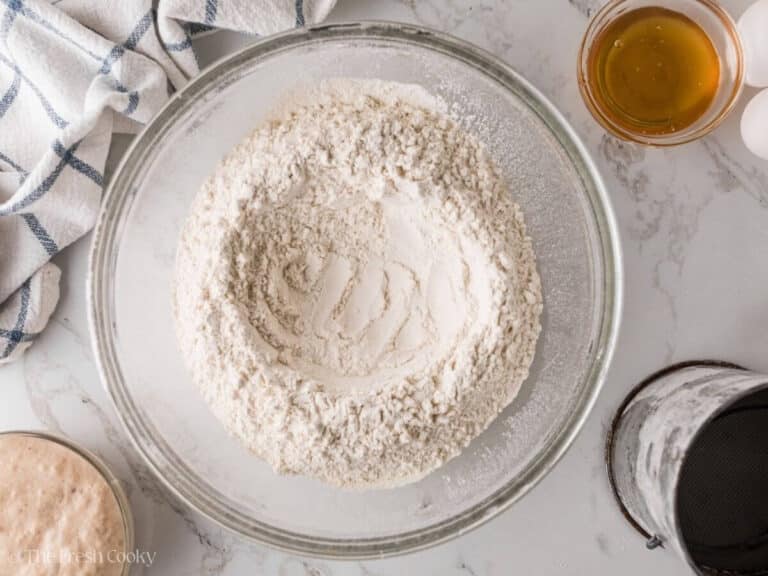
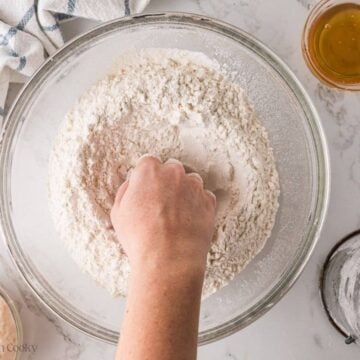
In a large bowl, whisk together the bread flour and salt. Make a large well in the center.
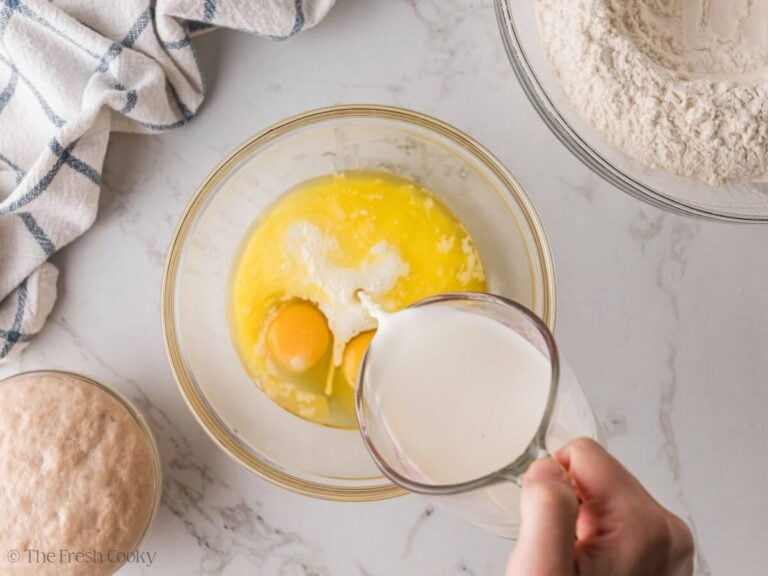
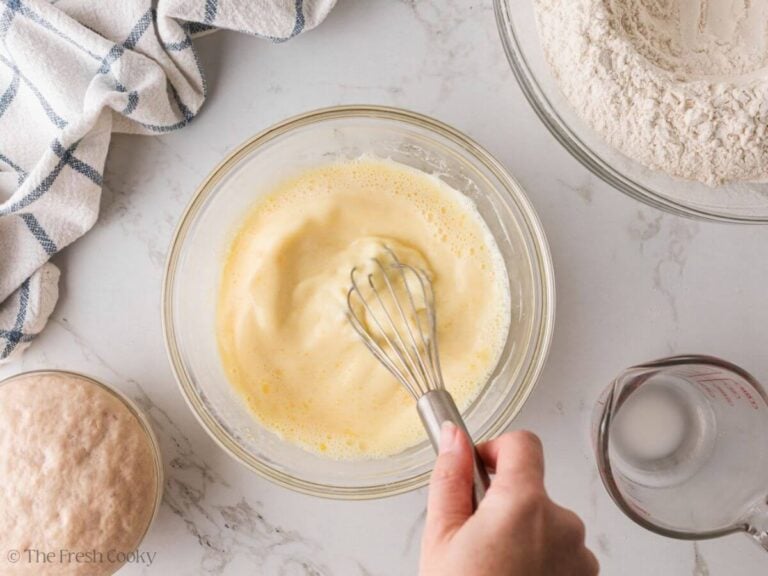
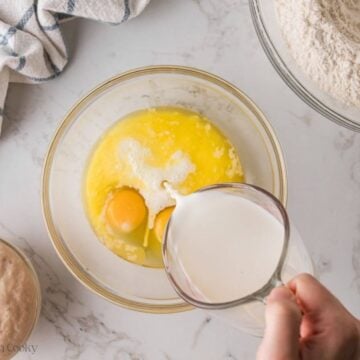
In a medium bowl, whisk the warm milk, remaining honey, 4 tablespoons of melted and cooled butter, and the eggs until smooth.
Step 3 | Stir Up the Dough
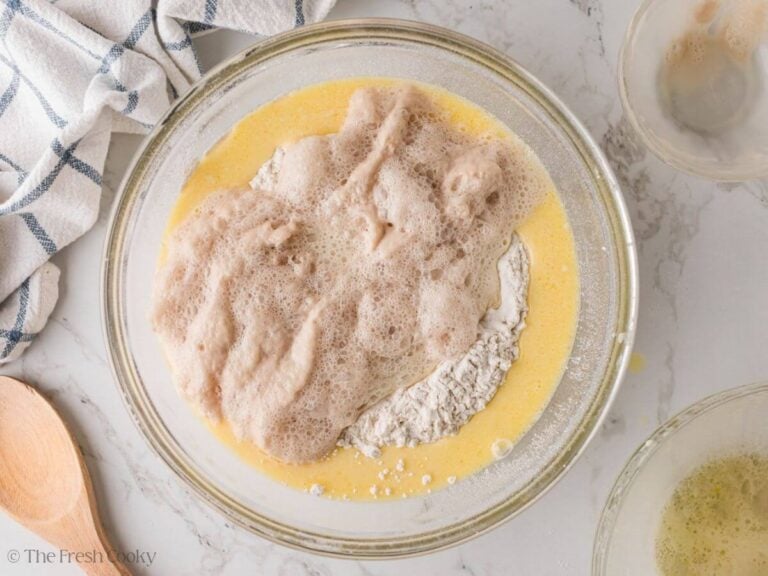
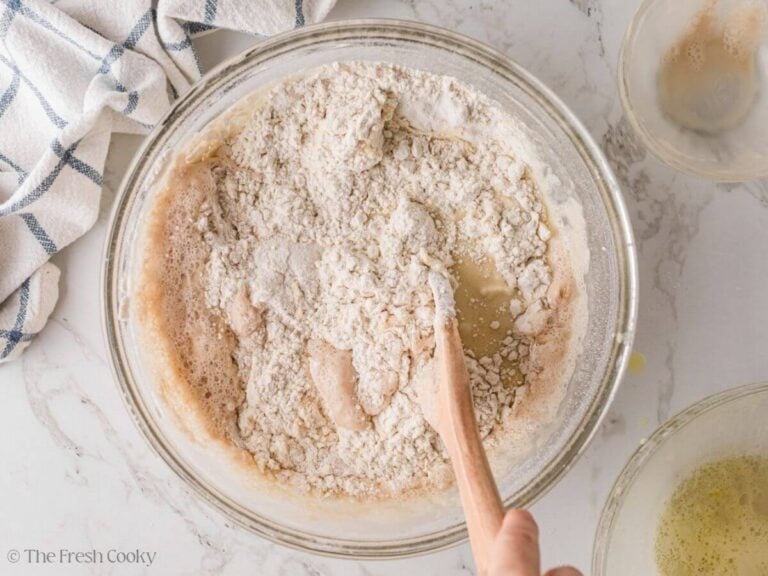
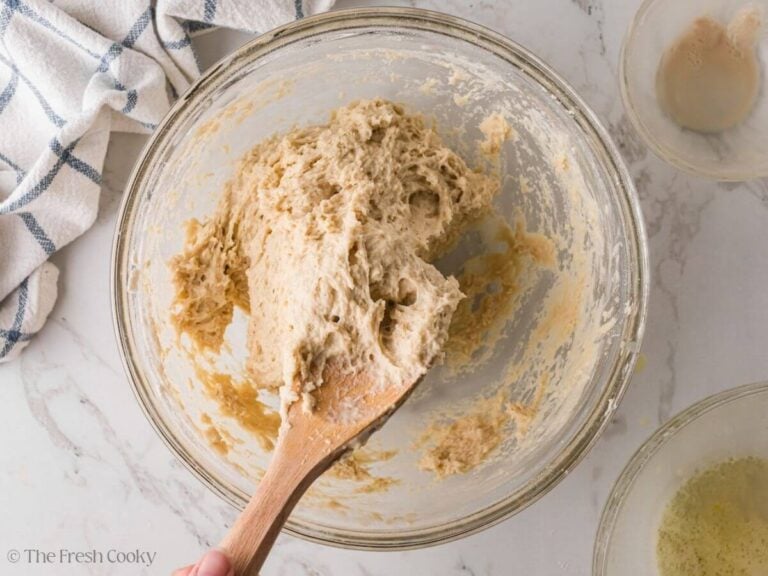
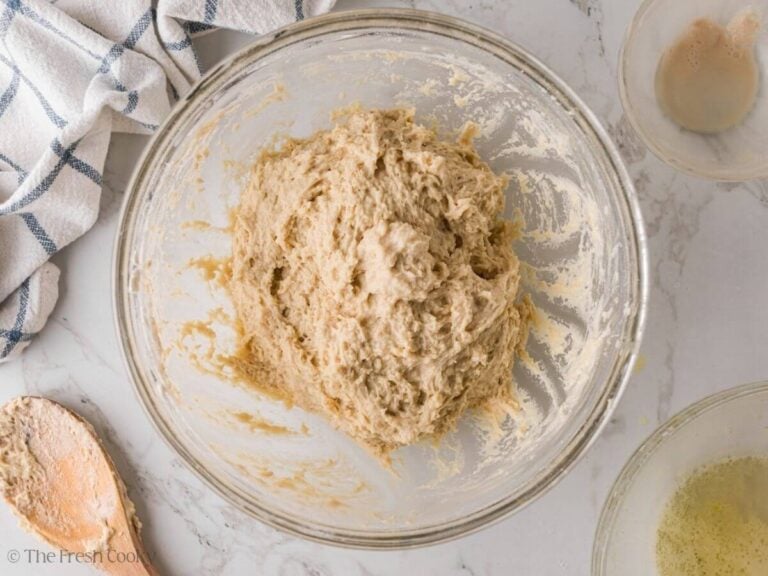
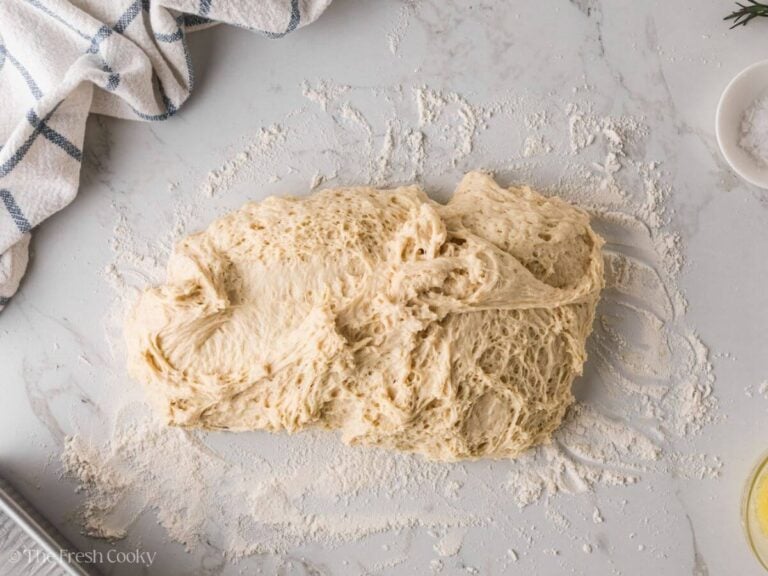
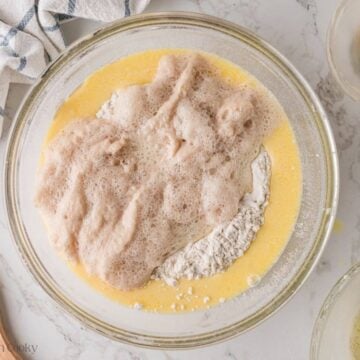
Pour the yeast mixture and the milk mixture into the well. Stir with a wooden spoon or dough whisk just until a sticky dough forms and no streaks of flour remain, about 2 minutes.
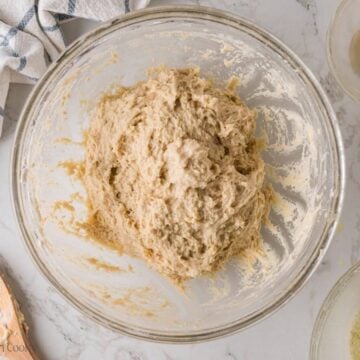
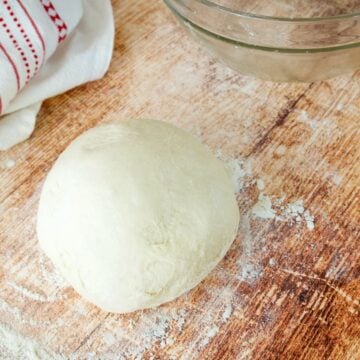
The dough will be sticky and shaggy, almost like biscuit dough. That’s exactly right. Adrienne used her favorite dough whisk and said mixing was very easy.
Humid day: If your dough looks more like thick batter than biscuit dough, stir in 1 more tablespoon of bread flour. Adrienne needed it on a muggy day. Just don’t go overboard; sticky is still the goal.
Step 4 | Let It Rise
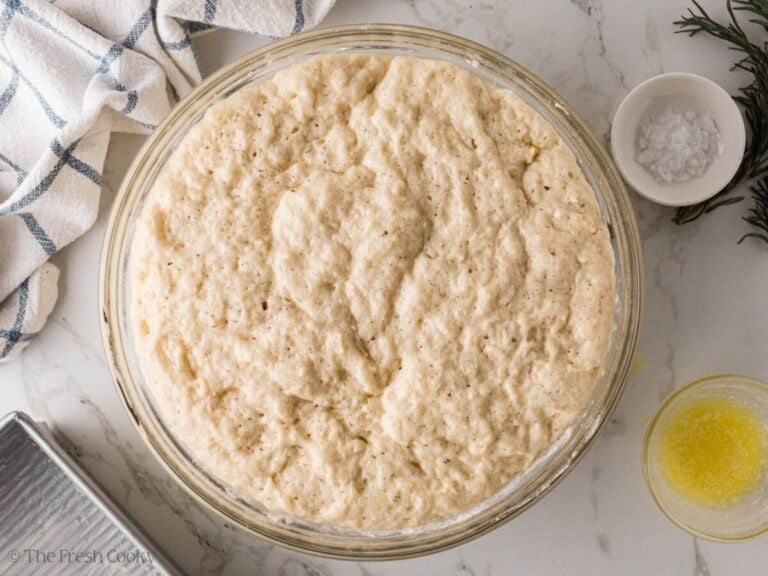
Cover the bowl with plastic wrap or a damp tea towel. For easier cleanup, use a spatula to scrape the dough into a lightly oiled bowl first. Let it rise in a warm place for 90 to 120 minutes, until well risen and puffy. Mine took the full 2 hours here in Denver on cool days. Adrienne’s took 90 minutes in a 79°F kitchen. At high altitude, start checking at 60 minutes.
Step 5 | Shape the Rolls
Grease a 9×13 pan with soft butter, or line a sheet pan or jelly roll pan with parchment paper.
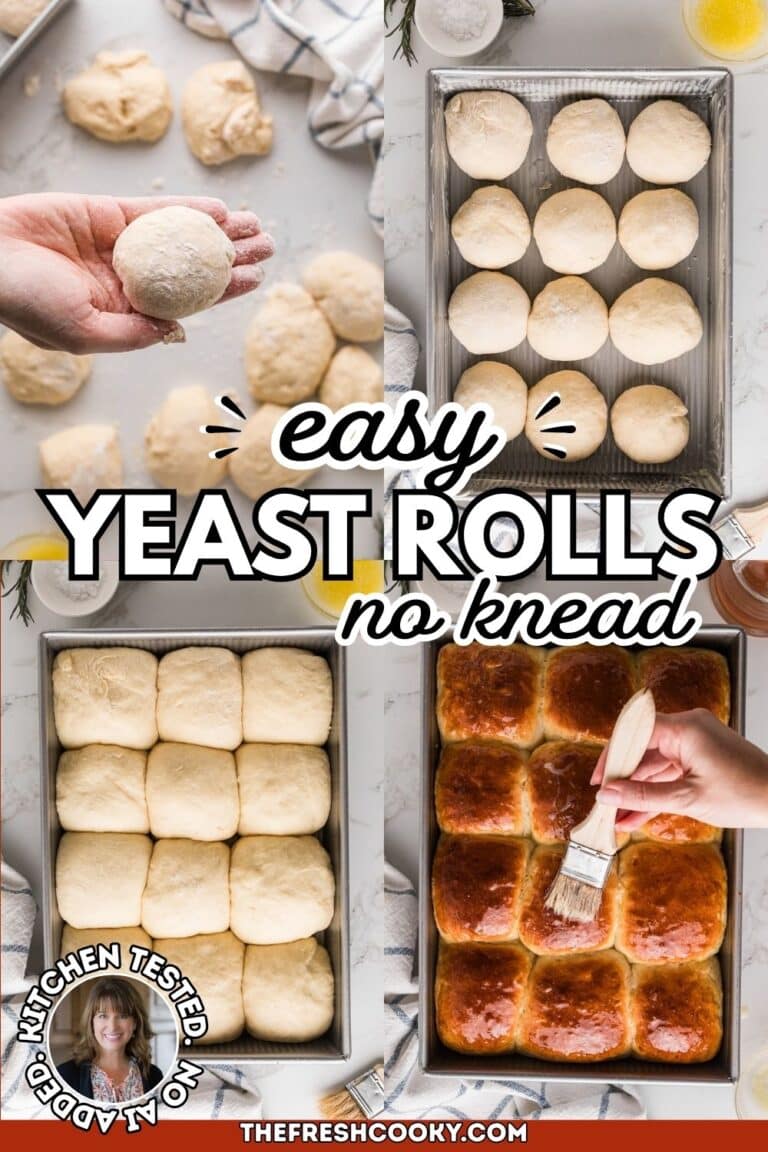
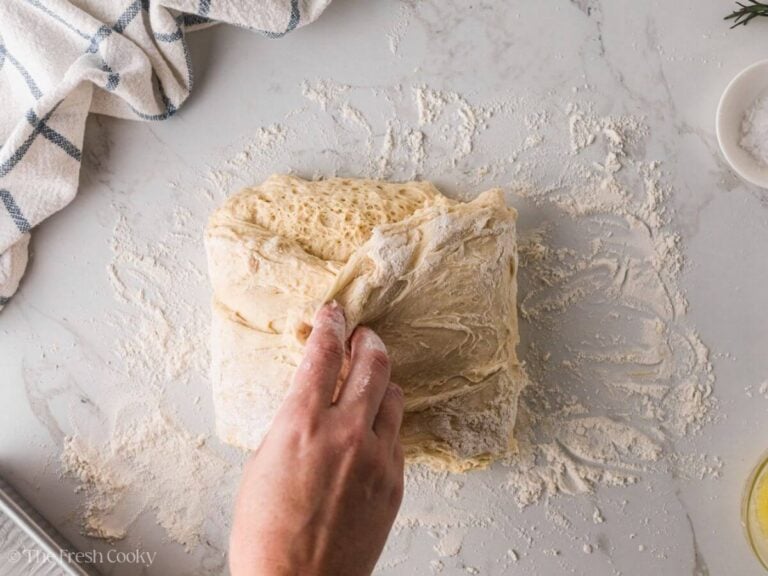
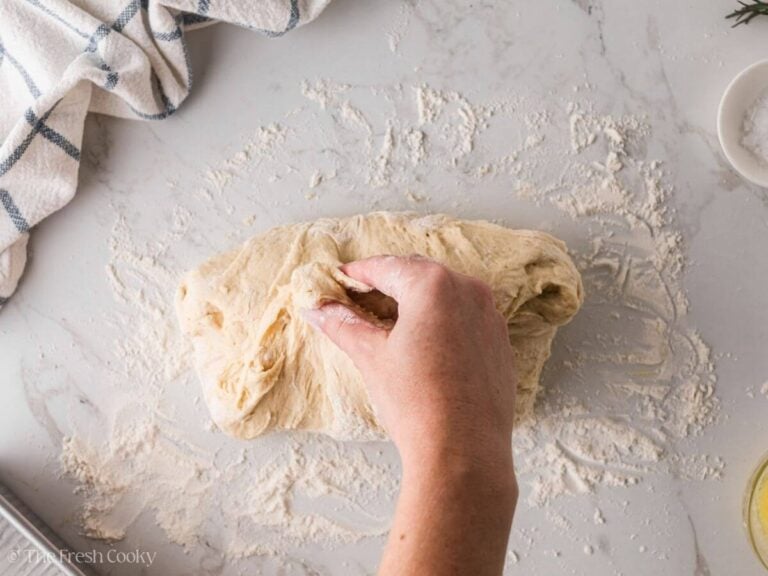
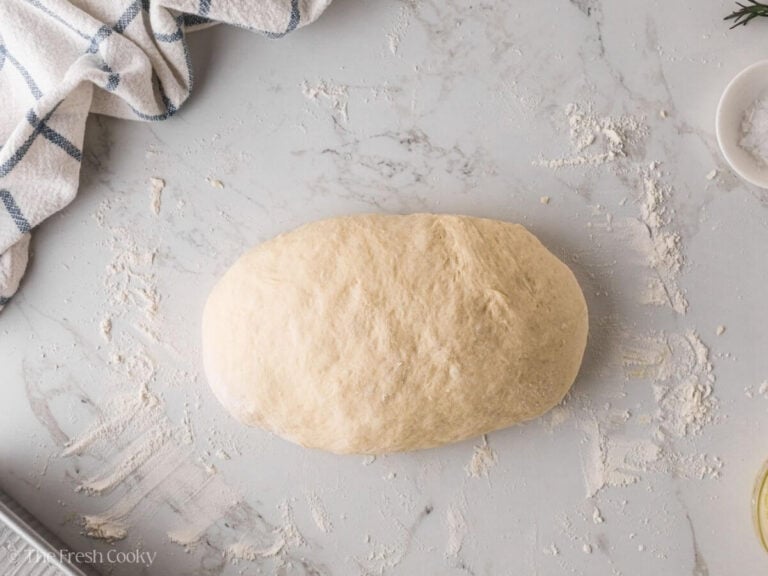
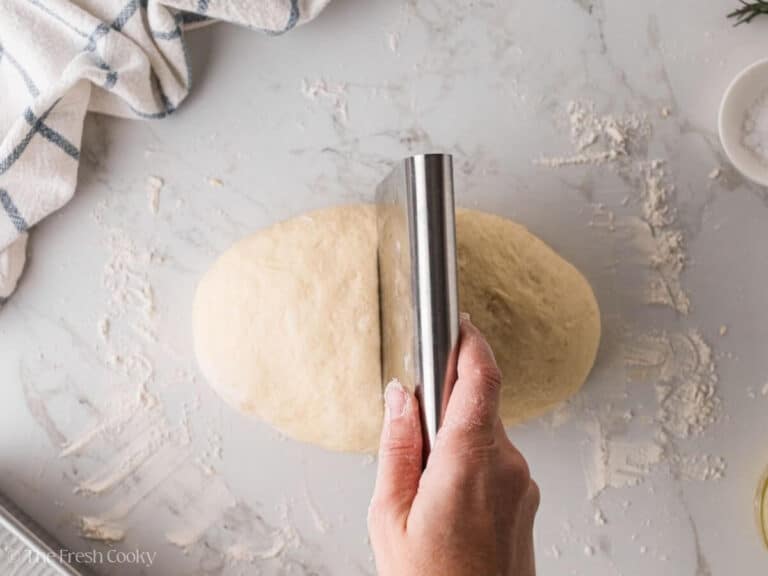
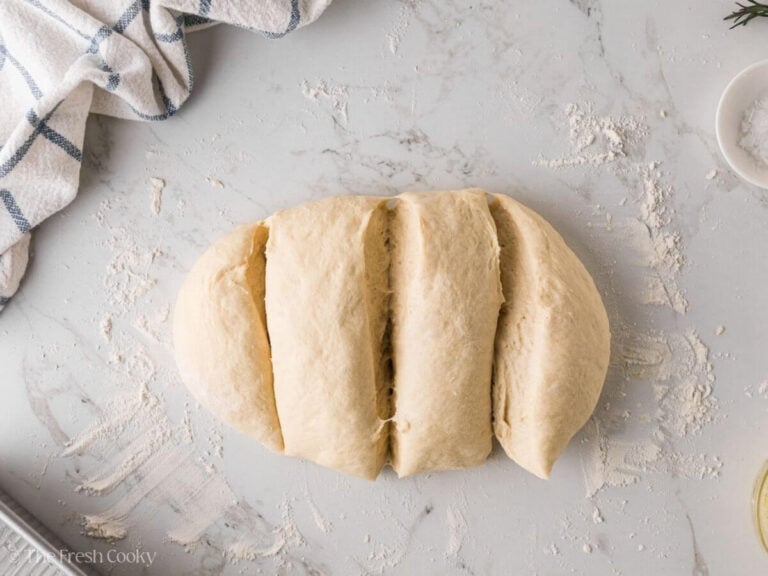
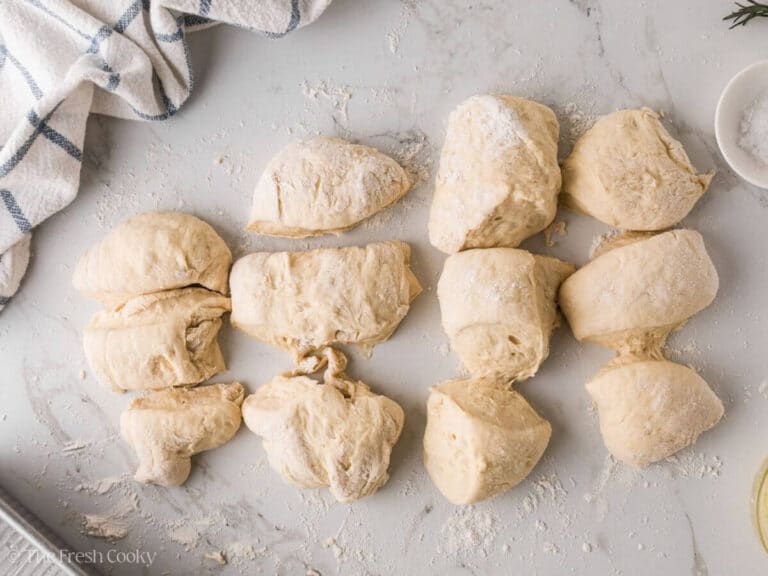
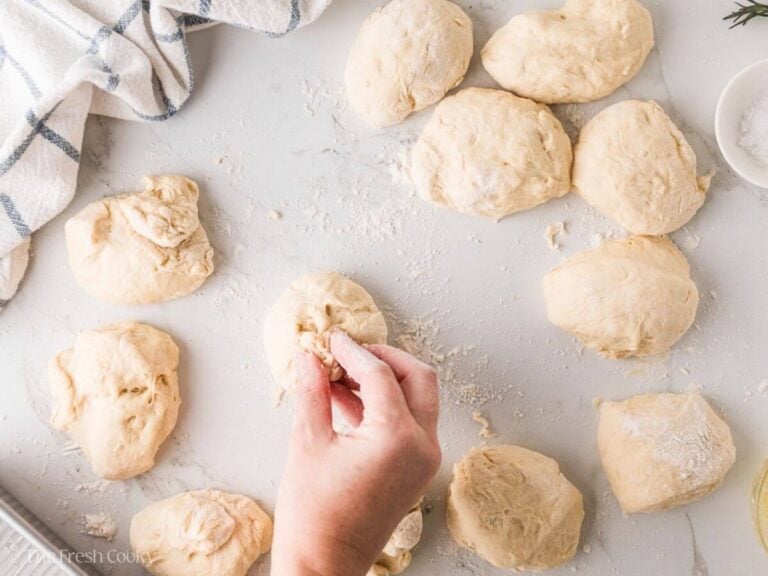
Turn the dough out onto a lightly floured surface and form it into a log. Pull it towards you on the counter a few times to build a little surface tension; this makes it easier to cut. Cut the log in half, then each half in half again. Cut each quarter into 3 equal pieces for 12 large rolls, or into 4 pieces for 16 smaller rolls. If you want to divide dough evenly, use your kitchen scale, pinching off or adding to a dough ball until they are equal.
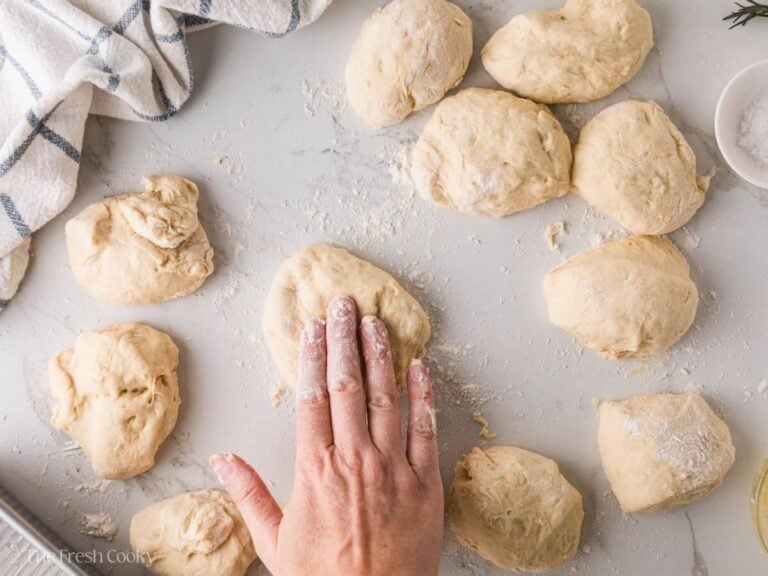
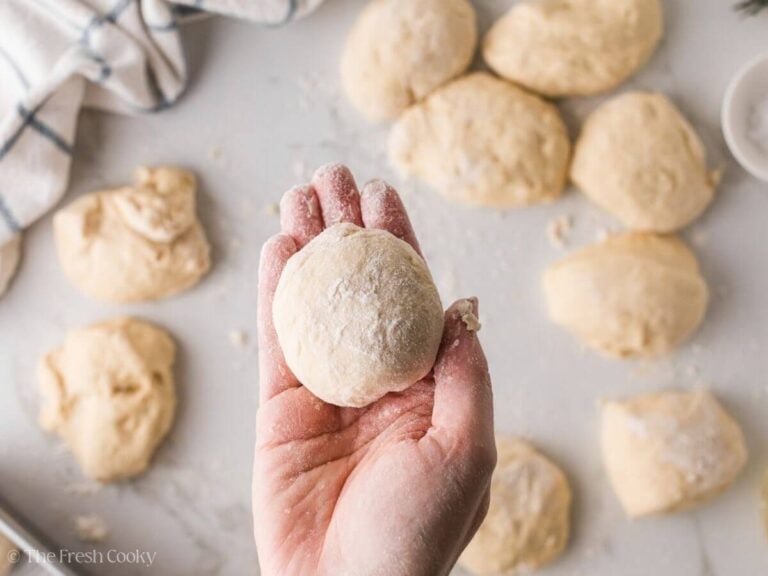
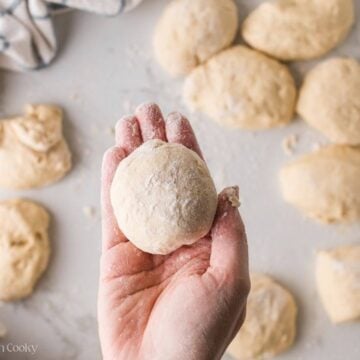
Flatten each piece, tuck the edges underneath, and pinch them together to form a ball. Gently roll each one on your work surface into a smooth ball. If one piece is bigger than the rest, pinch a little off and add it to a smaller one.
Step 6 | Second Rise
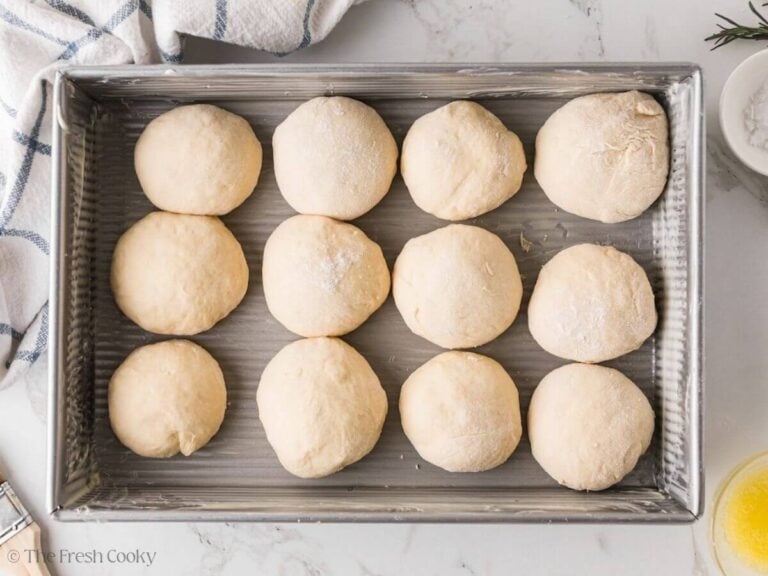
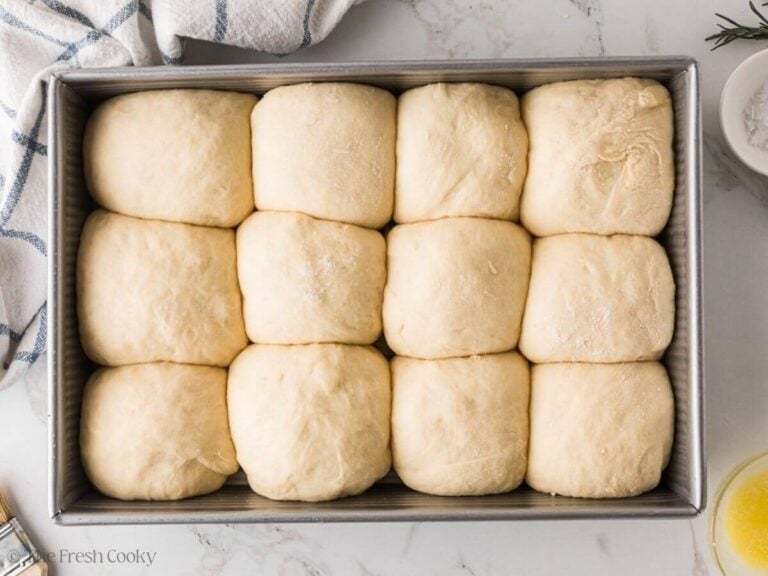
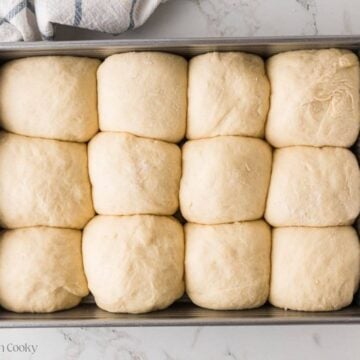
Place the dough balls in the pan, 3 across and 4 deep, close but not crowded. Cover with oil-sprayed plastic wrap or a damp tea towel and let them rise 20 to 35 minutes, until puffy but not quite doubled. Most batches take 20-25 minutes; mine took about 25.
Preheat the oven to 375°F during this rise. If your rolls are rising in the oven, move them to another warm spot first!
Step 7 | Bake
For glossy tops, whisk the egg yolk with 1 tablespoon of water and gently brush it over the rolls with a silicone pastry brush just before baking. Go easy so you don’t deflate them.
In a 9×13 pan, bake large rolls 18 to 23 minutes (mine took 23); start checking smaller rolls at 18 minutes. On a sheet pan, bake large rolls 12 to 15 minutes and smaller rolls 10 to 14 minutes. They’re done when they’re golden brown and the center roll reads 190°F on an instant-read thermometer. Go in from the side so you don’t leave a hole in the top.
Don’t panic if a roll or two cracks a little on the sides. Adrienne had the same thing happen, and it doesn’t change the taste.
Step 8 | Butter and Serve
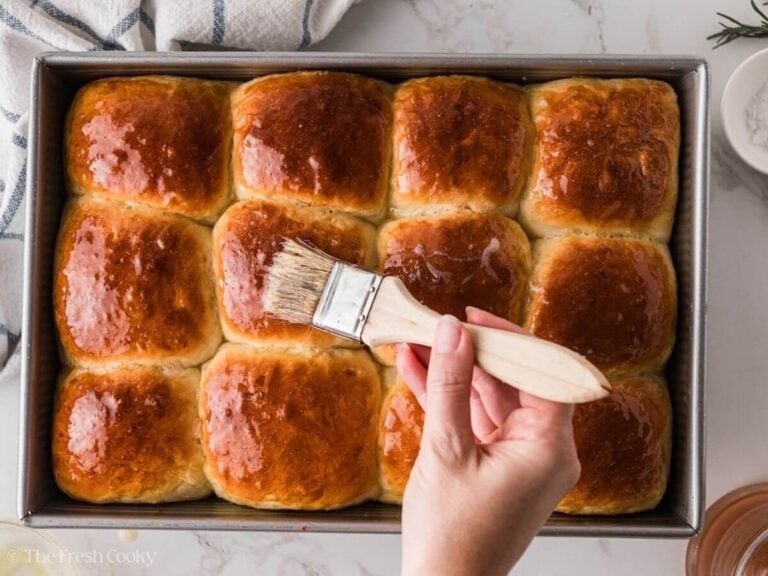
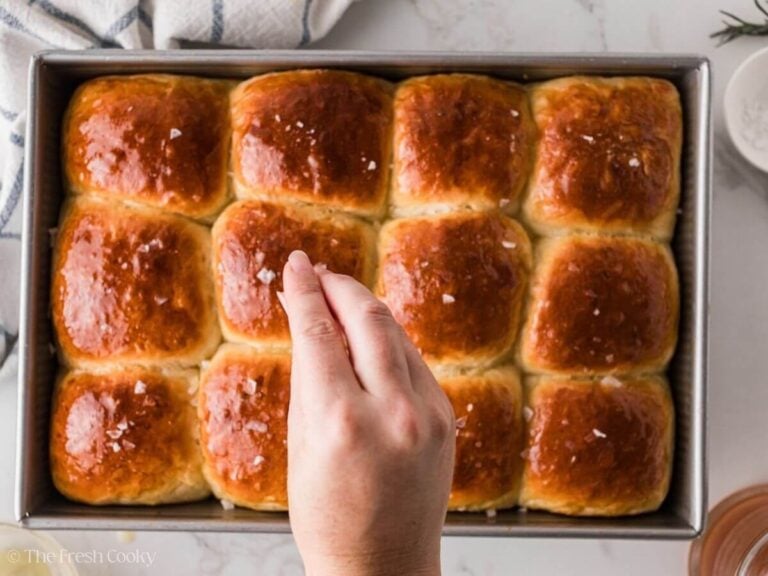
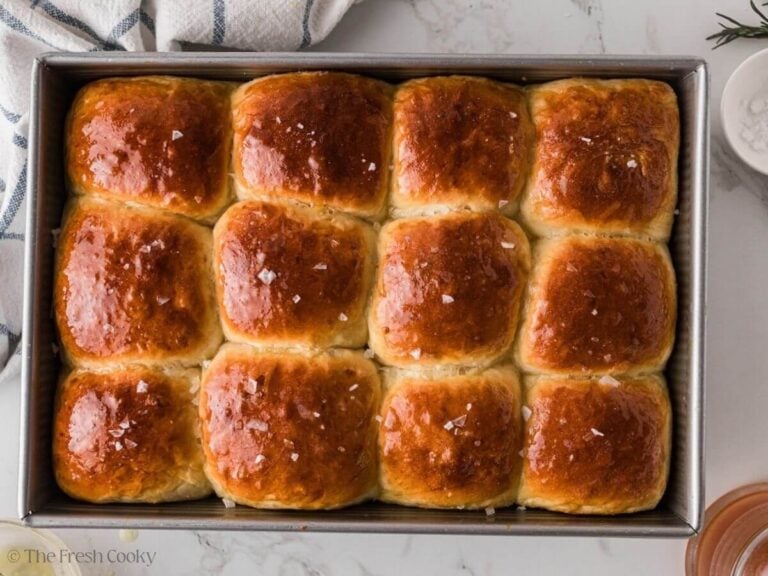
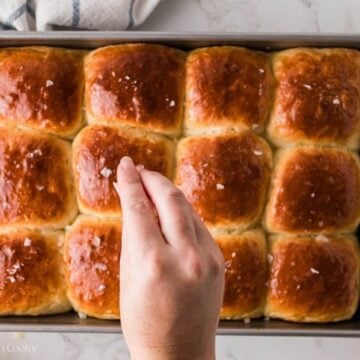
While they’re hot, brush the top of the baked rolls with the remaining tablespoon of melted butter. Sprinkle with flaky sea salt or fresh minced rosemary, if you like. Let them cool for 10 minutes, then dig in.
Tips for this Fluffy Dinner Roll Recipe
- Sticky is right. This dough looks more like biscuit dough than bread dough. Resist the urge to add flour; extra flour makes heavy rolls. Flour your hands and the counter only when it’s time to shape. The one exception: on a really humid day, an extra tablespoon of flour helps.
- Take the temperature. Keep the water and milk between 105°F and 110°F. An instant-read thermometer takes the guesswork out, and you’ll use it again to check doneness.
- Watch the dough, not the clock. A chilly kitchen slows everything down. A warm one, or high altitude, speeds it up. You’re after puffy and well-risen.
- Give it a warm spot. Yeast likes about 75°F to 80°F. My favorite spots: the oven’s proof setting; an oven heated to 100°F and turned OFF with a pan of boiling water on the lower rack; the microwave with a bowl of steaming hot water next to the dough (don’t turn it back on); or the top of the fridge. An oven light works for some folks, but mine are halogen and get way too hot. Near a sunny window or heat vent works well; right on top of a vent can be too hot. If using the oven, make sure to move the dough out before you preheat.
- Build surface tension. Pull the log along the counter and pinch the seams tight underneath to help the rolls rise tall with smooth tops.
- Don’t overdo the second rise. Puffy, not quite doubled. They’ll finish rising in the oven.
- Dense rolls usually come down to one of four things: too much flour, yeast that never got foamy, liquid that was too hot, or a rushed rise.
- Baking for a crowd. Plan on 1 to 1 ½ rolls per person. I’d make two separate batches instead of doubling in one bowl, so each batch has room to rise.
Dinner Roll Variations
Make them your own with these easy swaps and toppings.
- All-Purpose Flour: Swap it in cup for cup. The rolls won’t be quite as fluffy or tender, but they’re still delicious.
- Whole Wheat Dinner Rolls: Replace all of the flour with whole wheat flour, or just ½ of it, and proceed with the recipe as written. The more whole wheat you use, the heartier the rolls will be.
- Smaller Rolls: Cut each quarter into 4 pieces for 16 rolls. Perfect for a big holiday spread or for little hands. Bake rolls this size a few minutes less, and start checking early.
- Herb, Garlic, or Cheese Mix-Ins: Stir chopped fresh herbs (rosemary or thyme), roasted or minced garlic, chopped olives, or grated or shredded cheese into the dough right after mixing, before the first rise. Still no kneading required.
- Honey Butter Finish: For extra buttery dinner rolls, slather the warm rolls with my Whipped Honey Butter instead of plain butter. It’s a Texas Roadhouse copycat, and it’s dangerous.
- Rosemary Sea Salt: Brush with butter, then sprinkle with fresh minced rosemary and flaky sea salt. It smells like the holidays.
- Everything Bagel Tops: Brush with the egg wash, then sprinkle with everything bagel seasoning before baking.
- Make It a Centerpiece: For a party showpiece, my Garlic Pull Apart Bread Wreath is cheesy, garlicky, and festive.
- Gluten-Free: Use a quality gluten-free cup-for-cup, all-purpose flour here; I recommend 3 ½ cups plus ½ cup of certified gluten-free oat flour, which helps with texture.
- Dairy-Free: Swap the butter for plant-based butter (my favorites are Earth Balance and Miyoko’s). Swap the milk for unsweetened almond milk (or other plant-based milk). I’ve also used oat milk.
What to Serve with These Thanksgiving Dinner Rolls
Every holiday plate needs something to mop up the gravy. These rolls are it.
Build your Thanksgiving dinner:
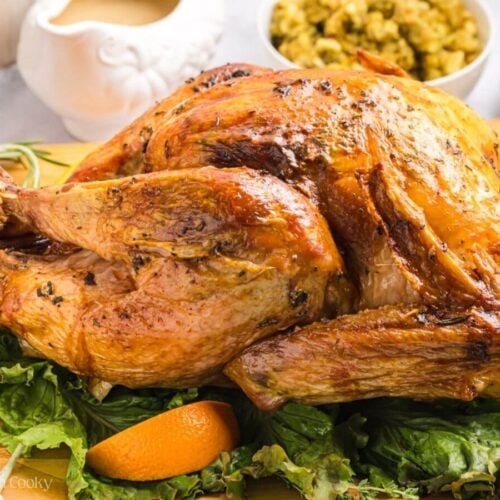
- My Herb Butter Roasted Turkey, or Air Fryer Turkey Breast for a smaller crowd
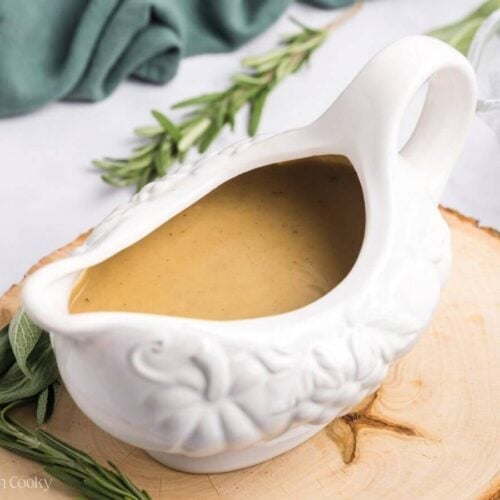
- Turkey Giblet Gravy (no drippings needed!) and Roasted Garlic Mashed Potatoes
- Best Thanksgiving Dressing or Maple Apple Sausage Stuffing
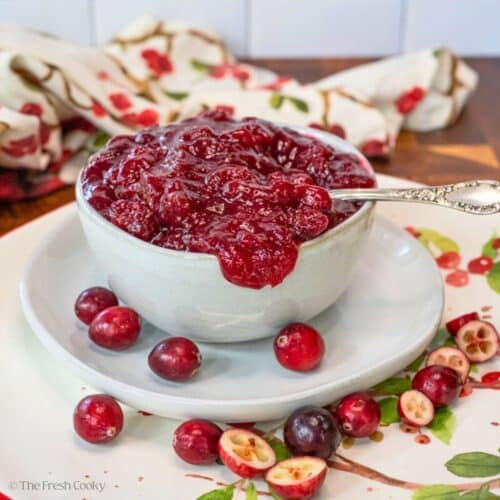
- Ultimate Green Bean Casserole, Sweet Potato Casserole, and homemade Cranberry Sauce
For more ideas, here are my Make-Ahead Thanksgiving Side Dishes.
For Christmas or Easter: They’re right at home next to a Spiral Ham or Orange Glazed Ham.
Soup night: Just like we did, pair them with French Onion Soup, Slow Cooker Beef Stew, Creamy Chicken and Wild Rice Soup, or Broccoli Cheese Soup. Adrienne loves them with chili, too, like my White Chicken Chili or Firecracker Chili.
The day after: They’re the perfect size for small sandwiches. Split leftover rolls for mini turkey sandwiches, or use them in my turkey and cheese sliders.
How to Store Homemade Dinner Rolls
Homemade bread has no preservatives, so it’s best the day it’s baked. Here’s how to keep soft dinner rolls from drying out.
Room Temperature: Let the rolls cool completely, then store them in an airtight container or zip-top bag for up to 3 days. Storing them warm traps steam and makes them soggy.
Refrigerating: Skip it. The refrigerator actually dries bread out faster. Keep them on the counter, or freeze them.
To Reheat:
- Oven: Wrap the rolls in foil and warm at 350°F for 10 to 12 minutes. The foil traps steam so they come out soft, like they were just baked.
- Microwave: Wrap a roll in a damp paper towel and heat for 10 to 15 seconds. Eat it right away; microwaved bread turns chewy as it cools.
- Kathleen’s Tip: Brush reheated rolls with a little melted butter for that fresh-from-the-oven taste.
Freezing Baked Rolls: Freeze cooled, baked rolls in a freezer bag for up to 3 months. Thaw on the counter, then reheat in foil as above.
Freezing Unbaked Rolls: Freeze the dough after shaping, before the second rise. Set the shaped rolls on a parchment-lined sheet pan with space between them and freeze until rock hard (about 2 hours). Then move them to a zip-top freezer bag.
- To bake from frozen: Arrange the frozen rolls in a greased 9×13 pan. Cover with oil-sprayed plastic wrap or a damp tea towel and let them rise for about 4 hours on the counter, until puffy. Brush with egg wash and bake as directed.
- Or thaw overnight: Let the frozen rolls thaw and rise in the fridge overnight, then bake as directed.
Make-Ahead (Overnight) Instructions: Follow the recipe through shaping. Cover the pan tightly with sprayed plastic wrap and refrigerate for 8 to 18 hours. The next day, set the pan on the counter, still covered, for 1 to 1 ½ hours until puffy. Bake, brush, and top as directed. Cold dough may need a few extra minutes, so go by the 190°F reading. Adrienne chilled hers for 11 hours, let them sit on a 79°F counter for a little over an hour, and they needed about 5 extra minutes in the oven. They came out golden and soft.
Dinner Roll Recipe FAQs
Yes. Swap it cup for cup. The rolls won’t be quite as fluffy or tender as with bread flour, but they’re still delicious.
Yes, use the same amount. Since you’re already proofing the yeast in warm water in step 1, nothing else changes. The first rise may take a little longer, so go by how puffy the dough looks.
You could, but you don’t need one. Normally, that’s exactly how I make my yeast rolls: in the bowl of a stand mixer with the dough hook attachment, kneading away on medium speed. That’s what makes this recipe so special. You mix everything easily with a spoon, and the long rise does the kneading for you.
Two. A standard ¼-ounce packet holds 2 ¼ teaspoons of yeast, so you’ll open a second packet to get 3 teaspoons (and 2 ½ teaspoons at high altitude). Measure it out and save the rest.
Plan on 1 to 1 ½ rolls per person. One batch makes 12 large rolls or 16 smaller ones. For a big crowd, make two separate batches instead of doubling in one bowl.
Yes, two ways. Shape the rolls, cover the pan, and refrigerate them overnight (8 to 18 hours), then bake the next day. Or bake them the day before, store them airtight, and reheat wrapped in foil at 350°F for 10 to 12 minutes.
Yes. Freeze the shaped rolls on a parchment-lined sheet pan until rock hard, then bag them. To bake, set the frozen rolls in a greased 9×13 pan, cover, and let them rise about 4 hours (or thaw and rise overnight in the fridge), then bake as directed.
Usually it’s too much flour (spoon and level, don’t scoop), yeast that didn’t foam, milk or water that was too hot, or a rise that got cut short. This dough should be sticky.
Use 2 ½ teaspoons of instant yeast and add 2 extra tablespoons of flour. Start checking the first rise at 60 minutes, though it may still take the full 2 hours.
They should be golden brown, and the center roll should read 190°F on an instant-read thermometer. Insert it from the side so you don’t leave a hole in the top.
In my kitchen, these beat my kneaded bread machine rolls. A wetter dough and a long, slow rise build the structure that kneading normally does, so you still get a soft, fluffy roll.
More Thanksgiving Recipes to Try
Like this recipe?
Don’t forget to give it a ⭐️⭐️⭐️⭐️⭐️ star rating and leave a comment below the recipe!
No-Knead Thanksgiving Dinner Rolls
Video
Equipment
- Large mixing bowl and a sturdy spoon or dough whisk
- 9×13 pan, sheet pan, or jelly roll pan
- Bench scraper or sharp knife
- Pastry brush (for the butter and egg wash)
Ingredients
- 3 teaspoons instant yeast 2 ½ teaspoons at high altitude; I use Saf instant yeast, may also use active dry yeast, see notes
- ¼ cup honey divided
- ½ cup warm water 105°F to 110°F
- 1 cup whole milk warmed to lukewarm (105°F to 110°F)
- 2 large eggs room temperature
- 5 tablespoons butter divided (I use salted): 4 tablespoons melted and cooled for the dough, 1 tablespoon melted for brushing
- 4 cups bread flour 480g (for high altitude: add 2 tablespoons more flour.) See note below for using all-purpose flour.
- 2 teaspoons kosher salt
- 1 to 2 tablespoons soft butter for greasing the pan, or use spray oil
- flaky sea salt for sprinkling on top
Optional (for shiny tops)
- 1 large egg yolk mixed with 1 tablespoon butter
Instructions
Mix the dough
- Step 1: Proof the yeast. In a small bowl or glass measuring cup (that's what I use), combine the warm water, yeast, and 1 tablespoon of the honey. Let it sit 5 minutes, until foamy and yeasty-smelling.3 teaspoons instant yeast, ¼ cup honey, ½ cup warm water
- Step 2: In a large bowl, whisk 4 cups bread flour and the salt. Make a large well in the center.4 cups bread flour, 2 teaspoons kosher salt
- Step 3: In a medium bowl, whisk the warm milk, remaining honey, 4 tablespoons melted and cooled butter, and eggs until smooth. Let the butter cool a bit first so it doesn't scramble the eggs.1 cup whole milk, 5 tablespoons butter, 2 large eggs
- Step 4: Pour the yeast mixture and the butter mixture into the well. Stir with a wooden spoon or dough whisk just until no streaks of flour remain, about 2 minutes. The dough will be sticky, almost like biscuit dough. That's normal.
- Step 5: Cover with plastic wrap or a wet tea towel and let rise in a warm place for about 90 to 120 minutes, until well risen and puffy. It can take the full 2 hours. At altitude, start checking at 60 minutes; a peek will tell you what's going on.
Shape
- Step 6: Grease a 9×13 pan (I like soft butter), or line a sheet pan or jelly roll pan with parchment.1 to 2 tablespoons soft butter
- Step 7: Turn the dough onto a lightly floured surface. Form it into a log, then pull it towards you on the counter a few times to build a little surface tension. This makes it easier to cut. Cut it in half, then cut each half in half again. Cut each quarter into 3 pieces, for 12 large rolls. For 16 slightly smaller rolls, cut each quarter into 4 pieces. If desired, weigh each dough ball and make them even for evenly sized rolls. Flatten each piece, then tuck the edges under and pinch them together to form a ball. Gently roll each ball on the counter to smooth the top. If one piece ends up bigger than the others, pinch a little off and add it to a smaller one. The dough is soft and easy to work with.
- Step 8: Place the rolls in the pan, close but not crowded. Cover with plastic wrap sprayed with oil, or a wet tea towel, and let rise 20 to 35 minutes (mine took about 25), until puffy but not quite doubled. Preheat the oven to 375°F during this rise. If your rolls are rising in the oven, move them to another warm spot first. (See notes for ways to create a warm spot in your house.)If using a sheet pan and golden rolls all the way around are desired, leave a couple inches between each roll. For glossy tops, whisk the egg yolk with 1 tablespoon water. Gently brush it over the rolls just before baking, careful not to deflate them.1 large egg yolk
Bake
- Step 9: Bake until golden brown. In a 9×13 pan, large rolls take about 18-23 minutes; start checking smaller rolls around 18 minutes. On a sheet pan, bake large rolls 12 to 15 minutes and smaller rolls 10 to 14 minutes. Check for doneness with an instant-read thermometer: the center roll should read 190°F. Go in from the side of the roll so you don't leave a hole in the top.
- Step 10: Remove from the oven and brush the hot rolls with the remaining 1 tablespoon melted butter. Sprinkle with flaky sea salt or fresh minced rosemary, if desired. Cool 10 minutes before serving.flaky sea salt
Notes
Nutrition



Rate & Comment