
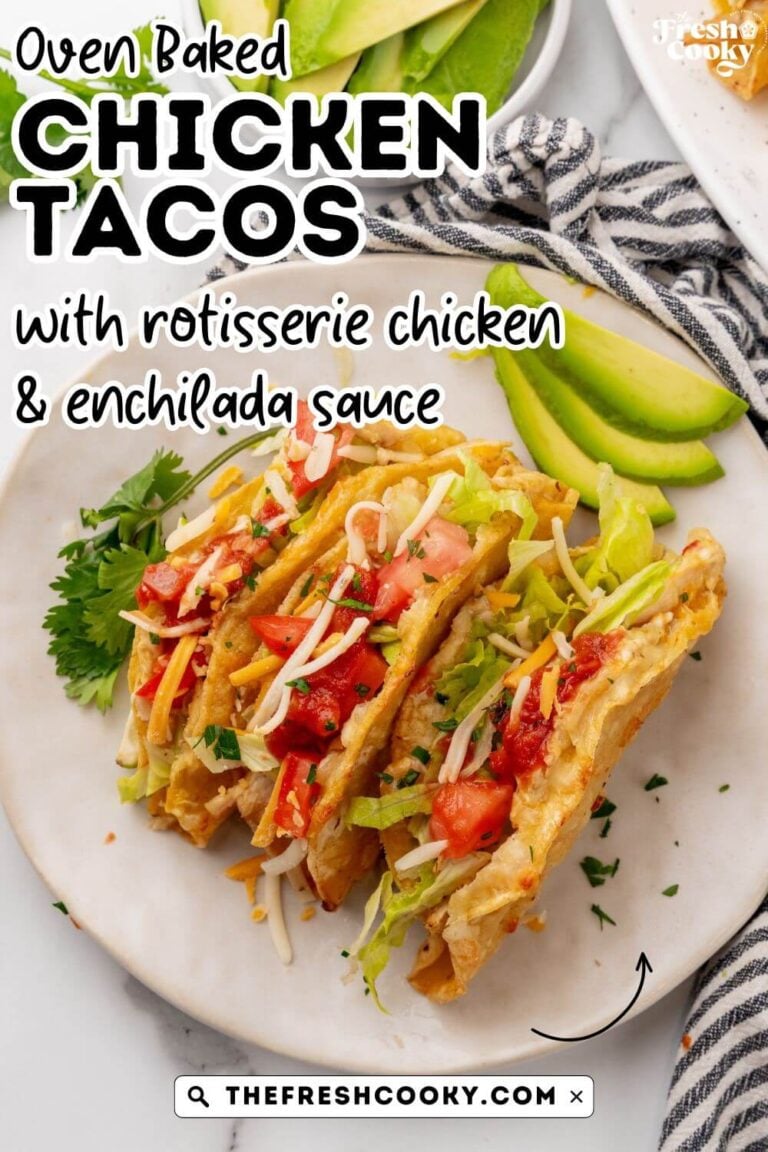


If you’ve scrolled through social media lately, you’ve probably seen those crispy baked tacos everyone’s making. But after testing a few viral versions, I found the flavor was missing. So, I set out to fix that! These sheet pan Baked Chicken Tacos are everything you want. They’re crispy, cheesy, and packed with serious flavor in every bite!
This May Just Be the BEST Chicken Tacos Recipe!
I know everyone says their taco recipe is “the best”, but after trying so many versions online, I just couldn’t find one that delivered both flavor and the ultimate crispy tacos. I loved the idea of baking with less oil and hands-off cooking, but they all needed something extra! Enter one of my new favorite recipes! Tried and tested!
So, I made a few tweaks:
- I swapped out the usual Rotel tomatoes for green chile enchilada sauce (I love the Hatch brand). It gives a deeper, smokier flavor that balances the cheese perfectly.
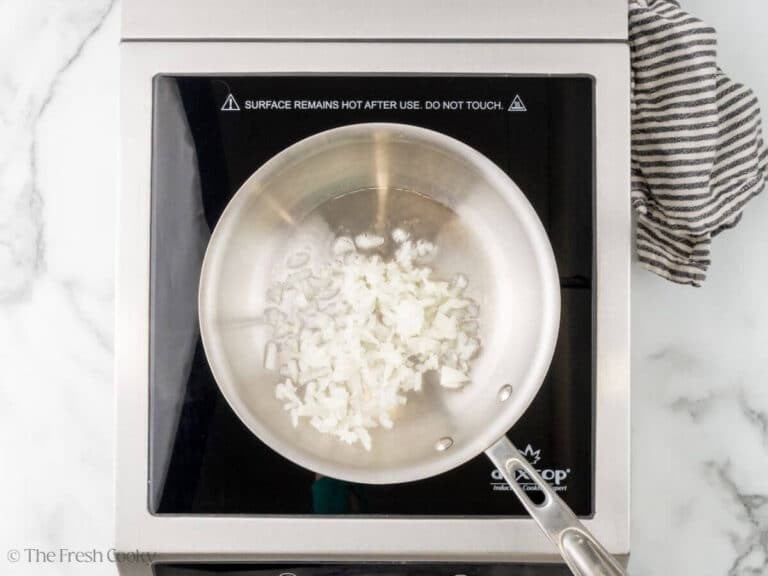
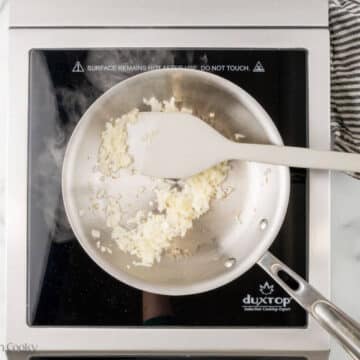
- I took a few extra minutes to sauté the onions, which adds so much depth. Totally worth it! But you can skip it if you want.
- I tested garlic powder vs. fresh garlic and, surprisingly, couldn’t tell a huge difference, so garlic powder it is! Because we’re going for easy here!
- And because I love my taco shells extra crispy, I added a quick pre-bake step before filling them.
They’re still ready in under 30 minutes, can easily feed a crowd, and are everything you love about tacos, just easier, crispier, and way less messy!
What You’ll Need to Make Oven Baked Chicken Tacos
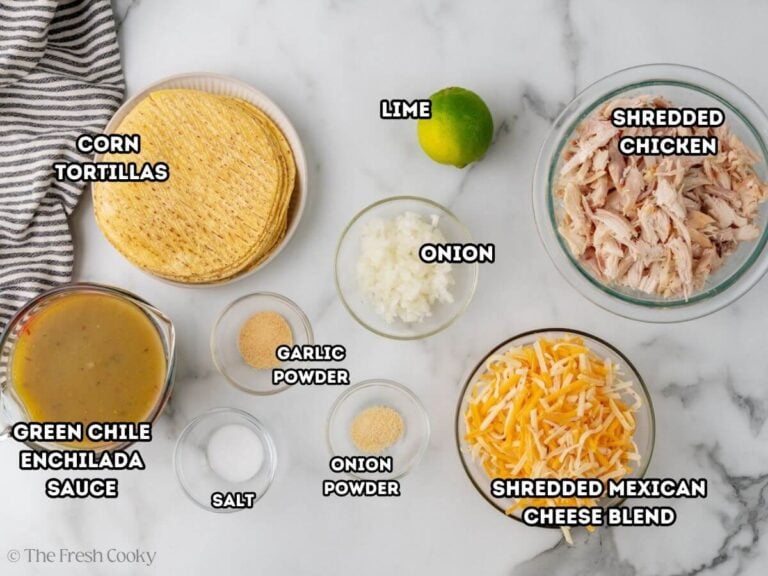
- Spray Oil: You only need a little spray oil to make them super crispy in the oven!
- Onion: A little onion in the chicken filling adds loads of flavor. I like to sauté mine first for even more added flavor!
- Shredded Chicken: You can use shredded rotisserie chicken or follow my shredded chicken recipe!
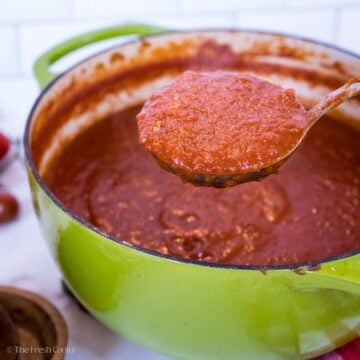
- Green Enchilada Sauce: A bit of green enchilada sauce in the shredded chicken adds a slightly spicy, tangy flavor. This is the brand I like.
- Garlic Powder & Onion Powder: For an added depth of flavor!
- Salt: Add to taste.
- Lime: For a hint of tang, it brightens it all up!
- Shredded Cheese: I used a Mexican blend cheese, but you can use any shredded cheese you have on hand.
- Corn Tortillas: Use your favorite corn tortillas!
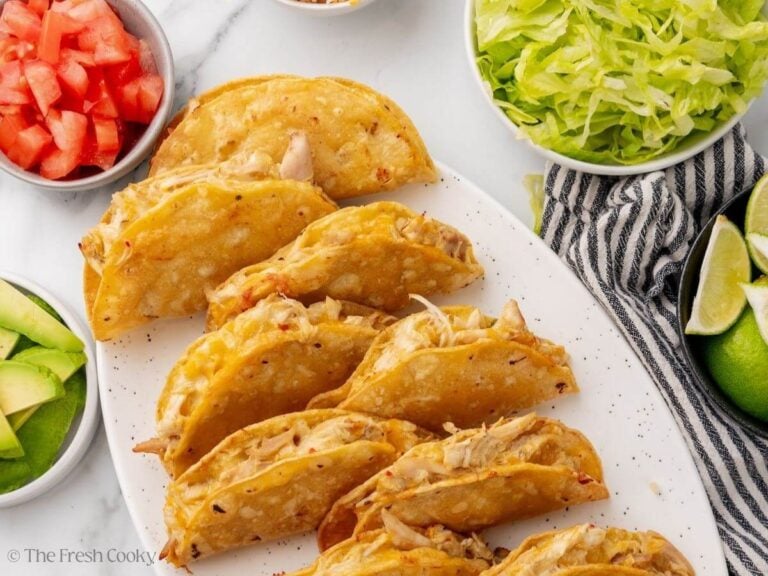
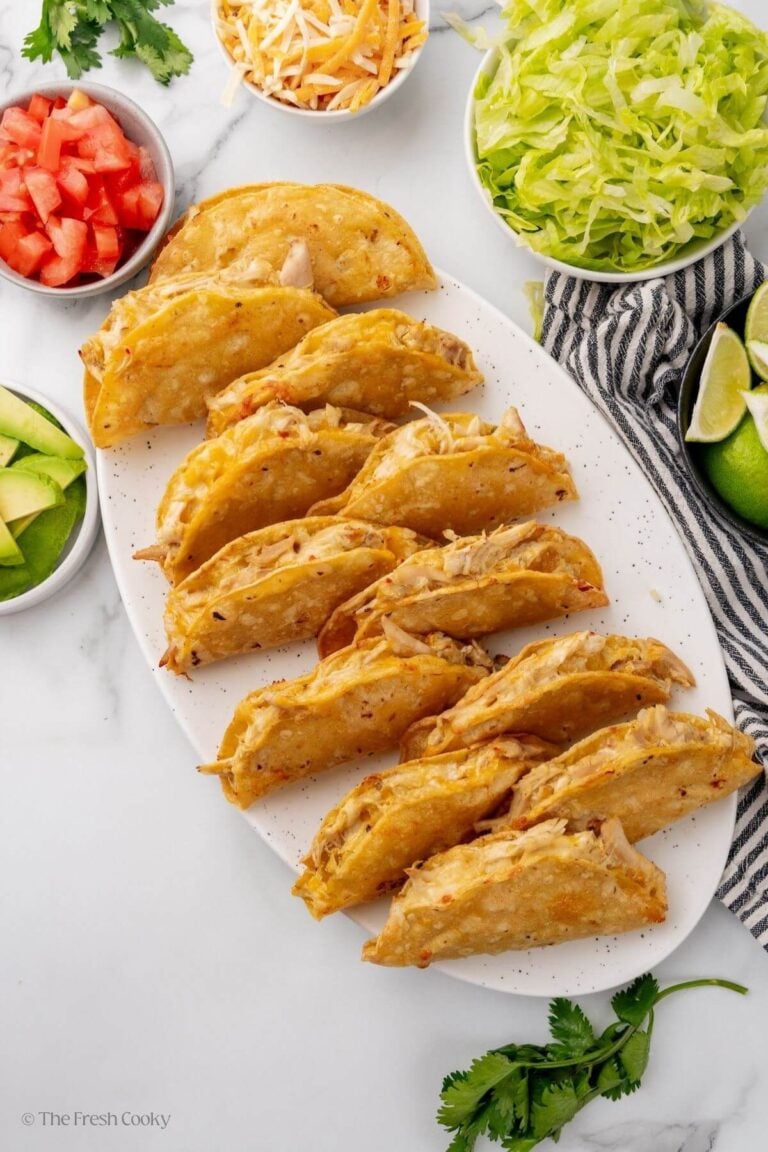
- Toppings: The topping options are endless. Try hot sauce, salsa, guacamole, sliced avocado, shredded lettuce, chopped tomatoes, cilantro, jalapenos, and lime! Your favorite taco toppings here!
Get the full recipe in the recipe card below.
How to Make Easy Chicken Tacos
Step 1 – Prep the Taco Filling
Set the oven to 425°F (220°C). Lightly spray or brush two sheet pans with oil.
In a small skillet over medium heat, cook the diced onion in a drizzle of oil for 3–5 minutes until softened and golden.
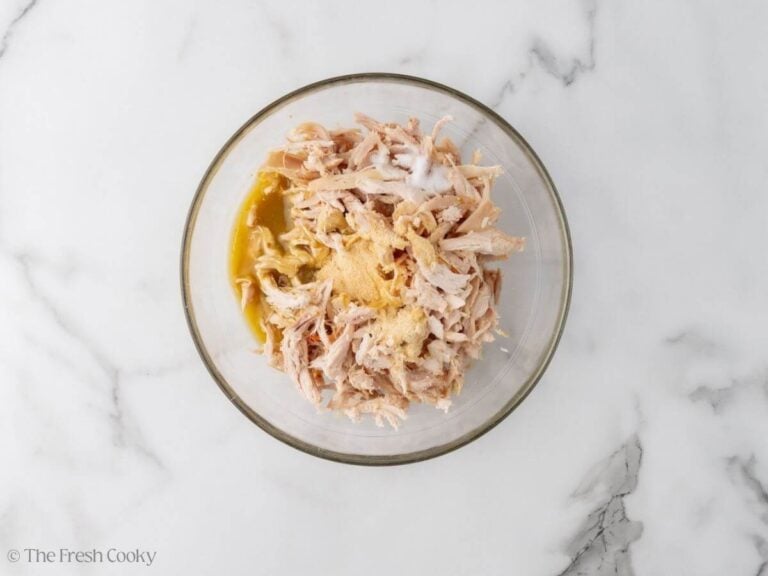
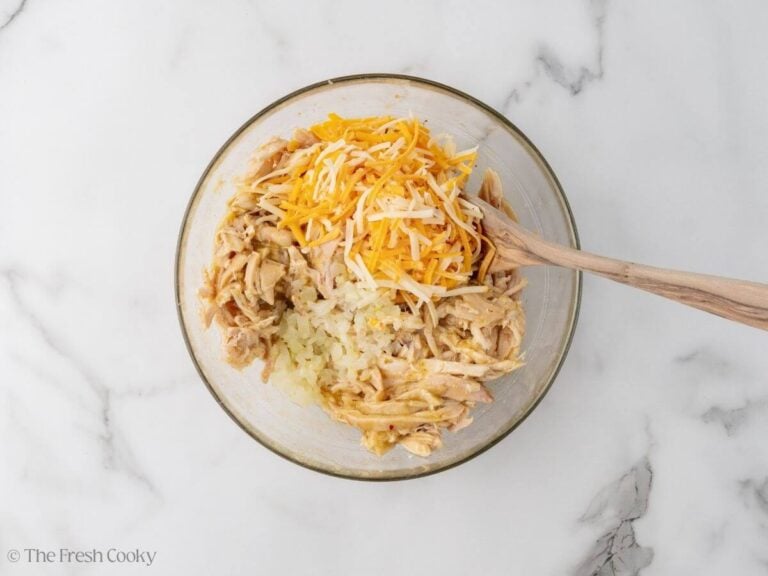
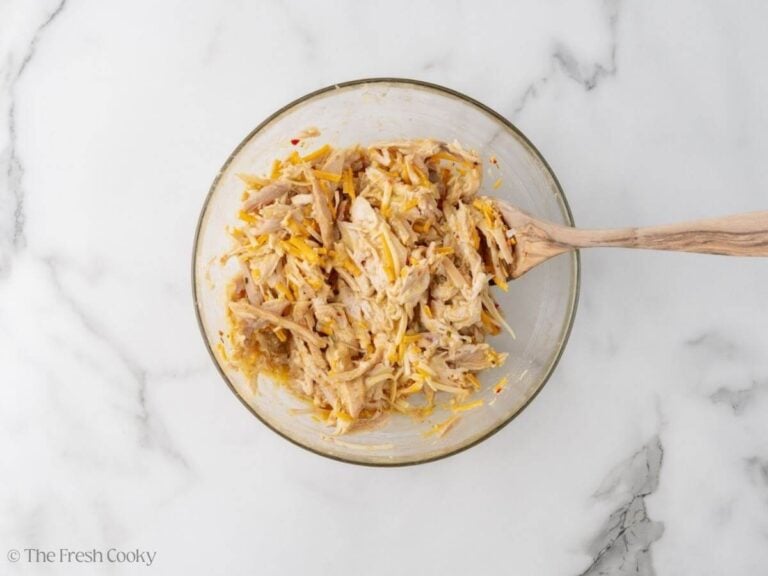
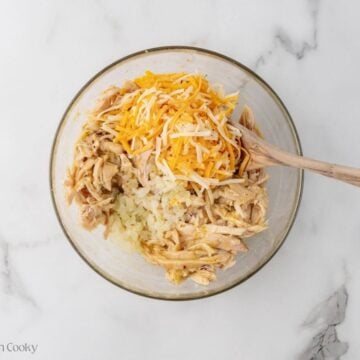
In a large bowl, combine the shredded chicken, enchilada sauce, garlic powder, onion powder, salt, lime juice, and the sautéed onions. Stir in 1 cup of cheese if you like it extra melty. Let sit a few minutes so the flavors soak in.
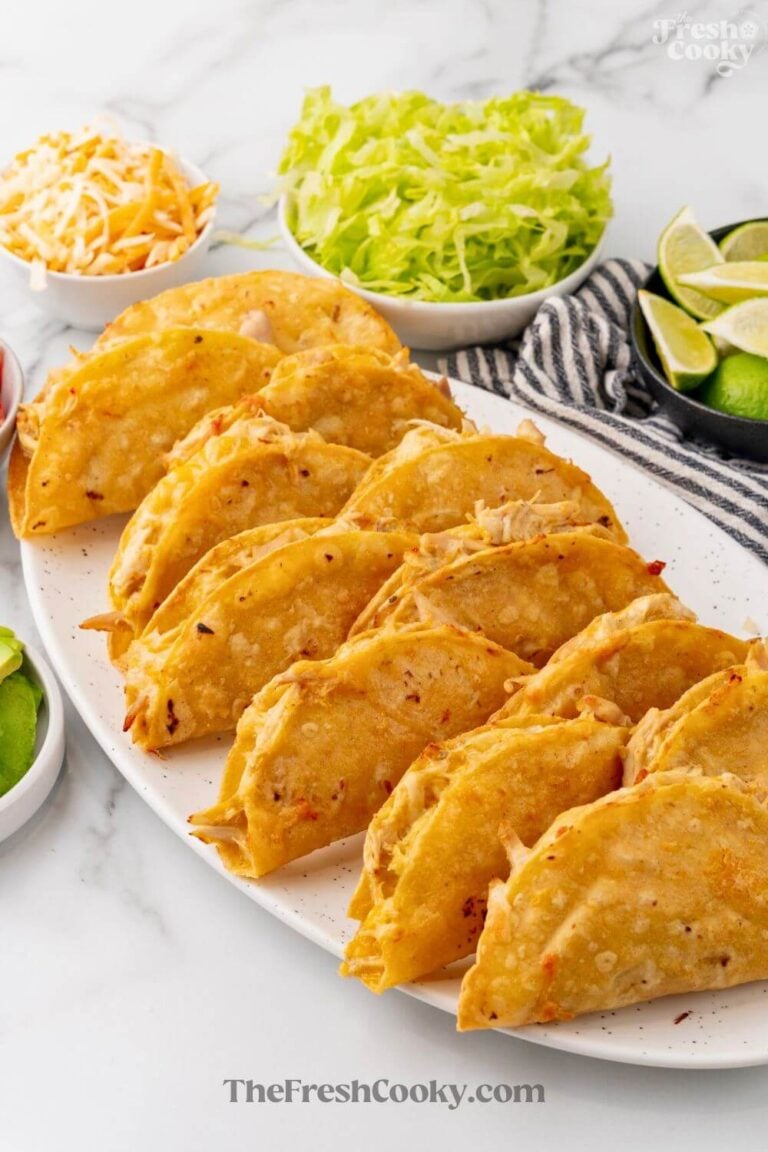
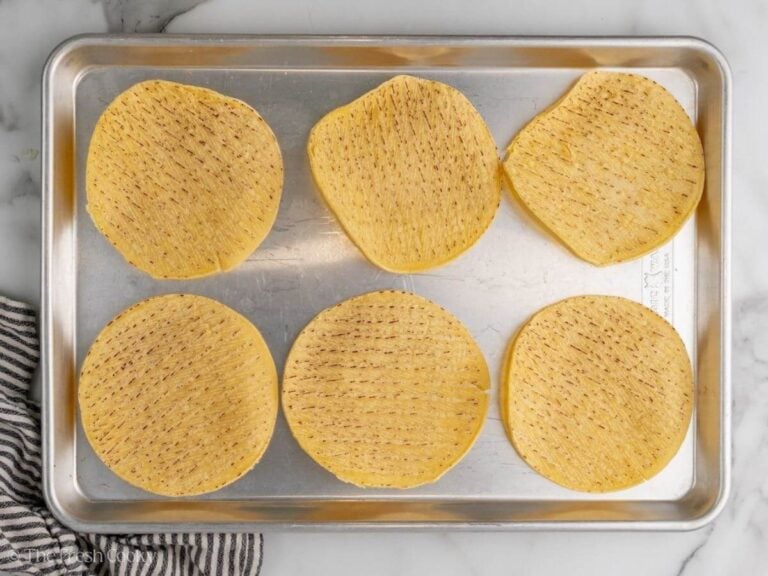
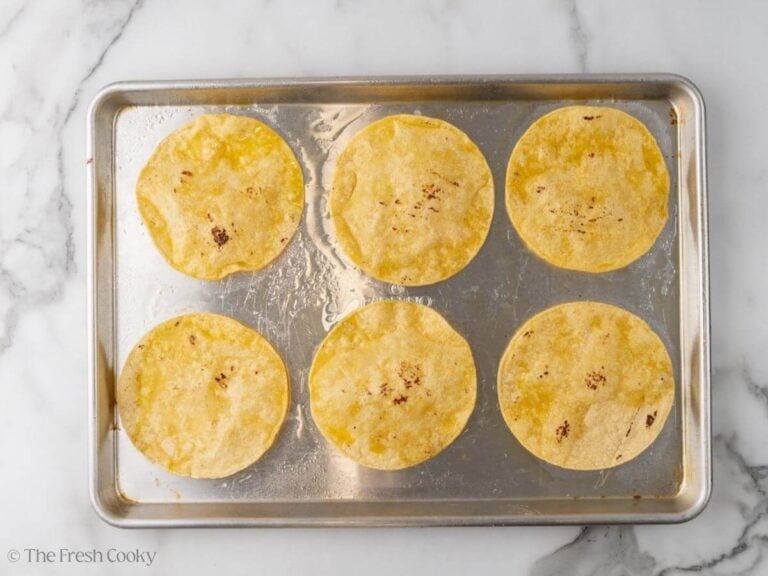
Step 2 – Crisp the Tortillas
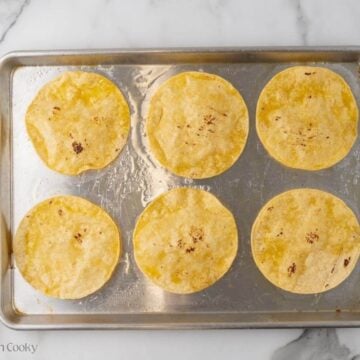
Spray both sides of each tortilla lightly with oil and bake them in a single layer for 3–6 minutes, just until pliable and starting to crisp.
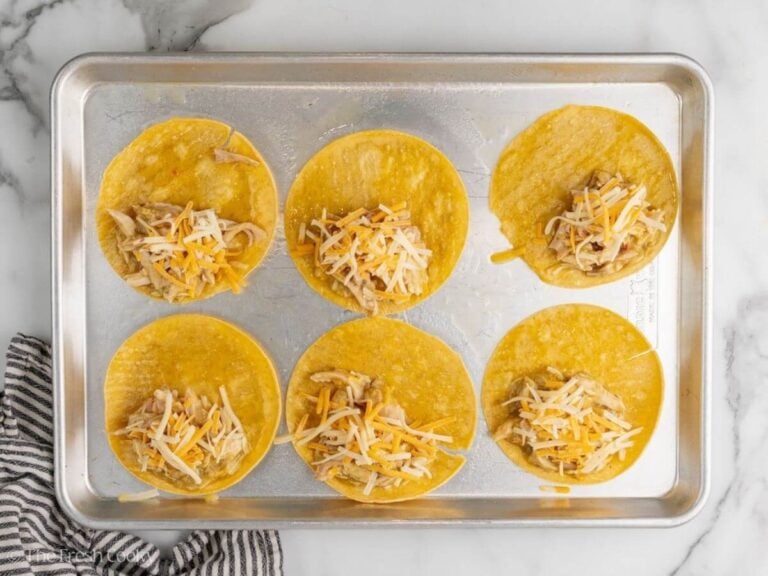
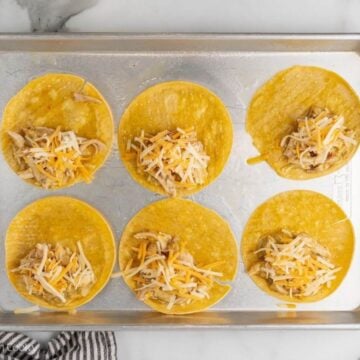
Step 3 – Assemble the Tacos
Spoon about 3 tablespoons of chicken mixture onto one half of each tortilla. Sprinkle a little more cheese on top, then fold in half. Arrange on your sheet pans.
Step 4 – Bake & Enjoy
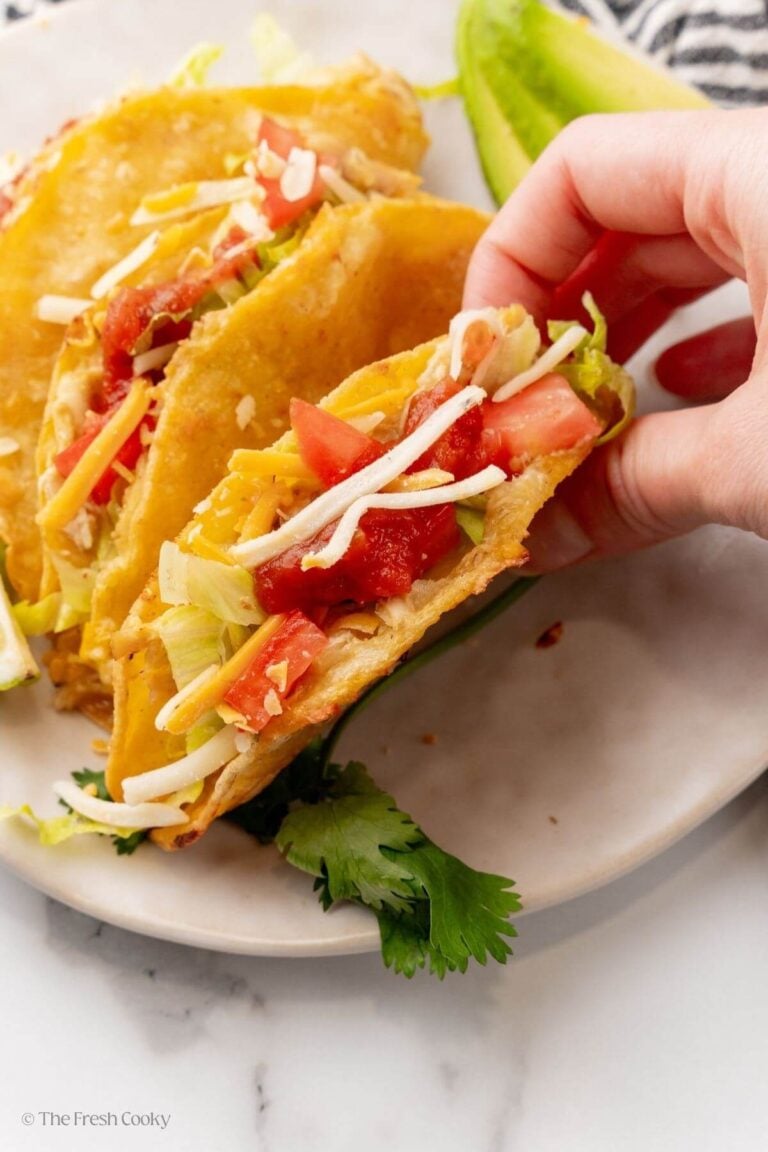
Bake for 12–17 minutes, flipping halfway through for maximum crispiness. Serve warm with all your favorite toppings, and maybe a little extra warm enchilada sauce on the side!

Tips for Success
- Don’t skip the pre-bake! That quick pre-bake step before filling might seem optional, but it makes all the difference. It keeps your tortillas from getting soggy once you add the chicken and cheese, giving you that perfectly crisp taco shell.
- Use rotisserie chicken for ease and flavor! Rotisserie chicken is not only a huge time-saver but also adds built-in flavor and moisture to your filling. Just shred it well so the sauce coats evenly!
- Go for corn tortillas. Corn tortillas crisp up beautifully in the oven and bring that authentic taco shop flavor. If you really want, you can use small flour tortillas, but they won’t get as crisp in the oven!
- Flip halfway through baking. It only takes a minute, and flipping the tacos halfway through ensures both sides get golden and crunchy. This extra little step helps them hold their shape and gives that perfect “crisp on the outside, melty inside” bite.
- Add cheese in two layers. Mixing some cheese into the filling helps everything bind together, while sprinkling more on top gives you that oozy, melted finish!
Serving This Baked Chicken Tacos Recipe
These oven-baked chicken tacos are perfect for family dinners, on busy nights, game days, or casual gatherings. Pair them with your favorite Mexican-inspired sides, especially for taco night! Here are some of my favorite things to serve them with:
- Mexican rice or cilantro lime rice
- Street corn rice
- Homemade guacamole and chips
- Queso dip
- Easy blender salsa
- A fresh margarita on the side!
Variations
- Want even more flavor? Add ½ teaspoon of smoked paprika, cumin or your favorite seasonings.
- You can use this filling for more than just tacos, too! Try it in quesadillas, enchiladas, or even add it to a salad!
- Kids love these tacos! Let them choose their toppings and make their day!
- Use your favorite cheese, try cotija, colby jack, shredded cheddar, etc.
- Try this same recipe using your favorite taco ground beef mixture, too!
- Add a schmear of refried beans (about 1 tablespoon) to the tortilla before adding the filling.
Rotisserie Chicken Tacos Toppings
Here’s where you can really have fun! These easy baked tacos can be topped with so many different fixings! Mix and match your favs:
- Shredded lettuce or cabbage
- Fresh tomatoes or pico de gallo
- Diced avocado or guacamole
- Cilantro and lime wedges
- Jalapeño slices
- Sour cream or Mexican crema
- Hot sauce or extra green chile sauce
Storing Leftover Baked Chicken Tacos
To store: Let the tacos cool completely, then place them in an airtight container or wrap them individually in foil. They’ll keep in the refrigerator for up to 3 days.
To freeze: Cool the tacos first, then arrange them in a single layer on a baking sheet to freeze until firm. Once frozen, transfer them to a freezer-safe bag or container. They’ll stay fresh for up to 2 months, perfect for busy weeknights!
To reheat:
- Air fryer: 375°F for about 4–6 minutes until hot and crispy again.
- Oven or toaster oven: 400°F for 8–10 minutes, flipping once halfway through.
- Microwave: About 45–60 seconds per taco (they’ll be softer but still tasty).
Pro tip! If you’re reheating straight from frozen, add an extra 3–5 minutes to your bake time to get them perfectly warm and crisp.
Got Leftover Baked Chicken Tacos?
This makes a good amount. I regularly make the entire amount of chicken mixture, use what I need, and freeze the rest in smaller portions so it’s easy to make tacos for two!
I had a LOT of leftover tacos during my testing. So one day, I layered the tacos in a baking dish sprayed with cooking spray or oil, then poured the remaining can of enchilada sauce over the top. Depending on how many leftover tacos you have, you may need a little extra. Try my homemade enchilada sauce or use another can. Tuck some cheese between the layers, then cover with foil and bake for about 20 minutes at 350°F (175 °C). Remove the foil and bake for an additional 10 minutes, until soft, melty, and bubbly!
I hope you love this easy weeknight meal, because sheet pan dinners are the best!
More Mexican recipes you’ll love
Like this recipe?
Don’t forget to give it a ⭐️⭐️⭐️⭐️⭐️ star rating and leave a comment below the recipe!
Equipment
Ingredients
- Spray oil I like Avocado oil
- ½ – 1 small onion small diced
- 4 cups shredded chicken shredded well (I use rotisserie or shredded chicken)
- 7 – 8 ounces Green chile enchilada sauce this will be about half a 15 ounce can
- 1 teaspoon garlic powder or 3-4 minced garlic cloves
- ½ – 1 teaspoon kosher salt
- ½ teaspoon onion powder
- 1 lime juiced
- 1-2 cups shredded Mexican cheese blend 8-ounces, divided
- 12 6-inch corn tortillas I like organic
- Optional Toppings: Hot sauce, salsa, guacamole, sliced avocad, shredded lettuce, chopped tomatoes, cilantro, lime
Instructions
- Preheat your oven to 425°F (220°C). Lightly spray or brush two large half-sheet pans (18 x 13) with oil.Spray oil
- Sauté Onion (optional but recommended): Heat a drizzle of oil in a small skillet over medium heat. Sauté the diced onion for 3–5 minutes, until softened and lightly golden. You can skip this step and add raw onion to the mix—but trust me, sautéing brings out the flavor and makes the tacos sing!½ – 1 small onion

- Mix the Filling: In a large bowl, combine the shredded chicken, enchilada sauce, garlic powder, onion powder, salt, and lime juice. Stir to coat evenly. Add the sautéed onions and, if desired, stir in 1 cup of cheese. Let the mixture rest for a few minutes to absorb flavor.4 cups shredded chicken, 7 – 8 ounces Green chile enchilada sauce, 1 teaspoon garlic powder, ½ – 1 teaspoon kosher salt, ½ teaspoon onion powder, 1 lime, 1-2 cups shredded Mexican cheese blend
- Pre-Crisp the Tortillas: Lightly spray both sides of each tortilla with oil. Arrange them in a single layer on the prepared sheet pans. Bake for 3–6 minutes, just until pliable and starting to crisp. Carefully remove from oven.12 6-inch corn tortillas
- Assemble the Tacos: Using a slotted spoon, spoon about 3 tablespoons of the chicken mixture onto one half of each tortilla. Sprinkle a little extra cheese on top, then fold in half to form tacos, it’s okay if they don’t stay folded, they will after you flip. Arrange them neatly on the sheet pans.
- Bake Until Crispy: Bake for 12–17 minutes, until golden and crispy. Tip: They crisp up even more if you flip them halfway through—worth the extra minute!
- Serve and Enjoy: Serve warm with your favorite toppings: warm the extra enchilada sauce and serve with the tacos, salsa, avocado, lettuce, lime, and a little extra cheese if you're feeling fancy.


Notes
- I tested so many popular baked chicken taco recipes using Rotel, green chiles, and taco seasoning—and I just wasn’t wowed. So, I went back to my favorite pantry staple: green chile enchilada sauce. It’s the secret that gives these tacos their delicious, tangy, slightly smoky flavor.
- Want more heat? Simply swap in a spicier enchilada sauce.
- I also wasn’t thrilled with the shells’ crispness, so I added a step to precrisp them before filling. If you don’t mind softer shells, skip this step!
- Pro Tip: This recipe halves easily! Or make the full batch of filling, cool, label, and freeze it for an easy dinner another day.
- Refrigerate: Store leftover tacos in an airtight container for up to 3 days.
- Freeze: Cool completely, then place in a freezer-safe container or bag for up to 2 months. Thaw overnight in the fridge before reheating.
- Reheat Options:
- Air Fryer: 375°F for 4–6 minutes, until hot and crisp.
- Oven/Toaster Oven: 400°F for 8–10 minutes, flipping halfway through.
- Microwave (soft version): 45–60 seconds per taco — not as crispy, but still tasty for a quick lunch!
Nutrition


Sheree Kirchner
These tacos are amazing! My husband, daughter and mom loved them! The chicken filling is delicious! The green chili enchilada sauce adds the perfect amount of spice (I did use “medium”). You can add toppings, whatever you like best, that add to the “yum!” of this incredible recipe. I can’t wait to make for our next family gathering! My grandkids and everyone else will LOVE these! Thank you Kathleen!
Thank you so much, Sheree! You are the best!!
Donna
I made these baked chicken tacos last evening for the first time! They were A-MA-ZING! Not difficult to put together at all. Quite scrumptious indeed! We loved them, and I’m going to make them again very soon! Adding this recipe to my collection!
So glad you loved them Donna. Thank you for your sweet comment.