


Think you can’t bake this beautiful loaf of Challah bread? Think again! I hold your hand through every step. It’s simple, and I’ve got a video showing you how to do the braiding!
⭐️⭐️⭐️⭐️⭐️ Susan raved, “I tried the Challah bread and it was delicious! My husband ate several pieces. It came together easily. “
This is the Best Challah Recipe
This bread is my tribute to my dear childhood Jewish friends. Growing up in a diverse neighborhood, I got to experience Jewish traditions firsthand, and challah became one of my favorite breads. After countless test batches (my taste testers went NUTS for this version; and yes, I had to hide it from Mr. Fresh Cooky), I’ve perfected a Challah Recipe that balances tradition with simplicity. Rich with eggs and honey, yet easy enough for any home baker to make.
And if how to braid challah has ever looked intimidating, don’t worry, I’ll walk you through it step by step. Whether you go for the classic three-strand braid, a round loaf, or even turn the dough into rolls, I’ll show you how to get that beautifully woven shape. Plus, this recipe makes two loaves, so you can eat one fresh and freeze the other (or share it with a neighbor!).
Once you try homemade challah, you’ll never go back to store-bought. And be sure to pair them with these Almond Macaroons, perfect for Passover. Ready to get started? Let’s do this!
Why You’ll Love This Recipe for Challah Bread
Once you try Challah, you will realize it’s so much more than just bread, but an experience that warms you from the inside out!
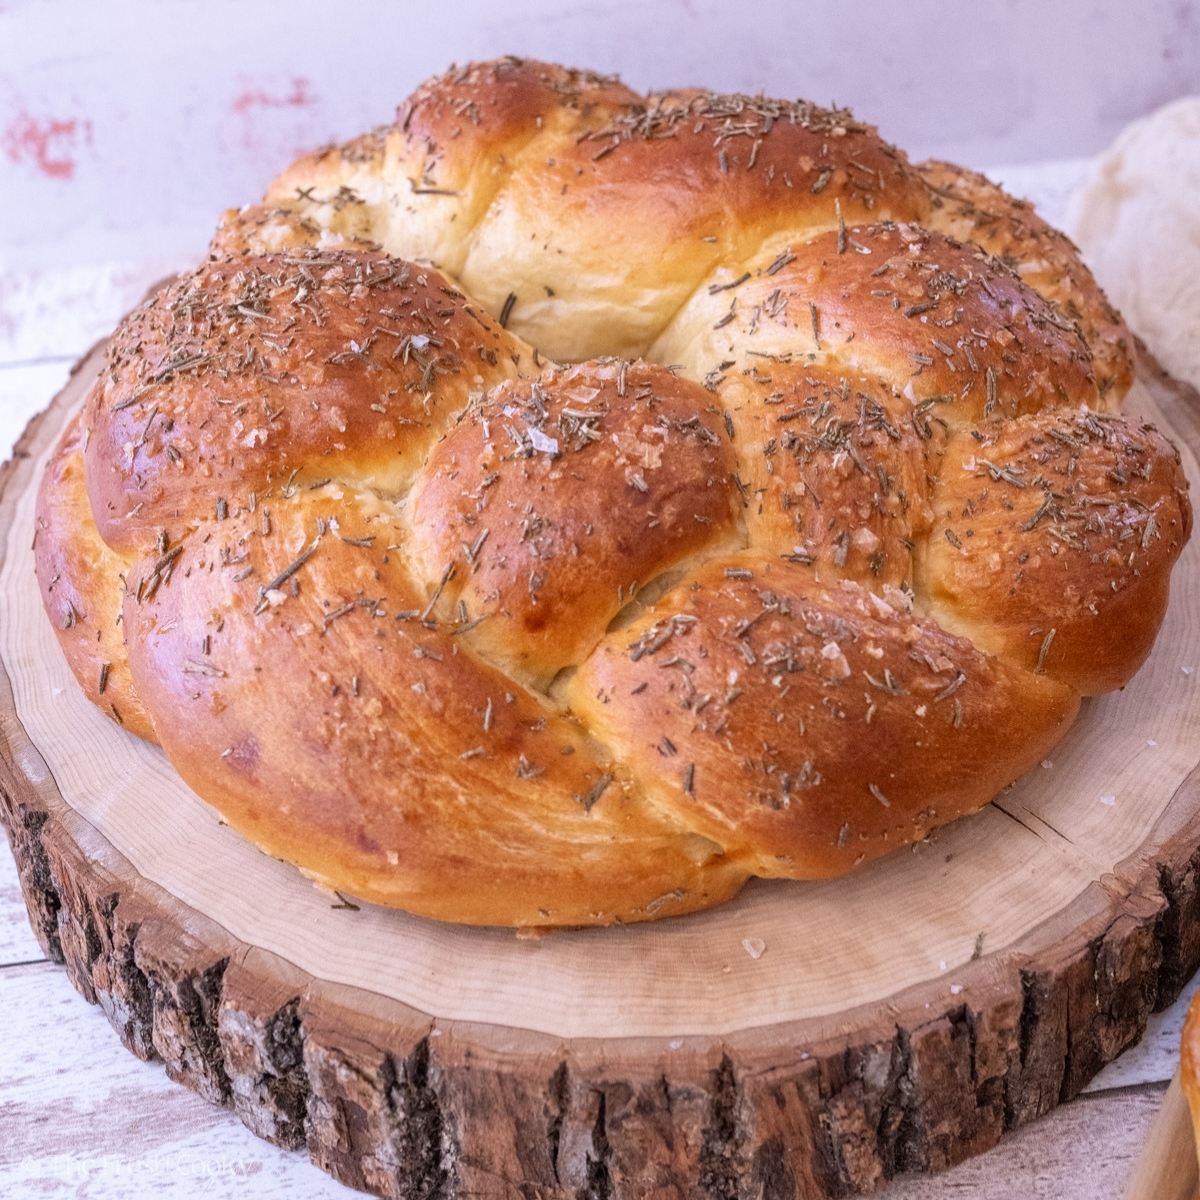
Beautifully braided, glossy, and golden with a soft and chewy inside. I’ve done all the testing on this bread, so you don’t have to, and can confidently bake a loaf that you will be proud of. Follow my step-by-step instructions or watch the video, and you will have your own beautifully braided loaf in no time! Whether you are serving it for Shabbat or just want a delicious, warm, eggy bread, this is your recipe!
Challah Bread Success Tips
- Plan ahead: This beautiful bread takes about 3-4 hours from start to finish, including rising and baking time.
- Patience is a virtue: Don’t rush the rising process; those extra minutes are what give the bread its soft, airy texture.
- Egg wash is key: It’s the secret to that shiny, golden crust that makes challah so addictive.

What is Challah Bread?
Challah (pronounced “HAH-lah”) is a traditional Jewish egg bread typically served on the Jewish Sabbath and holidays. An enriched dough creates a tender, rich bread with a distinctive braided appearance.
For centuries, this bread has been central to Jewish traditions – the classic braided loaf is served for Shabbat (Sabbath) meals, while round challahs, often studded with raisins, appear for Rosh Hashanah (Jewish New Year), Yom Kippur, and Sukkot. The round shape symbolizes the continuous cycle of the year and the seasons.
In my research on traditional challah bread baking, I discovered the beautiful ritual of hafrashat challah, which involves separating a portion of the dough before baking. This practice involves reciting a blessing and removing a small piece of dough, traditionally burned, symbolizing an offering. The blessing recited is:
“Barcuh atah Adonai, Eloheinu melech ha’olam, asher kid’shanu b’mitzvotav v’tzivanu l’hafrish challah min hai’isa.” (which translates: “Blessed are You, Lord our God, King of the Universe, who has sanctified us with His commandments and commanded us to separate the challah from the dough.”)
Once baked, the Hamotzi blessing (the blessing over bread) is recited, typically by the host or head of the household, before eating, marking the bread as a sacred part of the meal. I love how this process turns a simple loaf of bread into something so meaningful! For a great visual guide on this tradition, check out this video.

Challah Bread Recipe Ingredients
- Flour: Unbleached all-purpose flour works great here—no fancy flour needed! Some bakers use bread flour for extra chew, but AP flour keeps it soft and tender.
- Warm Water: Yeast loves warmth! Stick to 100-110°F—too hot, and you risk killing it.
- Honey: Adds just the right touch of sweetness and helps with that gorgeous golden crust. But don’t worry this is not a sweet bread!
- Oil: Keeps the bread soft and moist—traditional challah often uses light olive oil, but any neutral oil works, I like using Avocado oil.
- Instant Yeast: No proofing needed! Mix it in, and it gets straight to work creating that beautiful rise.
- Eggs & Egg Yolk: Use large eggs that are room temperature. The secret to a rich, golden-hued loaf with a tender crumb. Plus, we’ll use egg white for that signature glossy finish!
- Salt: Enhances flavor and slows the yeast to create a perfect rise and texture.
- Egg Wash: A must! It gives challah that deep golden, bakery-style shine.
- Optional Toppings & Add-ins
- Toppings: Classic choices include poppy seeds, sesame seeds, or Everything But the Bagel seasoning. Feeling fancy? Try fresh herbs, flaky sea salt, or even grated Parmesan.
- Add-ins: Raisins (regular or golden) are a traditional favorite, and chocolate chips add a fun twist!
Get the full recipe in the recipe card below.

How to Make 1 Loaf of Challah
This recipe may be halved for one loaf of bread, but please follow the measurements in the recipe card notes section, as it won’t quite come out right if you use the toggle feature on the recipe card. My recipe testers tried this, and it worked beautifully!
How to Make Challah Bread
Step 1 – Make the Dough
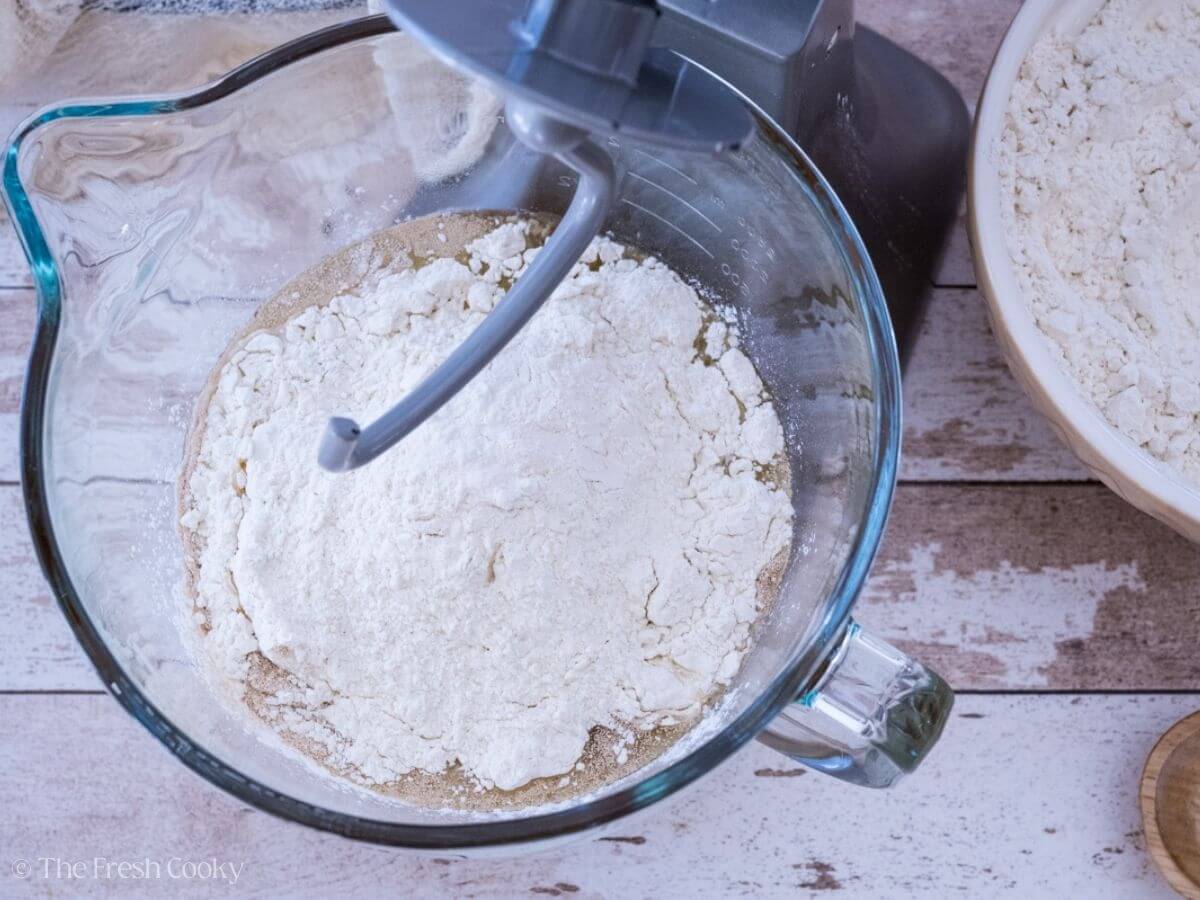
In a large bowl or the bowl of a stand mixer, combine warm water, eggs, egg yolk (save the white for later), honey, oil, yeast, salt, and a portion of the flour.
Mix on low speed with the dough hook (or use a hand mixer) until everything is combined. Gradually add more flour, mixing well after each addition. Keep going until the dough starts coming together, soft, slightly tacky, but not sticky. If your mixer struggles, switch to kneading by hand.


If the dough sticks to the sides or bottom of the bowl, add 1-2 tablespoons of flour at a time until it’s slightly tacky. Transfer to a floured surface and knead for 3-4 minutes until smooth and elastic. If you add raisins or chocolate chips, work them in as you knead.
Step 2 – First Rise
Gently stretch and fold the dough a few times to shape it into a tight ball. Lightly oil a clean bowl, then roll the dough around to coat it in a thin layer of oil. Cover tightly with plastic wrap and place it in a warm spot to rise for 1 ½ – 2 hours until puffy (it may not double in size). Start checking around the 1-hour mark, as rise times can vary depending on your house temperature and altitude.


Best Spots to Let Dough Rise
I usually bake bread in the cooler months, when the house can be a bit chilly. To help the dough rise properly, it’s important to keep your ingredients warm or at least at room temperature. Here are my go-to tricks for creating the perfect proofing environment:
- Oven Proof Setting: If your oven has a proof setting (typically 75-80°F), place the covered dough inside and let it do its thing.
- Oven Warm-Up Method: Turn the oven to 150°F while preparing the dough, then turn it off and place the bowl inside.
- Steamy Oven Hack: Fill a 9×13-inch pan halfway with boiling water and place it on the bottom rack. Set the dough inside the oven and close the door—no need to cover! The warm, moist air encourages a great rise.
- Microwave with Hot Water: Heat 3 cups of water in the microwave for 1 ½ – 2 minutes, then place the dough inside and shut the door. The residual heat creates a cozy proofing spot.
- On Top of the Fridge: A naturally warm spot that helps dough rise evenly.
- Inside a Cooler: Place a container of hot water inside a cooler, add the covered dough, and close the lid to trap the warmth.
- Laundry Room or Near a Running Dryer: A warm laundry room can create the perfect proofing environment.
Avoid: Drafty spots or cold areas. Placing the dough too close to direct heat (like a stovetop or heater).
Step 3 – Divide Dough & Rest
Cut the dough into two equal pieces—each will become its own loaf. For a classic 3-strand braid, divide each half into three equal pieces (use a scale for accuracy or eyeball it).
On a lightly floured surface, flatten each piece, fold in the sides, then roll and push it into a hot dog bun-sized log. Place the three pieces on a lightly oiled surface, cover with plastic wrap (or invert a pan over them), and let them rest for 10-20 minutes. This helps relax the gluten, making rolling and braiding easier.


Step 4 – How to Braid Challah
Braiding challah might look intimidating, but with a little practice, it becomes second nature. Be sure to watch the video if you are a visual learner! The classic three-strand braid is perfect for beginners:
Once the dough has rested, roll each piece into a 20-inch strand (24 inches long for a round loaf), tapering the ends slightly.
To braid, either:
- Middle-out method: Line up the strands, braid from the center to one end, then flip and braid the other side.
- Top-down method: Pinch the three strands together at the top and braid downward, tucking the ends under.
Place the braided loaf on a parchment paper-lined baking sheet (or greased/silpat-lined). Lay it diagonally to allow room for rising and baking.


Step 4 – Final Rise & Egg Wash
Cover the challah with a damp kitchen towel or lightly greased plastic wrap and let it rise in a warm place for 1-2 hours until very puffy. During the last 30 minutes, adjust your oven rack to the middle and preheat to 375°F (190°C).
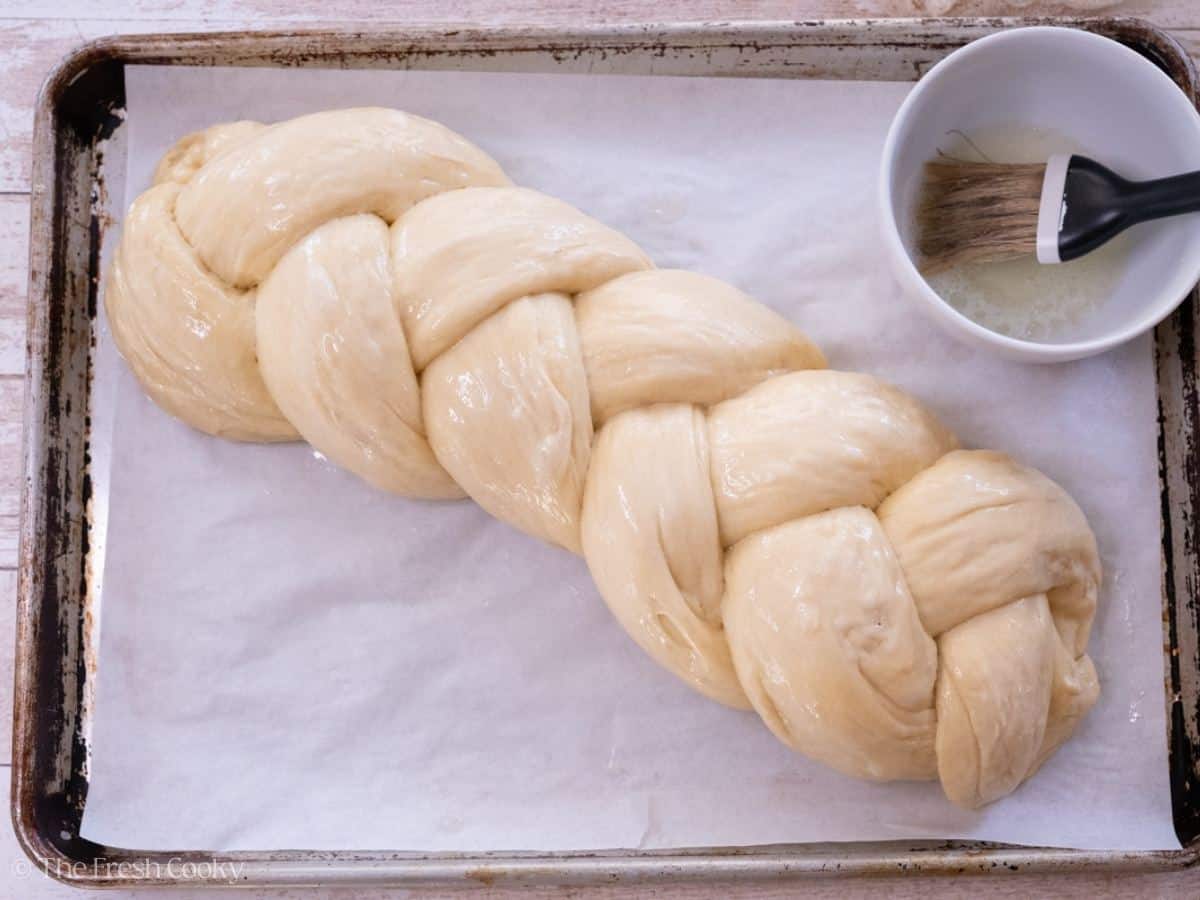
Whisk the reserved egg white with 1 tablespoon of water and gently brush it all over the dough, making sure to coat the sides and crevices. If using toppings, sprinkle them on now while the egg wash is still wet so they stick. Keep in mind the dough will expand in the oven, so don’t be shy with the toppings! Repeat with the second loaf.


Step 6 – Bake
Once the oven is preheated, place the first loaf on a baking sheet and bake for 25-45 minutes, until deeply golden and puffy with an internal temperature of 190°F. Keep the second loaf covered or refrigerate until ready to bake. Thicker braids and round loaves may take longer, so check for doneness as needed.

Challah Bread Recipe Variations
- Raisins: Knead in 1 cup of regular or golden raisins for a sweet, traditional variation often enjoyed during Jewish holidays.
- Chocolate: Fold in 1 cup of chocolate chips for a decadent twist—perfect for dessert or a special breakfast.
- Cinnamon Sugar: Sprinkle a cinnamon-sugar coating over the egg wash before baking for a lightly spiced, sweet crust.
- Honey Butter Glaze: Brush freshly baked challah with a mix of melted butter and honey for an extra touch of sweetness.
- Herbs: Add 2 tablespoons of fresh rosemary, thyme, or dill to the dough or sprinkle over the egg wash for a savory spin.
- Everything Bagel: Top with Everything But the Bagel seasoning before baking for a flavorful, savory loaf.
- Challah Buns: Shape small portions into braided buns or spirals and bake for 12-17 minutes—perfect for dinner parties or individual servings.
- Rosh Hashanah Round Challah: Shape into a round loaf, symbolizing the cycle of the year, traditionally served during the Jewish New Year.

Serving Suggestions for Challah Bread Recipe
Challah’s slightly sweet flavor and pillowy texture make it an exceptional addition to almost any meal. It is delicious when lightly toasted and topped with avocado and a perfectly poached egg, or served alongside a hash brown crusted quiche. And one of my favorite ways to use stale challah bread is in French toast!
When dinner rolls around, challah pairs perfectly with hearty soups and stews, like minestrone, potato leek soup, or lemon chicken soup. Its sturdy texture stands up beautifully to dipping without falling apart.
For a simple yet satisfying snack, enjoy a thick slice with high-quality butter and a sprinkle of flaky sea salt, or drizzle with honey for a sweet treat.

How to Store Challah Bread
Avoid Refrigeration: Storing bread in the fridge actually dries it out faster, so keep it on the counter or in the freezer for the best texture.
Countertop: Once fully cooled, store challah in a sealed bag at room temperature for 2-3 days. You probably will have to cut it into pieces.
Freezer: For longer storage, wrap the loaf twice in plastic wrap, then place it in a large freezer bag, removing as much air as possible. It will keep for up to 2 months.
Thaw & Reheat: Let the bread sit on the counter for about 5 hours to thaw. To rewarm, wrap it in foil and place it in a 325°F (165° C) oven for 15 minutes—keeping it covered prevents the crust from drying out.

Challah Bread Recipe FAQs
It should be done when it has a deep golden brown color and sounds hollow when tapped on the bottom. For the most accurate results, use an instant-read thermometer – the bread is done when the internal temperature reaches 190°F.
I bake at 5,280 feet above sea level, and bread can rise much faster at higher altitudes. But have no fear, I had my recipe testers try this at sea level, too! To get the best results:
1. Reduce yeast to 3 teaspoons to slow the rise time, creating a softer, more even-textured loaf.
2. Check for doneness early: start checking around 20 minutes. My loaves are usually perfect at 24 minutes. Use an instant-read thermometer; if it hits 190°F, it’s done!
Challah and brioche are both enriched breads with a soft, tender texture, but the key difference is in the ingredients. Challah is made with oil and contains no dairy, making it kosher, while brioche is made with butter and often includes more eggs, giving it a richer, more indulgent flavor. While their textures are similar, challah is slightly lighter, whereas brioche has a more buttery, almost pastry-like taste.
Challah is a rich, egg-based bread, so it’s not considered “light” or “low-calorie.” But being healthy isn’t just about numbers; it’s also about nourishment, tradition, and enjoyment. Made with simple ingredients like organic flour, eggs, yeast, and honey, challah can absolutely be part of a balanced lifestyle (Bonus: no preservatives or unwanted ingredients!). Plus, it’s better for the soul when shared around the table with people you love.
Challah is pronounced HAH-lah (with the first sound similar to clearing your throat, think a soft “kh” sound in Hebrew). But don’t worry, if you say “SHAH-lah” or “CHAH-lah,” your bread will still taste just as delicious.
More of our favorite bread recipes

More Recipes from The Fresh Cooky
Like this recipe?
Don’t forget to give it a ⭐️⭐️⭐️⭐️⭐️ star rating and leave a comment below the recipe!

Video
Equipment
Ingredients
- 8 – 8 ½ cups unbleached all-purpose flour see Note 1
- 1 ¾ cups warm water about 100-110° F
- ⅓ – ½ cup honey more for sweeter bread
- ½ cup neutral oil see Note 2
- 4 teaspoons instant yeast see Note 3
- 4 eggs room temperature, see Note 4
- 1 egg yolk room temperature, reserve the egg white
- 1 tablespoon kosher salt
Egg Wash
- 1 reserved egg white
- 1 tablespoon water
- Optional toppings include: sprinkle poppy seeds, sesame seeds, Everything But the Bagel seasoning, fresh chopped herbs such as rosemary, thyme, parsley, Maldon flaky sea salt (is one of my favorites), grated Parmesan or other hard cheeses.
- Optional add-ins: 1 cup regular or golden raisins or chocolate chips
Instructions
- Plan ahead! These beautiful loaves of traditional Challah bread will take about 3 hours total from beginning to finish baking; then, you should allow it to rest another 30-60 minutes before slicing for best results. So, if you are planning on eating it with dinner, you’ll need to start about 4 hours before dinner.
- In a large bowl or in a bowl of a stand mixer (note: unless you have a large stand mixer, you will most likely need to finish this dough by hand), place 1 ¾ cups warm water (see note 3 if using Active dry yeast) – 4 eggs, 1 egg yolk (save that egg white), ⅓ – ½ cup honey, ½ cup oil, 4 teaspoons instant yeast (see note if using Active Dry Yeast), 1 tablespoon salt and 2 cups of the all-purpose flour.1 ¾ cups warm water, ⅓ – ½ cup honey, ½ cup neutral oil, 4 teaspoons instant yeast, 4 eggs, 1 egg yolk, 1 tablespoon kosher salt, 8 – 8 ½ cups unbleached all-purpose flour


Stand Mixer Instructions
- In the bowl of the stand mixer, place 1 ¾ cups warm water (see note 3 if using Active dry yeast) – 4 eggs, 1 egg yolk (save that egg white), ⅓ – ½ cup honey, ½ cup oil, 4 teaspoons instant yeast (see note if using Active Dry Yeast), 1 tablespoon salt and 2 cups of the all-purpose flour.
- With the mixer on low with the dough hook attachment, mix until combined and most of the flour is incorporated, then add 2 more cups of flour and mix until most of the flour is incorporated, repeat 2 more times for a total of 8 cups of flour. If the Challah dough sticks to the sides and bottom of the bowl, add 1-2 tablespoons more flour at a time until it’s only slightly sticking to the bottom. It should be tacky, but not overly sticky. Remove to a floured surface and continue kneading until smooth and elastic. About 3-4 additional minutes. If adding raisins or chocolate chips, incorporate them into the dough while you knead.


Large Mixing Bowl Instructions
- In a large bowl, using a hand mixer, place 1 ¾ cups warm water (see note 3 if using Active dry yeast) – 4 eggs, 1 egg yolk (save that egg white), ⅓ – ½ cup honey, ½ cup oil, 4 teaspoons instant yeast (see note if using Active Dry Yeast) and 1 tablespoon salt and mix on low until combined.
- Using a hand mixer to start on low, add 2 cups of flour, mixing until incorporated, repeating the process until your mixer starts to strain. Then dump the dough onto a floured surface and continue to mix using your hands. Kneading until the dough is smooth, elastic and no longer sticky. Note: If you plan to incorporate raisins or chocolate chips, add them to the dough while you knead. Knead for about 7-10 minutes

First Rise
- On a lightly floured surface, stretch and fold the dough (pull out one side, fold on teh center, turn, repeat unt)il a nice tight ball is formed. Then, in a clean bowl, pour a little bit of oil and using the dough ball, swirl the oil around the bowl, then flip so that the dough is covered in a light film of oil. Cover tightly with plastic wrap and place in a warm spot to rise for 1 ½ – 2 hours until puffy (it may or may not double in size). Begin checking on your dough at about an hour, based on temperatures and altitudes, your dough could rise much faster than others. See notes for optimal proofing places.

Dividing Dough – Rest
- Divide the dough evenly into two pieces using a bench knife or knife. Once you’ve divided the dough evenly into two pieces, weigh the loaf and divide by 3 and cut into three equal pieces. Or if you don’t have a scale, you can eyeball it.
- Flatten out each piece, fold in sides and then roll and push away from you to form a tube of sorts (see video) until you have a large hot dog bun-sized roll. Place the three pieces on an oiled pan or surface, and cover with another pan or plastic wrap or invert a 9×13 pan onto the dough and allow to rest for 10-20 minutes, this will help the dough roll easier without springing back (works for pizza dough too, you are giving the gluten in the dough time to relax).


Braiding Challah
- Once your dough is relaxed, remove one strand at a time and using firm pressure, roll the dough into about a 20 inch long strand with the ends narrower compared to the middle (24 inches if making into a round (see Note 5). Set aside and repeat with remaining two pieces of dough.
- To braid: You can start in the middle by lining up all three strands of dough and begin braiding from the middle to the end, pinching and tucking the ends under, then flip around and complete the braid. OR, you can pinch all three ends together, then begin braiding from the top to the bottom. Pinch the ends together, tucking under. See the video to watch how to braid. If making a round challah, braid or twist the bread and form into a circle, braiding the two ends together as best you can, tuck any loose ends under.
- Gently transfer the braided loaf or round to their own parchment-lined baking sheets (grease or use silpat). Lay the braided long loaf diagonally across the pan, as it will grow as it rises and bakes.


Final Rise
- Cover the challah’s with a damp tea towel or cover with lightly greased plastic wrap to rise for the final time, between 1-2 hours until very puffy. Meanwhile, move your oven rack to the middle third of the oven and in the during the last 30 minutes of rise time, preheat the oven to 375°F (190° C)

Egg Wash
- Don’t skip the egg wash; it gives the challah bread its classic shiny, golden brown finish. Whisk together the reserved egg white and 1 tablespoon of water in a small bowl, then gently brush it ALL over, taking care to get the sides up to where the bottom of the pan meats the dough and into the cracks and crevices. If adding any kind of topping, add that now while it’s wet so that it will stick. Keep in mind that the dough will rise significantly while baking, so you can add a generous amount to the top of the dough. Repeat with the remaining loaf.

Refrigerating or Freezing Challah Braided Dough
- Fridge: Keeping the braided and egg washed dough on a baking sheet, cover lightly with greased plastic wrap and place in fridge overnight. Remove from fridge and allow to rise (covered still) at room temperature for 60-90 minutes before baking. If your house is really cool, it might take a bit longer. During the last 30 minutes of rising, preheat the oven. Bake as directed.
- Frozen: The braided dough may also be frozen at this point. Keeping on baking sheet, place a piece of lightly greased plastic wrap loosely over the top, then flash freeze for 1-2 hours (set a timer, you don’t want to forget), then remove frozen loaf, wrapping tightly in plastic wrap twice, and place in a large freezer baggie, or wrap again in foil. See below for how to prepare and bake. May be frozen up to 3 weeks before baking.
Baking
- Once your oven is preheated (375°F (190° C), place the first loaf into the oven and bake for 25-45 minutes (keep your second loaf covered or place in the fridge until ready to bake) or until deeply golden and puffy and the internal temperature reaches 190°F. I have a big range on here, because you may braid your loaf a little thinner or thicker, and it might take a bit longer to bake, the round loaf will take on the longer side.
- If you froze your dough, remove from the freezer, remove all of the wrapping, and place on a parchment lined baking sheet. Cover with a lightly greased piece of plastic wrap. Allow to thaw overnight in fridge, or at least 5 hours on the counter before baking. Bake as described above.

Notes
- Use a quality unbleached AP flour here, I like using King Arthur as well as Costco flour as it’s a bit higher in protein. You may also use bread flour and a mix of whole wheat flour or all whole wheat flour. Using up to ½ cup additional water if using whole wheat flour.
- I typically use a light olive oil (traditionally used in Jewish bread baking) or I like Avocado oil (heart healthy!) but you may use any neutral flavored vegetable oil.
- If using Active Dry Yeast (such as the kind in packets), proof it first, by stirring it into ½ cup (subtracted from total 1 ¾ cups) warm water with a teaspoon of sugar or honey, stir and allow to get foamy for about 5-10 minutes. Proceed with recipe. Only adding remaining 1 ¼ cups of water.
- It’s important to control the temperature of your dough. If you forget to bring your eggs out of the fridge, simply submerge them in a bowl of warm-hot water for about 5-7 minutes.
- Rosh Hashana Challah: During Rosh Hashana, you create a round, spiraled or braided loaf of Challah symbolizing the continuous cycle of the New Year. You can either create one long rope with your second lump of dough, rolling it into a 36-inch long rope and starting in the center of a 9” greased round cake pan, spiral the dough around tucking the bottom under as you finish. Or create another braided bread (this is what I did) using 24 inch long ropes, braid as you did the first time, shaping into a round, tucking the ends under (braiding into the other side). You can keep it small (it will rise closing the circle in the middle). And allow to rise until very puffy.
How to Make Challah Buns
Shape into small braided buns or spiral into snail shapes, and bake on parchment-lined baking sheet, brush with egg wash, sprinkle with toppings if desired, and rise for about 45-60 minutes. Bake at 375°F (190° C) for 12-17 minutes (depending on how large you made them), should make about 24 rolls. Make cloverleaf rolls, by rolling three same size pieces of dough (you would get about 24 rolls, so roll 72 pieces of dough balls) into small rounds, place them side by side in a greased regular size muffin pan and allow to rise for about 45 minutes. Brush with melted butter and sprinkle with flaky sea salt and bake at 375°F (190° C) 12-15 minutes or until golden and puffed.How to Make 1 Loaf of Challah
This recipe may be halved for one loaf of bread, but please follow the measurements below, as it won’t quite come out right if you use the toggle feature on the recipe card.- 4-4 ¼ cups unbleached, all-purpose flour
- ¾ cup warm water (100-110° F) if the dough is too dry, add a tablespoon of additional warm water at a time until it’s soft, a teensy bit tacky, but not sticky)
- ¼ cup honey (scant if you don’t want it too sweet)
- ¼ cup neutral oil
- 2 teaspoons Instant yeast
- 2 eggs, room temperature
- 1 egg yolk, room temperature (white reserved for topping)
- ½ tablespoon salt
Nutrition


Rate & Comment