


Learn how to grow a kombucha SCOBY from store-bought kombucha with my easy step-by-step recipe. Save money brewing this homemade fermented tea drink at home with minimal effort. The best part, you can customize your own flavors too!
I have been consuming a lot of kombucha over the last few years and finally figured it was time to make my own. What a fun experience and experiment it was! The key to success is maintaining your own SCOBY starter or mother. Since kombucha is expensive, this has become a much better way for me to feed my obsession!
For the SCOBY starter, we are using store-bought kombucha to make our own (how genius is that!). This way, we can always have lots of kombucha in the house, which is wonderful since my whole family loves it. After much trial and error, this is my foolproof method I’ve now been using every single week to make my delicious daily kombucha drink. Be sure also to try my Golden Milk Tea, another drink with great health benefits, and Elderberry syrup, a humongous immune booster!
Kombucha is Great for Gut Health
If you’ve never had kombucha, it’s a fizzy fermented tea drink. It contains natural probiotics that help maintain good gut health. I’ve found so many health benefits from drinking it daily!
Why You’ll Love this Recipe
- Cost-effective compared to store-bought. Kombucha is expensive, and with just one bottle, you can create your own SCOBY to make homemade kombucha on repeat and save a lot of money.
- Customize your own flavors. Once you have your new SCOBY mother, you can create your own flavored, delicious kombucha varieties.
- Easier to make at home than you would think! With my step-by-step method, anyone can make this easily and effectively in their own kitchen with minimal hassle.

What is a SCOBY?
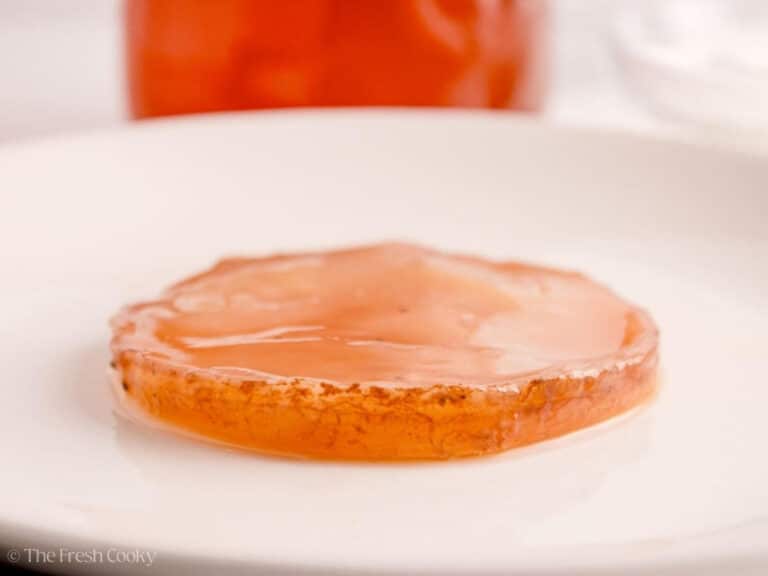
A SCOBY is also known as Symbiotic Culture of Bacteria and Yeast. It’s a rubbery, pancake-looking thing that helps turn sweet tea into kombucha. It’s full of good bacteria and yeast that work together to create kombucha’s signature tangy flavor.
If you’ve never had kombucha, it’s a fermented beverage made from tea and originally from China. It comes in a lot of different flavors, and I love it for its great digestive benefits and probiotics.
It’s lightly sweetened but tangy in flavor and has a little bit of effervescence as well. It’s truly a great afternoon drink or morning beverage. The SCOBY of the kombucha is also known as the starter or mother. It’s made by harvesting the live cultures from store-bought kombucha.
Pro Tip: Keep an eye on the temperature during the SCOBY-making process and during storage and maintenance. It can be a little temperamental, and having the optimal temperatures produces the best SCOBY growth.
Ingredients
- Raw, Unflavored Kombucha: Must contain live cultures (bacteria and yeast) necessary to create a SCOBY. Always choose unpasteurized versions that have visible sediment. The sediment contains the active organisms needed to grow your culture. GT’s Synergy brand is my favorite. I had a little trouble finding this, but I ultimately found it at my local Whole Foods. Natural Grocers also carries it. You may use a flavor, but pick a mild flavor (mango or berry is a good one) and dilute it a bit when making.
- Black Tea: I use organic black tea, which is rich in nitrogen and tannins, which feed the microbial community. Green tea or oolong tea can be substituted, but black tea produces the best and strongest SCOBY.
- Granulated Sugar: Primary food source for the SCOBY culture. Both organic cane sugar and regular white sugar work fine. I like organic sugar. Avoid honey, artificial sweeteners, or raw sugar as they may inhibit or harm the culture.
- Filtered or Dechlorinated Water: Essential for healthy culture growth. If using tap water, let it sit uncovered for 24 hours to allow chlorine to evaporate, or use a dechlorination tablet. Avoid distilled water or reverse osmosis (unless you have remineralization on it) because it lacks minerals that support microbial activity.
Equipment:
- Clean Glass Jar (Wide-Mouth): Sterilize it with hot soapy water or run it through the dishwasher. Avoid using metal containers because they can react with the acidic kombucha. A quart-sized jar will work.
- Breathable Cover & Secure Band: Allows airflow while keeping contaminants out. Coffee filters work best for preventing fruit flies. Avoid airtight lids because the SCOBY needs oxygen.
- Non-metal stirring spoon: Avoid metal as this can react with the kombucha leach a metallic flavor or even toxic compounds over time.
Get the full recipe in the recipe card below.

How to Make a Kombucha SCOBY
Step 1 – Brew the Tea
Place the black tea bags in a clean, wide-mouth quart-size glass jar. Bring 1 cup of filtered water to a boil, then pour it over the tea bags. Steep the bags for 10–15 minutes.


Step 2 – Sweeten the Tea
Remove the tea bags. Add ¼ cup sugar to the hot tea and stir with a non-metal spoon until the sugar is fully dissolved.


Step 3 – Cool the Tea
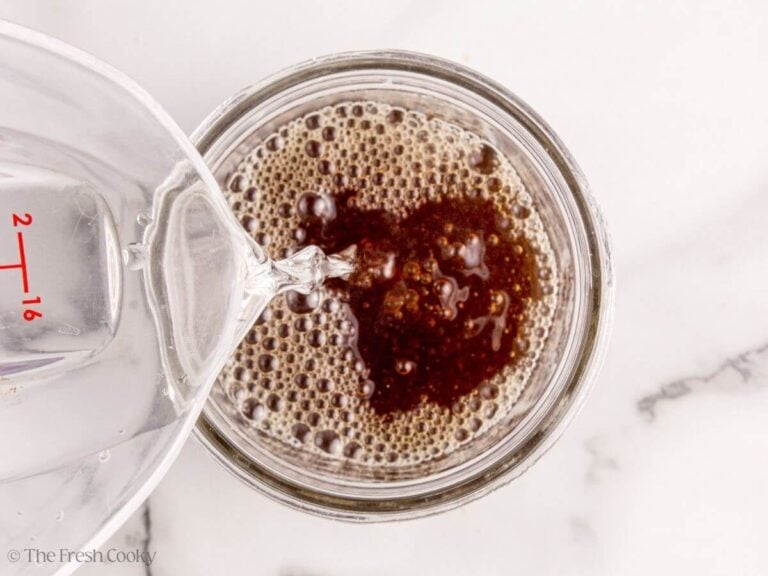
Add 1 cup of cool filtered water to the jar. Allow the mixture to reach room temperature (68–78°F) before proceeding. This prevents the heat from killing the beneficial microbes in the store-bought kombucha bottle.

Step 4 – Add the Kombucha
Gently shake the store-bought kombucha bottle before opening to mix in the culture sediment at the bottom. Pour 1 cup of kombucha into the jar with the cooled sweet tea and gently stir with a non-metal spoon to combine.


Step 5 – Cover and Ferment
Cover the jar with a clean kitchen towel, coffee filter, or tightly woven cloth and secure it with a rubber band. Use multiple layers when using a thin cloth to keep fruit flies out while allowing airflow. Place the jar in a warm spot, undisturbed at 68–78°F (a cupboard or pantry works well).


Step 6 – Grow the SCOBY
Allow the jar to sit undisturbed for 1–4 weeks. After about 1 week, you should see a thin, jelly-like film forming on the surface. This is your SCOBY beginning to form. By 2–4 weeks, it should be ¼-inch thick and ready for brewing kombucha.

Expert Tips
- Be sure to use dechlorinated water or buy tablets that remove chlorine. This is so important for the optimal growth of the SCOBY. You also want to make sure not to use distilled water, as it doesn’t have enough minerality for an optimal SCOBY growth environment. Reverse osmosis water may only be used if minerals are added back in.
- Maintaining the correct temperature. Maintain 68–78°F throughout the process. SCOBY formation slows significantly below 68°F and may be inhibited above 85°F.
- Look for a clear or while film to develop on the surface. This film should become gradually opaque and thicken. This is normal and desired. It’s how SCOBY protects itself when it’s being stored.
- Patience is key when maintaining a SCOBY. Depending on temperature and culture strength, a SCOBY may take 1–4 weeks to reach usable thickness.
- Don’t move or jostle the jar when the SCOBY is forming. This can actually disturb the development and cause contamination, and we don’t want that!
- Label your jar. Note the start date and expected completion date (2–4 weeks from start). This will keep your kombucha-making process nice and organized.
Storage
There are two ways to store SCOBY. One is called a hotel and the other is storing at room temperature. I’ve used both methods, but the hotel is my preferred storage method.
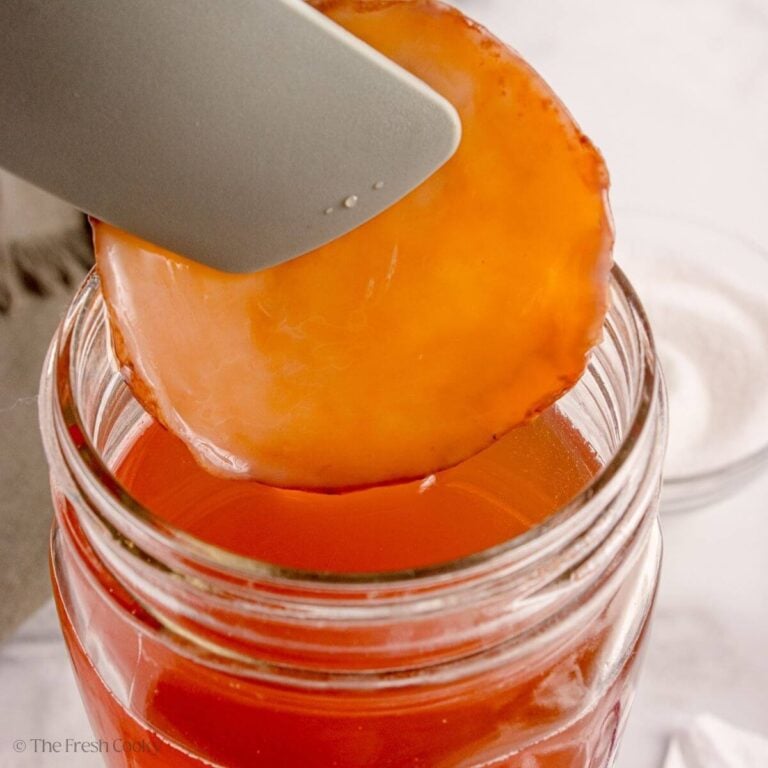
Use a SCOBY Hotel (Recommended): Now, what is a SCOBY hotel, you may be asking. It’s when you store your mature SCOBY submerged in at least 1 cup of strong starter kombucha in a glass jar with a breathable cover. Refrigerate it for long-term storage (up to 6 months) or keep it at room temperature for active maintenance (replace the liquid monthly).
To reactivate the SCOBY starter from the hotel, remove the SCOBY from refrigeration and let it come to room temperature for 2–4 hours before using it with fresh sweet tea.
Room Temperature Storage: Now, of course, we also give a room temperature option for ease. If the SCOBY is stored at room temperature, the starter liquid will develop a stronger vinegar flavor over time. This is normal and indicates the culture is still fully healthy and ready to make great kombucha.
FAQs
Check the temperature and move it to a warmer location (68–78°F is ideal). Cold temperatures tend to significantly slow development.
Mold appears as a fuzzy growth in green, black, or blue, usually on top of the SCOBY. If mold is present, discard the entire batch immediately and start over with sterilized equipment and a fresh jar.
You can, but flavored varieties often contain additional ingredients that can inhibit SCOBY growth. Stick with raw, unflavored kombucha for the best results. However, sometimes raw is hard to find; in that case, go with a mild flavor, like mango, berry, etc.
This is normal for mature SCOBYs. You can carefully separate layers and share them with friends or add extra layers to your SCOBY hotel for backup cultures.
A SCOBY hotel is a storage system for maintaining multiple SCOBY cultures. Store SCOBYs in a glass jar covered with kombucha. This keeps them healthy and ready for future brewing while serving as backup cultures in case your active SCOBY becomes contaminated or damaged.
More Delicious Drink Recipes
Equipment
- 1 clean kitchen towel, coffee filter, or tightly woven cloth
- 1 rubber band
- Non-metal stirring spoon
Ingredients
- 1 cup raw unflavored kombucha if you can't find pure kombucha, choose a mild flavor such as mango, berry, etc. GTs Brand is my favorite
- 2 bags black tea organic
- 2 cups filtered water remineralized or dechlorinated water, for brewing and cooling
- ¼ cup all-natural cane sugar white granulated sugar or
Instructions
- Place the black tea bags in a clean, sterilized (or run through the dishwasher) wide-mouth quart-size glass jar. Bring 1 cup of filtered water to a boil, then pour it over the tea bags. Steep the bags for 10–15 minutes.2 bags black tea , 2 cups filtered water

- Remove the tea bags. Add ¼ cup sugar to the hot tea and stir with a non-metal spoon until the sugar is fully dissolved.¼ cup all-natural cane sugar
- Add 1 cup of cool filtered water to the jar. Allow the mixture to reach room temperature (68–78°F) before proceeding. This prevents the heat from killing the beneficial microbes in the store-bought kombucha bottle.2 cups filtered water
- Gently "shake" (rotate the bottle in your hand, left to right gently) the store-bought kombucha bottle before opening to mix in the culture sediment at the bottom. Pour 1 cup of kombucha into the jar with the cooled sweet tea and gently stir with a non-metal spoon to combine.1 cup raw unflavored kombucha
- Cover the jar with a clean kitchen towel, coffee filter, or tightly woven cloth and secure it with a rubber band. Use multiple layers when using a thin cloth to prevent fruit flies from entering while allowing airflow. Place the jar in a warm, undisturbed spot at 68–78°F (a cupboard or pantry works well).
- Allow the jar to sit undisturbed for 1–4 weeks. After about 1 week, you should see a thin, jelly-like film forming on the surface. This is your SCOBY beginning to form. By 2–4 weeks, it should be ¼ inch thick and ready for brewing kombucha.


Notes
- Be sure to use dechlorinated water or buy tablets that remove chlorine. This is so important for the optimal growth of the SCOBY. You also want to avoid using distilled water or reverse osmosis (RO) water that isn’t remineralized, as it lacks sufficient minerality for an optimal SCOBY growth environment.
- Maintaining the correct temperature. Maintain 68–78°F throughout the process. SCOBY formation slows significantly below 68°F and may be inhibited above 85°F.
- Look for a clear or while film to develop on the surface. This film should become gradually opaque and thicken. This is normal and desired. It’s how SCOBY protects itself when it’s being stored.
- Patience is key when maintaining a SCOBY. Depending on temperature and culture strength, SCOBYs may take 1–4 weeks to reach usable thickness.
- Don’t move or jostle the jar when the SCOBY is forming. This can actually disturb the development and cause contamination, and we don’t want that!
- Label your jar. Note the start date and expected completion date (2–4 weeks from start). This will keep your kombucha-making process nice and organized.
Nutrition


Rate & Comment