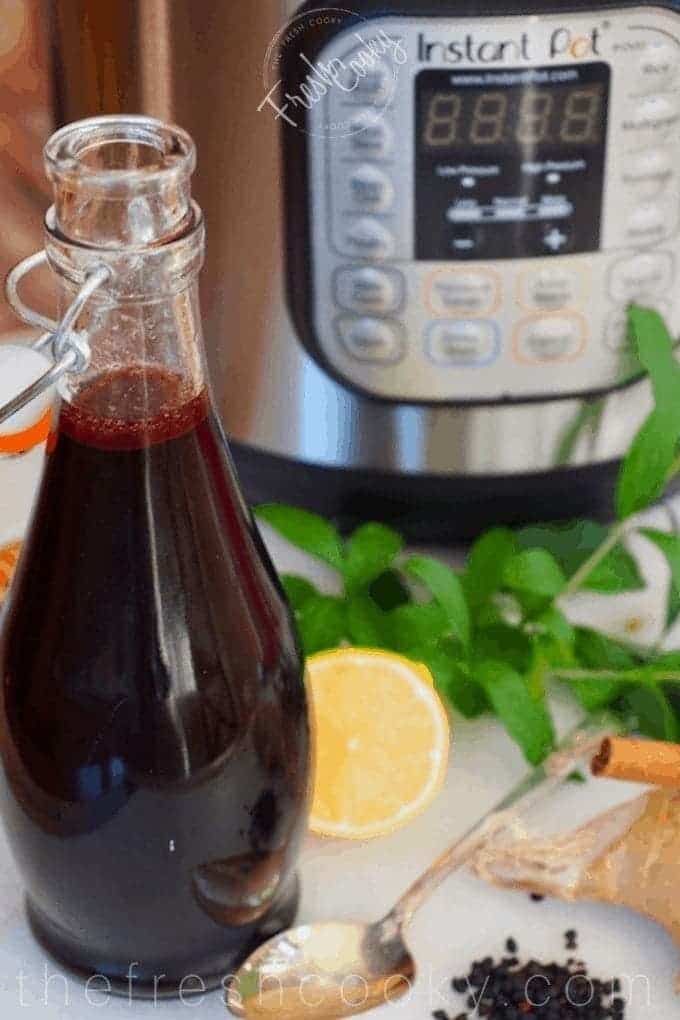
Every September, actually any time cold season threatens, I make a big batch of homemade elderberry syrup. Been doing it for nearly 20 years now, and I’m not stopping anytime soon. I’ll show you how to make it in the Instant Pot or on the stovetop, using dried, fresh, or frozen elderberries. And one thing you won’t find in most recipes: I add hibiscus flowers for extra flavor and immune-boosting power.
First published in 2017, refreshed in 2026 with new photos, cleaner instructions, and everything I’ve learned since. With improvements to the recipe making it standard to double.

Why I Started Making My Own Elderberry Syrup
My oldest son was a toddler when this whole elderberry thing started. He was cycling through colds that kept turning into ear infections, and my mom, always ahead of the curve, handed me a bottle of Sambucus elderberry syrup and said, just try it. So I did.

I bought it for one season. Then I looked at how fast we were going through it and thought, I can make this. I bought dried organic elderberries and started experimenting. My boys were my taste testers, and they were the ones who told me they thought it had too much honey. I cut it in half. Still sweet enough to balance the tartness, but no longer overwhelming.
Over time, I watched their colds get shorter. Sometimes they’d barely take hold at all when we started the syrup at the first sniffle. I’ve converted friends, neighbors, and even a few strangers since then.
If I needed any more convincing, my husband grew up in New England. They had wild elderberry bushes on their farmland, and every summer, his mom would have the kids pick them to make elderberry jam they’d eat all winter long. He was rarely sick. He still laughs when I make a batch and says, “Now I know why.”
I’ve since made it with fresh elderberries from a neighbor’s bush, more on that below, but whether you’re ordering dried online or lucky enough to have a bush nearby, this recipe works either way.

What Are Elderberries?
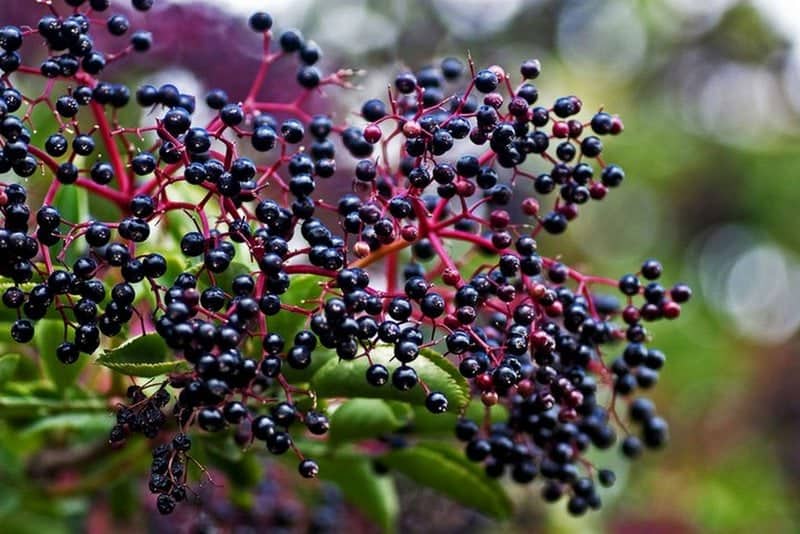
Elderberries (Sambucus nigra) have been used as a folk remedy for centuries across North America, Europe, western Asia, and North Africa, and modern research is catching up to what herbalists have known for a long time.
They’re high in antioxidants, have antiviral and anti-inflammatory properties, and the bioflavonoids in elderberry juice have been shown to block cold and flu viruses from infecting cells. One randomized, double-blind, placebo-controlled clinical trial published in 2016 found that elderberry supplementation reduced both the duration and severity of colds in air travelers. Not exactly a low-germ environment.
Why You’ll Love This Homemade Elderberry Syrup
- It saves real money. Store-bought elderberry syrup (looking at you, Sambucol) is expensive, especially if you’re taking it daily all season long. Making your own costs a fraction of that.
- You control what goes in it. No preservatives, no mystery ingredients. Just clean, whole-food ingredients you can actually pronounce.
- It works for fresh, frozen, OR dried elderberries. Got a neighbor with a bush? Lucky you. Found them at the farmers’ market? Grab them. Ordering dried from Amazon? Also covered.
- Kids actually like it. My boys took it willingly (eventually, see the honey note above). The sweet-tart flavor is genuinely good, especially with the cinnamon, hibiscus and ginger.
- Perfect timing: back-to-school season. Fresh elderberries ripen late summer, right around August and September, just as school starts and the annual germ-o-palooza begins. If you can get fresh berries, this is the moment.
- Two methods, one recipe. Make it in your Instant Pot in about 45 minutes, or use the stovetop if you prefer a slower simmer. Both get you there.

Equipment Needed
- Instant Pot or large heavy-bottomed pot
- Wooden spoon
- Fine mesh strainer
- Large glass bowl with pour spout
- Funnel
- Quart mason jar or 5-oz or 16-oz flip top bottles
Homemade Elderberry Syrup Recipe Ingredients
The Base
- Dried organic elderberries — the star of the show. Dried are more concentrated than fresh, easier to find, and available year-round. (Fresh and frozen work too — see notes below.)
- Filtered water — tap water can affect the flavor; filtered water keeps it clean.
- Raw, unfiltered honey — sweetens and preserves. Raw honey also brings its own antibacterial properties to the party. I love using local raw honey for added benefits. Added AFTER cooking; never heat above 115°F, or you’ll lose those benefits. And never give to children under 1 year old.
The Flavor Boosters
- Cinnamon stick — warm, familiar, and anti-inflammatory. A stick gives you better flavor than ground.
- Whole cloves — small but mighty. Antiviral and antimicrobial, plus they add that warm depth you’d miss without them.
- Fresh ginger — anti-inflammatory, great for nausea and sore throats, and it gives the syrup a little kick. Fresh makes a difference here over dried.
- Fresh lemon — brightens the flavor and acts as a natural preservative. Drop the squeezed halves right in the pot.
Optional Add-ins (highly recommend)
- Dried hibiscus flowers — sweet-tart flavor, gorgeous color, and a serious antioxidant boost. This is my secret weapon. See my Hibiscus Simple Syrup for more on these little gems.
- Fresh orange — zest it and drop the halves right in. Adds a subtle sweetness and a little vitamin C boost.
- Apple — mellows the tartness slightly and adds a subtle sweetness
- Vanilla extract or paste — doesn’t announce itself, but smooths and rounds out the overall flavor. Worth trying at least once.
Where to find elderberries: Dried organic elderberries are easy to order on Amazon and usually less expensive than the health food store. You can also find them at Whole Foods, Natural Grocers, or your local natural foods stores.
Get the full recipe in the recipe card below.

Using Fresh, Frozen, or Dried Elderberries: What You Need to Know
Dried elderberries are the most convenient option, shelf-stable, easy to order online, and available year-round. They’re also more concentrated than fresh, which is why you need less. This is what I use most of the time.
Fresh elderberries ripen late August through September in most of the US – right when school starts and germ season kicks off. If you have a source, use them. I’ve made this with berries from a neighbor’s bush, and it’s wonderful.
- Use double the amount: 1 cup fresh in place of ½ cup dried
- Rinse well under cold water
- Remove all stems and leaves before cooking, these contain compounds that can cause stomach upset. Pro tip: freeze the clusters first, then use a fork to comb the berries right off. Much faster.
- Only use fully ripe, deep purple-black berries. Discard anything green or unripe.
- The flavor is a little brighter and lighter than dried, less earthy, slightly less tart. Both are delicious, just different.
Frozen elderberries are a great option if you foraged or bought fresh berries at peak season and want to stretch them. I haven’t tested this version myself, but the ratio should be the same as fresh: 1 cup frozen in place of ½ cup dried. No need to thaw first, go straight from freezer to pot. Just rinse before using.

What to Avoid
Not all elderberries are created equal. A few things to watch out for:
- Red elderberries (Sambucus racemosa) — these are not the same as black elderberries and are not safe to use for syrup. You want Sambucus nigra only.
- Unripe berries, stems, leaves, and twigs — even on the right plant, these contain compounds that can make you sick. Fully ripe, deep purple-black berries only, and strip everything else off before cooking.
- Berries that smell musty or look dusty, brown, or shriveled — dried elderberries should be deep purple-black, plump, and smell earthy but clean. If something seems off, trust your nose.
How to Make Elderberry Syrup — Instant Pot Method
Total time: about 45 minutes
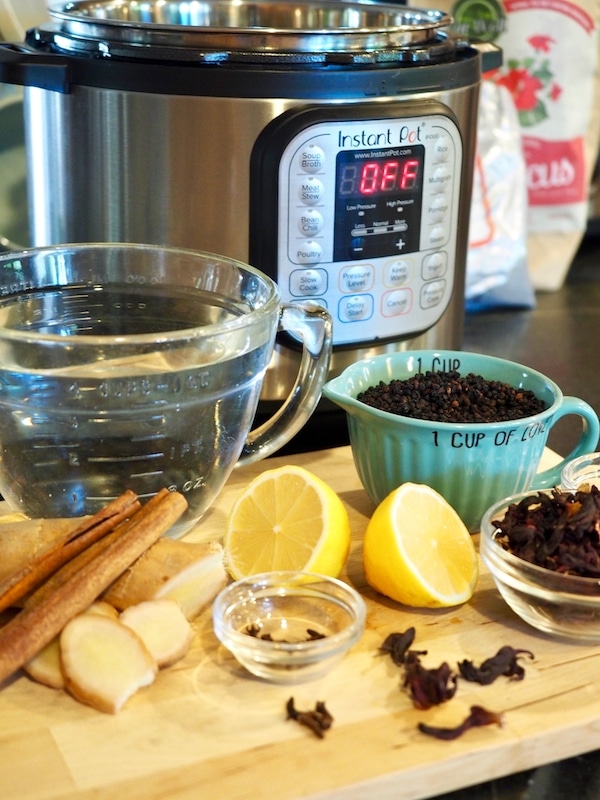
- Pour 6 cups of water into your Instant Pot insert. Add elderberries, ginger, cinnamon sticks, cloves, and squeezed lemon halves. Add optional ingredients; hibiscus flowers, zested orange halves, apple, and/or vanilla if using. Do NOT add honey yet.


- Secure the lid and set the valve to the sealing position. Cook on HIGH pressure for 15 minutes.
- Allow natural pressure release for 10 minutes, then carefully switch to quick release for any remaining pressure.
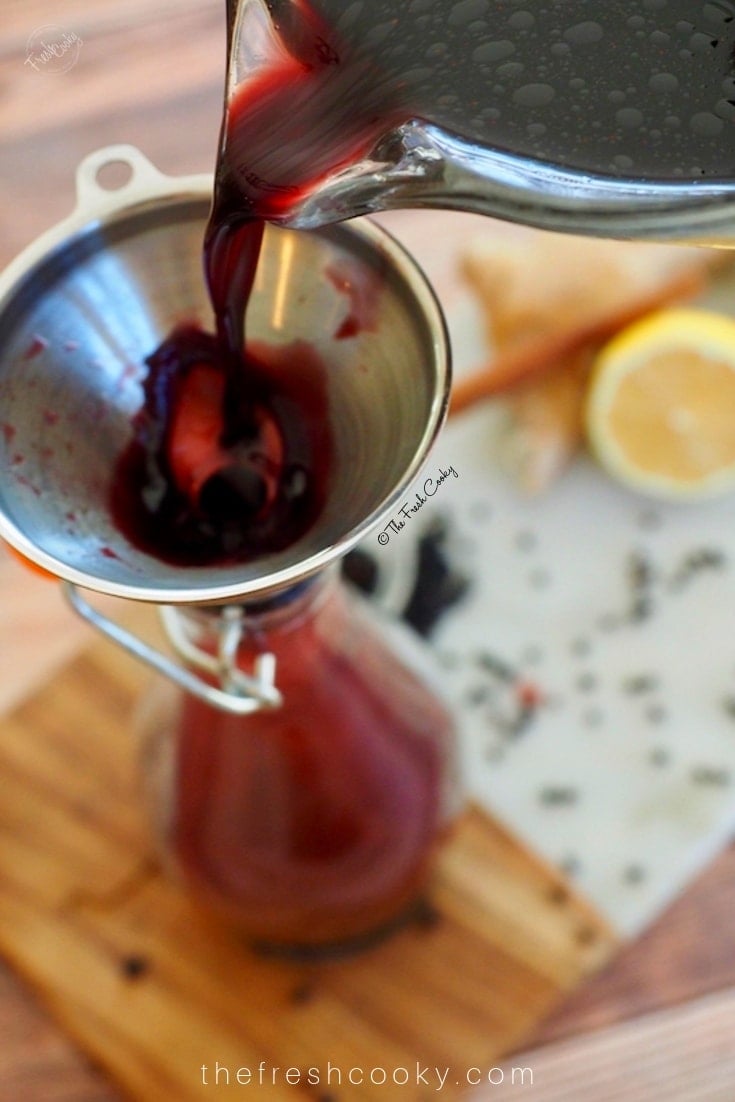
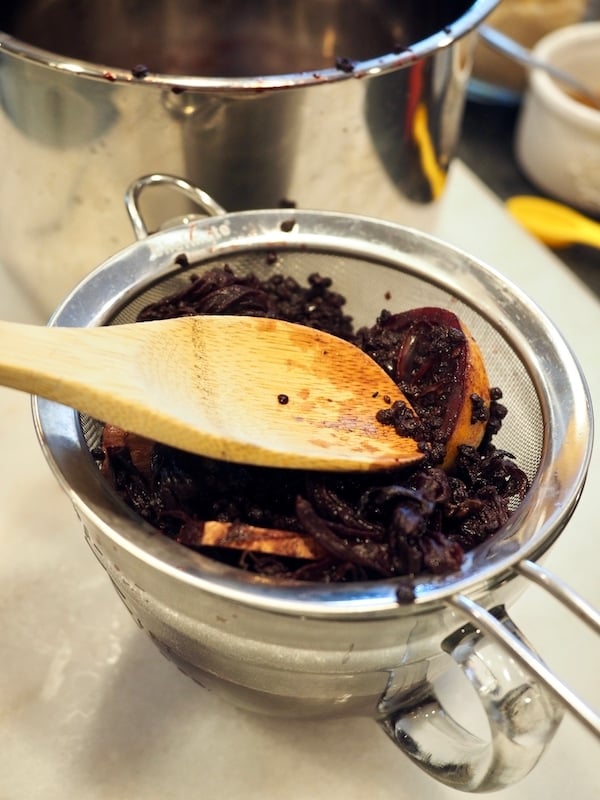
- Place a fine mesh sieve over a large glass bowl (one with a pour spout is your best friend here). Pour the mixture through, pressing the berries firmly with the back of a spoon to extract every last drop of juice. Discard the solids or compost.
- Here’s a step most recipes skip: open the lid and switch to Sauté or Boil mode. Simmer uncovered for 10 to 15 minutes, stirring occasionally. This reduces the liquid for a more concentrated syrup and breaks down any remaining compounds from the berries. Don’t skip it.


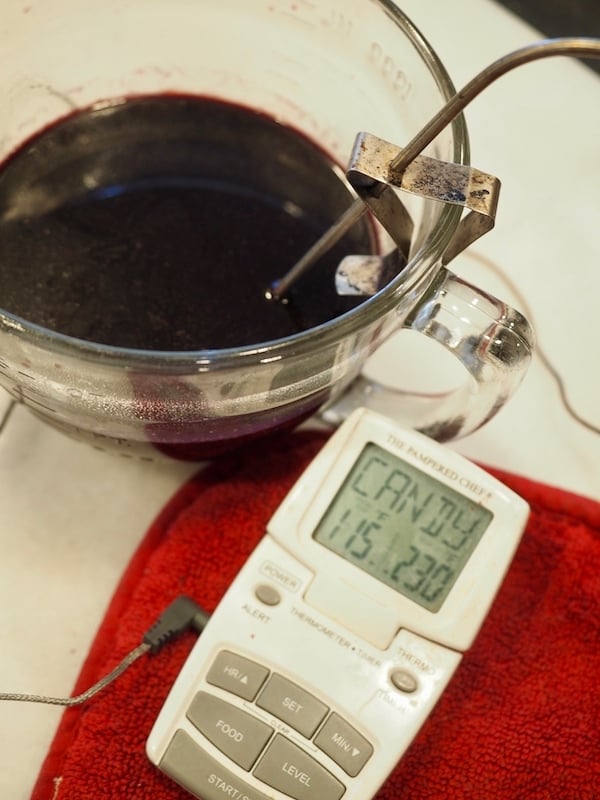
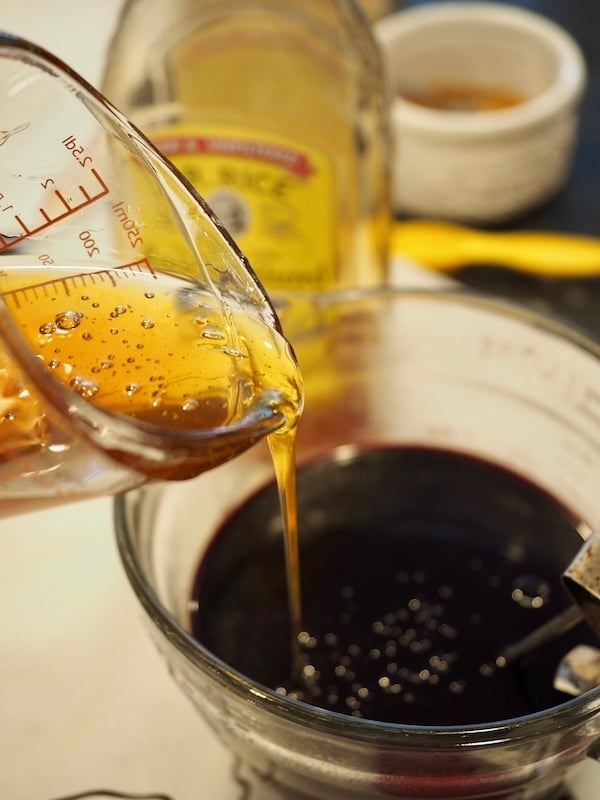
- Let the liquid cool to 115°F before adding honey. This matters; honey heated above that temperature loses its beneficial enzymes and properties. An instant-read thermometer takes the guesswork out. It doesn’t take long to cool down.
- Stir in honey until fully dissolved. Pour into a jar using a funnel. A pourable jar works great for daily use. You should get about 3 cups, though yield varies based on how long you reduce.

- Label with the date, refrigerate, and shake before each use.

How to Make Elderberry Syrup — Stovetop Method
Total time: about 60 minutes
Pour water into a medium saucepan and add elderberries, ginger, cinnamon sticks, and squeezed lemon halves. Toss in hibiscus flowers, zested orange halves, apple. Before you turn on the heat, note the level of liquid in the pan, that’s your visual cue for how much it needs to reduce later.
Bring to a boil over medium-high heat, then reduce to a gentle simmer. Simmer uncovered for 45 to 60 minutes, stirring and pressing the berries occasionally, until the liquid has reduced by about half.
Remove from heat and strain through a fine mesh strainer into a large glass bowl, pressing the berries firmly with the back of a wooden spoon to squeeze out every last drop of juice. Discard the solids or compost them.
Return the strained juice to the pan and continue to simmer until reduced by half again if you’d like a more concentrated syrup. This step is optional but gives you a richer, more potent result.
Let cool until lukewarm before stirring in honey. If your honey is cold and stiff, set the sealed jar in a bowl of warm water for a few minutes to loosen it up before adding. Once fully dissolved, pour into a jar, label with the date, and refrigerate.
A note on honey: My recipe uses less honey than most, my boys were my original taste testers and they were very clear when I’d gone too far. That said, honey is also a preservative and has its own immune-boosting properties, and you can add up to an equal amount of honey to juice if you want a longer shelf life. More honey, longer life. We just like ours a little less sweet.
Note on honey for babies under 1 year: Honey is not safe for infants under 12 months.
Using Fresh Elderberries on the Stovetop
If you’re using fresh elderberries, the process is a little different. Add berries and just a small amount of water to get things started. Fresh berries are so juicy that they create most of their own liquid as they cook down. Simmer for at least 30 minutes, pressing and stirring occasionally, until the berries are completely soft and have released all their juice. Strain out the skins and pulp, then return the juice to the pan and continue simmering until reduced by about half. From there, follow the same honey and storage steps as above.

Dosing Suggestions for Elderberry Syrup
This is what I’ve used for years, based on traditional herbal guidelines:
- Children ages 1–12: ½ to 1 teaspoon daily for maintenance; every 2–3 hours during active illness
- Adults: ½ to 1 tablespoon daily for maintenance; every 2–3 hours during active illness
I start everyone on the maintenance dose around September and keep it going through cold and flu season. At the first sign of a sniffle, we bump to the more frequent schedule.
You don’t have to take it straight, either. Stir it into yogurt, swirl it into a smoothie, drizzle over oatmeal or pancakes, or add it to warm (not hot!) tea.
For more specific dosing guidance by age and weight, Pediatric Associates of Durango has a helpful breakdown from a naturopathic perspective.
A note for those with autoimmune conditions: Elderberry is an immune stimulant, which is exactly what most of us want during cold season. However, if you have an autoimmune condition (lupus, rheumatoid arthritis, MS, and similar) that immune-boosting effect could potentially work against you. Check with your doctor before adding elderberry syrup to your routine.

How to Store Elderberry Syrup
Refrigerator: Stored in a sealed glass jar, homemade elderberry syrup keeps for 2 to 3 months in the fridge. Keep it toward the back where the temperature stays consistent. The door is the worst spot since it fluctuates every time you open it. Always use a clean spoon or pour directly, and get it back in the fridge promptly after use.
One quiet advantage of this recipe: it already has lemon juice built in. Lemon is a natural preservative and contributes to the longer end of that shelf life range.
Disclaimer: You know your syrup. If it smells off, looks cloudy in a way it didn’t before, or shows any mold, toss it, no questions asked. When in doubt, make a fresh batch. It only takes 45 minutes in the Instant Pot.
Freezer: This is how I stretch a big batch all season long. Pour cooled syrup into freezer-safe containers: small mason jars, a silicone ice cube tray for pre-portioned doses, or zip-top freezer bags laid flat. If using glass, leave a little headspace since syrup expands as it freezes. Keeps well for 6 to 8 months.
To thaw: Move a jar from the freezer to the fridge the night before you need it. No countertop thawing, no microwave, just patience. If you froze it in an ice cube tray, pop out a cube or two into a small jar and let them thaw in the fridge overnight.
Label your jars. Write the date on every jar. Sounds obvious until January rolls around and you find a mystery jar in the back of the fridge.
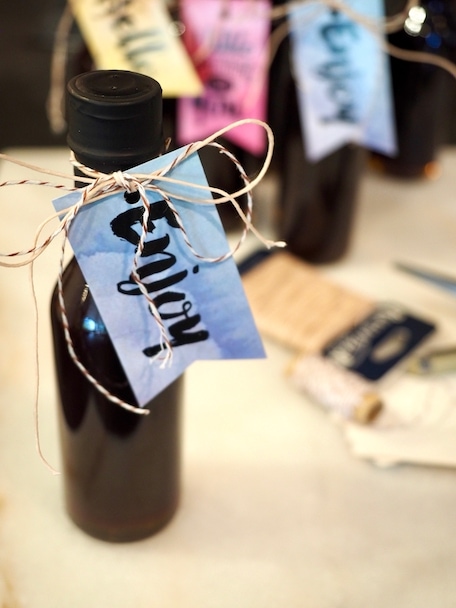
On gifting: These 5-oz bottles with shrink wrap lids make the most thoughtful back-to-school or holiday gift. Tie on a little tag with the date made, storage instructions (refrigerate immediately, shake before use, use within 2 to 3 months), and dosing info. People genuinely use them, and they remember who gave it to them. The Golden Milk Spice Mix pairs beautifully with a jar of elderberry syrup in a little wellness gift basket, just saying. And this below was a little Christmas gift I gave to my family, who wouldn’t love homemade hot fudge, vanilla extract and elderberry syrup!

Homemade Elderberry Syrup Recipe FAQs
Elderberries contain bioflavonoids and other compounds that block cold and flu viruses from attaching to your cells. If the virus can’t get in, it can’t spread. They also support the immune system more broadly through antioxidant activity and anti-inflammatory properties.
It’s multi-pronged: antiviral, anti-inflammatory, antibacterial, and high in antioxidants. It can also soothe a sore throat and support digestive health. And unlike Tamiflu, which can cause serious side effects, elderberry is all-natural with no known side effects at typical doses.
Yes, and I’ve been doing it for years. There’s a claim floating around online that pressure cooking traps cyanide toxins from the berries in the syrup. It comes from blogs, not peer-reviewed research, and no studies support it. This recipe also includes a built-in sauté step after pressure cooking. You open the lid and simmer uncovered for 10 to 15 minutes, which further breaks down any remaining compounds and concentrates the syrup. That open simmer is doing double duty. If you’re still more comfortable on the stovetop, that works just as well.
The recipe as written is already a large batch, but it freezes beautifully so making extra is always worth it. Just make sure your Instant Pot is large enough, don’t fill it past the max fill line.
Don’t just toss it. Compost it, or steep it in hot water for a light elderberry tea, not as potent as the syrup, but a nice way to use every last bit. If you have a dehydrator (I love my Breville Smart Oven), you can dry the pulp and save it for loose-leaf tea or future use. It’s a little spent at that point, but there’s still some good stuff in there.
No, and this is worth knowing. Raw elderberries (and elderberry stems and leaves) contain compounds that can release cyanide during digestion, causing nausea, vomiting, and other unpleasant side effects. Cooking destroys these compounds, which is why cooked or dried elderberries are safe to use. Never eat them raw off the bush.
Dried elderberry syrup has a rich, earthy, sweet-tart flavor, similar to blackcurrant or blackberry, with warm undertones from the cinnamon and ginger. Made with fresh berries, the flavor is a little lighter and brighter, less deeply earthy. Either way, it’s genuinely good, not the hold-your-nose kind of health remedy.
For daily immune support during cold and flu season: ½ to 1 teaspoon for kids, ½ to 1 tablespoon for adults. If you’re actively sick, increase the frequency to every 2–3 hours until symptoms improve.
About 2–3 months in the refrigerator, stored in a sealed glass jar toward the back of the fridge. The lemon juice already in this recipe helps extend that shelf life naturally. For longer storage, freeze it; it keeps 6–8 months in the freezer. Always check before using: if it smells off or shows any mold, toss it.
More Immune-Boosting Recipes
While you’re building your cold-season arsenal, these are worth having on hand too:
- Hibiscus Simple Syrup — antioxidant-rich and gorgeous, stirred into drinks, yogurt, or oatmeal. Also, try my Passion Ice Tea concentrate.
- Homemade Vegetable Mineral Broth — packed with vitamins and minerals; sip it like tea when you feel something coming on
- Beef Bone Broth — collagen, minerals, and serious immune support
- Old-Fashioned Chicken Noodle Soup — still the gold standard for a reason
- Medicine Ball Tea — my copycat of the Starbucks Cold Buster; five minutes flat, and it genuinely works on a sore throat
- Golden Milk Tea — warm, anti-inflammatory, caffeine-free; our evening go-to when someone starts sniffling
- Golden Milk Spice Mix — make a batch to keep in your pantry, or pair it with a jar of this elderberry syrup for the best homemade wellness gift
Like this recipe?
Don’t forget to give it a ⭐️⭐️⭐️⭐️⭐️ star rating and leave a comment below the recipe!

Equipment
- Organic Elderberries
- Swingtop Bottles
Ingredients
- 2 cups dried elderberries I used organic
- 6 cups filtered water see notes
- 1 lemon organic, hand-squeezed, halved and tossed in
- 4 slices fresh ginger ¼ inch thick
- 3 – 4 cinnamon sticks organic
- 1 cup unfiltered honey raw, local preferably, more if you want it sweeter up to 1:1 ratio
Optional Ingredients
- 1 cup hibiscus flowers optional, but adds great flavor and antioxidents
- 1 orange organic, zested, halved, hand squeezed into pot
- 1 teaspoon whole cloves
- 1 apple cut in half
Instructions
Instant Pot Instructions (see notes for Stovetop)
- Pour the water into your IP, add elderberries, hibiscus (optional), ginger, cinnamon, cinnamon sticks, squeezed lemon and orange halves, cloves and other optional ingredients if adding. DO NOT ADD HONEY, yet!2 cups dried elderberries , 6 cups filtered water, 1 lemon, 4 slices fresh ginger, 3 – 4 cinnamon sticks, 1 cup hibiscus flowers, 1 orange, 1 teaspoon whole cloves, 1 apple
- Secure IP lid and ensure pressure release valve is closed. Set timer for 15 minutes Manual mode or Normal.
- Allow pressure to release naturally for 10 minutes, then release steam valve (VENT), carefully.
- Strain elderberry juice through fine mesh strainer over a glass container. Using the back of a wooden spoon press berries, squeezing out as much of the liquid as possible. Discard spent elderberries (or compost them).
- Pour the liquid back into the instant pot and press Boil or Saute for 10-15 minutes uncovered, until reduced, not quite half. Stir occasionally, this reduces the cyanogenic glycosides.
- Allow to sit until lukewarm, stir in desired amount of honey, if you stir it in while it's too hot, it will kill beneficial enzymes in honey. Pour syrup into a quart sized jar(s) or preferably a 16 oz pourable, sealing jar. Store in refrigerator and take daily for best immune boosting results.*we like it less sweet, it actually has more immune boosting properties if more honey is added, add up to 1:1 amount of honey, but it will be syrupy sweet!1 cup unfiltered honey
- Standard dose is ½ – 1 teaspoon for kids (1-12 years) and ½ – 1 TBL for adults daily.
- If the flu or a cold does strike, take the normal dose, but every 2-3 hours until you start feeling better.


Amy
When doubling, do I double everything but the elderberries?
Hi Amy, forgive my delay, yes, double the water, you should be fine at 1 cup of elderberries!
Miz Helen
I can’t wait to make up your Elderberry Syrup, what a great project! Thanks so much for sharing with us at Full Plate Thursday,448 and hope you will come back soon!
Miz Helen
I hope you try it!!
Heidi
I never thought to make my own. Brilliant! Thanks for the recipe!
Let me know if you try it Heidi, if you do I am pretty sure you will love it!
Michelle
I saw your note about multiplying the recipe. If I do I’m concerned the potency won’t be as strong and it won’t work as well? Have you noticed that?
I have not Michelle, I’ve seen numerous recipes using less elderberries and I believe the healthy properties are just as strong. It’s a little less syrupy than when not doubled, but I’ve discovered the results are just as good.
Michelle — I thought I replied the other day, so sorry if it didn’t come through. But yes, I have found that I can multiply (in fact I just did the other day) giving me twice as much syrup, I simmered for longer, boiling it down a bit more for the potency, but those little elderberries back a whole lot of punch!