


Learning how to make Crème Brûlée doesn’t need to be intimidating! This recipe keeps it simple while sticking to the easy, tried-and-true techniques that make crème brulee so magical—silky, creamy custard and that irresistible sugar crack. Totally doable, even if you’re not a pro baker! With my step-by-step instructions and success tips, I’ll guide you through the process so you can make it confidently and impress every time.
Why you’ll love this recipe for Creme Brulee
Like many home cooks, I once thought crème brûlée was strictly restaurant territory – too fussy and complicated for my kitchen. That assumption couldn’t have been further from the truth! After some testing and refinement, this recipe proves that creating restaurant-quality crème brûlée at home is not only possible but surprisingly straightforward.
In fact, when I served these custards at a recent dinner party, one guest – whose husband happens to be a professional chef – declared them even better than her husband’s version!
At its heart, crème brûlée is essentially a baked version of crème anglaise, that silky pouring custard you might find drizzled over desserts in fine restaurants. The key difference? We’re baking it slowly and gently until it sets into that characteristic silky texture. By reducing the sugar content from traditional recipes, this version allows the pure, rich flavor of the cream and vanilla to take center stage, creating a more balanced dessert that doesn’t overwhelm you with sweetness.
Success in making the best creme brulee lies in simple details. Room-temperature egg yolks blend seamlessly with gently simmered cream, preventing scrambling. A double-straining process—first after heating the cream, then after combining with eggs—ensures perfectly silky custard without any unwanted bits!
Finally, remove the custards from the oven when the edges are set but the center still has a gentle wobble, then let them cool completely in the water bath. This gradual cooling process is essential for achieving that perfectly creamy texture without any graininess!

Success Tips for the Best Creme Brulee
- Go for the Good Stuff: This isn’t the time for shortcuts. Use real heavy cream, fresh egg yolks, and legit vanilla (bean, paste, or extract) to make your custard sing. Trust me; you’ll taste the difference!
- Tempering: Go Slow or Go Home: Add the warm cream slowly and steadily to the egg mixture. We’re going for silky custard, not scrambled eggs! Keep whisking as you pour, and don’t rush it. This “tempering” business may sound fancy, but it’s just about going slow.
- The Jiggle Test (or Thermometer Backup): For doneness, give the ramekins a gentle nudge—if the edges are set and the center jiggles like Jell-O, you’re golden. Still nervous? Grab a cooking thermometer, and check for 165°F in the center. Just don’t overdo it; crème brûlée should be smooth, not grainy.
- Cool It in the Water Bath: Once baked, let the ramekins chill in their hot tub (aka, water bath) until completely cool. This helps the custard set up nicely without any tragic cracks on top.
- Chill Time Matters: Crème brûlée needs a good nap in the fridge to firm up, so plan for at least 3-4 hours, or even better, let them chill overnight. Patience = creamy perfection.
- Brûlée at the Last Minute: Wait until right before serving to sprinkle on that sugar and torch it up (or broil it). Doing it too early softens the crackly crust, and no one wants a soggy brûlée!
- Broiler, Watch Closely!: If you’re using the broiler instead of a torch, keep your eyes on it! Sugar can go from caramelized to burnt faster than you’d think. Rotate the baking sheet if needed, and pull them out as soon as the tops turn that deep amber color.
Follow these tips, and you’ll be cracking through that perfect sugar crust in no time!

What is Creme Brulee?
Crème brûlée, pronounced krem broo-LAY, is a classic French dessert that’s all about the contrast—a silky, creamy custard base topped with a hard, caramelized sugar crust. The name means “burnt cream,” which refers to that crackly golden layer created by torching or broiling sugar until it caramelizes.
The custard itself is simple but decadent, made with just a few basic ingredients: heavy cream, egg yolks, sugar, and vanilla. The result? A rich, velvety texture that pairs perfectly with the crisp, slightly bitter sweetness of the caramelized sugar topping.
Traditionally served in individual ramekins, crème brûlée feels like a fancy restaurant dessert but is surprisingly easy to make at home. With its satisfying spoon crack and melt-in-your-mouth flavor, it’s the perfect dessert to impress your guests—or just treat yourself to something extra special.
How to make Creme Brulee
Step 1 – Prepare
Preheat the oven to 325°F (165°C) with the rack in the middle position. Arrange six 6-ounce ramekins in a 9×13-inch baking dish, so they are level and evenly distributed. You may use different sized ramekins, but you will need to adjust your baking time accordingly (less for shallow ramekins, more for smaller, taller ones)
In a heavy-bottomed medium saucepan, add heavy cream and the split vanilla bean; if using vanilla extract or paste, add it after heating. Heat over medium until it just simmers, stirring with a wooden spoon occasionally. Remove from heat and let stand for 15 minutes to infuse. If using vanilla extract or paste, stir it in now.


Step 2 – Mix Egg Mixture
In a large bowl, whisk 5 egg yolks (see High-Altitude Adjustments below if above 7000 feet), sugar, and salt until smooth and pale yellow, this will take a few minutes (it’s a good workout) and the resulting mixture is called the ribbon consistency.
Optional for the smoothest custard: strain the hot cream through a fine-mesh sieve into a bowl with a pouring spout to remove any solids. Discard the vanilla bean. I have been known to skip this step!
Gradually and slowly and continuously whisk the cream into the egg mixture in a slow, steady stream. This will avoid scrambling the eggs. If you are unsure or concerned about pouring too much at once, while whisking with one hand, slowly pour a ladleful of hot cream into the egg mixture. This will temper the eggs so you don’t scramble them. Continue gently whisking in the hot cream until it’s all incorporated.


Step 3 – Bake the Custard
Strain the custard mixture through a clean, fine mesh sieve one more time for extra smoothness. Don’t skip this straining step; then pour evenly into ramekins.
Carefully add boiling water to the baking dish, filling halfway up the sides of the ramekins, being careful not to splash water into the custards.
Bake for 30-45 minutes. The edges should be set, and the centers should be slightly jiggly (not soupy). Give the pan a gentle shove to see how wobbly the centers are. Avoid overbrowning and overbaking; a pale yellow with a few golden spots is okay.
Carefully (remember that water is hot) remove from the oven and place on a cooling rack. Allow the custards to cool completely in the water bath, then transfer the ramekins to a baking sheet. Cover loosely and chill for at least 3-4 hours or up to 48 hours (2 days).


Step 4 – Brûlée
Just before serving, sprinkle each custard with 1-1½ teaspoons of sugar, tilting and swirling to the edges for an even layer.
Kitchen Torch Method
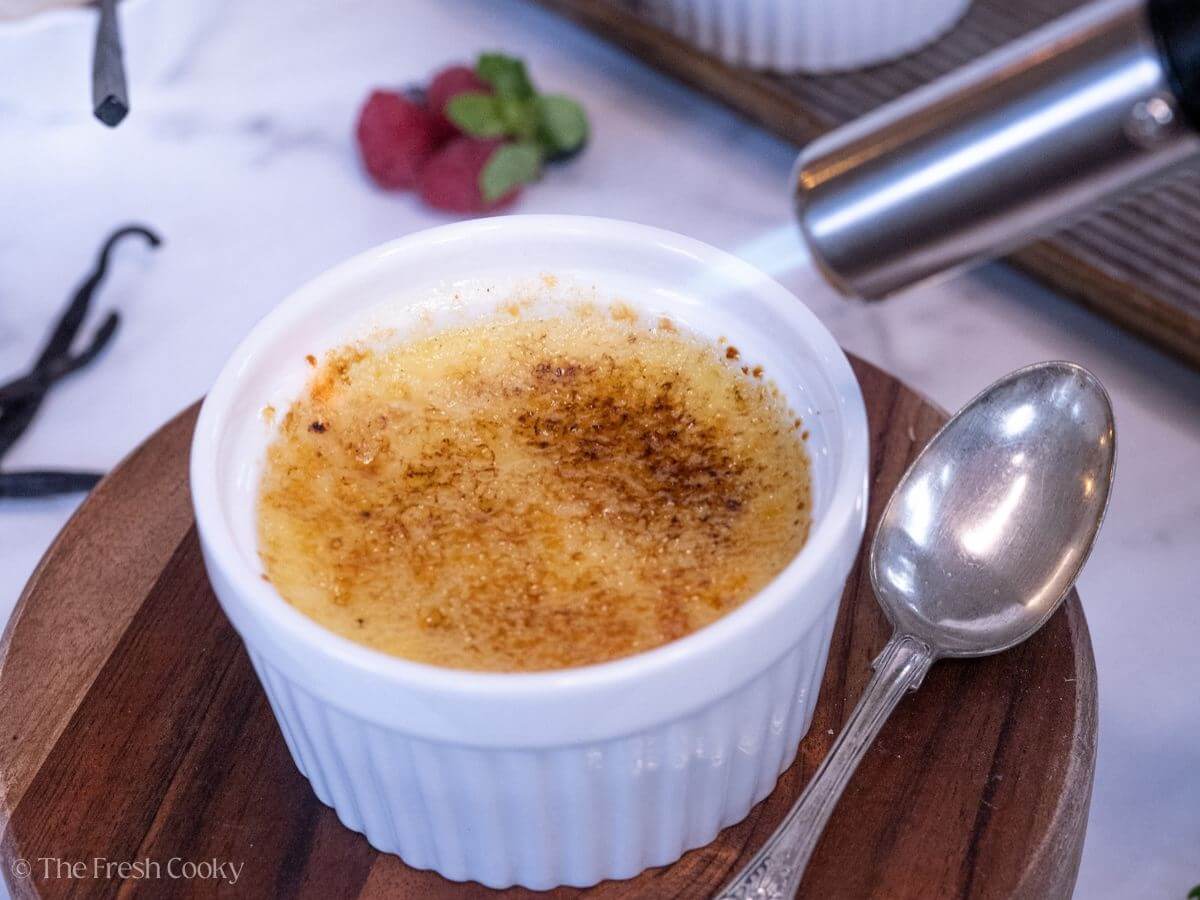
Use a kitchen torch or flame thrower on a medium flame to caramelize the sugar until it bubbles and turns a deep amber (not black) color. Keep the torch about 3-4 inches above the dish and keep it moving while you are caramelizing the sugar. Be careful if you are turning the ramekins. They will get hot – don’t ask me how I know! 😉
How to use the Broiler to Brûlée
Place the oven rack at the top, about 4-6 inches from the broiler element, turn on broiler. Place creme brulees on a sheet pan and place in preheated oven. Don’t walk away – the sugar will caramelize quickly—within 1-3 minutes. Rotate the baking sheet if needed to ensure even browning. Allow to cool for 1 minute before serving, careful the ramekins may be hot to the touch.
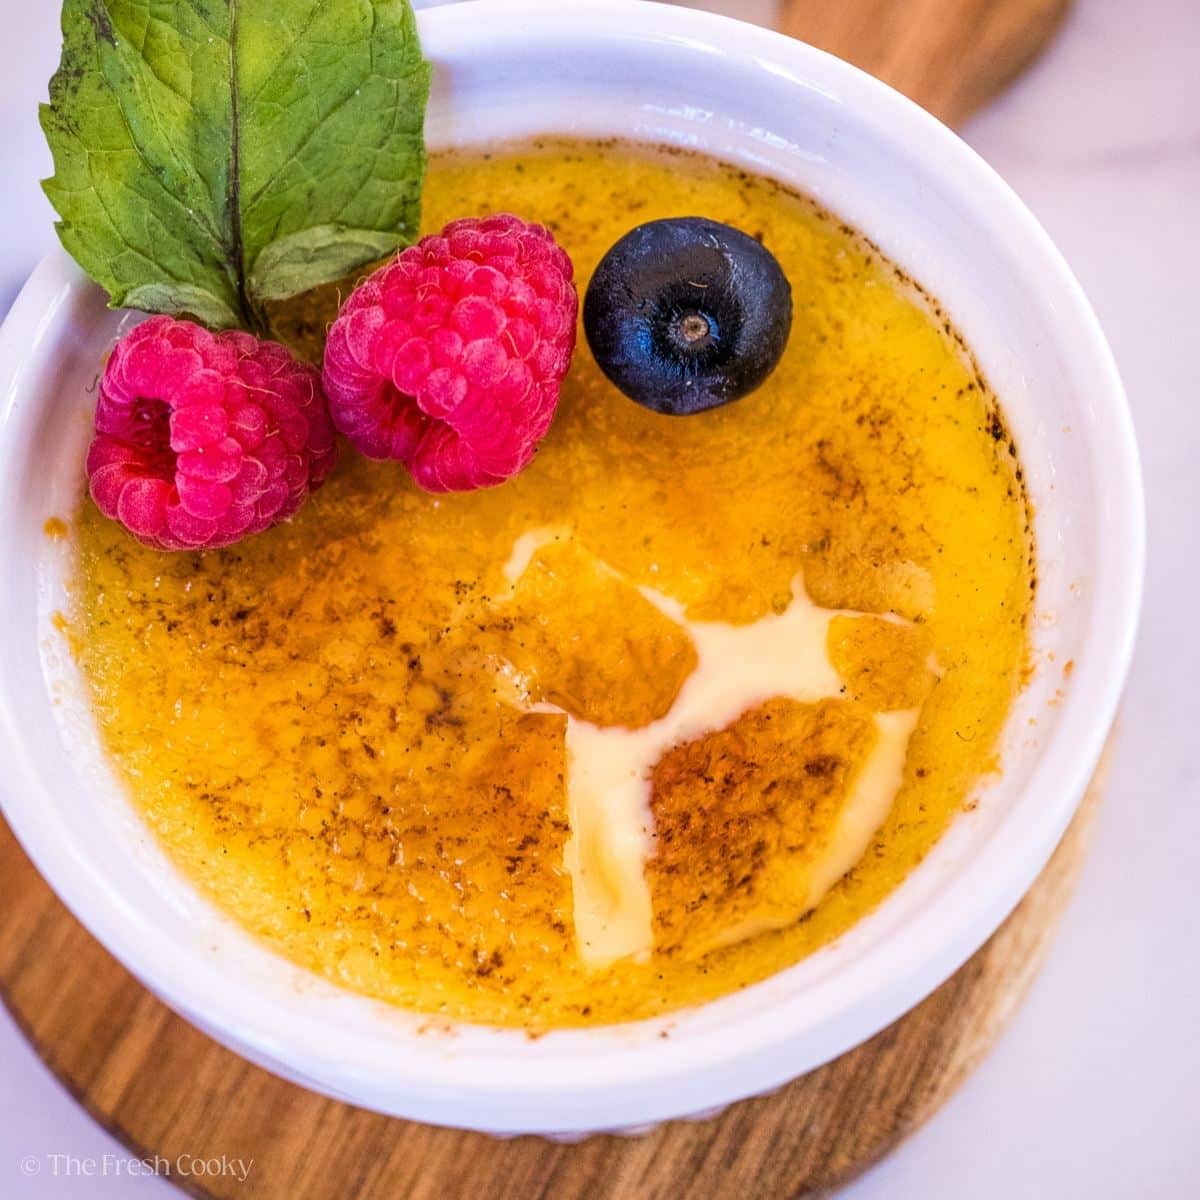
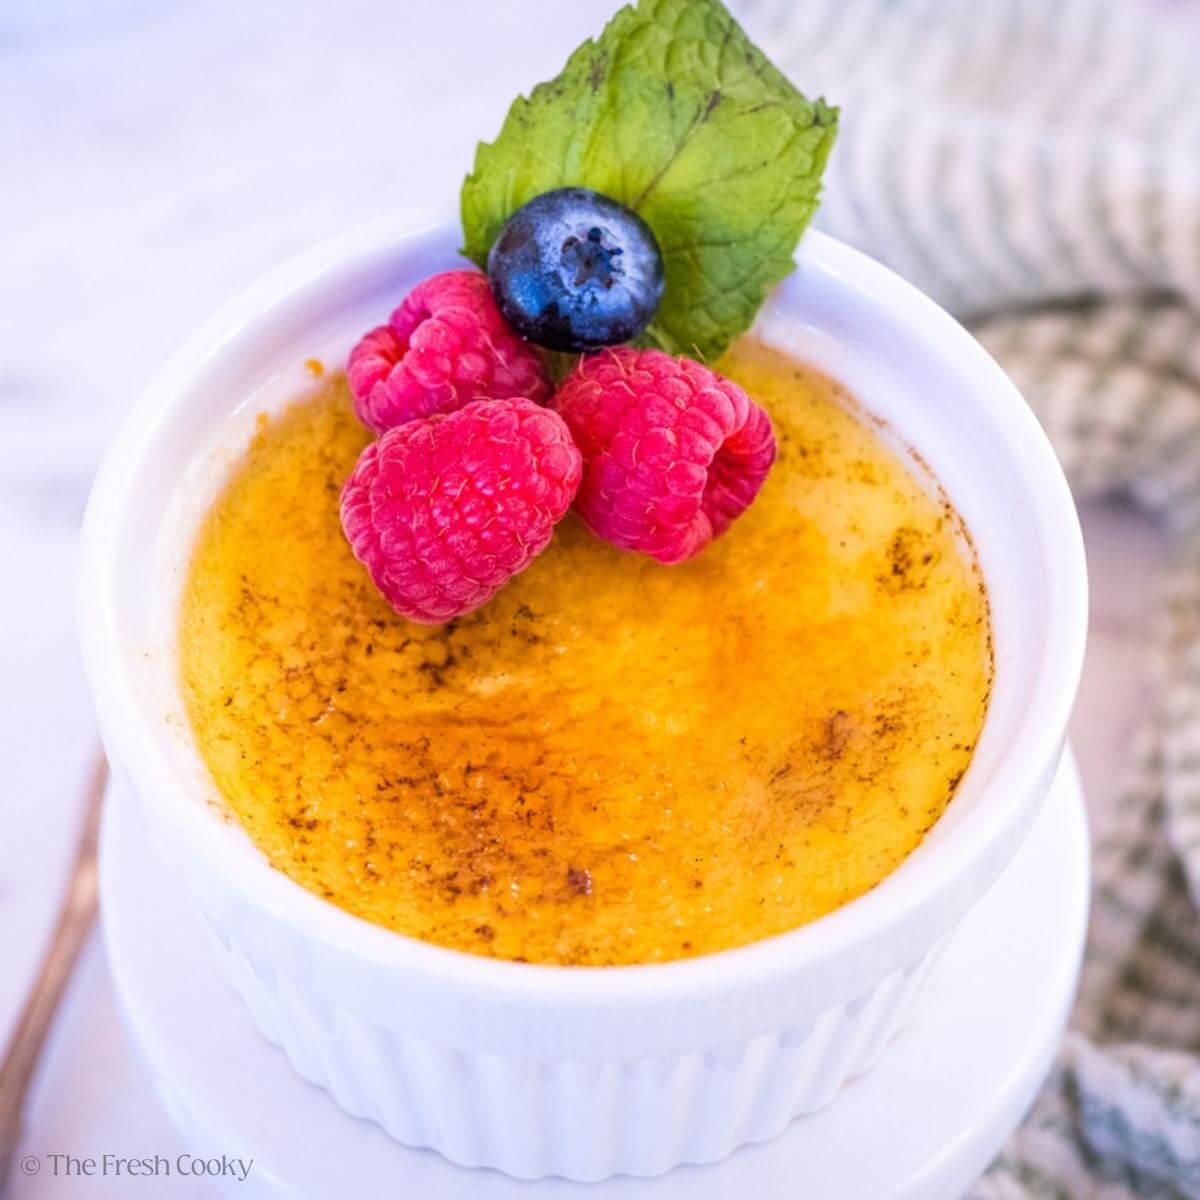
Serve immediately, garnished with berries and mint if desired.

Recommended Tools
- 6-ounce ramekins: You can use smaller or larger but you will need to adjust the baking time accordingly.
- Kitchen Torch is inexpensive and accessible to all home cooks! And fun!
- Fine Mesh Strainer – you need to run it through a strainer for the silkiest custard.
- Vanilla Bean: Spring for a bean, they really are superior when it comes to this simple dessert.
How to get a crisp Creme Brulee topping
- Start with Chilled Custard: Make sure your custard is fully set and cold from the fridge before adding the sugar topping. This helps the sugar caramelize without warming the custard.
- Choose the Right Sugar: For the topping, use granulated or superfine sugar (also called baker’s sugar or caster sugar). It melts and caramelizes evenly, giving you that perfect crackly crust.
- Evenly Sprinkle the Sugar: Add about 1-1½ teaspoons of sugar per ramekin. Swirl or tilt the ramekin to spread the sugar into a thin, even layer that touches the edges.
- Torch for Best Results: Use a kitchen torch to caramelize the sugar. Move the flame slowly, sweepingly, keeping it about 2 inches from the surface. Don’t stay in one spot too long, as the sugar can burn quickly. Torch until the sugar bubbles turns golden, with some brown spots. It will harden in 1-2 minutes.
- Broiler Method (if needed): If you don’t have a torch, place the sugared ramekins on a baking sheet under a preheated broiler. Keep them about 4-6 inches from the heat source and watch closely, rotating the ramekins as needed. This takes 1-3 minutes but requires you to stare at them through the oven door like a hawk, as they can go from golden to burnt in a second!
- Cool Slightly: Let the caramelized sugar harden for 1-2 minutes before serving. This gives you that signature crisp crack when you tap it with a spoon.

How to Store Homemade Creme Brulee
You can prepare the custards up to two days in advance but don’t add and caramelize the sugar until just before serving. Store in the refrigerator covered in plastic wrap until ready to serve.
How long does creme brulee last in the fridge?
It can be stored in the fridge for to 2-4 days without the caramelized sugar top, covered with plastic wrap. Though the custard will start to degrade after the 48 hours, not that it’s bad, mind you, it won’t be as creamy and perfect!
Creme brulee with caramelized sugar on top is best served within 30 minutes of torching, as the crisp top will soften and dissolve in the fridge. However; this isn’t necessarily a bad thing, you can try to re-crisp by adding a thin layer of sugar and bruleeing again.
For best results, make the custards ahead and only caramelize the sugar before serving!
Is creme brulee served cold?
Yes! The custard base should be served cold or chilled. The caramelized sugar top, however, is served warm, right after torching or broiling. This contrast is part of what makes crème brûlée special!
Can you freeze creme brulee?
Absolutely! Creme brulee is the base for French custard ice cream. I froze a couple of my test batches after caramelizing them, and we couldn’t get enough of them! It firms up and tastes so creamy and delish! But if you want to freeze and thaw, I wouldn’t recommend that, as the texture will change.
How to reheat creme brulee?
You can reheat crème brûlée, but it’s not ideal since it’s traditionally served chilled, and you won’t get the same results when caramelizing your sugar. If you want to warm it up, here’s how:
- Use a Low Oven: Preheat to 275°F (135°C). Place the ramekins in a hot water bath in a baking dish, cover loosely with foil, and warm for about 10-15 minutes until slightly warm (not hot).
- Add Fresh Topping: After reheating, sprinkle sugar over the custard and torch or broil it to create a fresh caramelized crust. But it will soften quickly.
For the best results, though, crème brûlée is best served cold with the sugar topping added just before serving!

Variations and Substitutions
- Vanilla Twist: No vanilla bean? No problem! Use one teaspoon of vanilla bean paste or pure vanilla extract instead. You’ll still get that lovely vanilla flavor, but if you’re after those little black specks in your custard (they look so fancy!), go with a whole vanilla bean if you can afford it—the flavor is exceptional!
- Flavor Fun: Want to mix it up? Try adding a splash of liqueur—like Grand Marnier for a hint of orange or Frangelico for a nutty twist. You can also infuse the cream with a cinnamon stick, a few coffee beans, or a couple of cardamom pods as it heats, then strain them out before mixing with the eggs for a subtle, aromatic flavor.
- Make Eggnog Crème Brûlée by replacing half of the cream with eggnog and adding a few grates of fresh nutmeg to the custard before baking. Festive and delish!
- Dairy-Free Option: For a dairy-free version, swap the heavy cream for full-fat coconut milk. The texture will be a bit different—slightly softer—but still yummy. You’ll also get a mild coconut flavor, which pairs beautifully with the caramelized sugar topping!
- Lower Sugar Option: If you’re watching your sugar intake, you can substitute half of the sugar with a granulated sugar alternative like allulose (monk fruit and erythritol will not caramelize or brown). Just keep in mind that the brûlée topping might not caramelize quite as well with sugar substitutes.

Do I Need to Adjust Creme Brulee for High Altitude?
I cook and bake at a mile high (5280 feet above sea level), and sometimes you need to adjust recipes. During my creme brulee testing, I did not need to adjust the basic sea level recipe for high altitude; see below for my suggested changes based on testing and my recipe testers.
At altitudes above 3500 feet
- Do not alter the ingredients; follow the directions and bake a little longer. I start checking at 35 minutes and usually take them out at about 42-45 minutes.
At altitudes above 7,000 feet
- Increase sugar to ½ cup
- Add two additional egg yolks
- Bake as directed, baking a little longer as above.
Vanilla Creme Brulee FAQs
Crème brûlée is a decadent dessert that tastes like creamy vanilla heaven with the vanilla bean and a hint of sweet silky custard. The custard is smooth and velvety with just a whisper of eggy flavor for depth. And then there’s the caramelized sugar on top—sweet, toasty and just a bit of bitter to balance it all. It’s fancy but feels like a comfort food in every bite.
If stored in the refrigerator, the custards will keep for 2-4 days. After 48 hours the custard will start to break down a bit — still good but just so you know. For best results; wait to caramelize the sugar top until just before serving.
Your oven’s broiler makes a decent alternative to a kitchen torch. Place the chilled custards 4-6 inches below the broiler element and sprinkle with sugar as usual. Watch carefully as they broil for 1-3 minutes, rotating the baking sheet if needed for even browning.
When gently shaken, a perfectly baked crème brûlée should have set edges but maintain a slight jiggle in the center. The center shouldn’t be liquid or soupy, but be careful not to overbake, as the custard will continue to set as it cools in the water bath.

How do I avoid bubbles in Creme Brulee?
Remember that the sugar will hide any bubbles that form, so don’t fret too much about a few bubbles, but in case they drive you crazy, here are my tips:
- Avoid Over-Whisking: When mixing the egg yolks and sugar, whisk gently until just combined to minimize air bubbles.
- Strain the Mixture: After combining the heavy cream and eggs, pour through a fine mesh strainer.
- Let Bubbles Settle: After pouring the custard into the ramekins, let them sit for a few minutes to allow any remaining bubbles to rise to the surface.
- Remove Surface Bubbles: Before baking, use a small spoon to gently skim off any visible bubbles on the surface of each ramekin. Alternatively, you can use the edge of a paper towel to dab the surface gently.
- Torch Any Remaining Bubbles: If you have a kitchen torch, briefly pass it over the surface to pop any last tiny bubbles before baking.
What is the best sugar for creme brulee?
For the perfect caramelized top on crème brûlée, regular granulated sugar is the way to go. Superfine sugar (also known as caster sugar) or organic cane sugar work just as well, they melt quickly and evenly and give you that crispy caramelized crust we all love. But don’t use brown sugar or powdered (confectioners’) sugar – they don’t caramelize properly and will leave you with an uneven sticky topping.
I decided to test this out since I usually bake with organic, all-natural cane sugar, which I used in the custard base. I’d heard superfine sugar (baking sugar) was the way to go for the topping so I compared it with granulated and cane sugar. As you can see in the pictures below all three types gave me a caramelized hard crust but each had its own subtleties. Watch the video below to see the results and find your favorite!

More of our Popular and Favorite Sauces

More Popular Dessert Recipes from The Fresh Cooky
Like this recipe?
Don’t forget to give it a ⭐️⭐️⭐️⭐️⭐️ star rating and leave a comment below the recipe!
Video
Ingredients
- 3 cups heavy cream See Note 2
- 1 vanilla bean split and seeds scraped (See Note 2)
- 5 large egg yolks at room temperature (see high altitude adjustments above 7000 ft)
- ⅓ cup granulated sugar I used all natural cane sugar, regular white sugar may be used.
- ⅛ teaspoon salt a heavy pinch
- boiling water for the pan
Brûlée Topping
- 6-8 teaspoons granulated sugar may use cane sugar, white sugar, or superfine (caster) sugar.
- fresh berries and mint optional, for garnish
Instructions
- Preheat the oven to 325°F (165°C) with the rack in the middle position. Arrange six 6-ounce ramekins in a 9×13-inch baking dish, so they are level and evenly distributed. (for other size ramekins see Note 1)

- In a heavy-bottomed medium saucepan, add heavy cream and the split vanilla bean – see Note 2; if using extract or vanilla bean paste, add after heating. Heat over medium until it just starts to simmer, stirring with a wooden spoon occasionally. Remove from heat and let stand for 15 minutes to infuse. If using vanilla extract or paste, stir it in now.3 cups heavy cream, 1 vanilla bean
- In a large bowl, whisk 5 egg yolks (see High-Altitude Adjustments in notes if above 7000 feet), sugar, and salt until smooth and pale yellow, this will take a few minutes (it’s a good workout) and the result is called the ribbon consistency.5 large egg yolks, ⅓ cup granulated sugar, ⅛ teaspoon salt
- Optional for the smoothest custard; strain the hot cream through a fine-mesh sieve into a bowl with a pouring spout to remove any solids. Discard the vanilla bean.
- Gradually and slowly and continuously whisk the cream into the egg mixture in a slow, steady stream, this will avoid scrambling the eggs. If you are unsure or concerned about pouring too much at once, while whisking with one hand, slowly pour a ladleful of hot cream into the egg mixture, this will temper the eggs so you don’t scramble them (see Note 3). Continue gently whisking in the hot cream until it’s all incorporated.
- Strain the custard mixture through a clean fine mesh sieve (see Note 4) one more time for extra smoothness, don’t skip this straining step; then pour evenly into ramekins.
- Carefully add boiling water to the baking dish, filling halfway up the sides of the ramekins, careful that you don’t splash water into the custards. See Note 5.boiling water
- Bake for 30-45 minutes. The edges should be set, and the centers slightly jiggly (not soupy). Give the pan a little gentle push to see how wobbly the centers are. Avoid over-browning and overbaking; a pale yellow with a few golden spots is okay.
- Carefully (remember that water is hot) remove from the oven and place on a cooling rack. Allow the custards to cool completely in the water bath, then transfer ramekins to a baking sheet. Cover loosely and chill for at least 3-4 hours or up to 48 hours (2 days).
- Just before serving, sprinkle each custard with 1-1½ teaspoons of sugar, tilting and swirling to the edges for an even layer.6-8 teaspoons granulated sugar, fresh berries and mint


Kitchen Torch Method
- Use a kitchen torch on a medium flame to caramelize the sugar until it bubbles and turns a deep amber (not black) color. Keep the torch about 3-4 inches above the dish and keep it moving while you are caramelizing the sugar. Be careful if you are turning the ramekins they will get hot – don’t ask me how I know! 😉

Broiler Brûlée Method
- Place an oven rack at the top, about 4-6 inches from the broiler element, turn on broiler. Place creme brulees on a sheet pan and place in preheated oven. Watch closely as the sugar will caramelize quickly—within 1-3 minutes. Rotate the baking sheet if needed to ensure even browning. Allow to cool for 1 minute before serving, careful the ramekins may be hot to the touch.
- Serve immediately, garnished with berries and mint if desired.

Notes
- If using smaller ramekins (4 ounces), use a total of nine 4-ounce ramekins if you have them available. If filling them fuller, you will probably need to bake longer. You may also use shallow ramekins, but note that they will bake quicker and are a bit more difficult to get into their water bath. Bake according to the size of the ramekin.
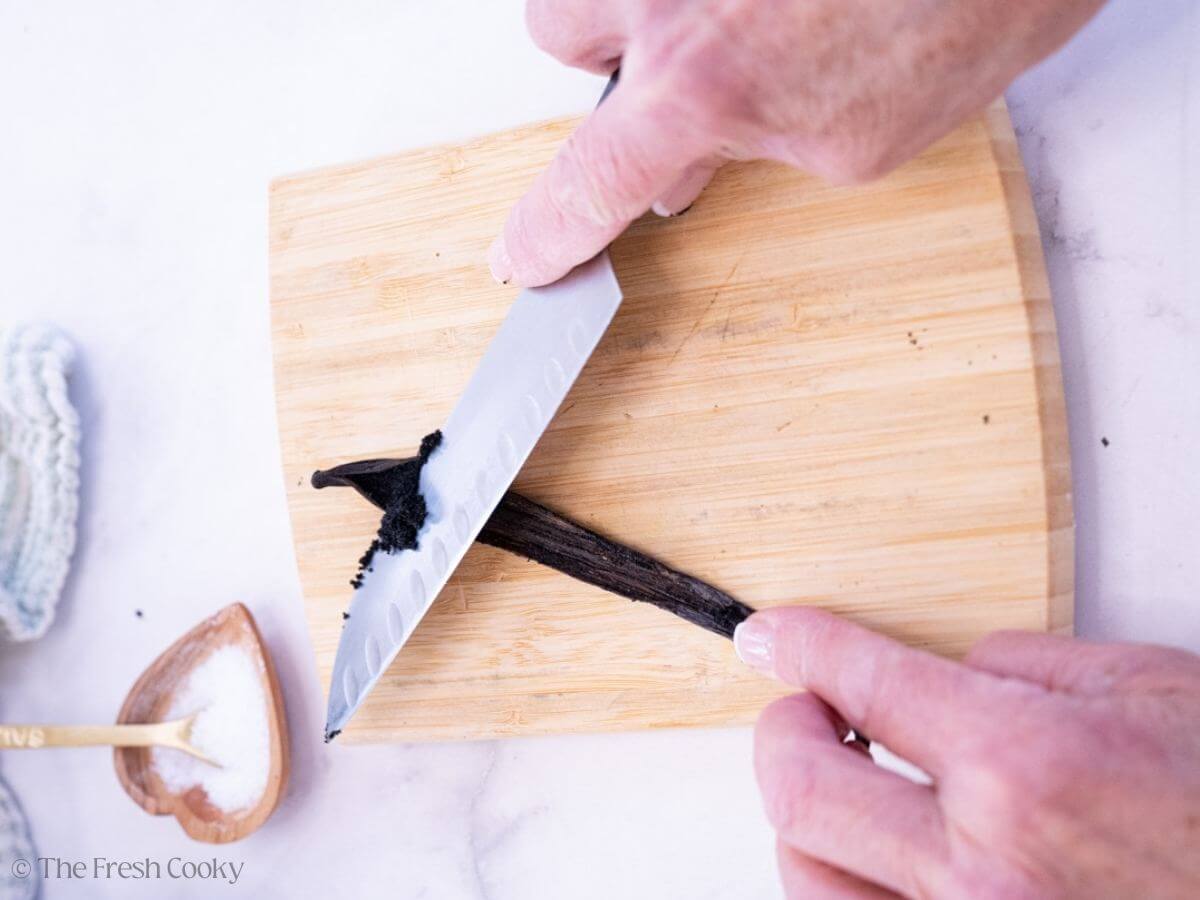
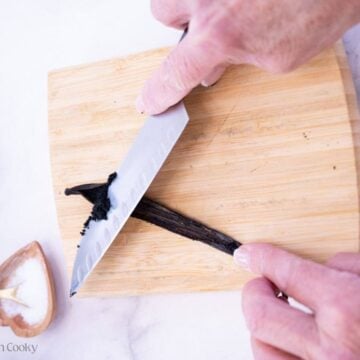
- Watch the video to see how to split a vanilla bean. Basically, using the tip of a sharp knife, slice through one side of a vanilla bean from tip to tip, spread open one end, and then, using the dull side of a knife, gently but firmly scrape the seeds from the vanilla bean.
- It’s really important to keep whisking while slowly incorporating the hot cream into the egg mixture; if you don’t temper the egg mixture, it will scramble the eggs. If you are concerned about pouring too much, use a ladle and slowly pour a little hot cream into the eggs while continuously whisking, add a little more, and repeat the process. Once you have a full ladle worth of heavy cream incorporated, then slowly begin pouring a small steady stream while whisking, until it’s all incorporated. If you accidentally scrambled some of the eggs by pouring the hot cream mixture too quickly into the eggs, don’t worry, you can strain those out through the fine mesh strainer.
- If you only have one strainer, make sure you rinse it well after the first straining, and tapping against a tea towel on the counter, get excess water out, then dry it well before using again.
- We have an instant hot water spout, so I no longer have a kettle, if you don’t have a kettle, find something that will allow you to control the speed of the water pouring into the pan. I used a teapot, you could also use a coffee carafe, French press container, etc.
- You don’t want to underbake the custards, but you also don’t want to overbake them. See the video to see how jiggly the center should be, it’s more jiggly than you might expect. But the custard will continue cooking while it cools in the pan of hot water.
- Traditional Creme Brûlée has the classic hard caramelized sugar crust on top, that “cracks” when you tap it with a spoon.
- At altitudes above 3500 feet
- Do not alter the ingredients; follow the directions and bake a little longer. I start checking at 35 minutes and usually take them out at about 42-45 minutes.
- At altitudes above 7,000 feet
- Add two additional egg yolks
- Increase sugar to ½ cup
Storage Tips
Store covered with plastic wrap in the fridge for up to 48 hours. Creme brulee may be stored for up to 4 days, but note that the custard will degrade after 48 hours. Still safe to eat, just will be more “soupy” Can creme brulee be frozen? Yes! If you have leftovers, that aren’t going to be eaten quickly. Pop it in the freezer (covered well). Enjoy straight from the freezer, after all creme brulee ingredients and process are the basis for French custard ice cream. You will love it as much as we did!Nutrition


Rate & Comment