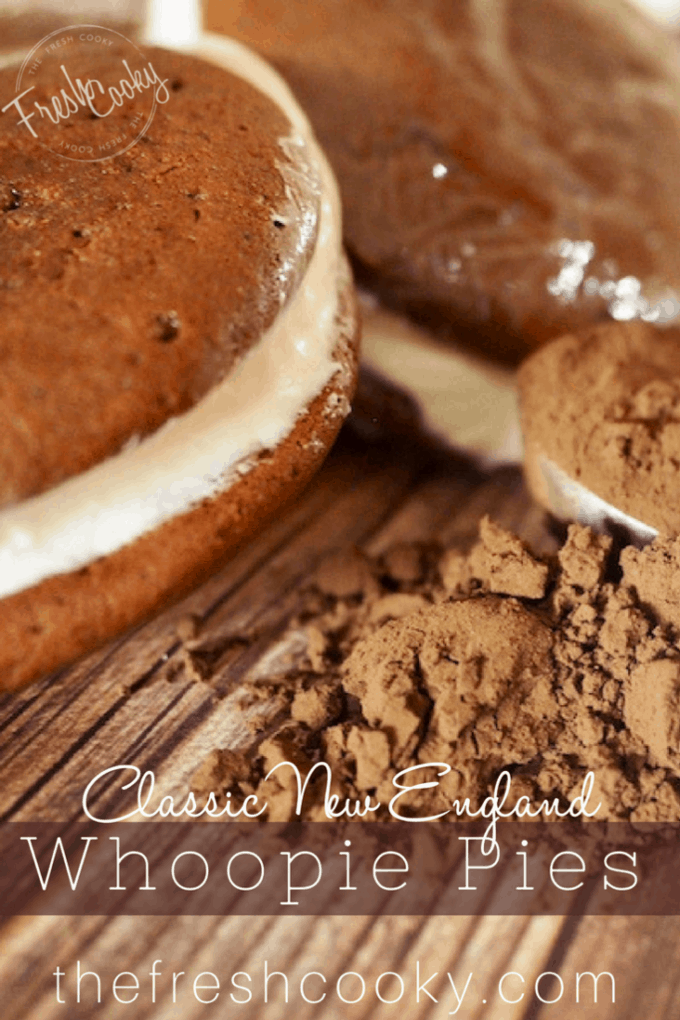
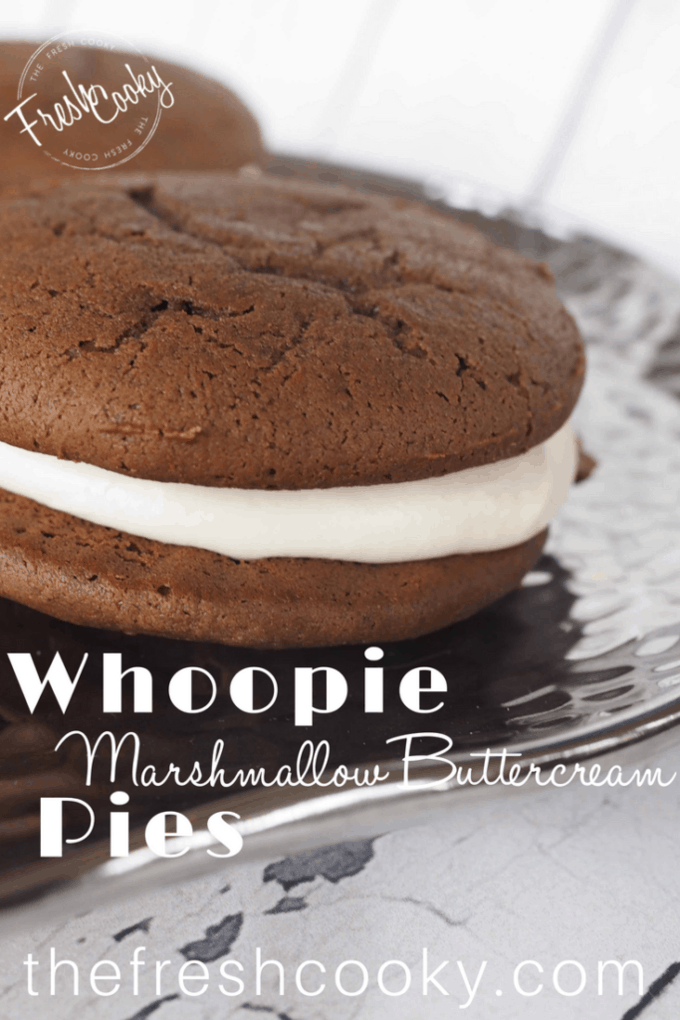
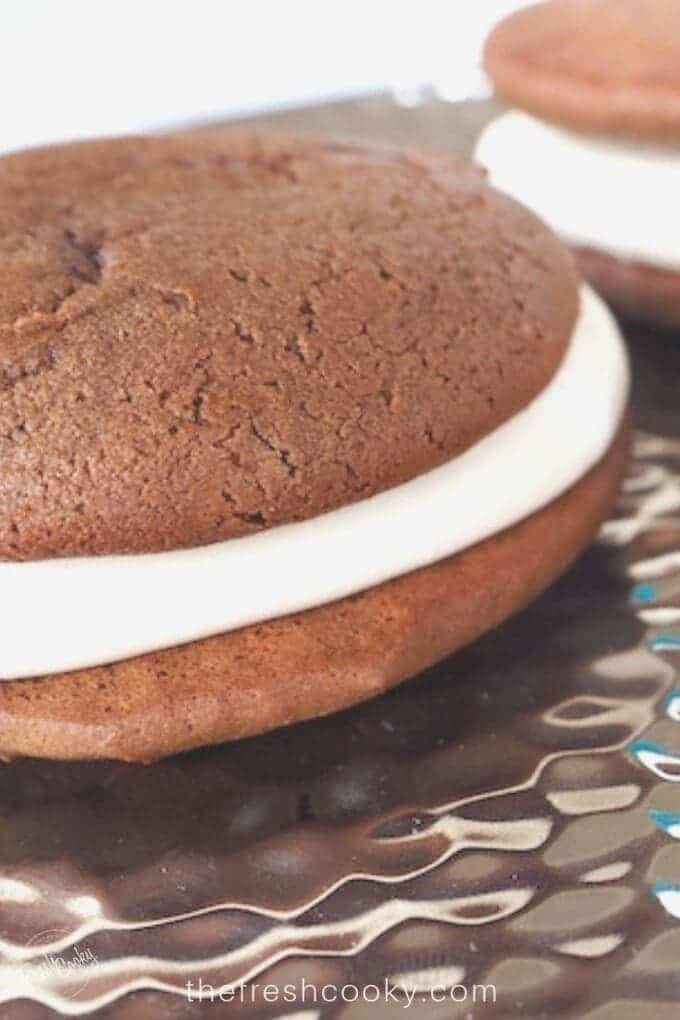
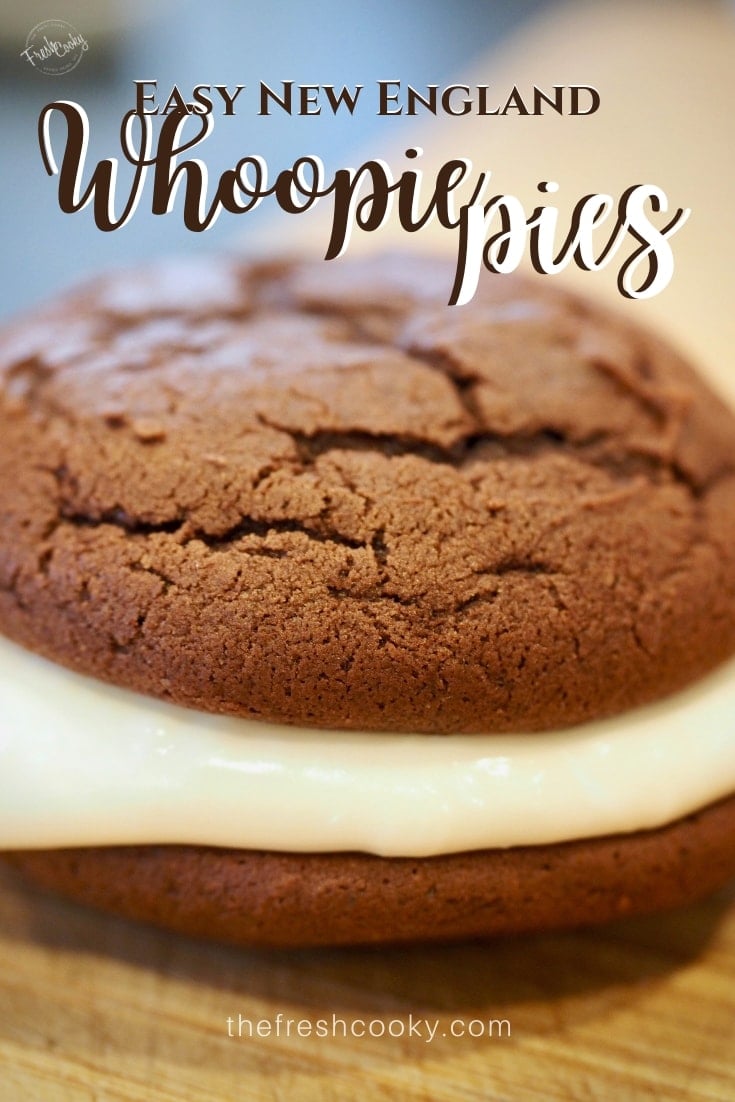
Soft, chocolatey whoopie pies filled with fluffy marshmallow buttercream! This classic New England treat has a fun history, and my easy recipe brings it straight to your kitchen. Perfectly sweet, simple, and oh-so-satisfying!
Did you know whoopie pies have a pretty sweet backstory? Legend has it they got their name because people would shout “Whoopie!” when they found one in their lunchbox. How can you not love a treat with that kind of joy baked in?
My husband grew up in New England, where whoopie pies are practically a way of life, so I knew I had to get this recipe just right. After plenty of taste tests (no complaints there!), I’m proud to say this version nails it—soft, chocolatey cakes paired with a fluffy marshmallow filling.
I have to tell you, I’m more of a lover than a fighter, especially when it comes to desserts. That’s why I fell hard for these whoopie pies. There’s just something about that perfect combination of pillowy chocolate cake and sweet, creamy filling that makes me swoon. They’re easy to make and even easier to devour! Whether you grew up eating these or are trying them for the first time, this recipe will make you feel like you’re part of the whoopie pie tradition.
How to Make Chocolate Whoopie Pies
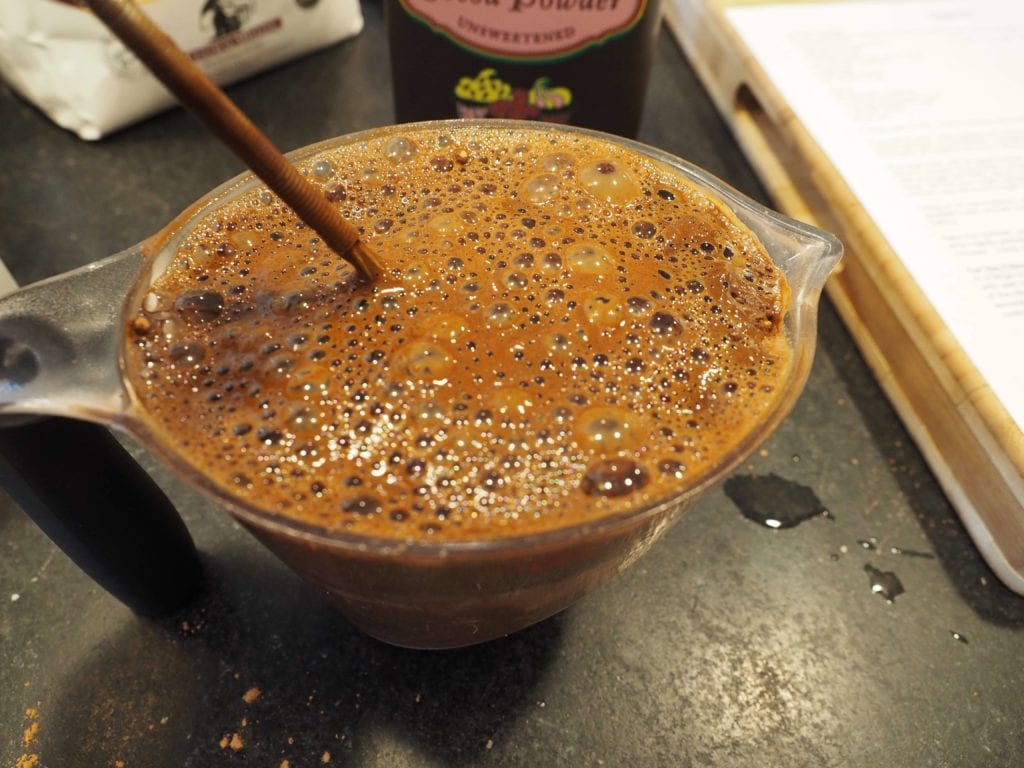
Measure hot water in a measuring or bowl (big enough to allow the mixture to foam up). Add cocoa and baking soda, mixing together with fork, careful it will foam up quickly. Once smooth, set aside and allow foam to settle.
Note | Once cooled and settled you’ll add sour cream to this mixture before adding to batter, so make sure your measuring device or bowl is large enough.
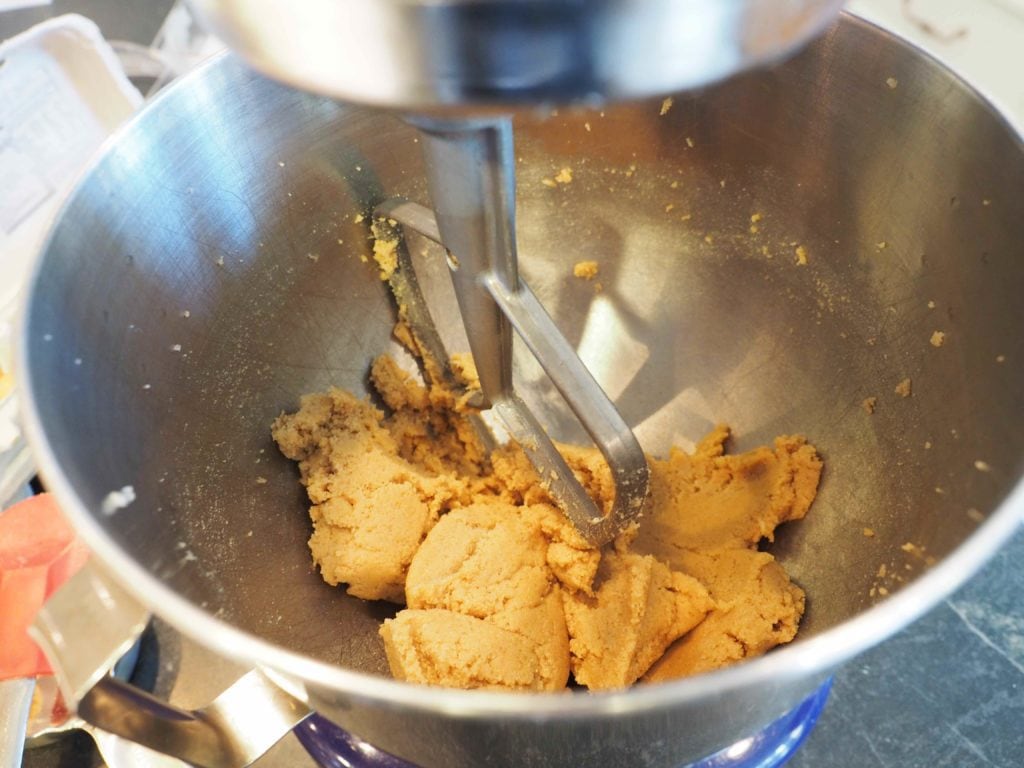
Next, plop your room temp butter and brown sugar into a mixing bowl, cream until it makes a nice creamy consistency, mixing about 2 minutes on medium-high.
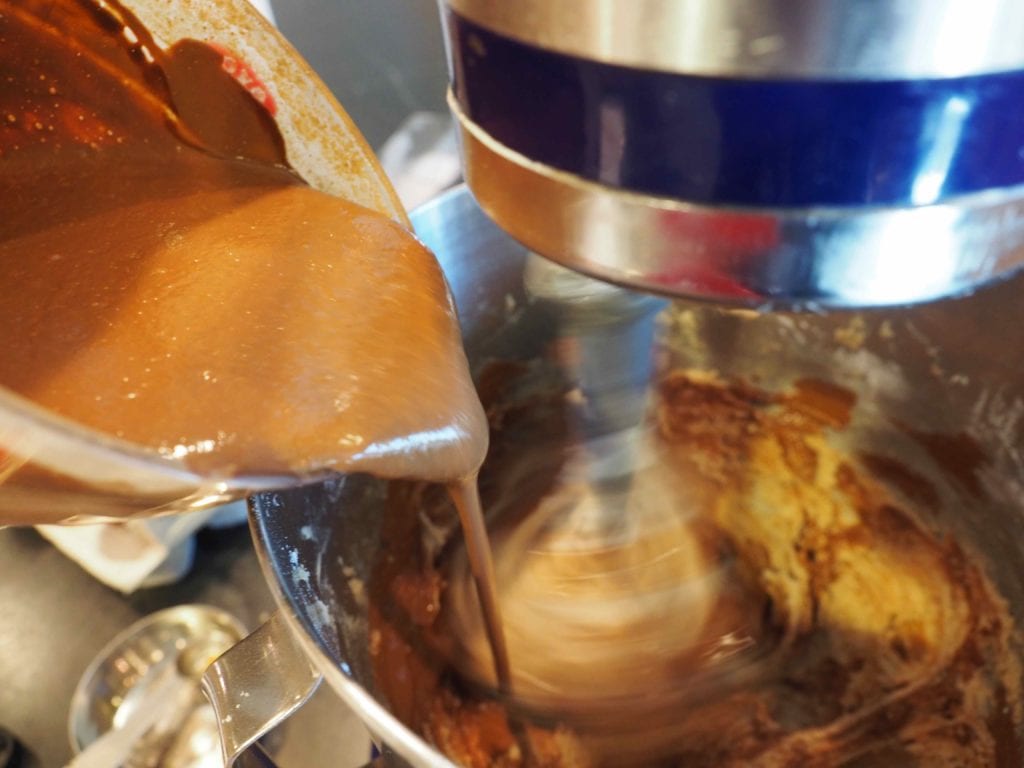
Add egg, and vanilla and mix well, another 2 minutes on medium-high until super light and fluffy. Carefully mix ½ cup sour cream into the chocolate mixture and slowly pour into butter sugar mixture with mixer on low.
With the mixer low, add half your flour mixture scraping down the sides and bottom often. Mix until combined…chocolaty yumminess! Making sure there are no flour or light streaks left.
Gently mix in the rest of the flour mixture, scraping down sides, paddle and bottom often. Once thoroughly mixed into chocolate fudgy goodness.
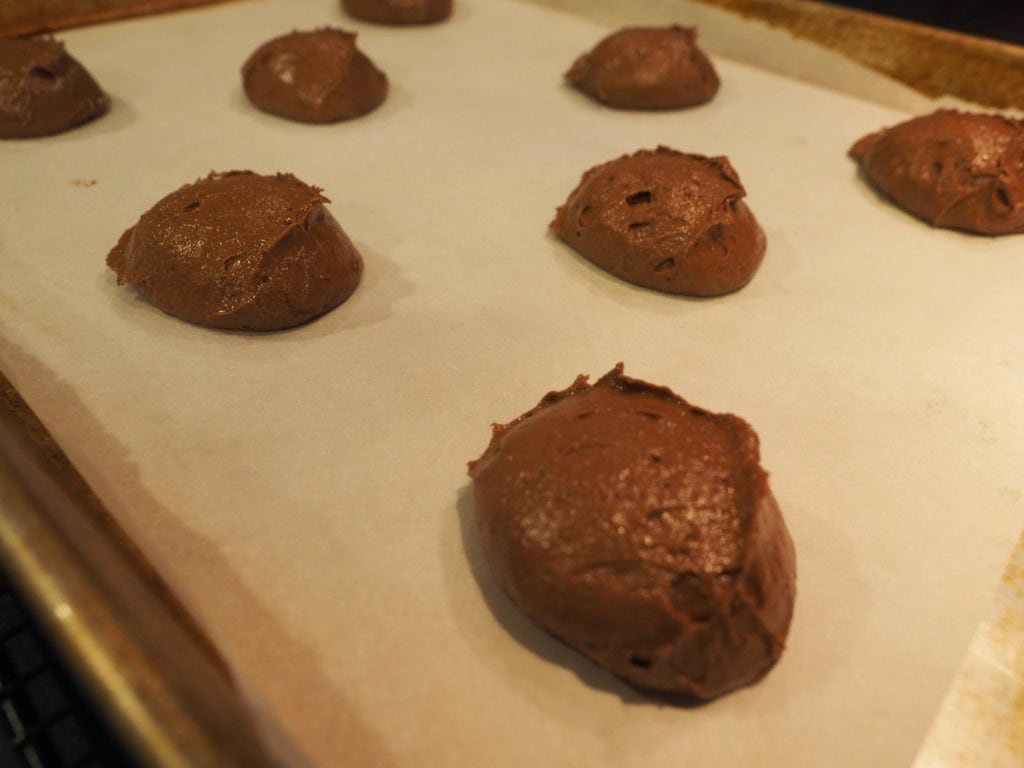
Scoop beautiful blobs of batter (an alliteration!) using a large or medium scoop onto a parchment lined cookie sheet. I personally like using a medium scoop. Makes a few more regular sized pies.
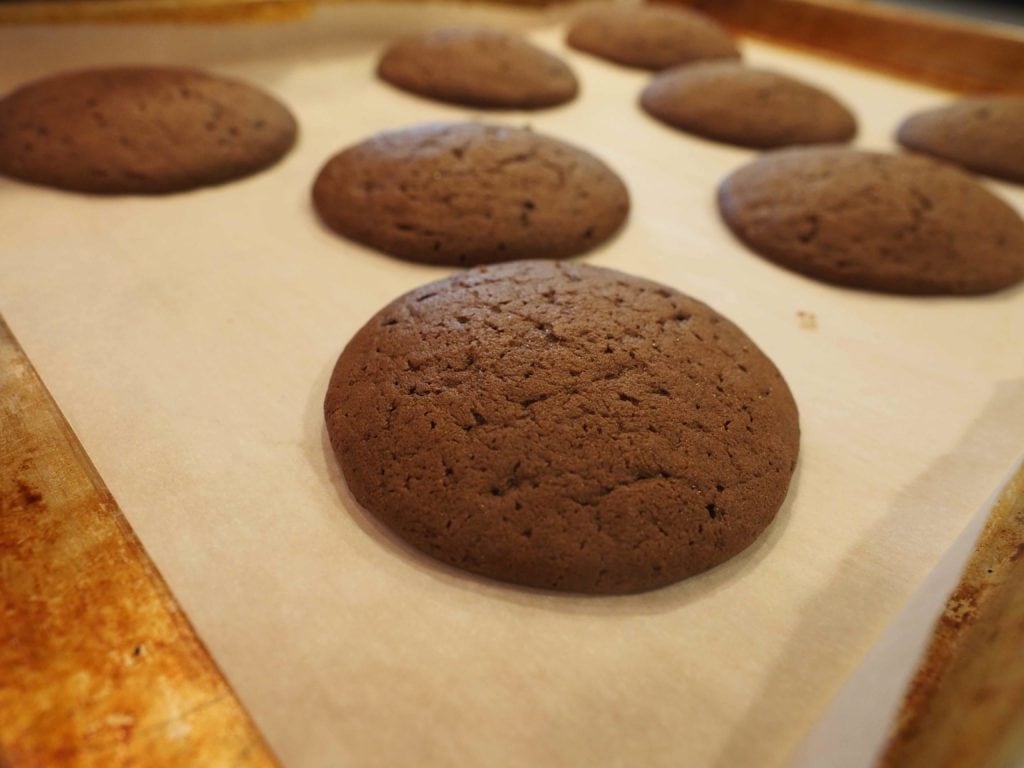
Bake in preheated 350° oven, 1 sheet at a time for 10-14 minutes, or until they spring back when lightly pressed in centers. If you under bake them they will be flatter and chewier, but just as good.
Transfer the cookie sheet to a cooling rack and let stand until cookies firm up, 4-5 minutes. Using a spatula, transfer cookies to wire racks to cool completely.
Storing Chocolate Whoopie Pies
Can I Freeze Whoopie Pies?
Yes, freeze the “cakes” in freezer bags until ready to frost.
I like to match them up in pairs, bottoms together, they freeze so well and pop apart easily when frozen. Layer the cookies between wax or parchment paper.
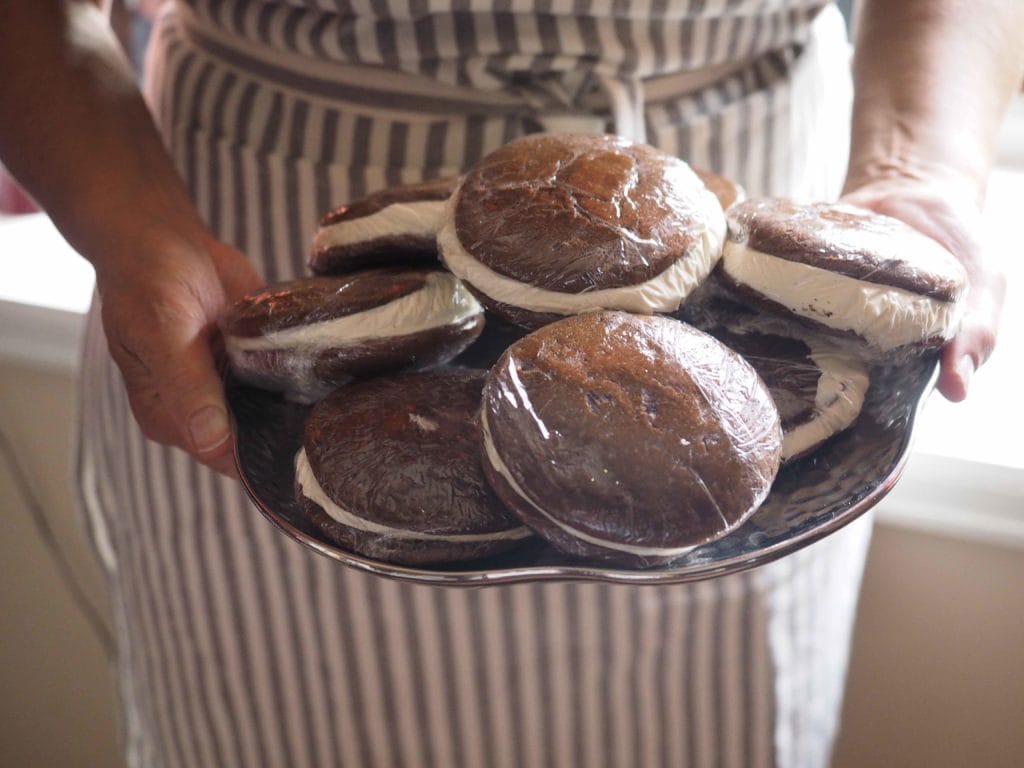
Once they are filled and sandwiched, wrap in plastic wrap and then they may again be frozen until ready to eat, these are great to pop in a lunch box!
How To Make Easy Marshmallow Buttercream
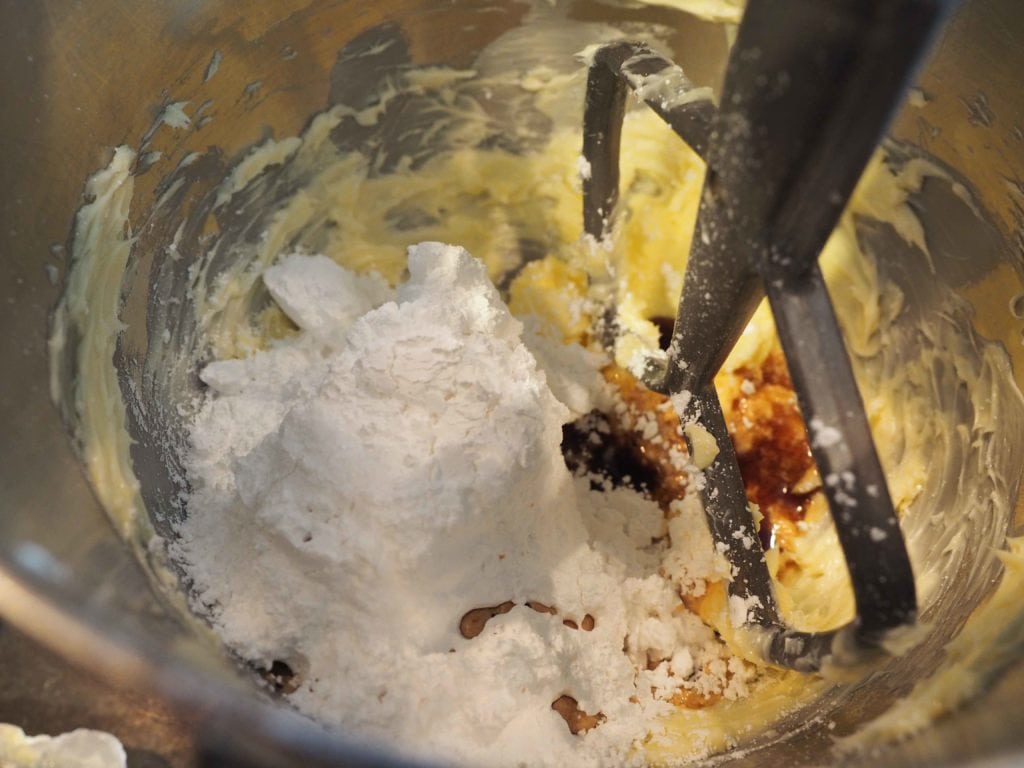
In the bowl of stand mixer, with paddle attachment, beat (on LOW until combined so you don’t floof powdered sugar all of your kitchen) together the butter, powdered sugar, vanilla and kosher salt until combined.
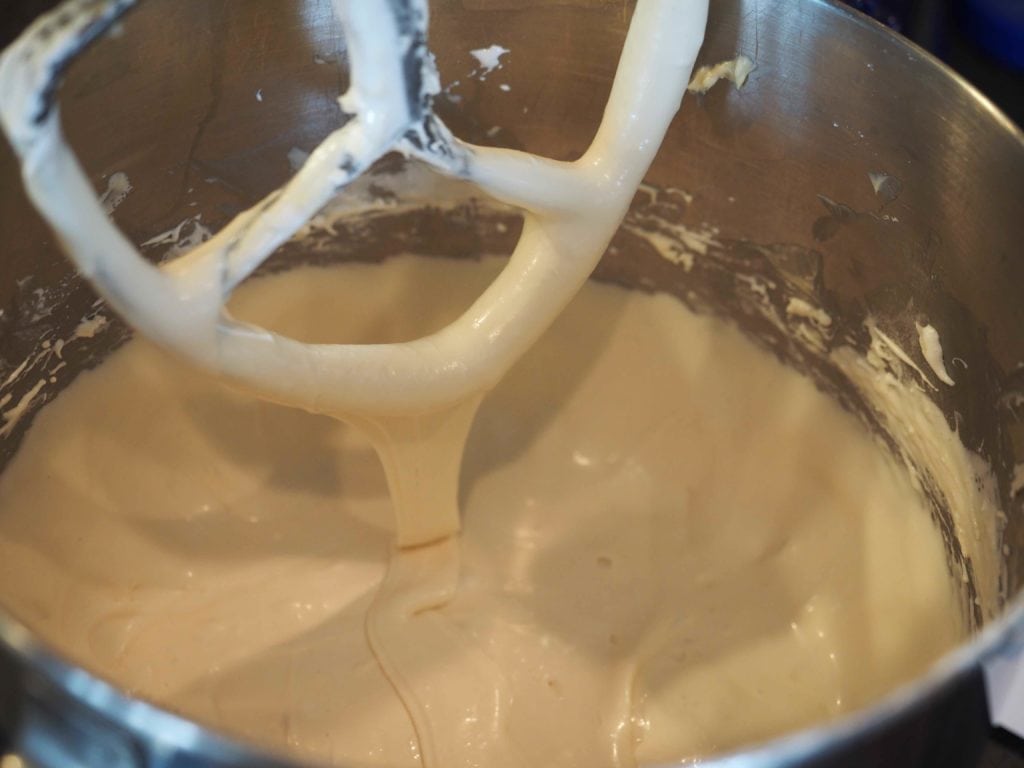
2. Once blended, increase your speed to medium-high until light and fluffy.
3. Add marshmallow cream and beat well until evenly incorporated, it will be nicely gloopy, is that a word? A cross between goopy and gooey and gluey, sort of, I do like to make up words.
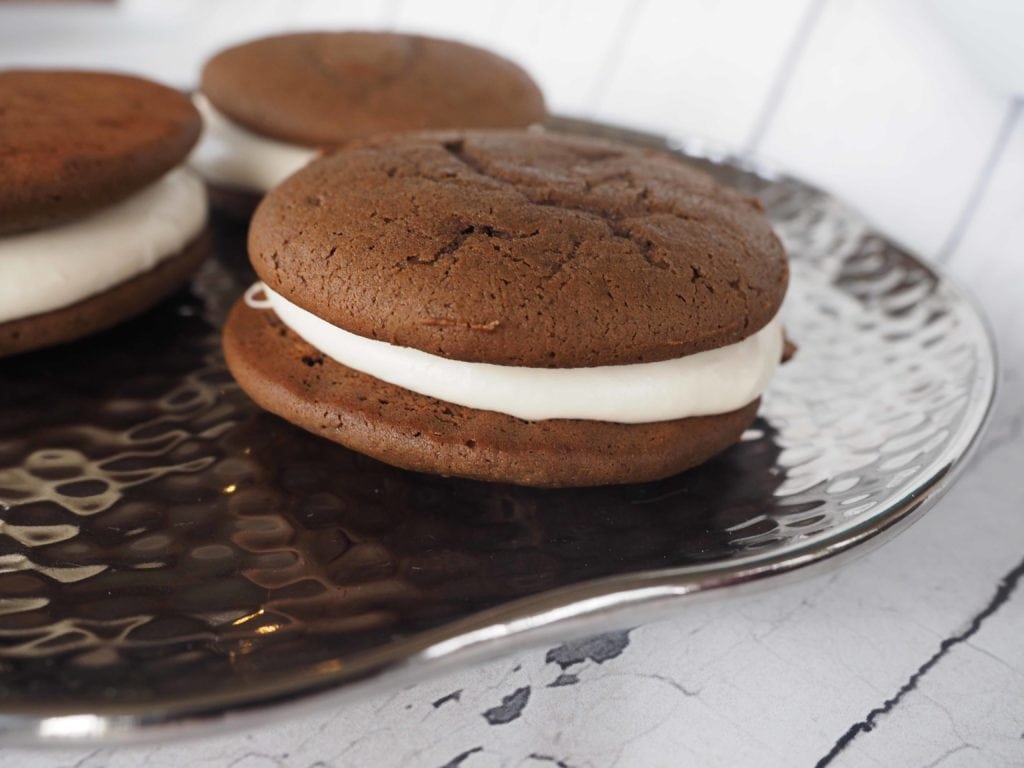
Assembling Whoopie Pies
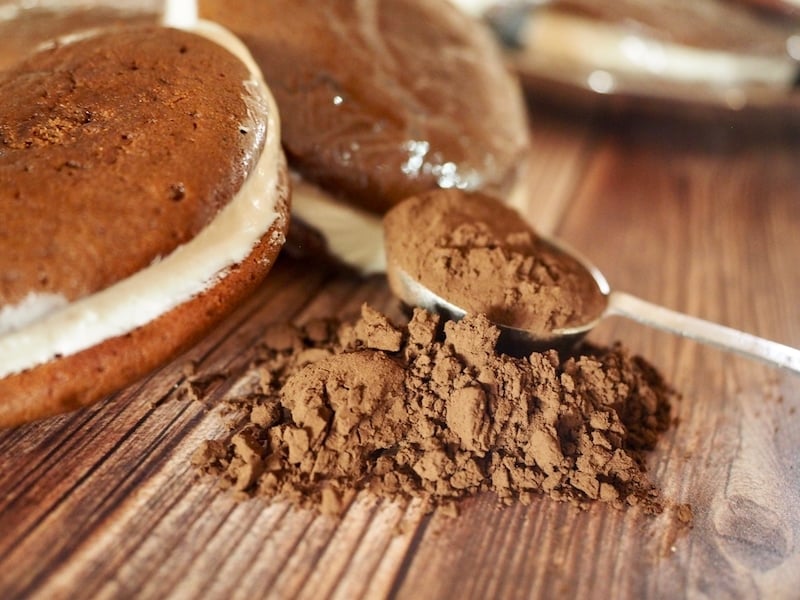
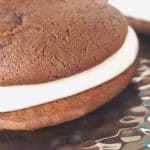
Match up the cookie tops (tops down, flat side up), using a medium or large scoop, dollop a healthy portion of the marshmallow filling onto the bottom of the cookie.
Press the top on the buttercream, making a sandwich, press gently on top pie until fluff reaches the sides.
Individually wrap pies in plastic wrap (or place sandwich baggies) and store in fridge or freezer (great to plop into a lunch box). Your friends and family will thank you!
Now, when you sink your teeth into one of these babies you will shout, “WHOOPIE”! I hope you love this Whoopie Pie recipe!
Please, hug the baker who made you tthese Whoopie Pies!
In a 2 cup or larger bowl or measuring cup, pour hot water, stir in cocoa powder and baking soda with a fork until smooth; the mixture will foam up (a lot) and darken. Let the mixture stand until the foaming subsides and the mixture has cooled. You will be adding sour cream to this mixture after it cools, so use a bowl large enough to add sour cream.
In a medium bowl, add flour, baking powder and salt, gently stir with whisk to mix. Set aside.
In a large bowl of a stand mixer (or hand mixer), beat together butter and brown sugar on medium-high until well blended and creamy, about 2 minutes. Scrape down sides of bowl. Add egg and vanilla, beating until light and fluffy, about 2 more minutes, scraping sides.
Beat in half the flour mixture; scraping down the sides several times. Stir the sour cream into the cocoa mixture now cooled. On low speed, beat the cocoa mixture and the remaining flour mixture, into the brown sugar mixture until even incorporated, Scraping down sides until you no longer see any of the white flour or creamed mixture.
Using a medium to large scoop, drop the dough onto parchment lined baking sheets, spacing about 3 inches apart. Don’t make the rounds much larger or they may spread too much during baking.
As these are a sandwich cookie, try and make an even number of cookies so they match up. Bake the cookies at 350, one sheet at a time, in the middle of the oven for about 10-12 minutes, or until they spring back when lightly pressed in the center. Transfer the sheet to a wire rack and let stand until cookies firm up, 4-5 minutes.
Using spatula, transfer the cookies to wire racks. Cool completely.
Once cooled, the cookies may be placed in freezer storage bags, layer using wax paper in between. Lay flat in the freezer. You may fill them straight from the freezer, sometimes easier.
Marshmallow Filling
In the large bowl of a mixer, on medium speed, beat together the butter, powdered sugar, vanilla and salt until well blended and fluffy. Add the marshmallow cream and beat until evenly incorporated. Using a medium or large scoop, plop a generous portion of frosting onto “bottom” of cookie, leaving a ½ ” border around the edge.Top with matching cookie top. Pressing gently to sandwich them together, just until filling reaches edges.
Store cookies in individual plastic bags or wrap in plastic wrap. Refrigerate or freeze (great to put in a lunch box) until ready to enjoy. Shout WHOOPIE!!!!
Last step! Leave a RatingRate this recipe here. This helps other readers and helps support this website.
Hi, I’m Kathleen Pope. Here at The Fresh Cooky you will find easy, mostly from-scratch, trusted recipes for all occasions. From speedy dinners to tasty desserts, with easy step-by-step instructions. I am here to help teach you how to make mouthwatering recipes without spending hours in the kitchen.


Dawn Vandermillen
Made these the other day! Fairly easy recipe and delicious. Thank Kathleen!!
Thanks Dawn! Not hard just a bit time consuming.
Dawn Vandermillen
Made these the other day! Fairly easy recipe and delicious. Thank Kathleen!!
Bks
Drooooolllll☕️☕️
You da best BKS!