


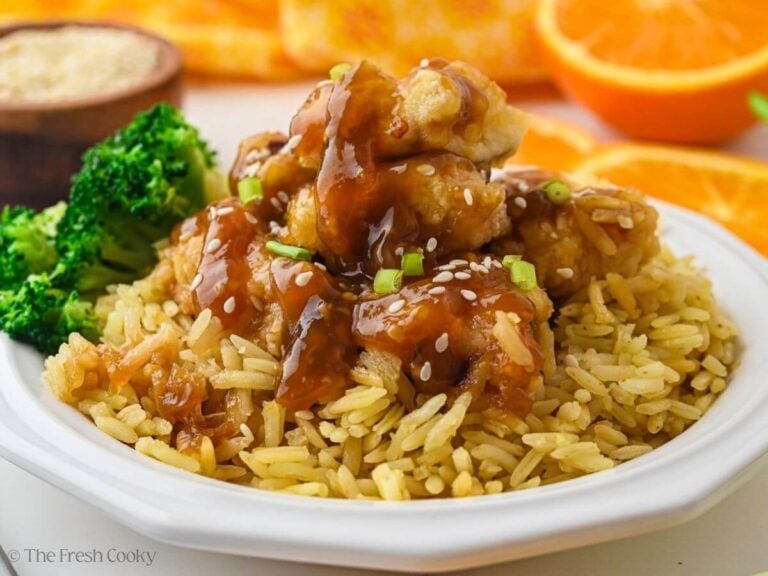
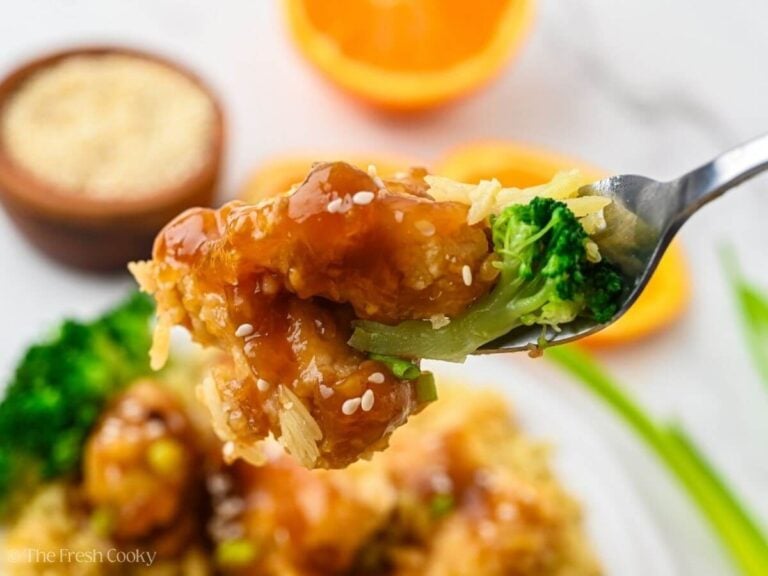
Homemade Orange Chicken that actually beats your favorite Chinese takeout spot? Yes, and it’s easier than you think! Tender, juicy chicken gets coated in a light cornstarch crust, fried golden, and tossed in a bright, sticky sauce made with real fresh oranges. No mystery ingredients and, best of all, no delivery fees!
Better-than-Takeout Orange Chicken Recipe
Chinese takeout has always been my go-to when I just don’t want to cook. Specifically, orange chicken. Orange chicken has been my weakness for years! Something about that sticky, citrusy glaze over crispy golden chicken just does it for me every single time! The Trader Joe’s orange chicken is our youngest son’s favorite thing ever, so I knew I needed to recreate this family-loved dinner.

So naturally, I became a little obsessed with figuring out how to make it at home. I tested it. I tested it again. Then, I taste-tested it on everyone who walked through my kitchen! And when I finally landed on this version, with that quick soy brine that keeps the chicken incredibly juicy, a sauce built from actual fresh oranges (not a bottle!), and a cornstarch coating that fries up shatteringly crispy, I was SO happy. Like, embarrassingly happy.
I’m a firm believer that homemade is almost always better than going out. It’s better for your wallet, better for your health, and for me, I just love it when I pull off something this good. This one is a keeper, friends!

Why You’ll Love This Orange Chicken Recipe
- It’s exactly like your favorite takeout, but made with real, fresh ingredients you can feel good about. Fresh-squeezed orange juice and orange zest give the sauce a bright, authentic citrus flavor that bottled sauce just can’t touch.
- Crispy chicken that stays crispy. The cornstarch coating fries up golden and crunchy, and with a few simple tricks (wire rack, not paper towels!), it holds its crunch even after being sauced.
- Totally customizable heat. Love it mild? Use a pinch of red pepper flakes. Want some kick? Add more, or drizzle on some chili crisp at the table. You’re in charge.
- Baked and air fryer options too! Not a frying fan? This recipe works beautifully in the oven or air fryer!
- Freezer-friendly and great for meal prep. Store the chicken and sauce separately and you’ve got easy dinners ready to go all week long.
Simple Ingredients
Soy Brine (Optional but Highly Recommended!)
- Cold water + kosher salt: The base of the brine. Draws moisture into the chicken, keeping it juicy during frying.
- Low-sodium soy sauce: For added flavor! Using low-sodium here keeps you in control of the salt level.
Chicken
- Boneless skinless chicken breasts: Cut into ¾-inch pieces for quick, even cooking. Chicken thighs also work beautifully here, too!
- Eggs: Beaten eggs create the “glue” that helps the cornstarch coating stick to every piece.
- Cornstarch: The secret to that light, crispy coating. All-purpose flour gets soggy faster, so cornstarch is where it’s at, plus it’s gluten-free!
- Salt + white pepper: To season up the coating! You can also use black pepper.
- Neutral oil for frying: Vegetable oil works well; I prefer high-heat Avocado oil, but you could also use Canola. You need about ½ inch of depth in your skillet or Dutch oven.
Orange Chicken Sauce
- Fresh orange juice + zest: Please, please use fresh here. You’ll need about 2 large oranges for the juice and one for the zest, and the difference in flavor is enormous.
- Orange peel strip: Simmered right in the sauce and then removed, it releases fragrant citrus oils!
- Rice vinegar: Adds some tang that balances the sweetness.
- Low-sodium soy sauce: Brings the savory, umami backbone to the sauce.
- Chicken broth: Adds depth without adding too much salt.
- Brown sugar: Sweetens the sauce and helps it turn glossy and sticky.
- Fresh garlic + ginger: Non-negotiable. Fresh ginger especially works well, but jarred or frozen Dorot cubes work in a pinch!
- Red pepper flakes: Anywhere from a pinch to a half-teaspoon, depending on how spicy you like it.
- Cornstarch slurry: Water + cornstarch mixed into the sauce at the end to thicken it up to that glossy, coat-the-back-of-a-spoon consistency.
Get the full recipe in the recipe card below.

How to Make Orange Chicken
Step 1 | Brine the Chicken
Cut chicken into ¾-inch pieces. Combine cold water, soy sauce, and kosher salt in a bowl, stir to dissolve, then add the chicken. Cover and refrigerate for 15–30 minutes. No longer, or the texture can get spongy. Rinse lightly, pat completely dry, and let it rest on a rack for a few minutes before dredging.

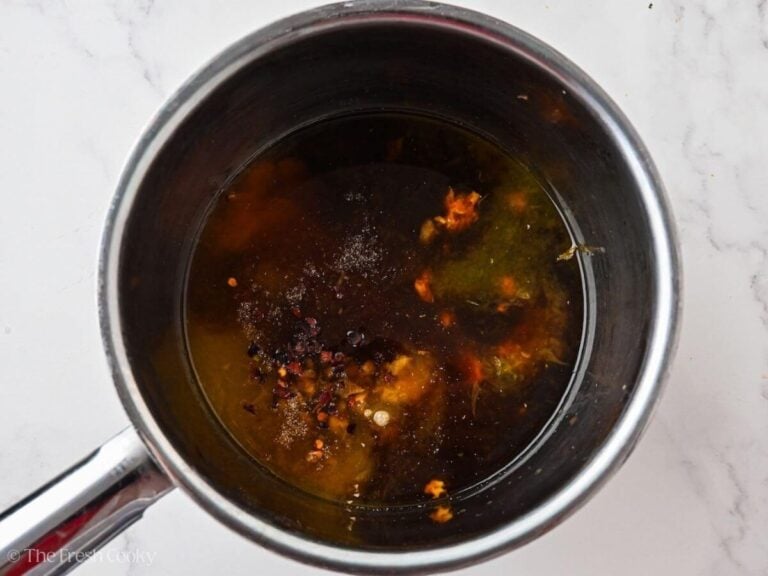
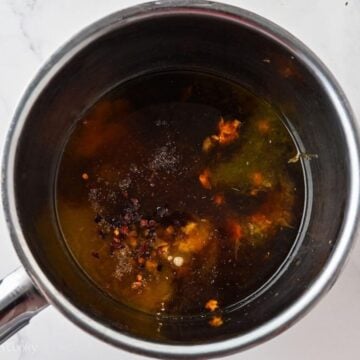
Step 2 | Make the Sauce
Combine the orange juice, zest, orange peel strip, rice vinegar, soy sauce, chicken broth, brown sugar, garlic, ginger, and red pepper flakes in a small saucepan over medium heat.
Bring to a low simmer for 3–4 minutes, then whisk in the cornstarch slurry and stir until the sauce thickens enough to coat the back of a spoon, about 1–2 minutes. Remove the peel strip and keep warm on low. Taste now! More vinegar for tang, more brown sugar if it’s too sharp.
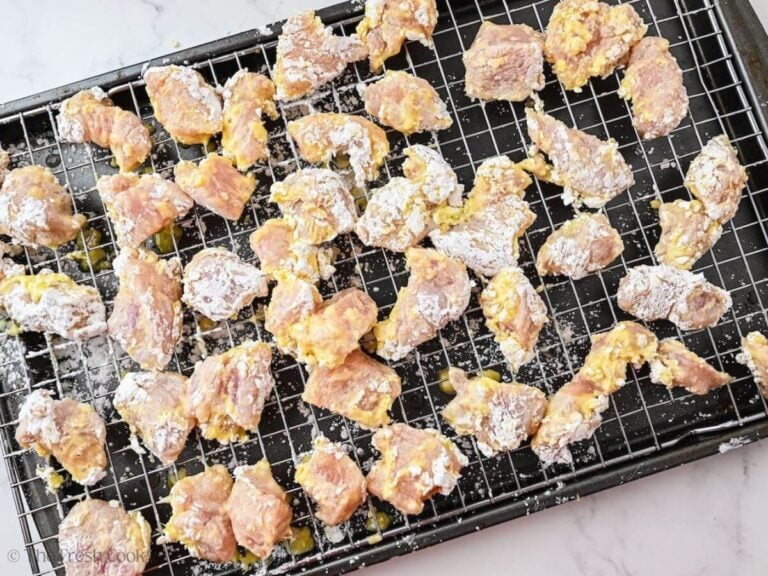
Step 3 | Dredge the Chicken
Set up two shallow bowls. Beaten eggs in one, cornstarch + salt + white pepper in the other. Dip each piece in the egg wash, let the excess drip off, then press into the cornstarch coating.

Step 4 | Fry
Heat about ½ inch of neutral high-heat oil in a heavy skillet or Dutch oven (less splatter!) to 360–375°F. No thermometer? A pinch of cornstarch should sizzle immediately when it hits the oil.
Fry in single-layer batches, making sure not to crowd the pan. Leave the pieces alone for the first 2 minutes, then flip and cook for another 45–60 seconds, until golden. Transfer to a wire rack set over paper towels; this keeps the bottom crispy!

PRO TIP: Placing fried foods directly on paper towels can actually make them soggy!
Step 5 | Bring it all Together and Serve
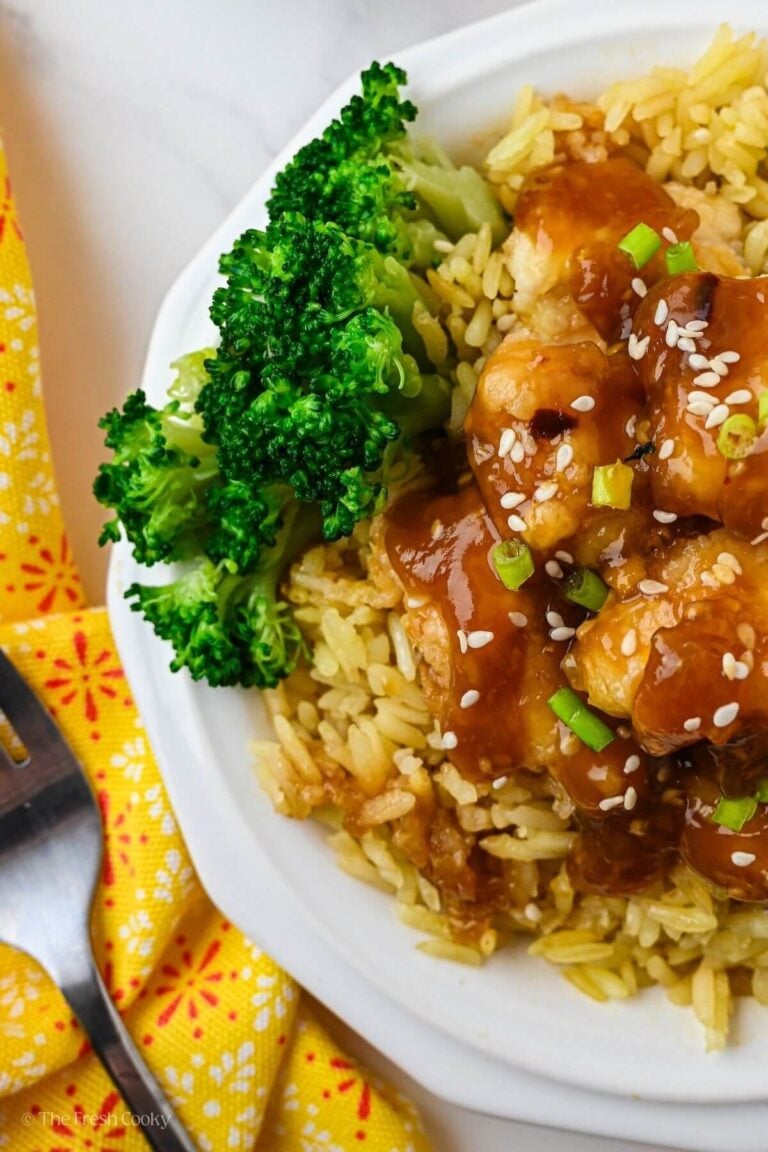
Add all the fried chicken to a large bowl and spoon the warm sauce over top. Serve right away over jasmine rice with steamed broccoli, green onions, sesame seeds, and chili crisp on the side.
Pro Tip: Frying in batches means your first batch will cool down while the rest catch up. No big deal. Just spread them on a baking sheet and slide under the broiler, about 6 inches from the heat, for 1-2 minutes. Watch them closely; the broiler works fast.

How to Make Orange Chicken Without Frying
Because I’m here for you, my friends, I tested this recipe both oven-baked and in the air fryer for healthier orange chicken. We certainly preferred the fried chicken (who wouldn’t, but the oven-baked and air fryer were also good, with air fryer coming in first of those two)
Oven Baked: Preheat the oven to 400°F and line a baking sheet with foil, well sprayed with avocado oil. Lay the dredged chicken in a single layer, bake for 15 minutes, flip each piece, then bake for another 7–10 minutes, until golden and crispy.
Air Fryer: Preheat your air fryer to 400°F, then reduce to 385°F. Spritz the basket with spray oil, add chicken in a single layer, and spritz the tops too (trust me on this one, loose cornstarch plus an air fryer fan is a mess you don’t want to clean up). Air fry 8-10 minutes, shaking and spritzing again halfway through. Works like a charm!
I will say that frying the chicken gives you the crispiest results, but both methods give you crispy, saucy chicken, just with a little less mess.
How to Serve Orange Chicken
This is a full meal once you build the bowl! Here’s how I love to serve it:
- Jasmine rice
- Steamed broccoli
- Green onions + sesame seeds
- Chili crisp on the side
You can also try it with my Hibachi Fried Rice, this Asian Ramen Noodle Salad for a crunchy cool contrast, or these flavor-packed Hibachi Vegetables to round out the plate.
Variations & Substitutions
- Swap the protein. I made it both ways, using chicken breasts and chicken thighs. Personally, I preferred chicken breasts here. But chicken thighs work well too if that’s what you have on hand! They’re definitely more forgiving in hot oil and stay juicy. You could also try this sauce with beef, shrimp or tofu!
- Make it gluten-free. Use tamari or coconut aminos in place of soy sauce, and double-check your cornstarch is certified GF.
- No fresh oranges? Bottled orange juice will work in a pinch, but the fresh stuff makes a real difference in brightness and flavor. You will also have to skip the orange zest, which adds significant flavor. Mandarin oranges work great too! You’ll just need more to get the total amount.
- Low-sodium swap. The recipe already calls for low-sodium soy sauce, but you can also use coconut aminos for an even lower-sodium option.
Storage
Refrigerator: Store the sauce and chicken separately in airtight containers for 3–4 days, if possible. Chicken sitting in sauce will soften that crispy coating overnight, and nobody wants soggy orange chicken!
Freezer: Freeze cooled chicken (without sauce) in a freezer-safe container for up to 3 months. Freeze the sauce separately in a small zip-top bag. Thaw the sauce overnight in the fridge; chicken can go straight from frozen to the air fryer.
Reheating:
- From the fridge: Spread chicken on a baking sheet and warm at 375°F for 8–10 minutes, or pop it under the broiler for 1–2 minutes, watching closely. Reheat the sauce in a small saucepan over low, adding a splash of water or juice if it’s thickened too much.
- From frozen: Air fryer at 375°F for about 7 minutes, shaking halfway through. Honestly, this might be my favorite way to eat the leftovers — the coating comes back almost as good as fresh.
- Microwave is not recommended since it softens the coating and you worked too hard for that!
Like this recipe?
Don’t forget to give it a ⭐️⭐️⭐️⭐️⭐️ star rating and leave a comment below the recipe!

Video
Ingredients
Optional Soy Brine (15 minutes)
- 2 cups cold water
- 1 tablespoon low-sodium soy sauce
- 1 teaspoon kosher salt
For the chicken:
- 1.5 lbs boneless skinless chicken breasts cut into ¾-inch pieces (use breasts or thighs)
- 2 large eggs beaten
- ¾ cup cornstarch non-GMO preferred
- ½ teaspoon salt
- ¼ teaspoon white pepper
- Neutral oil for frying canola or vegetable, about ½ inch depth in skillet or Dutch oven
For the sauce:
- 1 tablespoon fresh orange zest about one orange, zested
- ¾ cup fresh-squeezed orange juice about 2 large oranges
- 1 strip orange peel about 3 inches (simmered, then removed)
- 3 tablespoons rice vinegar
- 3 tablespoons low-sodium soy sauce
- ¼ cup chicken broth
- 3 tablespoons brown sugar
- 3 cloves garlic minced
- 1 teaspoon fresh ginger grated or minced (or 2 Dorot frozen ginger cubes)
- ¼ – ½ teaspoon red pepper flakes to taste
Cornstarch slurry:
- 1.5 tablespoons cornstarch dissolved in the water
- 2 tablespoons cold water
optional for serving:
- Steamed jasmine rice
- Steamed broccoli
- Sliced green onions
- Sesame seeds
- Chili crisp on the side
Instructions
- Brine the chicken first: This is optional, but I highly recommend it; in testing it gave the chicken extra great flavor!
- Cut chicken into ¾-inch pieces. Combine cold water, soy sauce, and kosher salt, in a bowl and stir until dissolved. Add chicken pieces, cover, and refrigerate for 15-30 minutes. Do not go longer or the texture gets spongy. Rinse lightly, then pat completely dry with paper towels. Let sit on a rack for a few minutes before dredging.2 cups cold water, 1 tablespoon low-sodium soy sauce, 1 teaspoon kosher salt, 1.5 lbs boneless skinless chicken breasts


Make the sauce (before you fry anything):
- Combine orange juice, zest, orange peel strip, rice vinegar, soy sauce, chicken broth, brown sugar, garlic, ginger, and red pepper flakes in a small saucepan over medium heat. Stir and bring to a low simmer for 3-4 minutes so the peel can release its oils. Whisk in the cornstarch slurry and stir constantly until the sauce thickens enough to coat the back of a spoon, about 1-2 minutes. Remove the orange peel strip. Keep warm on low. Taste here. More vinegar for tang, more brown sugar if it’s too sharp, more chili crisp for heat.1 tablespoon fresh orange zest, ¾ cup fresh-squeezed orange juice, 1 strip orange peel, 3 tablespoons rice vinegar, 3 tablespoons low-sodium soy sauce, ¼ cup chicken broth, 3 tablespoons brown sugar, 3 cloves garlic, 1 teaspoon fresh ginger, ¼ – ½ teaspoon red pepper flakes, 1.5 tablespoons cornstarch, 2 tablespoons cold water
Fry the chicken:
- Get out two shallow bowls. Beat eggs in one bowl. Combine cornstarch, salt, and white pepper in another. Dip each piece in egg wash, let excess drip off, then dredge in cornstarch and press lightly to adhere.2 large eggs, ¾ cup cornstarch, ½ teaspoon salt, ¼ teaspoon white pepper
- Heat oil in a large heavy skillet (I used my Dutch oven, less splatter) over medium-high heat to 360-375°F. No thermometer? Drop a pinch of cornstarch in, it should sizzle immediately.Neutral oil for frying
- Fry in batches, single layer, no crowding. Leave them alone for the first 2 minutes. Flip and cook another 45-60 seconds until golden and cooked through. Transfer to a wire rack, not paper towels, so the bottom stays crispy. Repeat with remaining batches. To rewarm the chicken, place 6 inches under the broiler for 1-3 minutes, watching closely. Fry just until it reaches 165°F or a few degrees below, but know that it goes from undone to overdone quickly.


Bring it together:
- Add fried chicken* to a large bowl, and toss most of the sauce reserving some for serving. Serve immediately over rice, with broccoli topped with green onions, sesame seeds, and chili crisp on the side if desired.*Not serving all four portions at once? Only toss the chicken you're eating now in the sauce. Store the rest separately and toss with fresh sauce when you reheat. Your future self will thank you.Steamed jasmine rice, Steamed broccoli, Sliced green onions, Sesame seeds, Chili crisp on the side

Notes
Nutrition


Rate & Comment