


These Sugar Cookie Bites are soft, chewy sheet pan cookies topped with fluffy buttercream frosting. Perfect for parties, graduations, and showers—easy to make and always a hit!
The Quick Dish on Sugar Cookie Bars
Prep: 10 minutes | Cook: 10 minutes | Total Time: 20 minutes
Cuisine Inspiration: American, Classic Bakery
Primary Cooking Method: Baking
Dietary Info: Vegetarian
Key Flavor: Sweet vanilla with rich buttercream
Skill Level: Beginner to Intermediate if piping frosting, beginner if spreading
Sheet Pan Cookies That Never Disappoint
I’ve made these Sugar Cookie Bites more times than I can count—for weddings, baby showers, graduations, potlucks, even memorials. They’re my go-to when I need a big batch of cookies that still feel homemade and special. These sheet pan cookies have the perfect chewy texture, just the right amount of sweetness, and a generous swirl of creamy buttercream on top.
Whether you call them sugar cookie bars, bites, or sheet pan cookies, this is one of my most requested recipes. I’ve served them to crowds of over a hundred, and every time, someone asks for the recipe. They’re like a soft sugar cookie topped with cupcake frosting—and who doesn’t love that?
These are true two-bite cookies (like my Espresso Brownie Bites), and they’re easy to cut, decorate, and transport. They’re the perfect dessert for graduations and big gatherings because they hold up so well—and bonus, they freeze beautifully if you need to prep ahead.
Sheet Pan Cookie Ingredients
- Butter – I used salted butter, make sure it’s room temperature, not too soft. If using unsalted butter, add extra ¼ teaspoon salt.
- Sugar – Granulated sugar keeps these bites sweet and chewy. I use all-natural cane sugar.
- Eggs – I use large eggs, which are at room temperature, as they mix in smoothly and help with structure.
- Vanilla – Pure vanilla extract gives that classic sugar cookie flavor.
- Flour – Unbleached all-purpose flour keeps the texture soft.
- Baking Soda and Salt – Providing just enough lift for these bites.
- Frosting – Classic buttercream made with butter, powdered sugar, vanilla, and cream. Whip until fluffy!
How to Make Sugar Cookie Bars
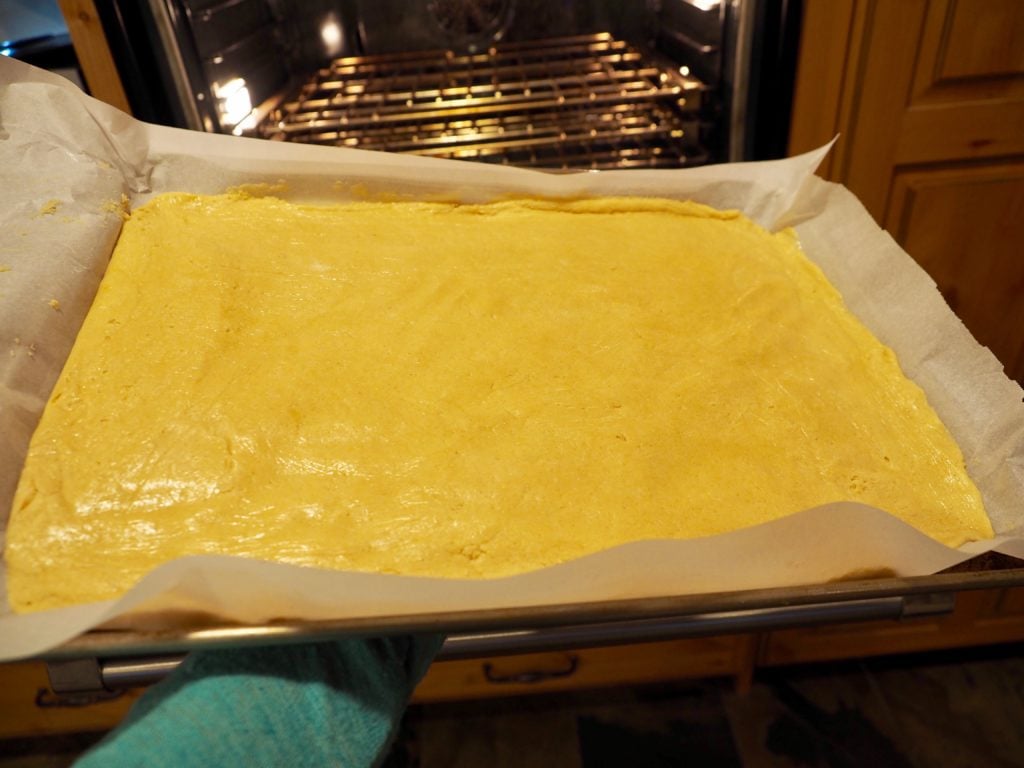
Preheat your oven to 375°F (190°C) and line a baking sheet or 9×13 inch baking pan with parchment or spray.
For thicker bars, use a 9×13 pan and bake 10–12 minutes for soft, chewy bites.
Add softened butter and sugar to your mixer bowl and beat until light and fluffy.
Pro Tip: If you forgot to take your butter out, cut it into little cubes and it will be soft in no time.
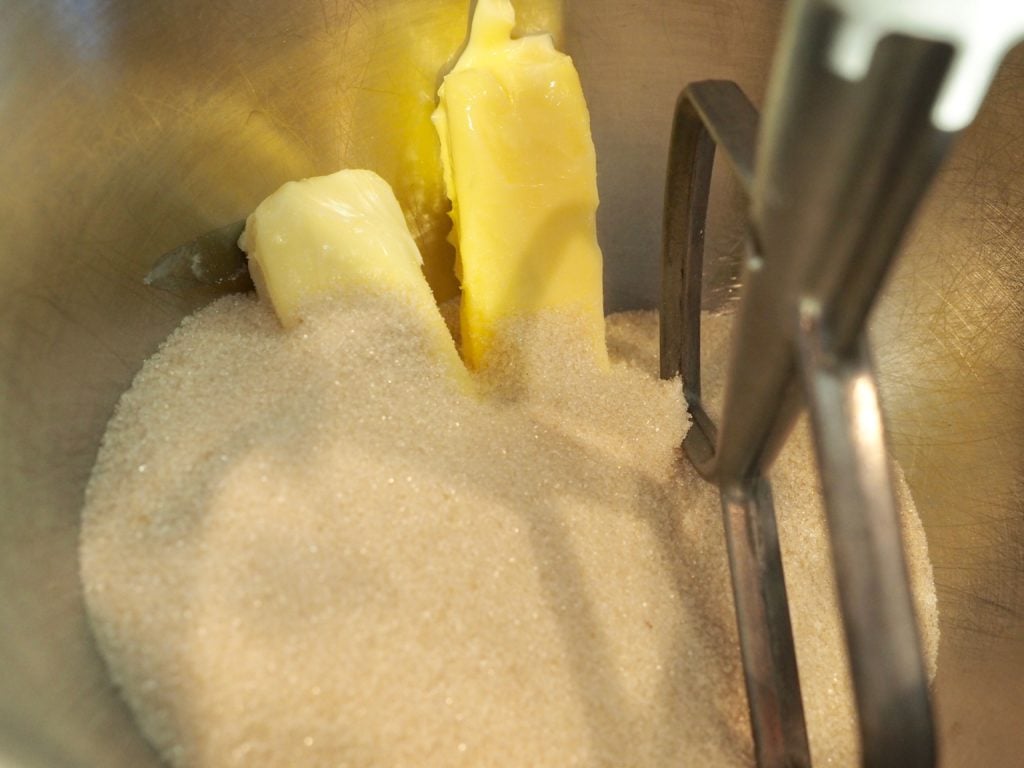
Step 1 – Mix Sugar and Butter
In a stand mixer with the paddle attachment (or use a hand mixer), beat butter and sugar on medium-high in a large bowl for 3–5 minutes until light and fluffy.
I use all-natural cane sugar, which takes a little longer to cream since it’s coarser than white sugar—worth it for the flavor!
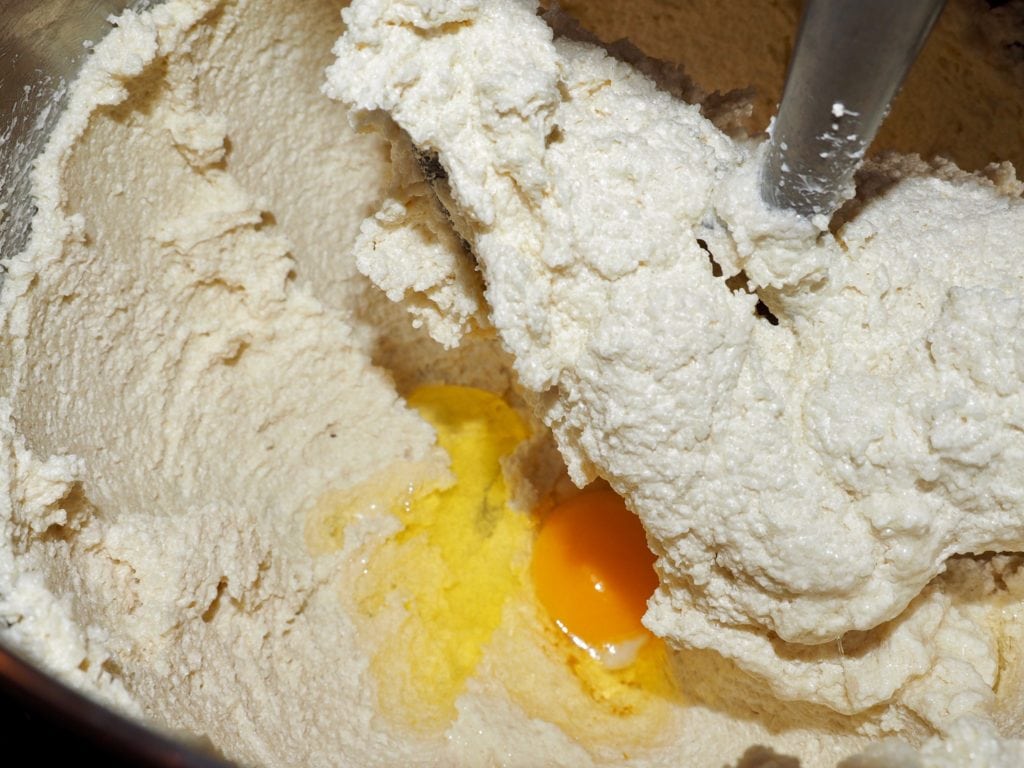
Scrape down the bowl with a spatula, then add eggs one at a time, mixing about 30 seconds per egg and scraping between each. Then add vanilla extract.
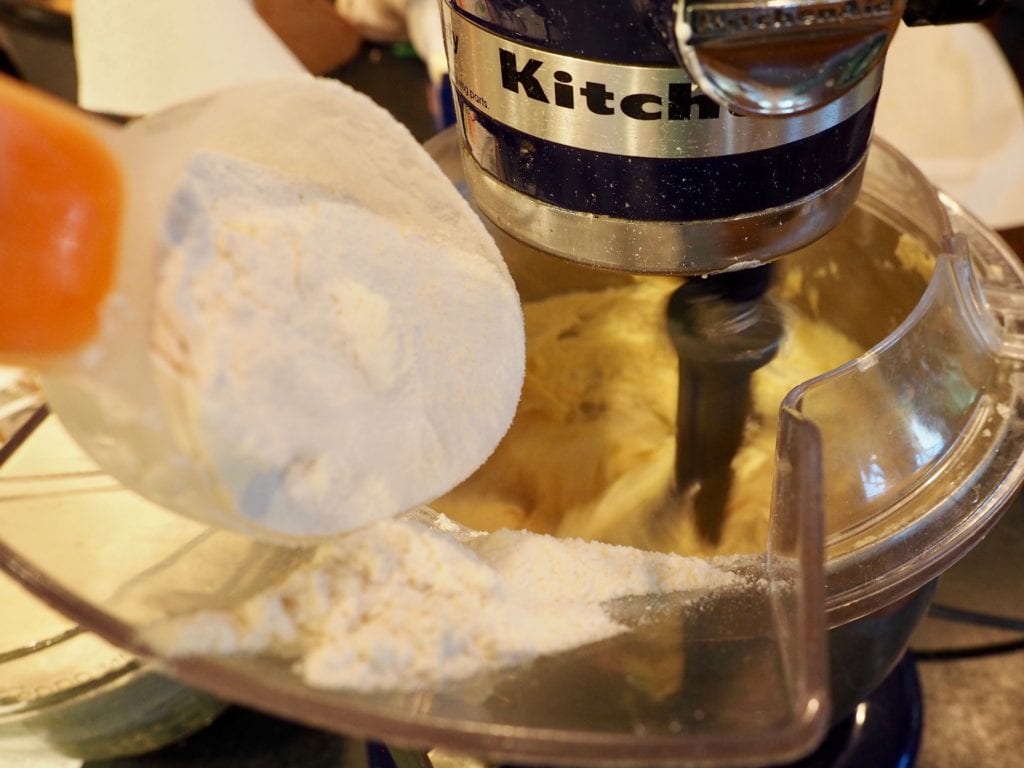
Step 2 – Mix Dry Ingredients
In a medium bowl, whisk together flour, baking soda, and salt.
Add the flour mixture to the wet ingredients, ½ cup at a time, mixing on low and scraping the bowl as needed.
Mix just until the flour is fully incorporated—overmixing can dry out the cookies.
Step 3 – Bake soft sugar cookie bars
Press cookie dough batter into your prepared pan in an even layer (half sheet pan or 9×13 for thicker bars). If any dry bits remain, gently knead them in.
Use sprayed parchment or plastic wrap on top of the dough to help spread it evenly to the edges.
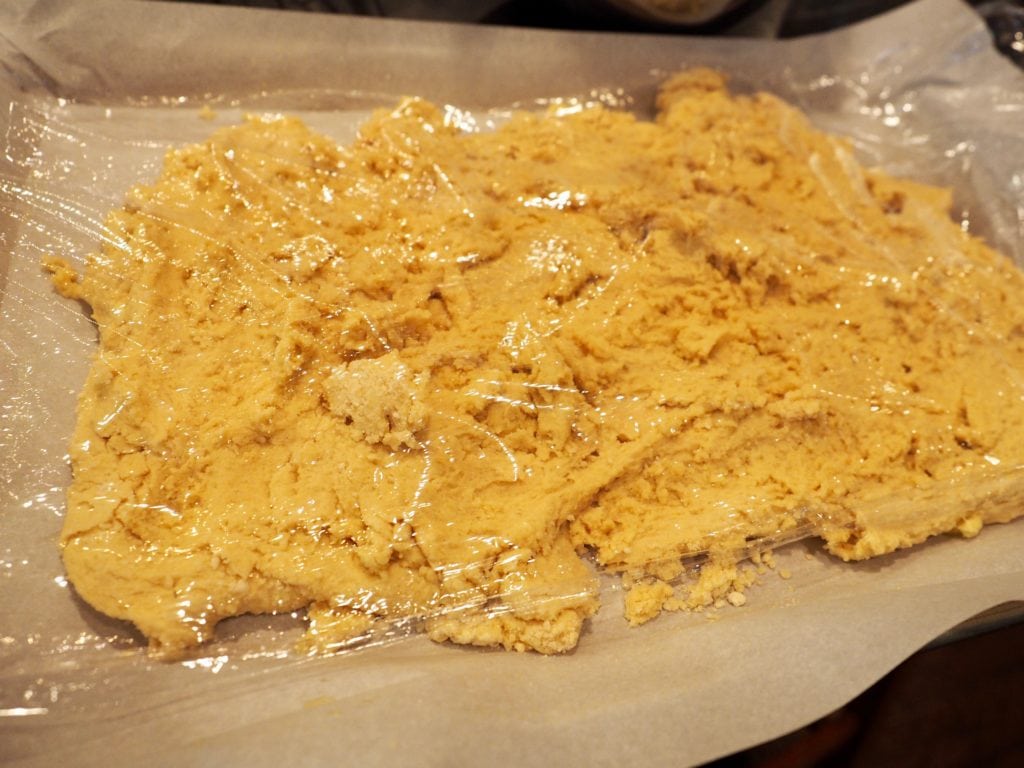
When I’m doing my sugar cookie “button” bites, I line the pan with parchment or foil so I can lift them out for easier cutting.
How Long to Bake Sugar Cookie Bars for the Softest Sugar Cookies
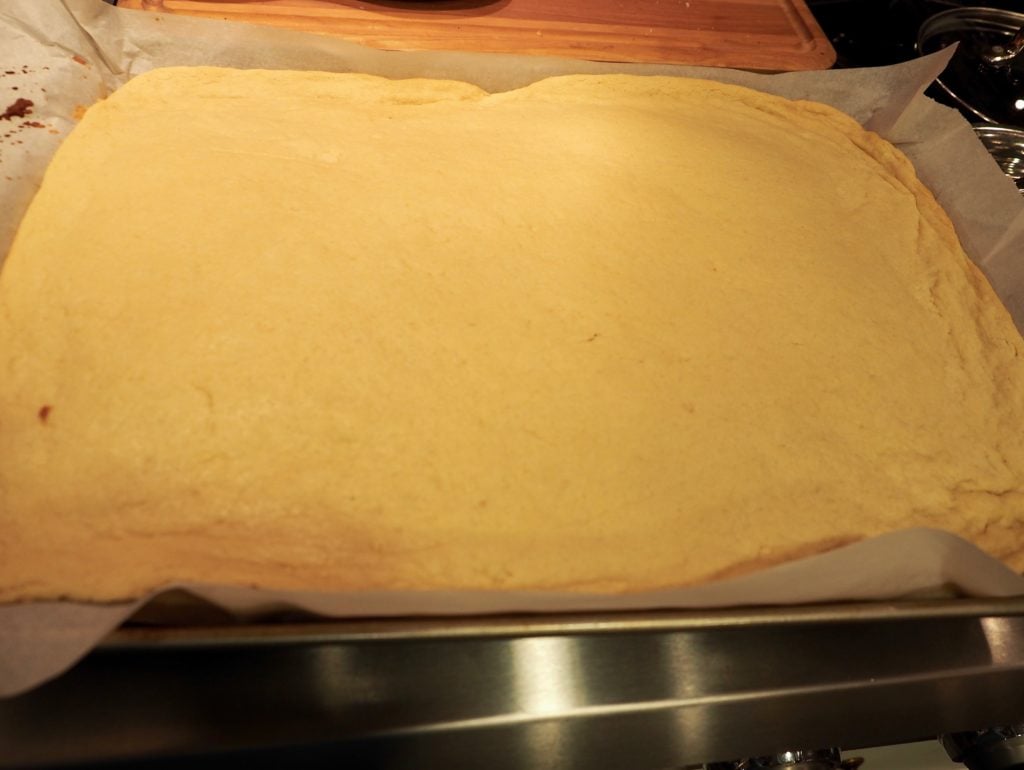
Bake for 10 minutes—no more! They’ll look pale and slightly underdone, and that’s exactly what you want for soft, chewy bars.
Let them cool on a wire rack completely before frosting.
Pro tip: Use a loud, reliable kitchen timer—you want one you can hear from anywhere in the house!
Do Not OVERBAKE Sugar Cookie Bar Recipe
Resist the urge to bake for longer than 10 minutes; if you’re a baker, you’ll think they’re undercooked. They will look underbaked in the middle and should be slightly golden brown on the edges.
However, if you bake them for longer, instead of getting chewy, soft cookies, you will end up with a crumbly, dry cookie. Trust me on this one!
I typically cool mine and then cover with foil or tight plastic wrap and frost the following day.
Make-Ahead Tips
- Making a big batch? Freeze the whole cookie slab right in the pan. Once frozen, lift it out using the parchment, wrap tightly in plastic wrap, and return to the freezer.
- Repeat with additional batches, stacking them as you go.
- When you’re ready to cut, let the slab sit at room temp for 10–15 minutes, then slice and serve.
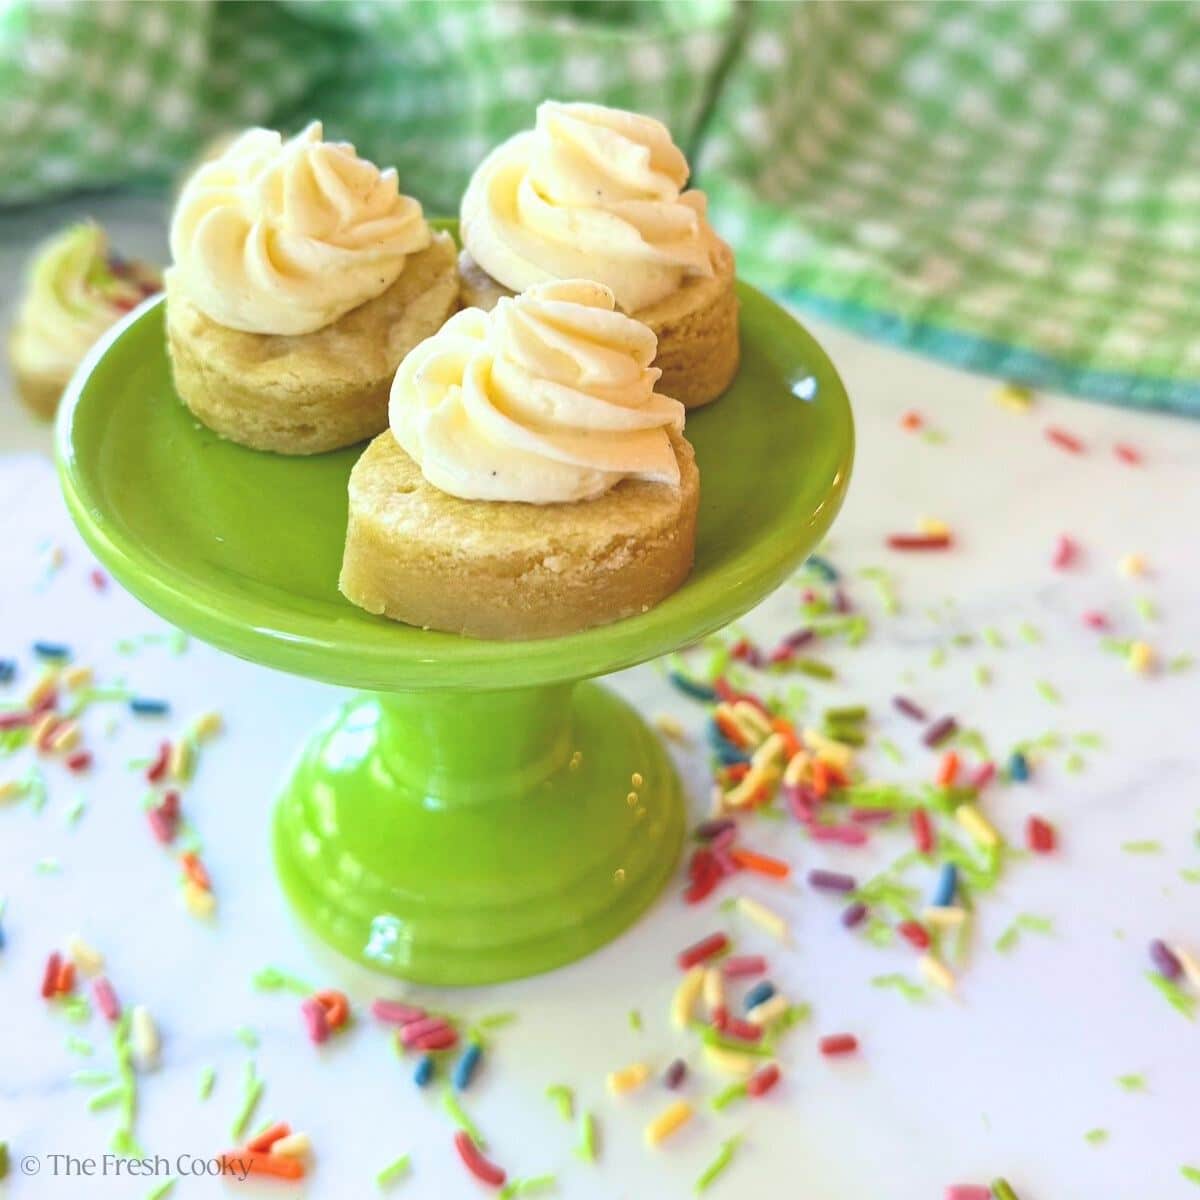
How to Frost or Pipe Sugar Cookie Bars
This frosting is light, fluffy, buttery, and seriously delicious!
For piping, reduce the cream or milk just a bit for a stiffer consistency. For spreading, leave it as-is—it glides beautifully over the bars.
Feel free to tint the frosting with food coloring, add sprinkles, or keep it plain and simple. It’s great either way!
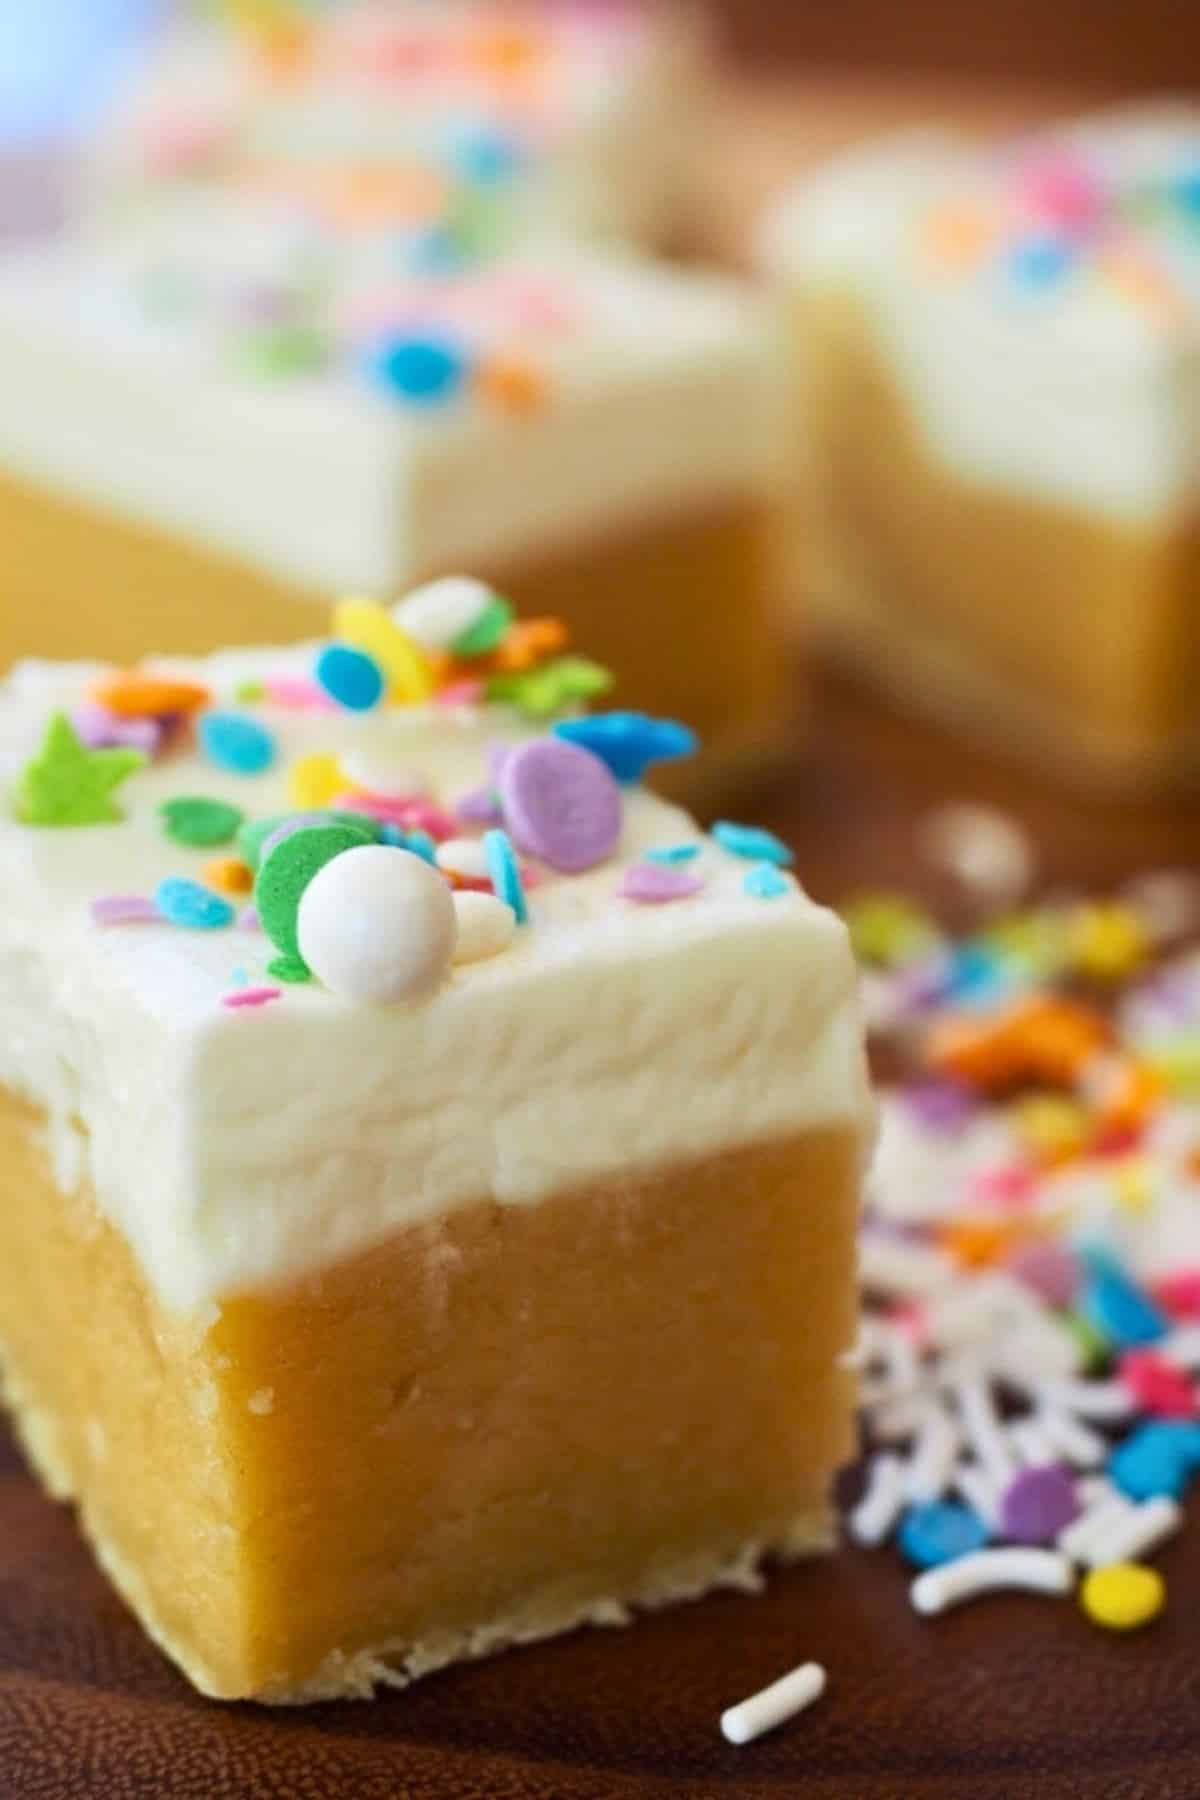
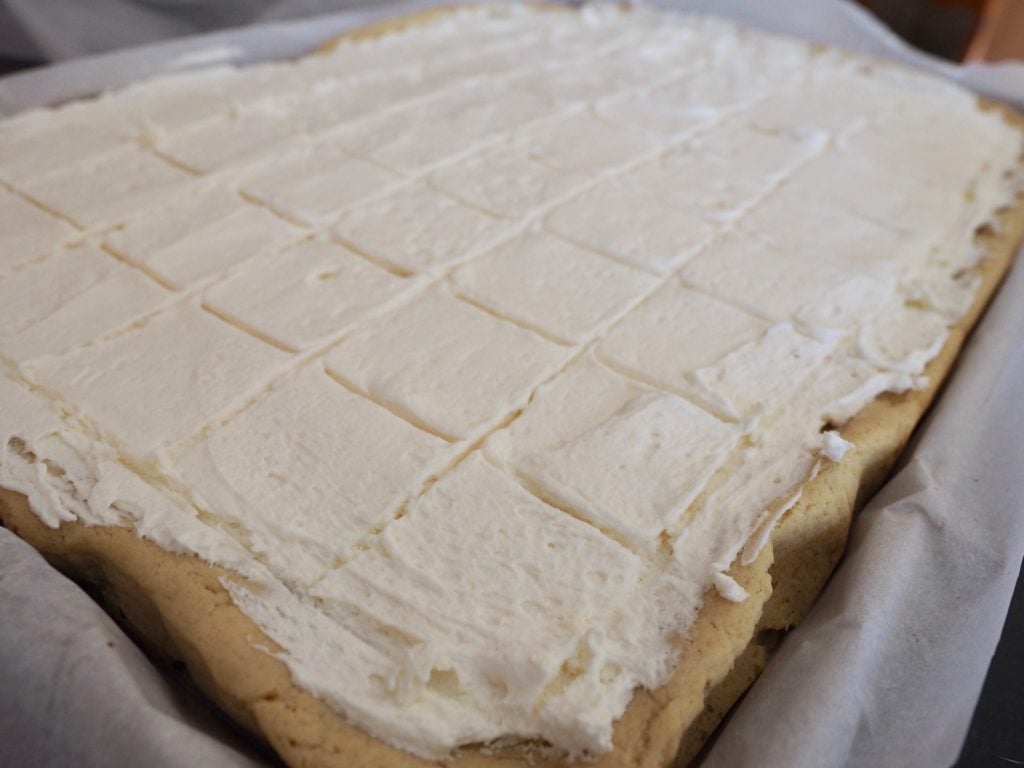
How to Cut Frosted Sugar Cookie Bars | Clean and Easy
After frosting, score the bars with a warm sharp knife to cut through the frosting cleanly.
Chill for 30–60 minutes to let the frosting firm up, then cut into any size you like—big bars or small bites.
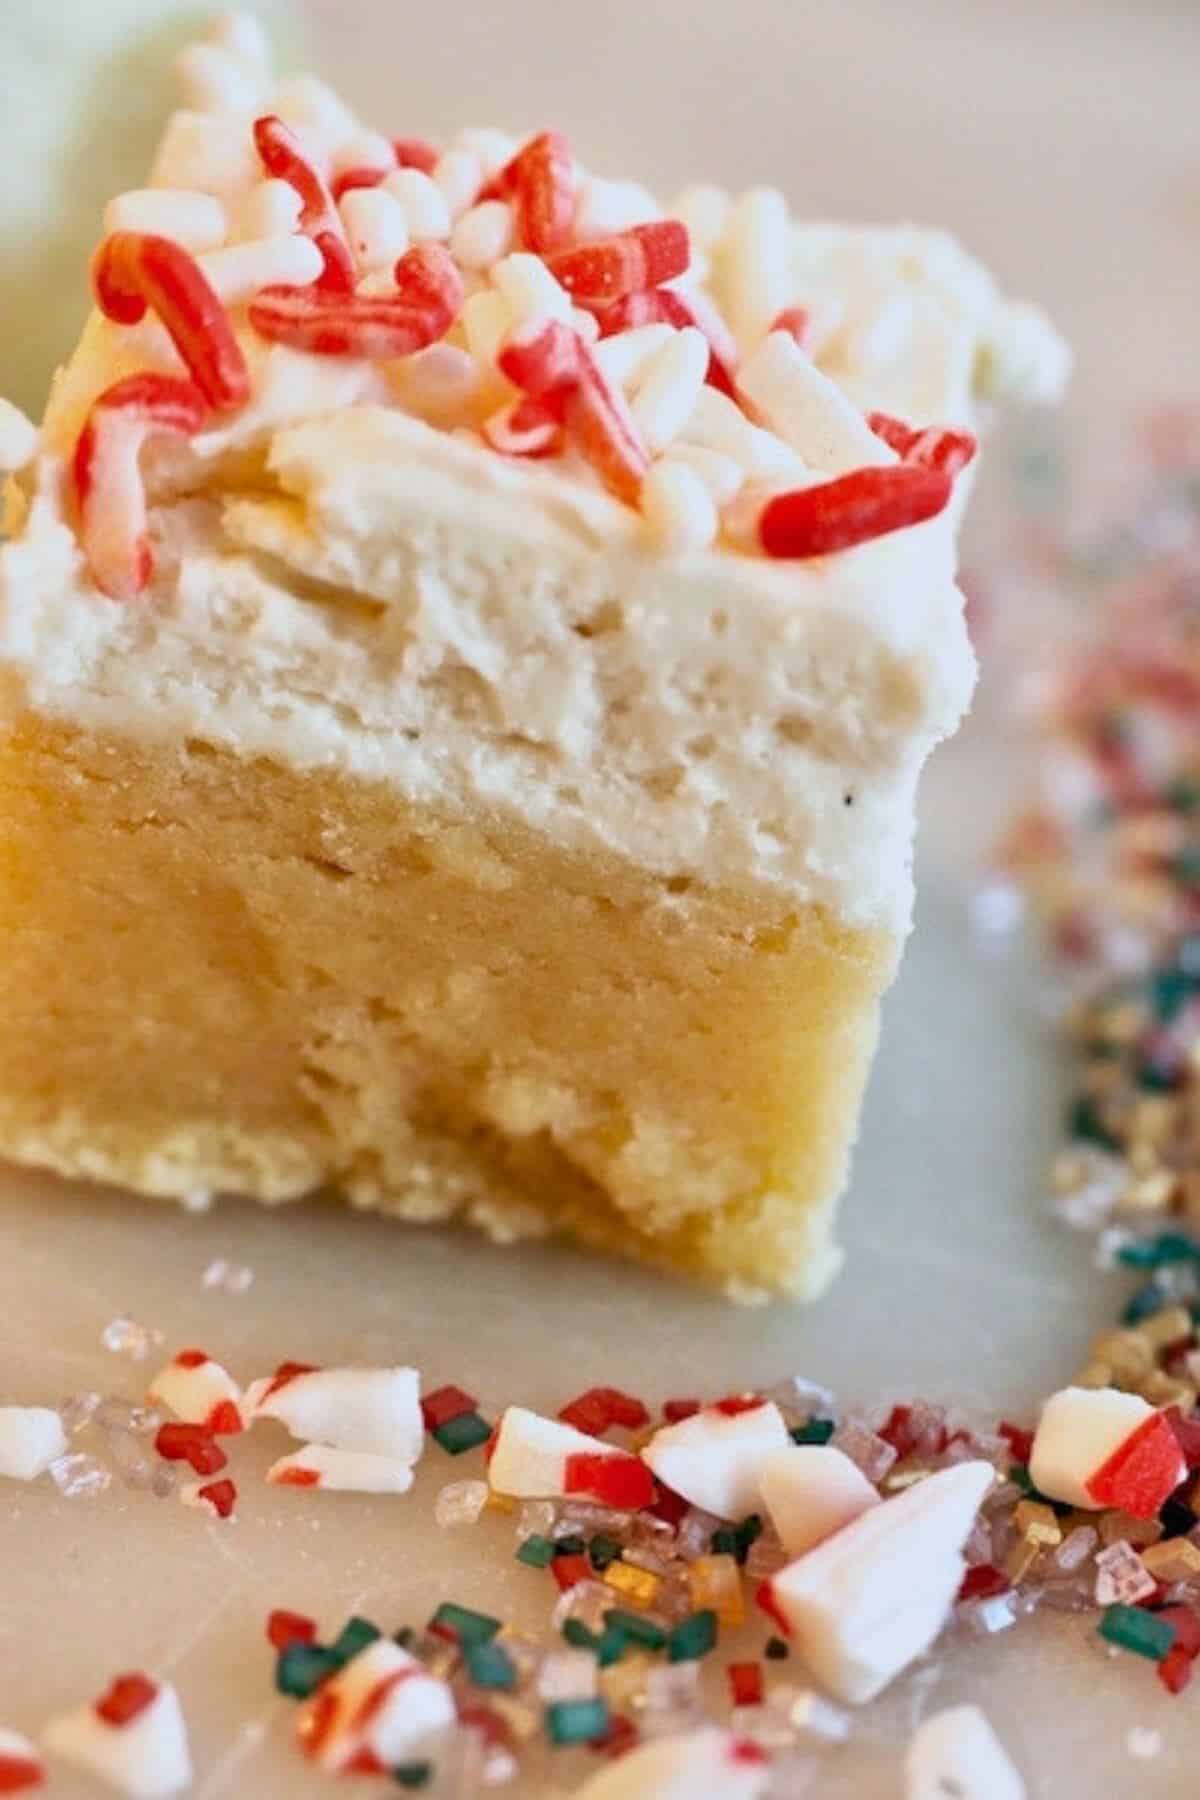
Top with seasonal sprinkles or keep it simple. I love using all-natural colored sugars for a festive touch.
Dress them up or leave them plain—either way, they’re always a hit!
Pro Tip: I typically cut off the brown, uneven edges in order to get nice clean sliced and evenly sized cookies.
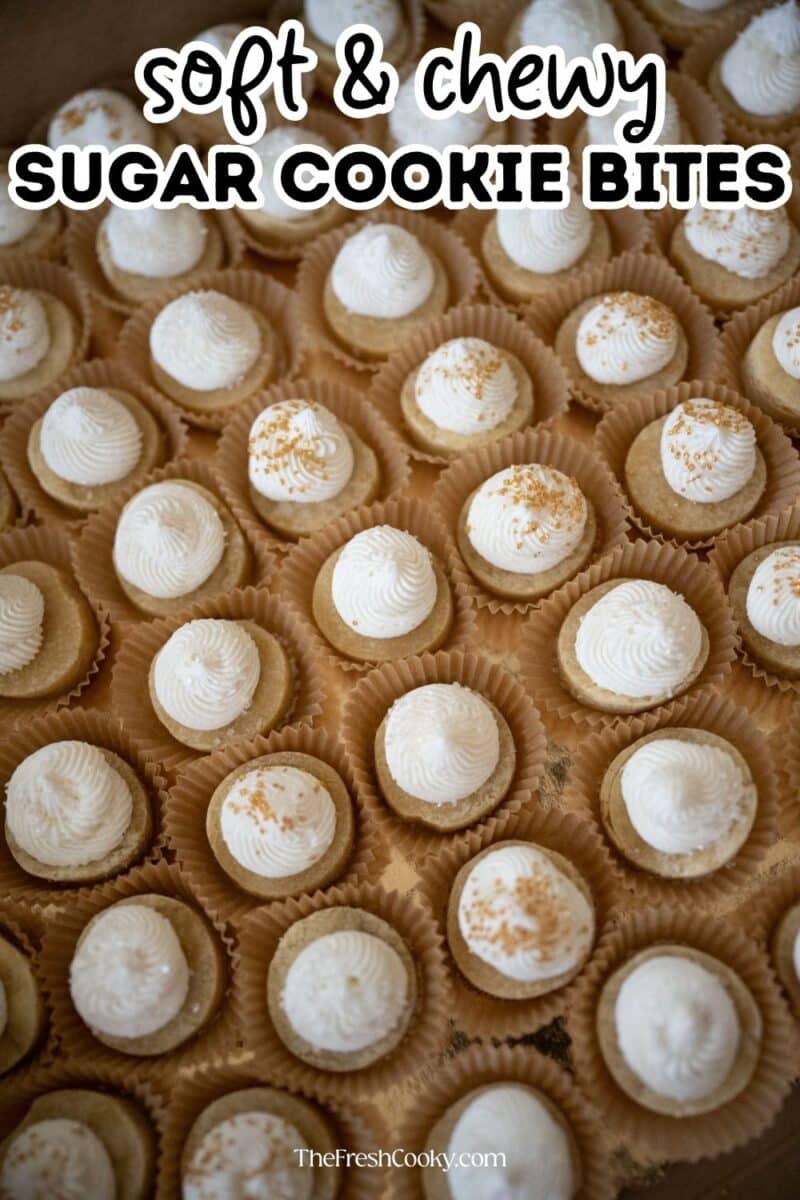
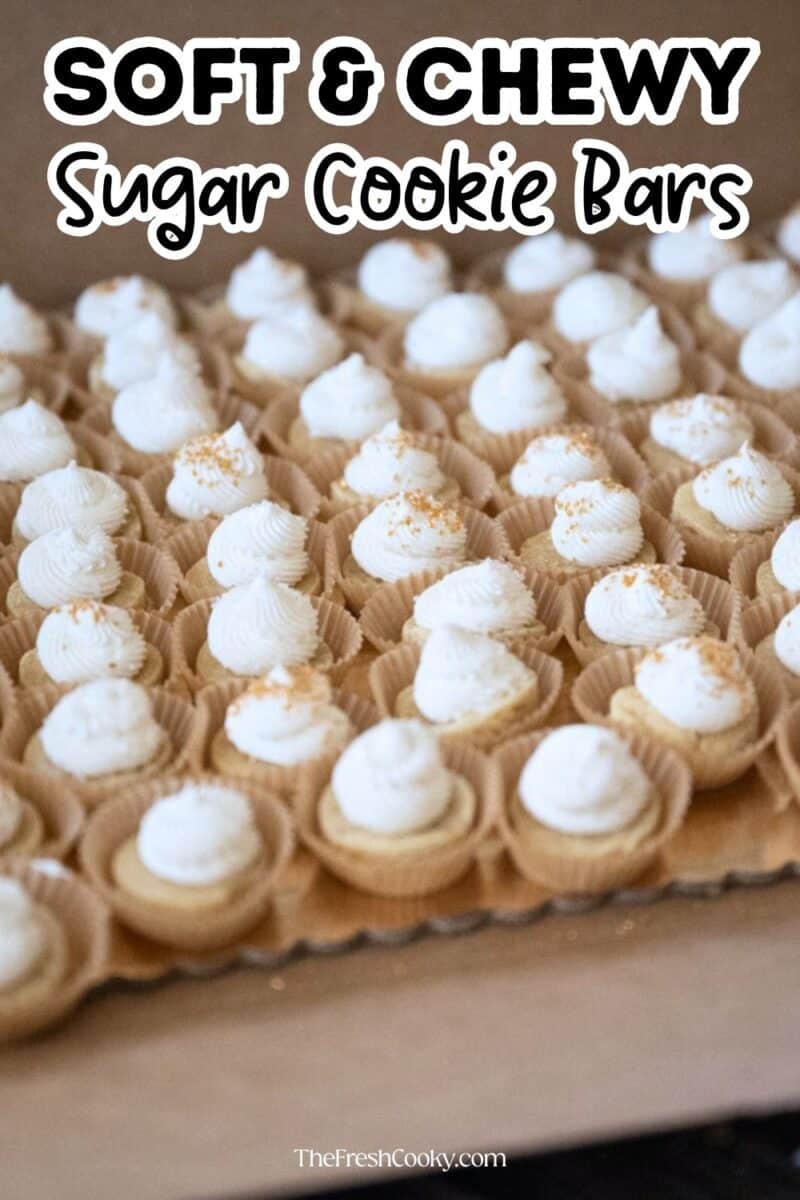
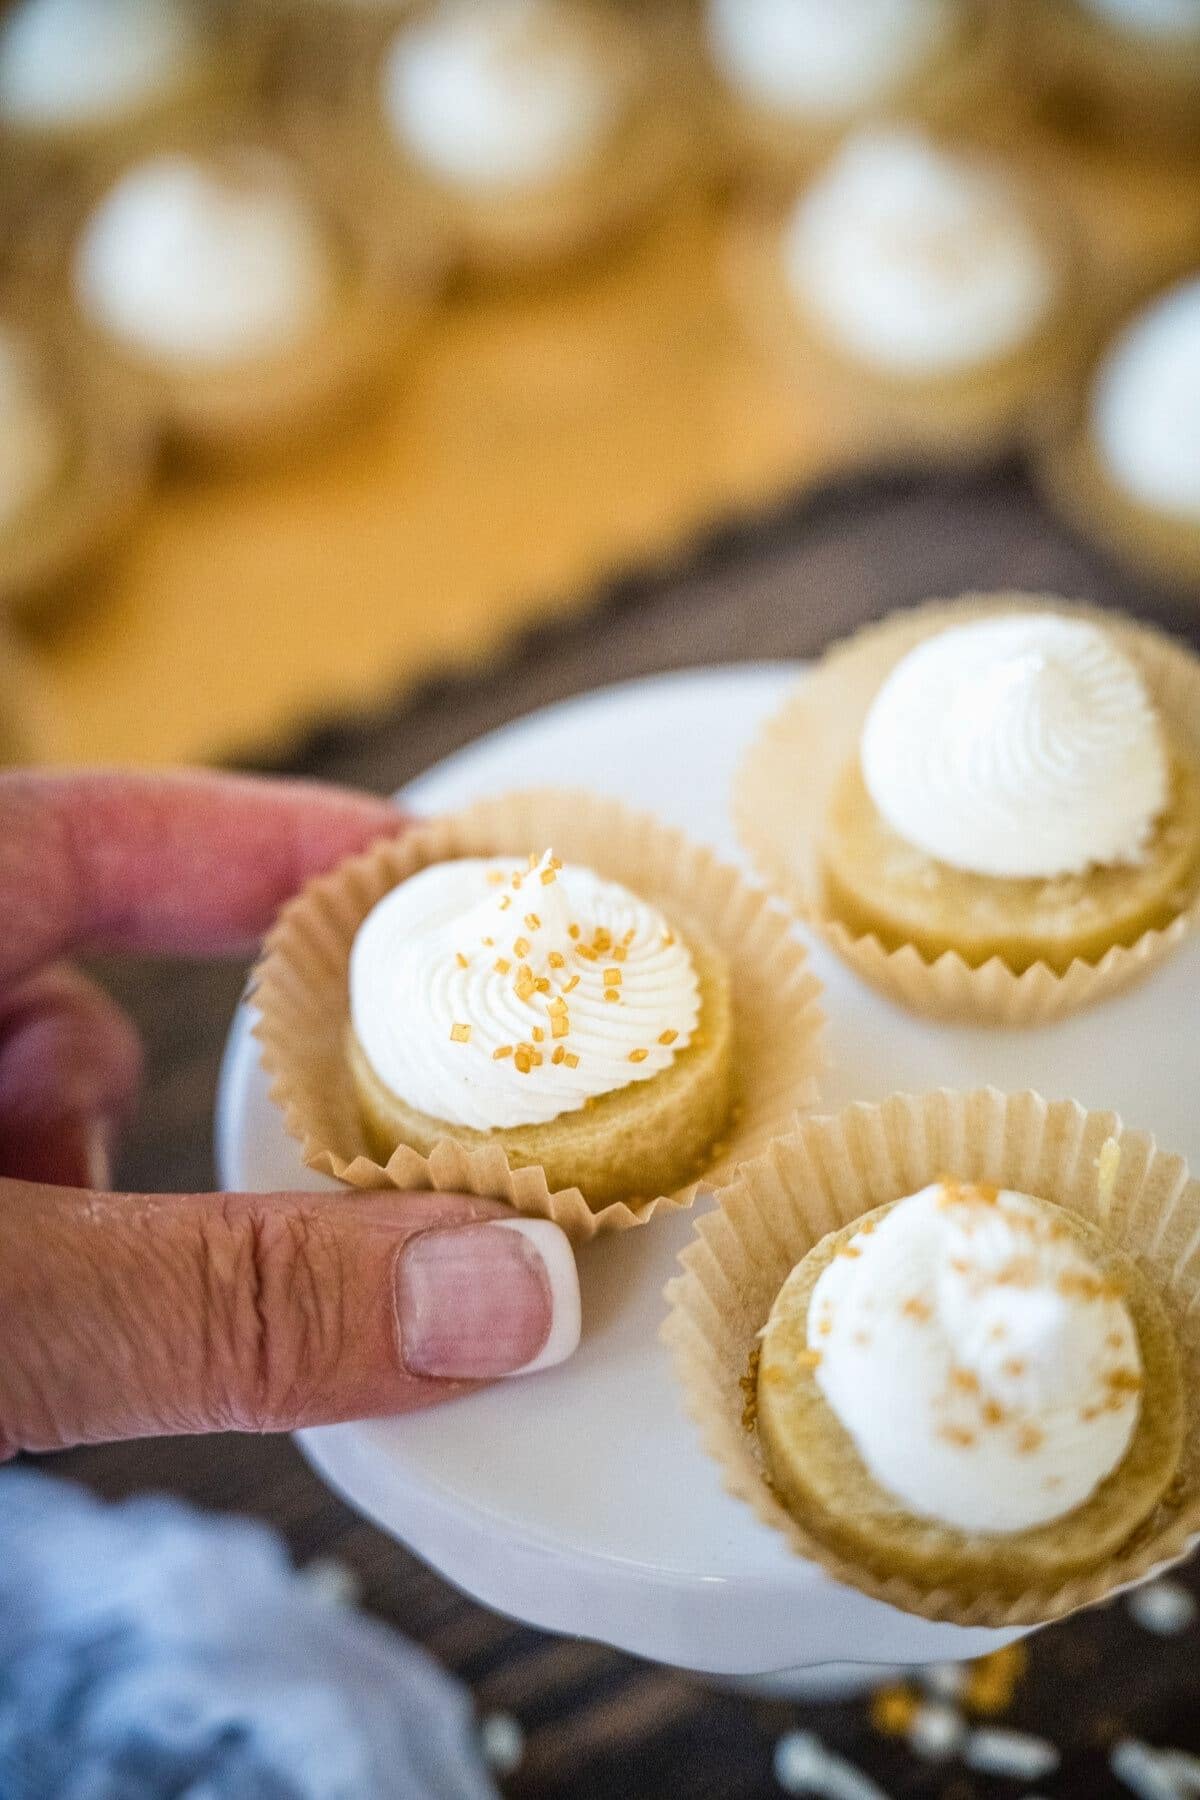
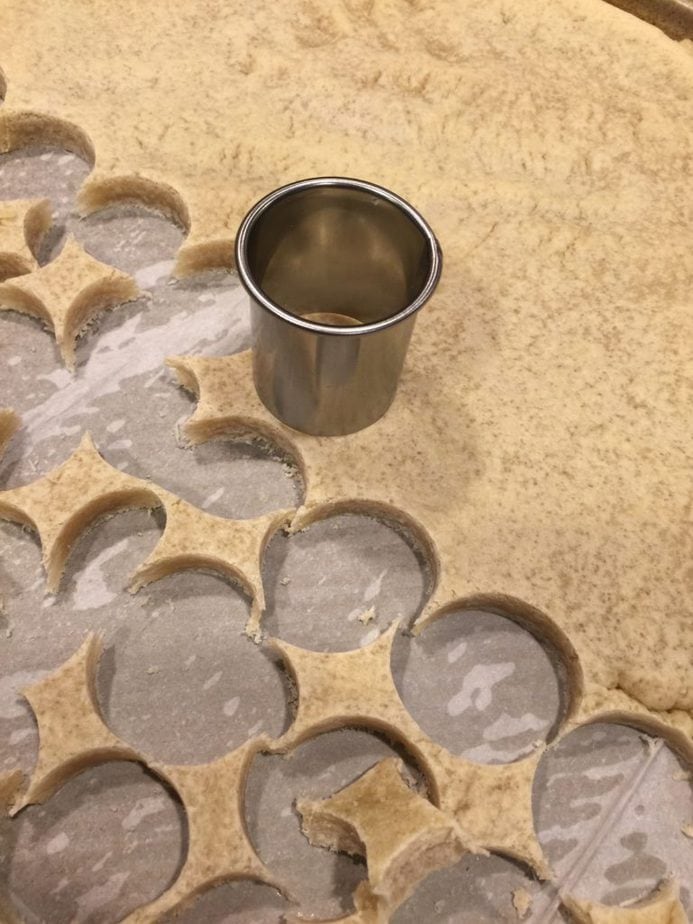
How to Make Sugar Cookie Buttons or Bites
To make buttons or bites, lift the cookie slab from the pan using the parchment or foil.
Place on a large cutting board and use a 1-inch round or square cutter to punch out the cookies, keeping cuts close together.
And don’t toss the cookie “guts”—those leftover scraps are gold!
Try them:
• Crumbled over ice cream
• Stirred into homemade ice cream
• Packed in a lunchbox
• Blended into a milkshake
Sweet little extras that are just as tasty as the main event!
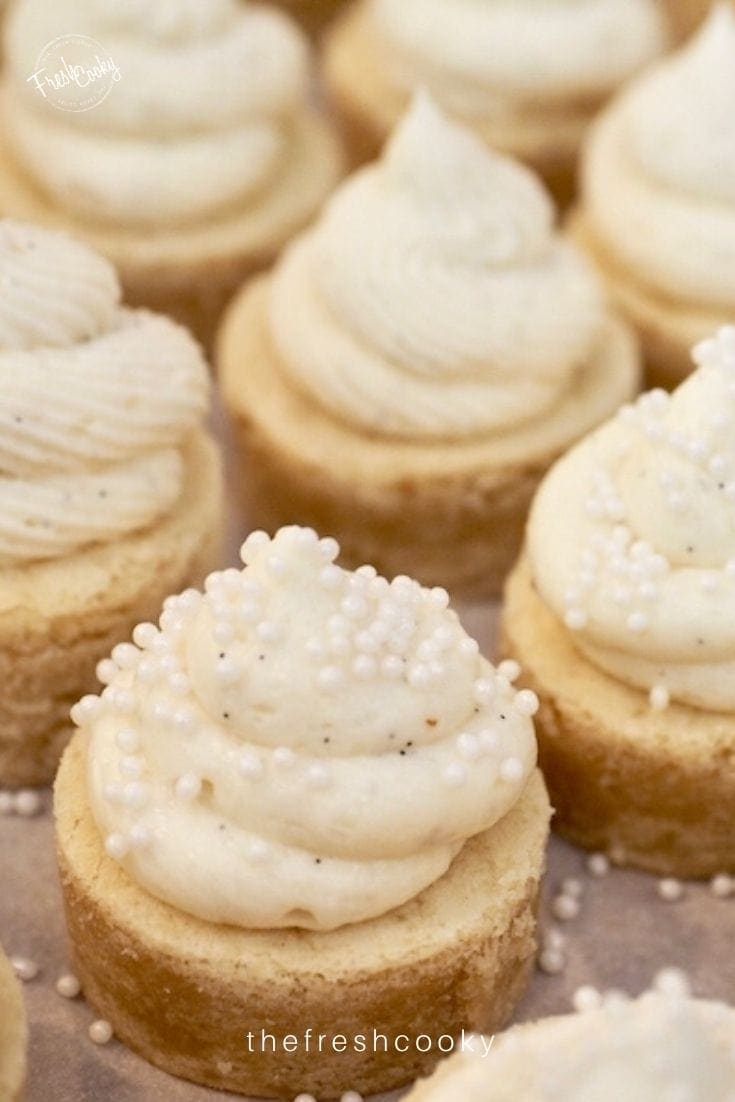
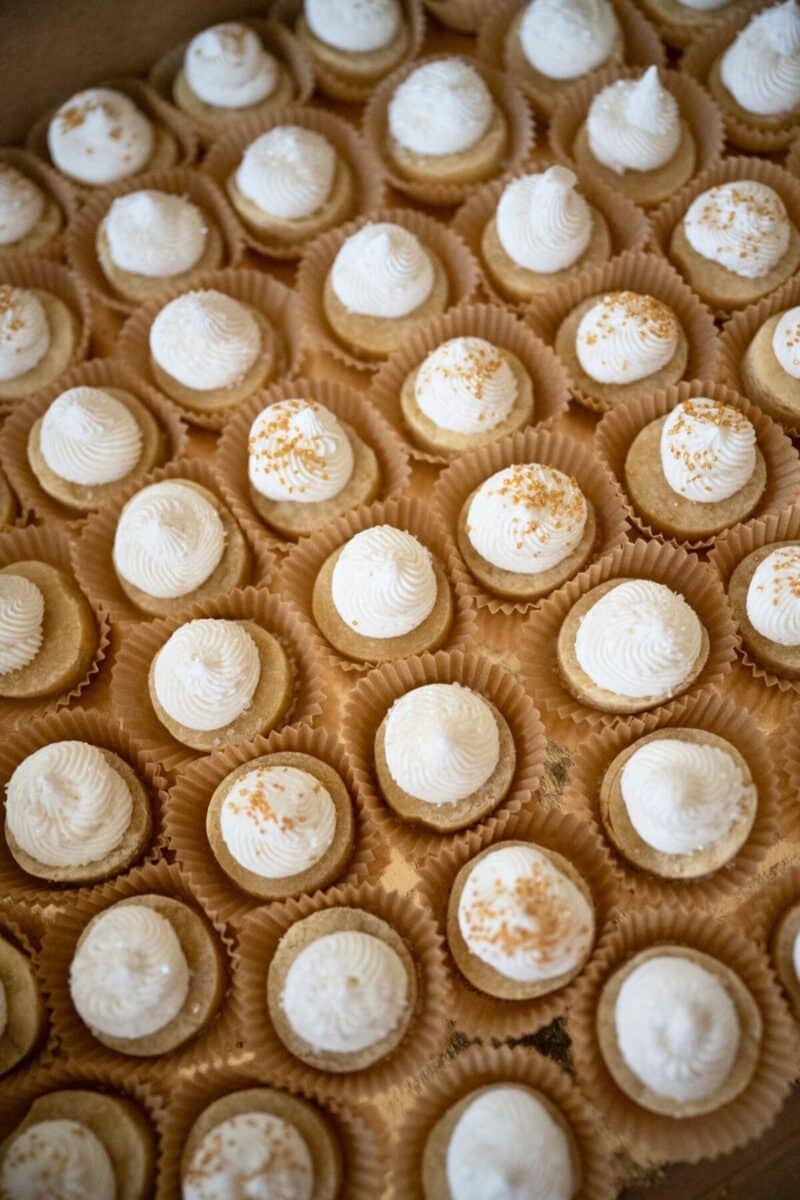
Piping Frosting on Sugar Cookie Bites
Pipe a small swirl of frosting onto each button using a piping bag fitted with your favorite tip—I used the Wilton 1A for a smooth look and the Wilton 32 for swirls.
Piping Pro Tip: Fold the top of the piping bag over and place it in a tall glass while filling. It keeps the bag steady and makes cleanup easier.
Want to switch tips? Use a frosting coupler so you can easily swap them out—just make sure it fits your tip. Or prep two bags with different tips ahead of time.
If you’re adding sprinkles, work in small batches. Pipe a few cookies, then add sprinkles right away before the frosting sets—otherwise, they won’t stick!
One sheet pan makes about 86 sugar cookie bites—perfect for a crowd! Plan on 2–3 per person.
They can be frozen, but they’re best freshly frosted for that soft, fluffy finish.
FAQs for Soft Sugar Cookie Bars
To cut a 9×13 pan of bars, first let them cool completely (chilling helps if they’re frosted), then use a sharp knife to slice cleanly. For standard servings, cut into 2×2-inch squares to get 24 bars. Want smaller bites for a crowd? Cut into 1×1-inch squares for up to 117 mini bars—perfect for parties or dessert platters.
Sugar cookies can turn out hard if they’re overmixed, overbaked, or if there’s too much flour in the dough. Mix just until the flour is combined—overmixing develops gluten, which makes cookies tough. Bake only until the edges are set; they should still look pale in the center when you pull them out. And always measure flour properly (spoon and level!) to avoid a dry dough. Storing them properly—tightly covered or in an airtight container—also helps keep them soft.
They’re likely overbaked or made with too much flour. Bake just until the edges are set—they should look slightly underdone in the center. And be sure to measure flour properly (spoon and level) to avoid a dry dough.
Storage Tips
Store in an airtight container on the counter for up to 5 days. Freeze for up to 3 months. I typically don’t like to put cookies in the fridge, as they tend to dry out.
Variations and Substitutions
- Want to mix things up? Try dipping the Sugar Cookie Bites in melted chocolate (I love using Ghirardelli Melting Wafers) and topping with sprinkles—so fun for holidays!
- Make them festive with crushed candy canes or peppermint sugar. Snowflake sprinkles or peppermint dust are perfect for Christmas cookie trays.
- You can also switch up the flavor by using different extracts—almond extract is a favorite for a slightly nutty twist, or try peppermint extract during the holidays for a cool finish.
- Dairy-Free? Use vegan butter and a plant-based milk.
- Gluten-Free? I’ve never made these particular cookies gluten-free, but I have done others, and they turn out great, use a good gluten-free all-purpose flour.
More of our favorite cookie recipe
Like this recipe?
Don’t forget to give it a ⭐️⭐️⭐️⭐️⭐️ star rating and leave a comment below the recipe!
Video
Equipment
Ingredients
SUGAR COOKIE BARS
- 1 cup butter room temperature, if using unsalted butter add ½ teaspoon additional salt
- 2 cups all natural cane sugar or regular white sugar
- 4 large eggs room temperature
- 2 teaspoons vanilla extract
- 5 cups unbleached all-purpose flour
- 1 teaspoon kosher salt
- ½ teaspoon baking soda
FROSTING
- 1 cup butter no substitutes, room temperature
- 2 teaspoons vanilla extract or 1 vanilla bean, seeds scraped into frosting and beaten, or 1 teaspoon vanilla bean paste
- pinch salt
- 4 cups powdered sugar
- 4-6 tablespoons milk or cream
- food coloring optional
- sprinkles optional
Instructions
- Preheat oven to 375°F (190° C) and grease or line with parchment an 18×13-inch pan (½ sheet pan) or for thicker cookies, use a 9×13 inch pan.
- In the bowl of a stand mixer or large mixing bowl with a hand mixer; mix butter for 2-3 minutes. Add sugar and beat until until light and fluffy, occasionally scraping down sides. If using natural cane sugar, mix on high speed for at least 2-4 minutes.1 cup butter, 2 cups all natural cane sugar
- Add eggs, one at a time, mixing well (30 seconds each) after each addition, scrape the bowl after each addition. After eggs incorporated, add vanilla extract.4 large eggs, 2 teaspoons vanilla extract
- While eggs are mixing, in medium bowl, measure out flour, baking soda and salt and whisk together. Slowly pour in flour, mixing on low speed until all the flour is incorporated, scrape down sides of bowl. Mix on medium speed for 30 seconds.
- Spread dough into prepared pan, using a non-stick sprayed piece of plastic wrap or parchment paper, spread over top of of dough and spread evenly to all corners of the pan, making sure it's as even as possible. I sometimes use a rolling pin.
- Bake at 375° for 10 minutes, no longer, they will not look done, remove from oven and let cool completely. May be wrapped and frozen (cool completely). If making in 9×13 pan you may need any extra 1-3 minutes but no longer, you want it puffy, but should look dull, no shiny parts.
BUTTERCREAM FROSTING
- While cookies cool (or take out of freezer, if frozen) make frosting.
- Place butter in the mixer bowl and whip on medium-high speed until light & fluffy, 2-4 minutes. Add the vanilla and pinch of salt and whip up well. Gradually add powdered sugar, mixing on low. Pour 4 tablespoons (with mixer running) of milk or cream and whip up well, depending on consistency needed (less milk for piping) a little extra for spreading typically.1 cup butter, 2 teaspoons vanilla extract, pinch salt, 4 cups powdered sugar, 4-6 tablespoons milk
- Add more milk as needed, whip for 4-8 minutes until cloud like light! If you'd like to color the frosting, add tiny amounts of gel food coloring until desired tint is achieved. If adding an extract, add at end and whip for additional minute. Spread or pipe onto baked goods. Add sprinkles, if desiredfood coloring
Notes
Nutrition


Nikki
Love the versatility of this cookie add decorations to suit the occasion! A great recipe!
Linda Krenz
I love all the different ways you can use this recipe. It’s a keeper!
Absolutely, that’s what I love about it!
Marci
I made these last night and I LOVE them. Frosted sugar cookies are my favorite and these are wonderful!
Wahoo!!! I love hearing that Marci!! Thank you and Merry Christmas to you!
shelley brouwer
Oh My gosh, Kathleen, I just made these and cannot wait to serve them to my family—-, hopefully there will be some left by the time they get here! (I had to taste test one for good measure of course, now I’m willing myself to stay away from the kitchen- good thing the recipe makes so many!) Your directions were easy to follow. Spreading the dough out in the pan was my favorite part!
Thank you for this blog, can’t wait to try more of your delicious recipes!
Thanks Shelley! So glad you liked it and tried them and that they turned out the same! If you want to get recipes each week, via a weekly email please sign up or let me know if you want me to sign you up!
shelley brouwer
Oh My gosh, Kathleen, I just made these and cannot wait to serve them to my family—-, hopefully there will be some left by the time they get here! (I had to taste test one for good measure of course, now I’m willing myself to stay away from the kitchen- good thing the recipe makes so many!) Your directions were easy to follow. Spreading the dough out in the pan was my favorite part!
Thank you for this blog, can’t wait to try more of your delicious recipes!
Kathy Moeker
Can I put the dough in a mini muffin tin? Does this change the cooking time?
Gosh Kathy, they are much easier the other way and you’d be making them for a long time. Try it, bake until the top looks slightly dry but they are still pale in color and soft. Let me know if you do it and how they turn out.